
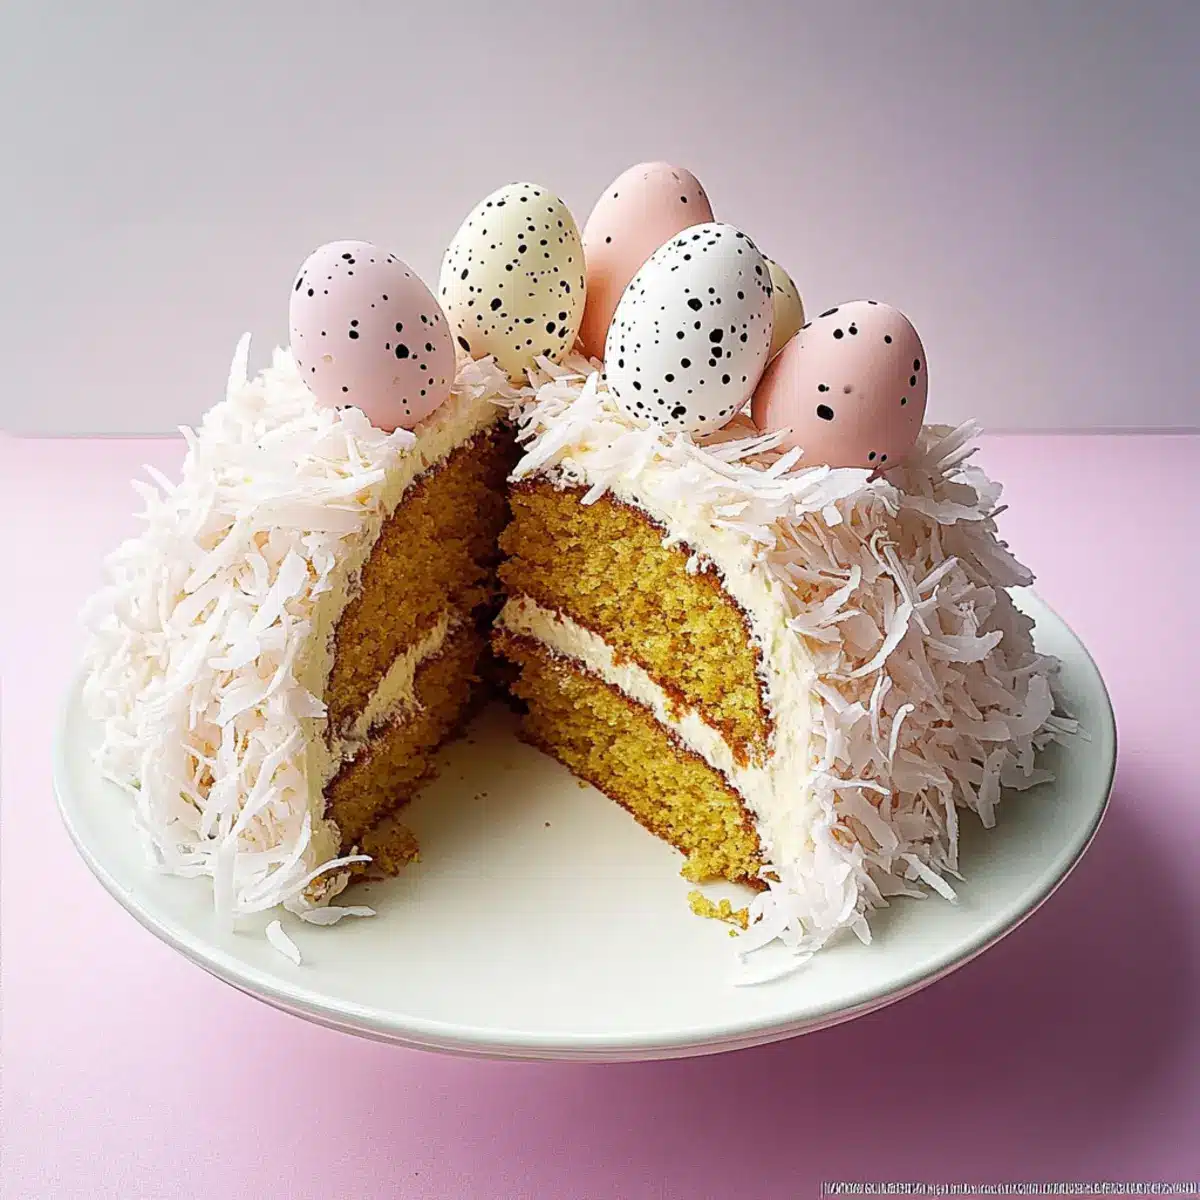
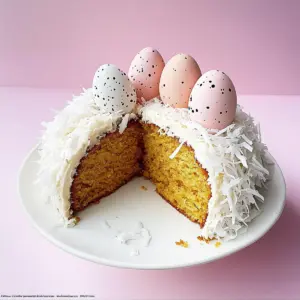
As I stepped into spring, the vibrant colors and sweet scents of the season flooded my senses, evoking a sense of joy that only Easter can bring. That’s when I decided to whip up this stunning Easter Nest Cake, a delightful centerpiece that captures the essence of the holiday with its fluffy, donut-shaped base adorned with creamy, luscious buttercream. Not only is this cake a feast for the eyes—it’s also a quick-to-make treat that effortlessly elevates your festive gatherings. With bright flavors of lemon and the crunch of toasted coconut, it invites everyone to the table with open arms. Best of all, the playful speckled chocolate eggs add a whimsical touch that kids and adults alike will adore. Ready to impress your family and friends this Easter? Let’s dive into creating this joyful masterpiece together!
Why Will You Adore This Easter Cake?
Stunning Presentation: The vibrant colors of this cake beautifully represent the spirit of spring, making it a head-turning centerpiece for your Easter table.
Quick to Assemble: With a simple donut-shaped design and ready-made elements, you can save time and still impress your guests.
Luscious Flavor: The zesty notes of fresh lemon combined with the richness of buttercream create a mouthwatering experience that’s hard to resist.
Kid-Friendly Fun: Decorating with speckled chocolate eggs is not just enjoyable for you; it’s a magical moment for kids too!
Versatile Options: Feel free to get creative with different candy coatings and toppings to personalize this cake to your liking. Check out Pumpkin Cheesecake Cookies for another delightful treat perfect for spring!
Easter Nest Cake Ingredients
• Get ready to gather key components for a delightful baking experience!
For the Cake
- Cake baked in a Donut Shaped Pan – This will give your Easter Nest Cake its unique structure; feel free to use a box mix if you’re short on time.
For the Frosting
- American Style Buttercream – Essential for a smooth, thick coat that enhances flavor and helps hold the coconut topping.
For the Chocolate Eggs
- Light Pink Candy Coating – This creates a beautiful shell for your eggs; you can substitute any color you prefer for a fun twist.
- Dark Chocolate Candy Coating – Ideal for creating the speckled design on eggs; melt it gently to avoid scorching.
- Egg Mold, extra large – A must-have for shaping your colorful chocolate eggs; they’re available at most baking supply stores.
For Decoration
- Toasted Coconut Chips – Perfect for a crunchy topping and extra flavor; choose either fresh or pre-packaged options.
- Toothpicks – Handy for handling and arranging your chocolate creations during the decorating process.
Embrace the creativity of this Easter Nest Cake, and enjoy making sweet memories with each delightful layer!
Step‑by‑Step Instructions for Easter Nest Cake
Step 1: Bake the Cake
Preheat your oven to 350°F (175°C). Grease your donut-shaped pan with cooking spray to prevent sticking. Prepare your favorite cake batter, filling the pan evenly. Bake for 30-35 minutes, or until a toothpick inserted in the center comes out clean. Once baked, allow the cake to cool in the pan for about 10 minutes before transferring it onto a wire rack. Wrap the cooled cake in plastic wrap and refrigerate for easier icing.
Step 2: Prepare the Buttercream
In a large mixing bowl, beat together softened butter and powdered sugar to make the American buttercream. Add vanilla extract and a splash of milk, mixing until smooth and fluffy. For best results, refrigerate the buttercream for about 30 minutes. Before spreading on your Easter Nest Cake, re-whip it briefly to restore texture and ensure it’s easy to work with.
Step 3: Make Chocolate Eggs
Melt dark chocolate over a double boiler or in the microwave, stirring until smooth. Using an egg mold, spoon the melted chocolate into each cavity, creating a speckled effect with a toothpick. Chill in the refrigerator for about 20 minutes to set. Next, melt the light pink candy coating and pour it into the egg mold to form shells. After chilling and hardening for another 20 minutes, carefully remove the shells and set aside.
Step 4: Decorate the Cake
Once the Easter Nest Cake is chilled, take your spatula and spread a generous layer of buttercream over the top and sides, forming a nest-like shape. To achieve that rustic appearance, drag your spatula around the edges while keeping a circular motion. Press toasted coconut chips into the buttercream, covering the cake completely and ensuring even placement for a beautiful final touch.
Step 5: Finish with Eggs
Carefully place the two halves of the chocolate eggs together, using melted chocolate as glue if necessary. Arrange the speckled chocolate eggs in the center of your beautifully decorated Easter Nest Cake. Scatter additional coconut chips around the edges for an extra festive touch, bringing the entire cake to life as a whimsical spring centerpiece for your celebrations.
What to Serve with Easter Nest Cake
As you celebrate the arrival of spring, consider these delightful pairings that perfectly complement the sweetness of your festive creation.
- Fresh Berries: The vibrant tartness of strawberries, blueberries, or raspberries brings a refreshing balance to the rich flavors of the cake.
- Lemonade Spritzer: A fizzy lemon drink captures the sunny spirit of spring, adding a sparkling touch to your brunch table.
- Vanilla Ice Cream: The creamy texture and neutral sweetness of vanilla ice cream enhance each bite of the cake, making it an indulgent treat.
- Carrot Sticks with Hummus: For a crunchy, healthy contrast, serve vegetables alongside a smooth dip; they lighten the festivities with fresh flavors.
- Simply Grilled Asparagus: The earthy, savory notes of asparagus pair well with the cake’s sweetness, showcasing a delightful contrast for your palate.
- Mimosa Bar: Set up a mimosa station with sparkling wine and various juices; this fun activity engages guests and provides refreshing options.
- Coconut Macaroons: Emphasizing the coconut flavor, these chewy treats echo the cake’s theme, creating a harmonious dessert experience.
- Chocolate-Covered Strawberries: Elegantly luxurious, they add a touch of sophistication and echo the delightful chocolate elements in the Easter Nest Cake.
- Spring Green Salad: A mix of crisp greens, herbs, and a light vinaigrette adds a fresh touch, balancing the sweetness and enhancing the meal’s presentation.
Variations & Substitutions for Easter Nest Cake
Feel free to let your creativity shine as you customize this delightful cake for your festive gatherings!
-
Different Colors: Experiment by using pastel yellow or blue candy coatings instead of light pink for a playful twist.
Let your imagination run wild! Colorful candy coatings add a cheerful touch, making your cake even more festive and inviting. -
Nutty Crunch: Swap toasted coconut chips for finely chopped nuts, such as almonds or pecans, for a unique flair.
Nuts not only add texture but also a delightful, rich flavor that complements the buttery cake and icing perfectly. -
Citrus Zing: Add a splash of orange or lime juice to the buttercream for a refreshing citrus kick.
This zingy twist enhances the cake’s flavor profile while amplifying that bright, spring vibe everyone loves. -
Vegan Delight: Substitute butter with vegan margarine and use dairy-free milk for the buttercream.
And for the cake base, consider a vegan cake mix—these swaps don’t compromise the rich flavor and creamy texture! -
Gluten-Free Goodness: Utilize a gluten-free cake mix to ensure everyone at your gathering can enjoy this delightful dessert.
Just be sure to check your candy coatings and toppings for gluten-free labels, so no one feels left out. -
Chocolate Overload: Drench the whole cake in a chocolate ganache instead of frosting for a richer experience.
A glossy chocolate coating not only elevates the visual appeal but also offers an indulgent layer of flavor. -
Layer It Up: Transform the Easter Nest Cake into a layered version by making two smaller cakes and stacking them.
A layered cake adds extra height and a stunning visual impact; it’s a showstopper that will wow your guests! -
Whimsical Flavors: Infuse your cake with almond extract or lemon zest for a delightful flavor surprise.
These subtle changes enhance the essence of spring while leaving your guests guessing and charmed by the unique twist.
For even more delightful sweets to enjoy during this delightful season, check out my cherished Cream Cheese Pound Cake or the luscious Pudding Icebox Cake.
How to Store and Freeze Easter Nest Cake
Fridge: Store leftover Easter Nest Cake in an airtight container for up to 5 days to maintain its freshness. Ensure the container is tightly sealed to prevent the cake from drying out.
Freezer: If you’d like to keep the cake longer, wrap it thoroughly in plastic wrap and aluminum foil, then freeze for up to 3 months. Thaw in the fridge overnight before serving.
Reheating: To enjoy slices of your cake warm, pop them in the microwave for about 10-15 seconds. This also slightly melts the buttercream, making it even more delicious.
Decoration Storage: If you have chocolate eggs or decorations left over, store them separately in a cool, dry place. They will maintain their quality when stored properly until you’re ready for your next gathering!
Expert Tips for the Best Easter Nest Cake
-
Chill for Smooth Icing: Refrigerate the cake before icing; this ensures the buttercream spreads beautifully without slipping.
-
Be Chocolate Savvy: Melt chocolate coatings slowly to avoid burning; using low heat ensures the perfect consistency for your speckled eggs.
-
Create Decorative Depth: When applying coconut chips, press them into the buttercream at a slight angle to give your cake a more natural nest effect.
-
Match Your Colors: Feel free to swap out the candy coating colors for the eggs; pastel shades always look delightful and suit the spring theme.
-
Make Ahead Madness: Prepare chocolate eggs and buttercream a day prior; this saves time on the decorating day and lets you focus on presentation!
Make Ahead Options
This Easter Nest Cake is perfect for busy home cooks looking to save time during the holiday season. You can bake the cake up to 24 hours in advance; just cool it completely, wrap it tightly in plastic wrap, and refrigerate to keep it moist. The American buttercream can also be prepared ahead and stored in the fridge for up to 3 days—just remember to re-whip it briefly before applying to restore its smooth texture. The chocolate eggs can be crafted a day ahead as well; keep them in an airtight container. When you’re ready to serve, assemble the cake by icing it with buttercream, adding the toasted coconut, and placing the decorated chocolate eggs on top. This way, you’ll have an impressive Easter Nest Cake ready with minimal effort!
Easter Nest Cake Recipe FAQs
What kind of cake pan do I need for the Easter Nest Cake?
You’ll want to use a donut-shaped pan to achieve the unique nest design of the Easter Nest Cake. It helps create that beautiful structure that’s not only visually appealing but also functional for holding all your delicious frosting and toppings. If you don’t have one, a round cake pan can work in a pinch, but the donut shape adds that special touch!
How should I store leftover Easter Nest Cake?
Absolutely! You can store leftover cake in an airtight container in the fridge for up to 5 days. Make sure the container is tightly sealed to keep the cake moist and fresh, but it’s best enjoyed within the first few days of baking!
Can I freeze the Easter Nest Cake?
Yes! To freeze your Easter Nest Cake, wrap it thoroughly in plastic wrap, followed by aluminum foil. This helps prevent freezer burn. You can freeze it for up to 3 months. When you’re ready to enjoy it again, simply thaw it in the fridge overnight. It’s a great way to enjoy this festive treat beyond Easter!
How can I troubleshoot if my chocolate eggs don’t set properly?
If your chocolate eggs aren’t setting, it could be that the chocolate is too hot. Make sure to melt your chocolate slowly and at low heat. If they’re set but aren’t coming out of the mold smoothly, try placing the mold briefly in the freezer for a few minutes before gently tapping it out—this often helps release them from the molds.
Are there any allergen considerations for the Easter Nest Cake?
Yes, you should be mindful of allergens! The Easter Nest Cake contains common allergens such as gluten (in the cake) and dairy (in the buttercream). If you’re serving guests with allergies, consider using gluten-free cake mix and alternatives like vegan butter for the frosting. Always check the labels of your ingredients to be safe!
What do I do if my buttercream is too stiff?
If you find your buttercream is too stiff to spread, simply add a splash of milk, one teaspoon at a time, mixing well until you reach your desired consistency. This can make the buttercream easier to work with, ensuring it spreads beautifully over your Easter Nest Cake.
Easter Nest Cake That Will Wow Your Spring Gatherings
Ingredients
Equipment
Method
- Preheat your oven to 350°F (175°C) and grease your donut-shaped pan. Prepare cake batter and bake for 30-35 minutes.
- In a bowl, beat softened butter and powdered sugar for the buttercream, adding vanilla and milk for smoothness. Chill for 30 minutes before applying.
- Melt dark chocolate, fill egg mold for speckled eggs, chill for 20 minutes, then melt pink candy coating for shells.
- Spread buttercream on the cooled cake and press toasted coconut chips into it to create the nest shape.
- Assemble chocolate eggs and arrange them on top of the cake with extra coconut chips for decoration.
Leave a Reply