
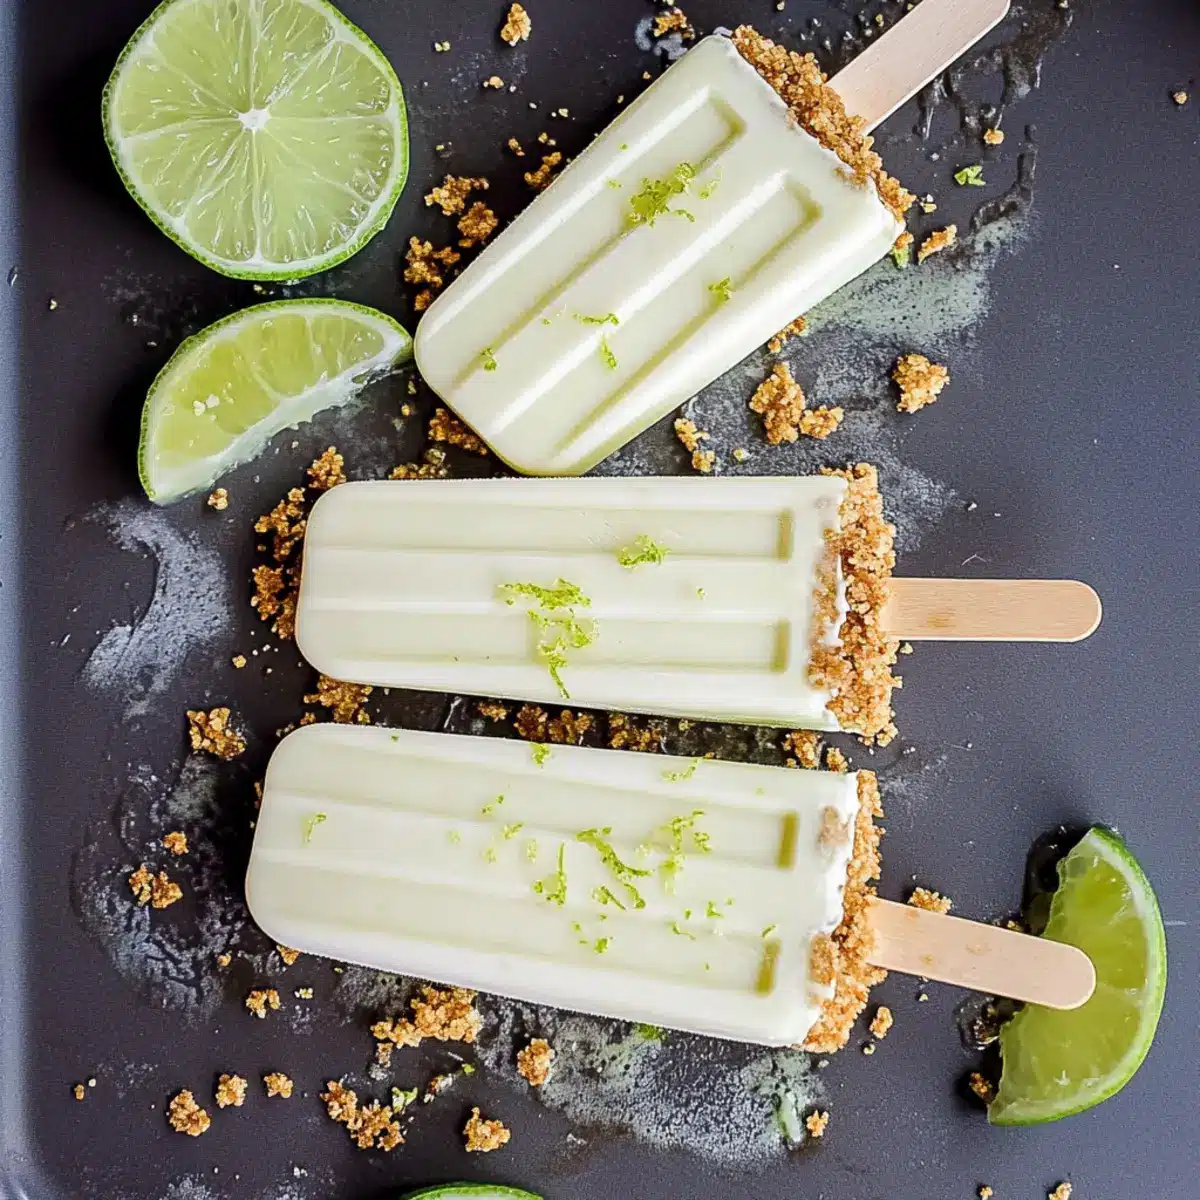
On a sweltering summer afternoon, nothing sounds more appealing than a cool treat that whispers sweet secrets of the tropics. That’s where my Naturally-Sweetened Key Lime Pie Popsicles come into play. Made creamy with tangy Greek yogurt and sweetened naturally with honey, they deliver all the flavors of your favorite key lime pie without the guilt. Not only are they a delightful way to beat the heat, but these popsicles are also healthy and gluten-free—a win-win! With quick prep time, you can have a refreshing dessert ready to share with family and friends in no time. Curious to find out how easy it is to whip up this light, summery delight?
Why Are These Popsicles a Must-Try?
Healthy Indulgence: With Greek yogurt and natural sweeteners, these popsicles offer a guilt-free way to satisfy your sweet tooth.
Quick Prep: Ready in just a few steps, you’ll be enjoying this refreshing treat in no time—ideal for last-minute summer gatherings!
Versatile Flavors: Feel free to swap in different citrus fruits for a unique twist. Have you tried a lemon version yet?
Crowd Pleaser: Perfectly creamy and slightly tart, these popsicles are sure to impress friends and family. Serve them alongside my Honey Mustard Turkey for a delightful combo!
Make Ahead: Prepare a batch and keep them in your freezer for when that summer sweet craving strikes!
Sweetened Key Lime Pie Popsicles Ingredients
This recipe for Sweetened Key Lime Pie Popsicles is both simple and delicious!
For the Crust
- Large Graham Cracker Rectangles – Provides the base flavor and structure for that pie-like crust; substitute with crushed digestive cookies if needed.
- Melted Butter – Binds the graham cracker crumbs together; feel free to use coconut oil for a dairy-free version.
For the Filling
- Plain Greek Yogurt – Offers creamy texture and protein; can be replaced with any plain yogurt or a non-dairy alternative for vegans.
- Honey – Acts as a natural sweetener for the yogurt mixture; switch it out for maple syrup or agave to keep it vegan.
- Key Lime or Regular Lime Juice – Delivers the signature tart flavor of key lime pie; fresh juice is preferred for the best taste.
- Lime Zest – Infuses vibrant citrus aroma and enhances the lime flavor; can be omitted if unavailable.
Step‑by‑Step Instructions for Sweetened Key Lime Pie Popsicles
Step 1: Prepare Graham Cracker Base
Start by crushing the large graham cracker rectangles in a food processor or by placing them in a sealed bag and using a rolling pin. Aim for fine crumbs, then transfer them to a bowl. Combine the crushed graham crackers with melted butter, mixing well until the crumbs are evenly coated. This will form the base for your Sweetened Key Lime Pie Popsicles.
Step 2: Mix Filling
In a medium bowl, whisk together the plain Greek yogurt, honey, freshly squeezed key lime juice, and lime zest until smooth and well combined. Look for a creamy consistency, ensuring there are no lumps. This flavorful mixture serves as the filling and embodies the delightful taste of key lime pie, making your popsicles irresistibly refreshing and tangy.
Step 3: Fill Molds
Begin layering the popsicle molds by spooning in the yogurt mixture, filling them about halfway. Be sure to leave some space at the top for the graham cracker layer. Next, take your prepared graham cracker mixture and press it down firmly on top of the yogurt in each mold. This will create the “crust” of your Sweetened Key Lime Pie Popsicles.
Step 4: Freeze
Insert popsicle sticks into the molds, ensuring they are centered and upright. Place the filled molds in the freezer and allow them to freeze for at least 3 to 4 hours, or until they are completely solid. You’ll know they’re ready when they feel firm to the touch, making for a perfectly refreshing treat on a hot summer day.
Expert Tips for Sweetened Key Lime Pie Popsicles
-
Zest Before Juicing: Make sure to zest the limes before you juice them. This makes the process easier and enhances the flavor of your popsicles.
-
Taste Test for Sweetness: Adjust the sweetness of your mix by varying the amount of honey based on your personal preference. Remember, you can always add more, but you can’t take it out!
-
Optimal Freezing: For best results, ensure your popsicle molds are filled properly and the sticks are inserted straight. This helps the popsicles freeze evenly and makes removal easier.
-
Mold Alternatives: If you don’t have popsicle molds, don’t worry! Small cups or ice cube trays work too—just insert popsicle sticks and freeze as directed.
-
Storage Tips: Keep leftover popsicles in an airtight container in the freezer for up to a month. This way, you’ll always have a tasty treat on hand for those warm summer days.
Sweetened Key Lime Pie Popsicles Variations
Feel free to get creative with these popsicles and make them your own with these delightful twists!
-
Dairy-Free: Swap plain Greek yogurt with almond or coconut yogurt to make a vegan version that’s just as creamy.
-
Sweetener Options: Use maple syrup or agave instead of honey for a vegan-friendly treat that still packs in the sweetness.
-
Alternative Zest: Experiment with grapefruit or orange zest for a fragrant twist that brightens your popsicle’s flavor.
-
Fruit Infusion: Toss in pureed mango or banana into the yogurt mix for a tropical flair; the added fruit complements the lime beautifully!
-
Nutty Crunch: Incorporate crushed nuts like almonds or pecans into the graham cracker mix, adding a satisfying crunch that’s absolutely irresistible.
-
Spicy Kick: Add a dash of cayenne pepper to the yogurt mixture for a surprising spicy twist that enhances the tartness of the lime.
-
Berry Bliss: Fold in some fresh raspberries or blueberries into the yogurt for a pop of color and sweetness; it’s like a summer party on a stick!
-
Present with Style: Serve alongside my Biscoff Rice Krispie treats for an unforgettable dessert table that will have guests raving.
Embrace these variations and turn each batch of popsicles into a unique creation that your family will adore!
Make Ahead Options
These Naturally-Sweetened Key Lime Pie Popsicles are a fantastic option for meal prep enthusiasts! You can prepare the graham cracker base and yogurt mixture up to 24 hours in advance; simply store them separately in airtight containers in the refrigerator to maintain their freshness and prevent sogginess. When you’re ready to assemble, layer the yogurt mixture and graham cracker crumbs into the molds as per the instructions and freeze them for about 3-4 hours until solid. This way, you’ll have delicious, refreshing popsicles ready to go whenever your sweet tooth strikes, making them perfect for busy weeknights or summer gatherings!
Storage Tips for Sweetened Key Lime Pie Popsicles
Fridge: Store popsicles wrapped in plastic wrap or in an airtight container for up to 2 days, though they’re best enjoyed frozen.
Freezer: Keep your Sweetened Key Lime Pie Popsicles in an airtight container or a zip-top bag for up to 1 month to maintain freshness.
Reheating: Allow popsicles to sit at room temperature for a couple of minutes before attempting to remove them from the molds for easy serving.
Make-Ahead: Prepare a batch in advance for summer gatherings, ensuring a refreshing treat is always on hand!
What to Serve with Naturally-Sweetened Key Lime Pie Popsicles
Imagine welcoming a burst of refreshing flavors that dances on your palate while complementing the delightful zest of your key lime popsicles.
- Coconut Whipped Cream: A dollop on top adds a rich, buttery texture that beautifully balances the tanginess of the popsicles.
- Fruit Salad Medley: Juicy berries and tropical fruits like mango and pineapple create a vibrant dish that harmonizes with the popsicle’s citrus notes.
- Minty Mojito Mocktail: This refreshing drink brings a crisp mint and lime blend, amplifying the festive spirit of summer gatherings.
- Grilled Chicken Skewers: Savory and lightly charred, these skewers provide a savory contrast to the creamy sweetness of the popsicles, enhancing your meal experience.
- Chocolate-Dipped Strawberries: A sweet indulgence that adds an extra layer of delight—who can resist that chocolatey touch alongside a fruity dessert?
- Coconut Rice: Fluffy and slightly sweet, this side dish carries hints of tropical flavor that mirror the essence of your key lime popsicles.
- Lemon Sorbet: For a more tart refreshment, serve a lemon sorbet alongside; it’s a cool way to indulge in summer vibes.
- Chilled Green Tea: A light and soothing drink that provides a refreshing cleanse between bites of your creamy popsicle.
Sweetened Key Lime Pie Popsicles Recipe FAQs
How do I select ripe limes for the best flavor?
Absolutely! Look for limes that are firm with a slight give when gently squeezed. They should be bright green and have a slightly glossy skin. If they have dark spots all over, they might be overripe. Opt for those that feel heavy for their size, indicating juiciness.
What’s the best way to store the popsicles?
For maximum freshness, store your Sweetened Key Lime Pie Popsicles in an airtight container or a zip-top bag in the freezer. They will keep well for up to 1 month. If you have any leftovers, wrap them in plastic wrap to prevent freezer burn. Just make sure they’re completely frozen before transferring!
Can I freeze these popsicles for later use?
Of course! To freeze, prepare the popsicles as directed in the recipe. Once they are fully frozen, you can remove them from the molds by letting them sit at room temperature for a couple of minutes. If you’re using small cups, simply peel away the cup once they’re solid. Store them in a container in the freezer for up to a month.
What should I do if my popsicles are hard to remove from their molds?
No worries! If you find that your popsicles are sticking, try running warm water over the outside of the mold for a few seconds to help loosen them. If you’re using plastic molds, gently twisting while pulling on the popsicle can also help. Patience is key here—let them sit for a moment before trying again!
Are these popsicles safe for those with food allergies?
Very! This recipe is naturally gluten-free and can be adapted for various dietary needs. For those avoiding dairy, simply swap the Greek yogurt with a non-dairy yogurt alternative. Also, ensure that you use gluten-free graham crackers or digestive cookies if necessary. Always double-check ingredient labels if there are specific allergies to consider.
Sweetened Key Lime Pie Popsicles for a Refreshing Summer Treat
Ingredients
Equipment
Method
- Start by crushing the large graham cracker rectangles in a food processor or by placing them in a sealed bag and using a rolling pin. Aim for fine crumbs, then transfer them to a bowl. Combine the crushed graham crackers with melted butter, mixing well until the crumbs are evenly coated. This will form the base for your Sweetened Key Lime Pie Popsicles.
- In a medium bowl, whisk together the plain Greek yogurt, honey, freshly squeezed key lime juice, and lime zest until smooth and well combined. Look for a creamy consistency, ensuring there are no lumps. This flavorful mixture serves as the filling.
- Begin layering the popsicle molds by spooning in the yogurt mixture, filling them about halfway. Be sure to leave some space at the top for the graham cracker layer. Next, take your prepared graham cracker mixture and press it down firmly on top of the yogurt in each mold.
- Insert popsicle sticks into the molds, ensuring they are centered and upright. Place the filled molds in the freezer and allow them to freeze for at least 3 to 4 hours, or until they are completely solid.
Leave a Reply