
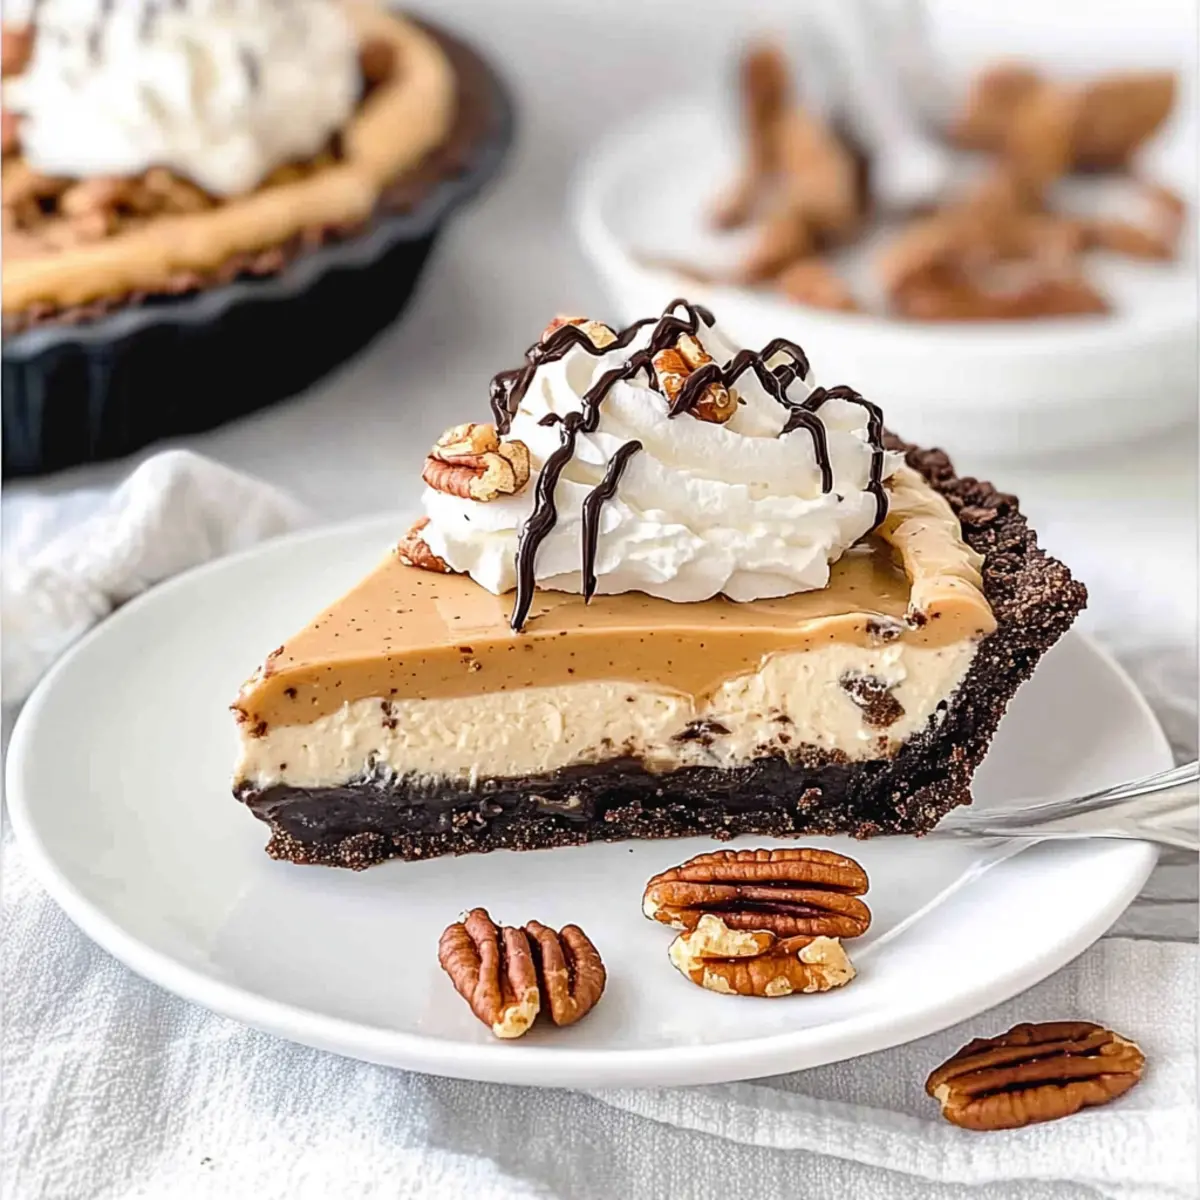
As I stood in my kitchen, the aroma of melting chocolate filled the air, stirring memories of family gatherings and sweet celebrations. I couldn’t wait to share my latest creation: a No-Bake Turtle Pie with Dulce de Leche and Whipped Cream. Not only is this dessert a showstopper with its luscious creamy filling and indulgent Oreo crust, but it also comes together effortlessly, making it a game changer for weeknight dinners or festive get-togethers. With just a few simple ingredients, you’ll impress friends and family, while savoring the rich flavors of chocolate mingling with caramel. This Turtle Pie is the perfect way to elevate your dessert game—are you ready to dive into this deliciousness?

Why is Turtle Pie so Irresistible?
Indulgence: With its rich creamy filling and a firm Oreo crust, each bite of this Turtle Pie transports you to dessert heaven.
No-Bake Ease: Perfect for busy days, this pie requires zero baking time, letting you whip up an impressive treat in a snap.
Flavor Fusion: The delightful combination of dulce de leche and chocolate creates a flavor explosion that keeps everyone coming back for more.
Versatile Variations: Don’t hesitate to mix things up! Try adding more nuts or chocolate shavings for extra texture, or switch up the crust for a new spin.
Crowd-Pleasing Appeal: Whether it’s a holiday gathering or a casual family dinner, this Turtle Pie is guaranteed to be the star of the dessert table, just like my Pumpkin Pie Tacos and Biscoff Rice Krispie treats!
Turtle Pie Ingredients
For the Crust
• Oreos (25 pieces) – Base crust; feel free to substitute with other chocolate sandwich cookies for a different flavor.
• Unsalted Butter (10 tbsp, melted) – Binds the cookie crust together; margarine can be used if preferred.
For the Filling
• Cream Cheese (8 oz, at room temperature) – Adds creaminess and stability to the filling; low-fat cream cheese works well for a lighter dessert.
• Dulce de Leche (¾ cup) – The star of this Turtle Pie, providing that rich caramel-like sweetness; can be store-bought or homemade.
• Brown Sugar (⅓ cup, packed) – Enhances the sweetness and depth of flavor; regular granulated sugar can substitute if needed.
• Sour Cream (3 tbsp, at room temperature) – Balances the sweetness of the filling with a slight tang; Greek yogurt is a great alternative.
• Salt (¼ tsp) – Elevates the flavors in the filling; adjust to your taste.
• Heavy Cream (⅔ cup, cold) – Necessary for volume and lightness when whipped into the filling.
• Powdered Sugar (3 tbsp) – Sweetens the whipped cream; granulated sugar can work in a pinch if finely powdered.
• Vanilla Bean Paste (2 tsp) – Offers a depth of flavor and flecks of real vanilla bean; use an equal amount of vanilla extract if preferred.
For the Topping
• Heavy Cream (1 cup, for topping) – Whipped for a luxurious finish to your Turtle Pie.
• Chocolate (2 oz, melted) – Drizzled on top for added richness; semi-sweet or dark chocolate are excellent choices.
• Chopped Pecans (¼ cup, toasted) – Adds delightful texture and nutty flavor; omit if you want a nut-free dessert.
Get ready to delight your taste buds with this irresistibly creamy Turtle Pie that brings together all the flavors of indulgence!
Step‑by‑Step Instructions for Turtle Pie
Step 1: Prepare Crust
Begin by pulsing 25 Oreo cookies in a food processor until they resemble fine crumbs. In a medium bowl, mix the cookie crumbs with 10 tablespoons of melted unsalted butter until thoroughly combined. Press this mixture firmly into the bottom and up the sides of a 9-inch pie plate. Refrigerate the crust for about 15 minutes to set while you prepare the filling.
Step 2: Make Filling
In a large mixing bowl, use a hand mixer to beat 8 ounces of room temperature cream cheese and ¾ cup of dulce de leche until the mixture is smooth and creamy, about 2-3 minutes. Gradually add in ⅓ cup of packed brown sugar, 3 tablespoons of sour cream, and ¼ teaspoon of salt. Continue mixing until everything is well blended and fluffy, ensuring a rich filling for your Turtle Pie.
Step 3: Whip Cream
In a separate chilled bowl, pour in ⅔ cup of cold heavy cream, then add 3 tablespoons of powdered sugar and 2 teaspoons of vanilla bean paste. Use an electric mixer to whip the cream on medium-high speed until stiff peaks form, which should take about 3-5 minutes. This light and airy whipped cream will elevate the richness of the Turtle Pie filling.
Step 4: Combine
Gently fold the whipped cream into the dulce de leche mixture using a spatula. Be careful not to deflate your whipped cream; this step ensures that your Turtle Pie has a light and creamy texture. Mix until just combined, creating a beautiful and fluffy filling that will be irresistibly delicious.
Step 5: Assemble Pie
Pour the creamy filling into the prepared Oreo crust, smoothing the top with a spatula to create an even layer. Cover the pie with plastic wrap and refrigerate for at least 4 hours, or until it sets up nicely. This chilling time allows the flavors to meld and creates the perfect texture for your Turtle Pie.
Step 6: Prepare Topping
Once your Turtle Pie has set, grab another mixing bowl and combine 1 cup of cold heavy cream with 3 tablespoons of powdered sugar and 2 teaspoons of vanilla bean paste. Whip the cream with an electric mixer until stiff peaks form, just like in the previous step. This fluffy topping will add a light finish to your beautifully chilled pie.
Step 7: Garnish and Serve
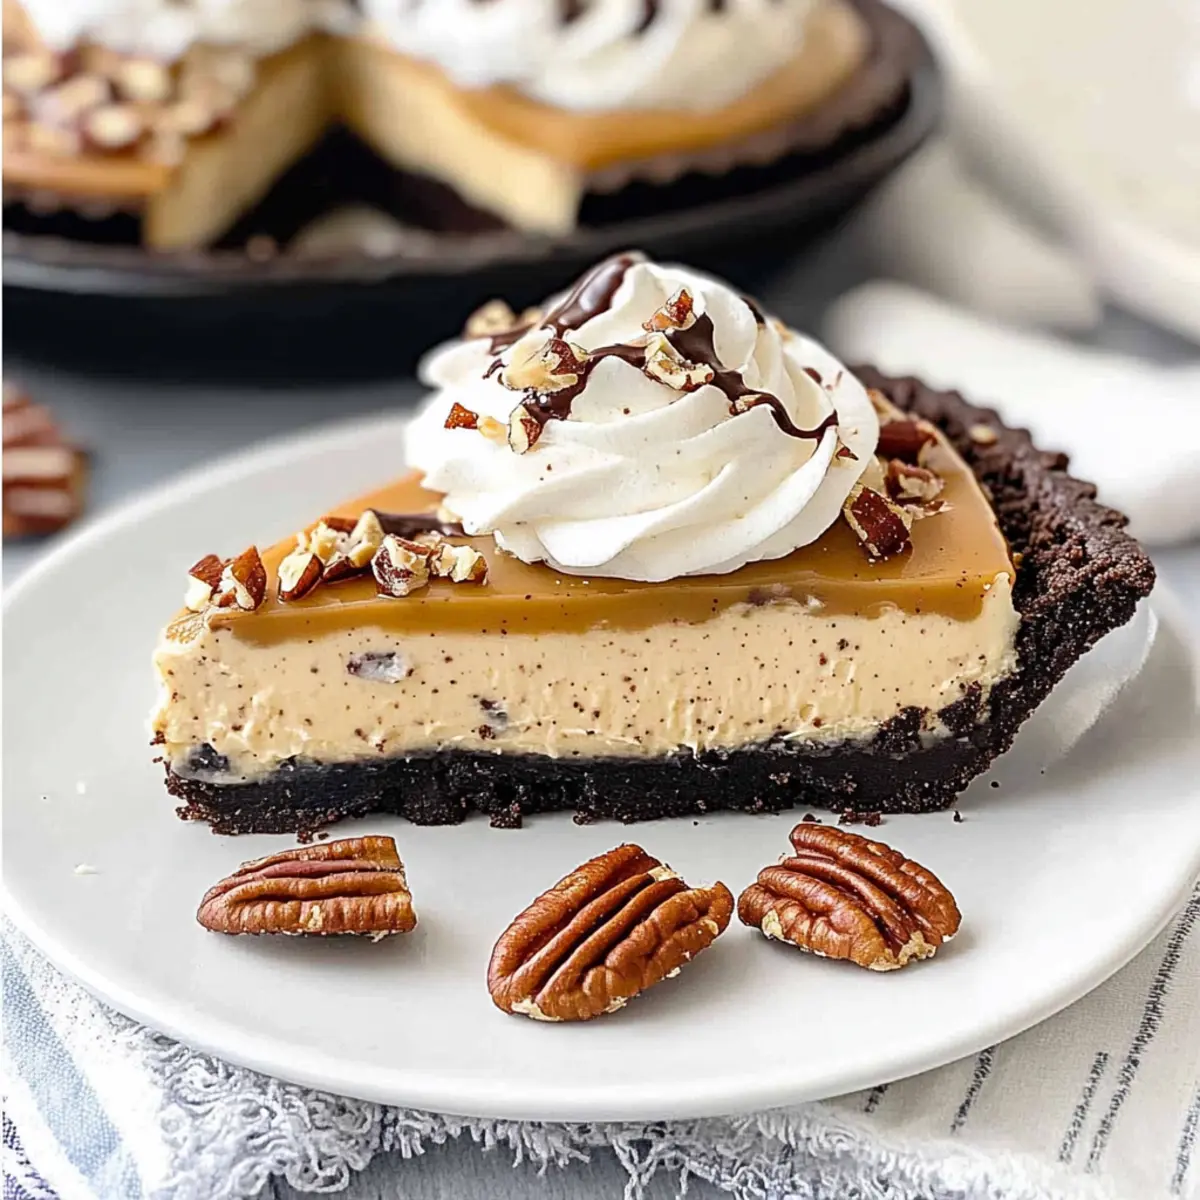
Finally, dollop the whipped cream over the chilled Turtle Pie, spreading it out evenly. Drizzle 2 ounces of melted chocolate on top and sprinkle with ¼ cup of toasted chopped pecans for crunch. To take it to the next level, add a swirl of extra dulce de leche. Slice and serve this indulgent Turtle Pie, and watch everyone enjoy every creamy bite!

What to Serve with Turtle Pie
Looking to create an unforgettable meal around this creamy delight? Here’s how you can build a full dining experience that perfectly complements your Turtle Pie.
-
Rich Coffee: The bold flavors of a fresh cup of coffee or espresso enhance the sweetness of the Turtle Pie, creating a beautifully balanced experience. A sprinkle of cocoa or cinnamon adds an extra touch.
-
Vanilla Ice Cream: A scoop of vanilla ice cream served alongside will bring an additional layer of creaminess while contrasting with the pie’s texture. This is the ultimate indulgent pairing for warmth and sweetness.
-
Fresh Berries: Raspberries or strawberries offer a tart note that cuts through the richness of the dessert. Their vibrant color adds a lovely visual element to your plate, making it even more inviting.
-
Chocolate Sauce Drizzle: A warm drizzle of chocolate sauce over each slice not only enhances the chocolate flavor but also adds an extra layer of decadence, enveloping the palate in sweet bliss. Perfect for chocolate lovers!
-
Sparkling Water with Citrus: Pair this dessert with refreshing sparkling water, garnished with slices of lemon or lime. This effervescent drink cleanses the palate and balances the sweetness of the pie beautifully.
-
Creamy Fruit Salad: A light fruit salad featuring melons, citrus, and a hint of mint will provide a refreshing contrast to the rich flavors of the Turtle Pie. It’s a perfectly light way to finish off your meal.
Creating a well-rounded meal to enjoy with Turtle Pie brings warmth and delight, transforming any occasion into a cherished memory.
Turtle Pie Variations & Substitutions
Feel free to get creative with this Turtle Pie recipe; each twist brings a unique flavor to your dessert!
-
Nut-Free: Omit chopped pecans for a nut-free version. You can still enjoy the delightful flavors without any nut-related concerns.
-
Flavor Boost: Add a splash of espresso or coffee liqueur to the filling for a mocha twist. It enhances the chocolate flavor, adding depth to each bite.
-
Sweet & Spicy: Sprinkle in a pinch of cayenne pepper or chili powder for a hint of warmth that complements the sweet caramel. The unexpected kick will intrigue adventurous palates!
-
Fruit Twist: Add fresh banana slices or berries between the filling layers for a fruity surprise. This variation adds freshness and balances the richness of the pie perfectly.
-
Caramel Drizzle: Drizzle extra caramel sauce on top of the pie along with the chocolate. The extra layer of sweetness will elevate your dessert game!
-
Cheesecake Style: Blend in ¼ cup of melted white chocolate into the filling to create a cheesecake-inspired Turtle Pie. It adds a delightful creaminess that everyone will love.
-
Graham Cracker Crust: Swap the Oreo crust for a graham cracker crust for a lighter flavor profile. The subtle sweetness of graham crackers pairs beautifully with the rich filling.
-
Savory Crunch: Mix in crushed pretzels with the pecans for a sweet and salty topping. This contrast brings a fun twist, making every bite even more exciting.
Whatever combination you choose, your Turtle Pie will surely impress! If you’re looking for more dessert inspirations, check out my Pumpkin Pie Tacos or indulge in some delightful Biscoff Rice Krispie treats!
Storage Tips for Turtle Pie
-
Fridge: Keep your Turtle Pie covered in the refrigerator for up to 5 days. This helps maintain its creamy texture, so indulge without any worries!
-
Freezer: For longer storage, freeze your Turtle Pie without toppings for up to 3 months. Wrap it tightly in plastic wrap and follow with aluminum foil to prevent freezer burn.
-
Thawing: When ready to enjoy, transfer the pie from the freezer to the fridge and let it thaw overnight. The next day, you can add toppings and serve.
-
Reheating: If desired, serve each slice chilled or at room temperature. There’s no need to reheat this no-bake Turtle Pie, as it’s designed to be refreshing and creamy!
Make Ahead Options
These Turtle Pie treats are perfect for busy home cooks looking to save time! You can prepare the crust and filling up to 24 hours in advance. Simply follow the initial steps of making the crust and refrigerate it, then complete the filling and store it separately in an airtight container. This allows the flavors to blend beautifully while preventing the crust from becoming soggy. When you’re ready to serve, simply pour the filling into the prepped crust, chill for at least 4 hours (or overnight), and finish with whipped cream, chocolate drizzle, and pecans just before serving. Enjoy this time-saving strategy for a delightful dessert experience!
Expert Tips for Turtle Pie
-
Room Temperature Cream Cheese: Make sure your cream cheese is at room temperature for easier mixing, ensuring a smooth and creamy filling for your Turtle Pie.
-
Chill Your Tools: Chill your mixing bowls and beaters before whipping the cream. This helps achieve stiff peaks more quickly and results in a fluffier topping.
-
Don’t Rush Setting Time: Allow the Turtle Pie to set in the refrigerator for at least 4 hours. This ensures the filling firms up properly, giving you the perfect slice consistency.
-
Customize Your Toppings: Feel free to swap the pecans for other nuts or omit them altogether for a nut-free Turtle Pie. Extra chocolate or caramel drizzle never hurts!
-
Avoid Overmixing: When folding the whipped cream into the filling, do it gently. Overmixing can deflate the cream and make the filling lose its lightness.
-
Make it Ahead: This Turtle Pie can be prepared a day in advance, enhancing the flavors and saving you time on your big day.
Turtle Pie Recipe FAQs
What type of Oreos should I use for the crust?
You can use classic Oreos for a traditional flavor, but feel free to experiment with different chocolate sandwich cookies if you want to switch things up. Just make sure they provide that same crumbly texture when crushed!
How should I store my Turtle Pie?
Store your Turtle Pie covered in the refrigerator for up to 5 days. It’s best to keep it in an airtight container to maintain its creamy texture. If you have any leftovers, you can indulge without worry!
Can I freeze Turtle Pie, and if so, how?
Absolutely! To freeze your Turtle Pie, first ensure it’s topped with no garnishes. Wrap it tightly in plastic wrap and then in aluminum foil to prevent freezer burn. It can be stored this way for up to 3 months. When you’re ready to enjoy it, simply transfer it to the fridge to thaw overnight, then add your toppings before serving.
How do I prevent my whipped cream from deflating when mixing?
Great question! To keep your whipped cream fluffy, always fold gently into the dulce de leche mixture, using a spatula in a folding motion rather than stirring aggressively. This way, you’ll keep the air incorporated, leading to a light and airy filling in your Turtle Pie.
Can I make this Turtle Pie ahead of time?
Yes, you can! I often make this pie a day in advance, which actually enhances the flavors. Just be sure to cover it well in the refrigerator to keep it fresh. The next day, you can add your toppings right before serving for that just-made look!
Is this Turtle Pie suitable for people with nut allergies?
If you want to keep it nut-free, just skip the pecan topping altogether. The rest of the ingredients and the creamy filling are generally safe for those with nut allergies, but always double check labels to ensure no cross-contamination.
Creamy Turtle Pie: A No-Bake Dream for Sweet Tooth Lovers
Ingredients
Equipment
Method
- Pulse 25 Oreo cookies in a food processor until fine crumbs. Mix with 10 tbsp melted unsalted butter and press into a 9-inch pie plate. Refrigerate for about 15 minutes.
- Beat 8 oz room temperature cream cheese and ¾ cup dulce de leche until smooth, about 2-3 minutes. Gradually add ⅓ cup brown sugar, 3 tbsp sour cream, and ¼ tsp salt. Mix until well blended.
- In a separate bowl, whip ⅔ cup cold heavy cream, 3 tbsp powdered sugar, and 2 tsp vanilla bean paste until stiff peaks form, about 3-5 minutes.
- Gently fold the whipped cream into the dulce de leche mixture until just combined.
- Pour the filling into the prepared Oreo crust, smoothing the top. Cover and refrigerate for at least 4 hours.
- Combine 1 cup cold heavy cream, 3 tbsp powdered sugar, and 2 tsp vanilla bean paste. Whip until stiff peaks form.
- Dollop the whipped cream over the pie, drizzle 2 oz melted chocolate, and sprinkle with ¼ cup toasted chopped pecans. Serve chilled.
Leave a Reply