
As the aroma of roasted green chiles wafts through my kitchen, my mouth waters in anticipation. There’s something truly magical about creating a creamy Green Chile Queso Dip that brings friends and family together, especially during game days or cozy holiday gatherings. This recipe, made with savory onions, rich melting cheese, and just the right amount of spice, can be whipped up in about 20 minutes if you opt for canned chiles or 45 minutes when roasting fresh ones. It’s a crowd-pleaser that’s incredibly versatile—ideal for dipping crispy tortilla chips or pairing with fresh veggies. Plus, it’s the perfect way to elevate your at-home snacking game. Are you ready to dive into this cheesy, delicious experience? Let’s get started!

Why Choose Green Chile Queso?
Bold, Flavorful Experience: This Creamy Green Chile Queso dip is bursting with rich flavors from roasted chiles and melting cheese, providing an instant upgrade to any gathering.
Quick and Easy: Whip it up in just 20 minutes using canned chiles, making it an effortless choice for game day or last-minute guests.
Customizable Heat: Adjust the spice level easily by omitting jalapeños or opting for different cheese types, allowing everyone to enjoy this crowd favorite!
Perfect for Sharing: Whether paired with tortilla chips or fresh veggies, this dip is a sure way to impress your friends and family, just like the delightful Style Potato Green dish from earlier.
Store and Reheat: Make it ahead of time and store it in the fridge for a quick snack later—just reheat while maintaining its creamy texture!
3. Green Chile Queso Ingredients
• To create your own batch of this creamy dip, here’s what you’ll need:
For the Dip Base
- Hatch Chiles – Provides earthy flavor and mild-to-medium heat; substitute with canned chiles, Anaheim, or poblano peppers if needed.
- Olive Oil – Used for sautéing ingredients, adding richness to the dip.
- White Onion – Adds sweetness and depth, enhancing the overall flavor.
- Jalapeño (optional) – Adds spice; omit for a milder dip if preferred.
- Garlic – Key for aroma and flavor enhancement, bringing the dish to life.
- All-Purpose Flour – Necessary for thickening the dip, forms a roux for a smooth texture.
For the Creamy Texture
- Evaporated Milk – Creates a creamy base; adjust consistency with extra milk if needed.
- Salt and Black Pepper – Essential for seasoning, enhancing all the flavors of your Green Chile Queso.
For the Cheese Goodness
- Melting Cheese (3 cups) – Core flavor; options include Monterey Jack, Pepper Jack, Mozzarella, Oaxaca, Queso Asadero, or Queso Chihuahua for a delightful cheese experience.
Step‑by‑Step Instructions for Green Chile Queso
Step 1: Roast the Peppers
Preheat your oven to broil. Place the Hatch chiles on a baking sheet and broil them for about 20 minutes, turning occasionally until the skins blister and char. Once roasted, transfer the chiles to a bowl, cover them with plastic wrap, and let them steam for 10 minutes. This will make peeling the skins easier.
Step 2: Prepare the Base
In a large skillet, heat 2 tablespoons of olive oil over medium heat. Add the finely chopped white onion and optional jalapeño, cooking for about 4-5 minutes until softened and translucent. Stir in minced garlic and sauté for an additional minute until fragrant, then remove the skillet from heat, allowing the mixture to cool slightly.
Step 3: Make the Roux
Sprinkle 2 tablespoons of all-purpose flour over the sautéed onion and jalapeño mixture in the skillet. Stir continuously for about 2 minutes, cooking the flour without browning it. This will create a roux, which will help thicken your Green Chile Queso dip as it cooks further.
Step 4: Add Milk and Cheese
Lower the heat to medium-low and slowly stir in one can of evaporated milk, mixing well. Season the mixture with salt and black pepper to taste. Gradually add in 3 cups of your favorite melting cheese, and stir continuously until the cheese is fully melted and the dip is smooth and thick, about 5 minutes.
Step 5: Incorporate Chiles
Carefully peel the skins off the roasted chiles and remove the seeds. Chop the chiles into small pieces, then mix them into the cheese dip. If the mixture is too thick, adjust the consistency with a splash of additional milk, stirring until it reaches your desired creaminess.
Step 6: Serve
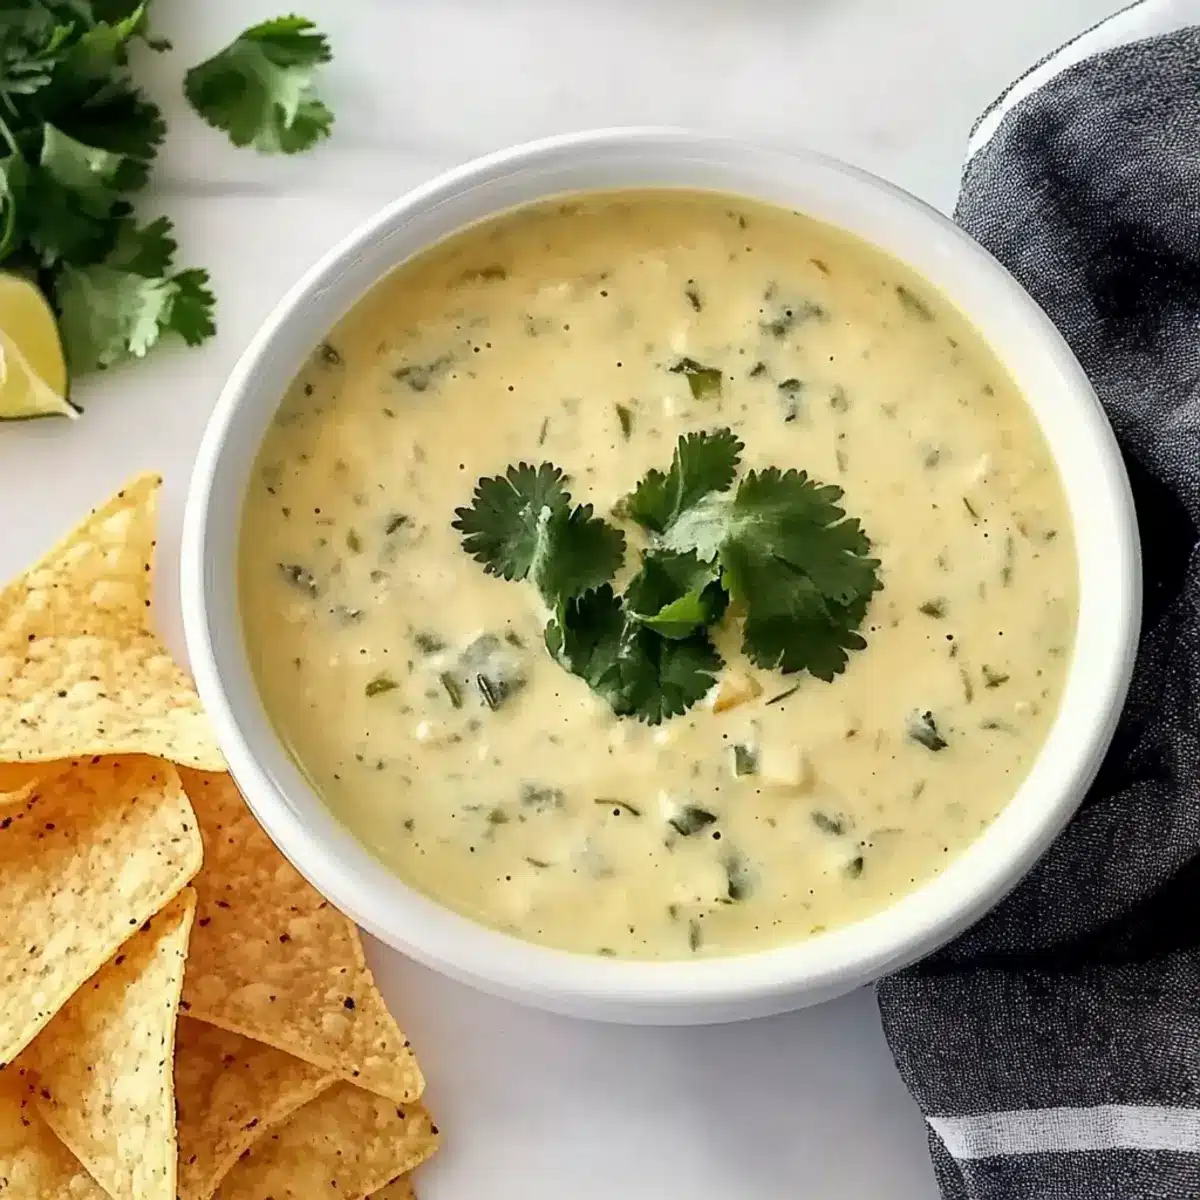
Once your Green Chile Queso is creamy and well-combined, remove it from heat. Transfer to a serving bowl and garnish with fresh cilantro or chopped green onions for a burst of color. Serve hot with tortilla chips on the side for an irresistible dipping experience!

What to Serve with Creamy Green Chile Queso Dip
Imagine a gathering infused with warmth and laughter, where the aroma of cheesy goodness fills the air, tempting everyone to dive into delightful bites.
-
Crispy Tortilla Chips: The ultimate pairing, these chips offer a satisfying crunch against the smooth, creamy dip. Perfect for dipping!
-
Fresh Veggie Platter: Snappy cucumber and sweet bell pepper sticks add a refreshing contrast, providing a crunchy, nutritious option alongside the rich queso.
-
Soft Flour Tortillas: Warm, pliable tortillas can be used to scoop or wrap the queso, creating a delightful handheld treat that’s both comforting and delicious.
-
Spicy Sausage Rolls: These savory bites bring a touch of heat and heartiness, making them a great choice for those who crave a bit more protein alongside the dip.
For a unique twist, consider serving the queso alongside mini quesadillas. Filled with cheese and additional veggies, these cheesy delights are perfect for dipping and add a fun finger-food element to the spread.
-
Zesty Cilantro Lime Rice: This tangy, flavorful rice will contrast beautifully with the cheese’s richness, adding a bright note to your meal.
-
Chilled Margaritas: Elevate the experience with a refreshing margarita, its citrusy flavor complementing the dip while providing a little extra cheer to your gathering!
Expert Tips for Green Chile Queso
- Cheese Gradually: Control the heat when melting cheese to prevent graininess; add it gradually at low temperatures for a smooth finish.
- Avoid Overheating: When reheating leftover Green Chile Queso, use low heat and stir frequently to maintain that creamy texture—no one likes a clumpy dip!
- Fresh vs. Canned: Roasting fresh chiles brings out richer flavors, but canned chiles are a quick alternative. Choose based on your time and flavor preference!
- Spice It Up: For more heat, keep the seeds from jalapeños or add a pinch of cayenne pepper. Adjust the spice to suit your crowd!
- Thicken with Care: If your dip is too thick, add a splash of milk until you reach your desired consistency. The right texture makes for better dipping!
Storage Tips for Green Chile Queso
- Fridge: Store your Green Chile Queso in an airtight container for up to 3 days. Always cool it completely before sealing to preserve its creamy texture.
- Freezer: You can freeze Green Chile Queso for up to 2 months. Use a freezer-safe container, and be sure to leave some space for expansion.
- Reheating: To reheat, warm gently on the stove over low heat, stirring frequently, or microwave in short intervals. Add a splash of milk if needed to restore creaminess.
- Make-Ahead: Prepare the dip ahead of time and store it in the fridge. Just reheat slowly before serving for a quick, delicious snack!
Make Ahead Options
These Creamy Green Chile Queso Dips are perfect for busy home cooks looking to save time without sacrificing flavor! You can sauté the onion, garlic, and jalapeño, then refrigerate this mixture for up to 3 days in advance, making your meal prep a breeze. Additionally, roast and peel the Hatch chiles ahead of time, storing them in an airtight container in the fridge for up to 24 hours. When you’re ready to finish the recipe, simply reheat the sautéed mixture on low heat, gradually add in the evaporated milk and cheese, and stir in the prepared chiles until melted and smooth. This way, your Green Chile Queso will be just as delicious, with minimal effort when it’s time to serve!
Green Chile Queso Variations
Feel free to unleash your creativity with these delightful twists on the classic dip!
-
Spicy Kick: Add diced serrano peppers for a fiery version that will have spice lovers cheering with every bite.
-
Creamy Avocado: Mash ripe avocado into the queso for a silky texture and a pop of freshness. It’s like a creamy hug for your taste buds!
-
Smoky Flavor: Incorporate smoked cheddar or add a touch of chipotle in adobo sauce for a smoky depth that transforms the queso into something extraordinary.
-
Meaty Add-In: Mix in cooked chorizo or ground beef for a heartier dip; the savory meat paired with the creamy queso will be a hit at your next gathering.
-
Herb Infusion: Stir in fresh cilantro or green onions before serving for a vibrant, herbaceous note that brightens up the rich flavors.
-
Cheddar Blast: Use a combination of sharp cheddar and pepper jack cheese for a dip that has both gooey richness and a hint of sharpness—perfect for dippers who like bold flavors!
-
Nutritional Boost: Replace half the cheese with cauliflower puree for a lighter option that doesn’t skimp on flavor while sneaking in some extra veggies. Trust me, you won’t miss a beat!
-
Vegan Delight: To make this dip plant-based, swap in cashew cream and a blend of non-dairy cheeses. With the right spices, you won’t even notice the difference!
No matter how you decide to jazz up your Green Chile Queso, it’s bound to become a household favorite. Looking for more delicious ideas? Check out this appetizing Green Chile Chicken dish that pairs perfectly with your dip!
Green Chile Queso Recipe FAQs
How do I select the right chiles for my Green Chile Queso?
Absolutely! For the best flavor, choose fresh Hatch chiles when they are in season, typically August through September. Look for chiles with smooth, shiny skin and no dark spots. If fresh isn’t an option, canned green chiles (like diced green chiles) are a convenient substitute that still deliver a tasty outcome!
What’s the best way to store leftover Green Chile Queso?
Very! Store your Green Chile Queso in an airtight container in the refrigerator for up to 3 days. Ensure it cools completely before sealing it to safeguard that creamy texture. For longer storage, it can be placed in the freezer for up to 2 months; just be sure to use a freezer-safe container and leave some space for expansion.
How do I freeze Green Chile Queso correctly?
Certainly! To freeze your Green Chile Queso, allow it to cool completely, then transfer it to a freezer-safe container. Leave about an inch of headspace for expansion during freezing. Seal tightly and label with the date. When ready to use, thaw it overnight in the fridge before reheating gently on the stove or microwave, adding a splash of milk to restore creaminess.
What should I do if my queso turns out too thick?
No worries! If your Green Chile Queso is too thick, simply add a splash of milk and stir until you reach the desired consistency. Heat gently on low if necessary, as stirring continuously will help smooth it out. If you made it ahead, you might need to add a bit more milk when reheating, so don’t be afraid to adjust as needed.
Are there any dietary considerations for this recipe?
Absolutely! This Green Chile Queso contains dairy, which can be an issue for lactose intolerant individuals or those with dairy allergies. For a dairy-free version, consider using a plant-based cream cheese or non-dairy cheese substitutes. Always check labels on any ingredients to ensure they align with dietary needs.

Irresistibly Creamy Green Chile Queso You’ll Crave!
Ingredients
Equipment
Method
- Preheat your oven to broil. Place the Hatch chiles on a baking sheet and broil them for about 20 minutes, turning occasionally until the skins blister and char. Once roasted, transfer the chiles to a bowl, cover them with plastic wrap, and let them steam for 10 minutes.
- In a large skillet, heat 2 tablespoons of olive oil over medium heat. Add the finely chopped white onion and optional jalapeño, cooking for about 4-5 minutes until softened and translucent. Stir in minced garlic and sauté for an additional minute until fragrant, then remove from heat.
- Sprinkle 2 tablespoons of all-purpose flour over the sautéed mixture in the skillet. Stir continuously for about 2 minutes without browning it to create a roux.
- Lower the heat to medium-low and slowly stir in one can of evaporated milk, mixing well. Season with salt and black pepper to taste. Gradually add in 3 cups of your favorite melting cheese, stirring until fully melted and smooth.
- Carefully peel the skins off the roasted chiles, remove seeds, and chop them into small pieces. Mix into the cheese dip, adjusting consistency with additional milk if too thick.
- Remove from heat, transfer to a serving bowl, and garnish with fresh cilantro or green onions. Serve hot with tortilla chips.
Leave a Reply