
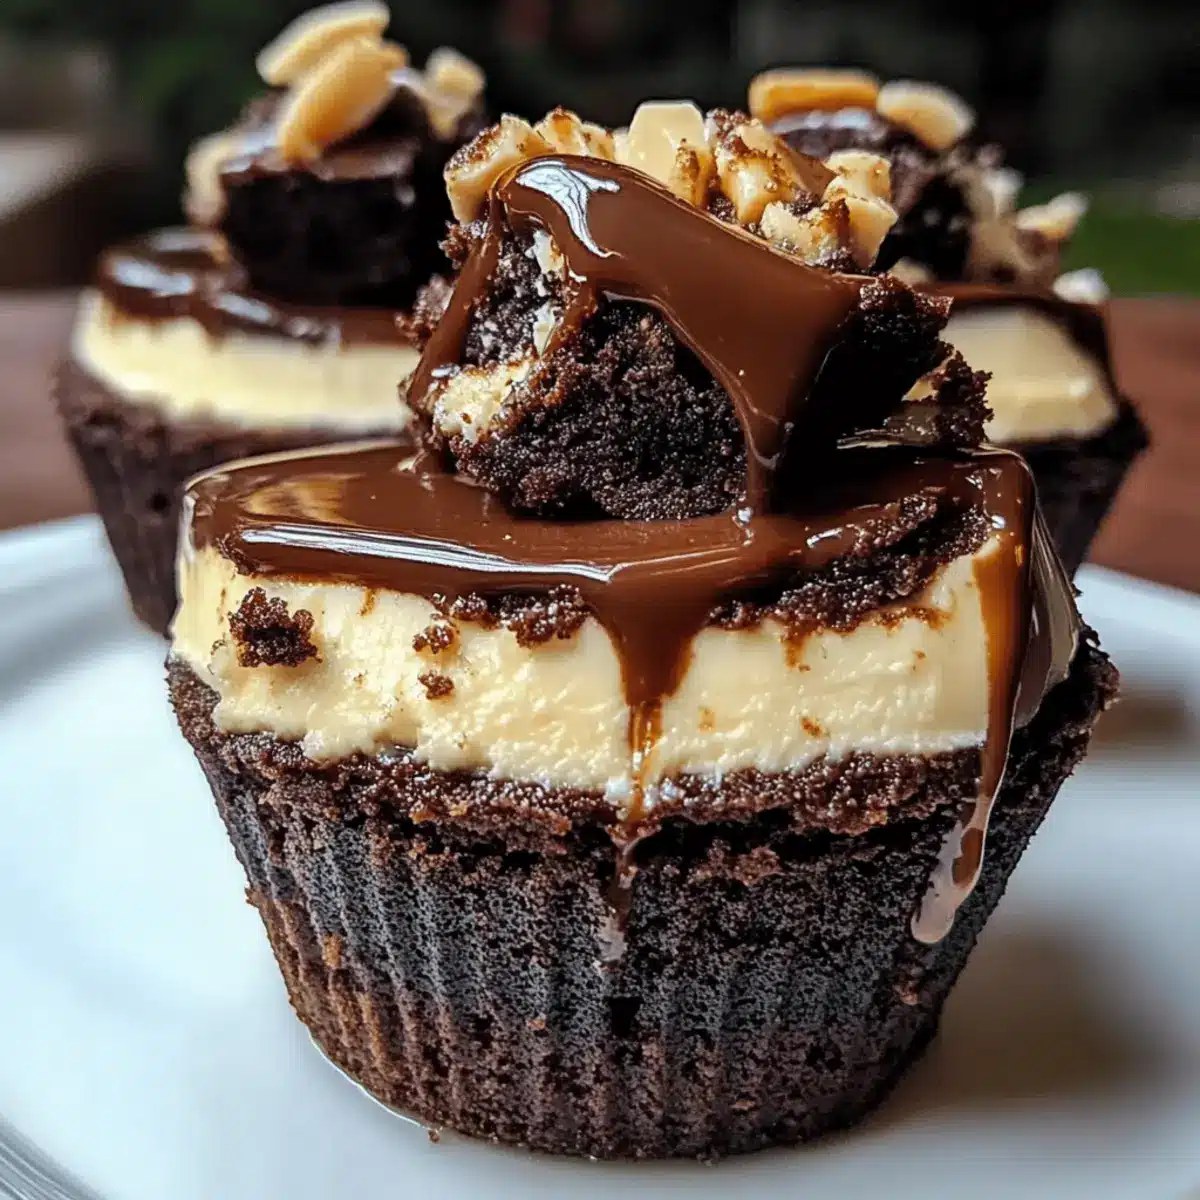
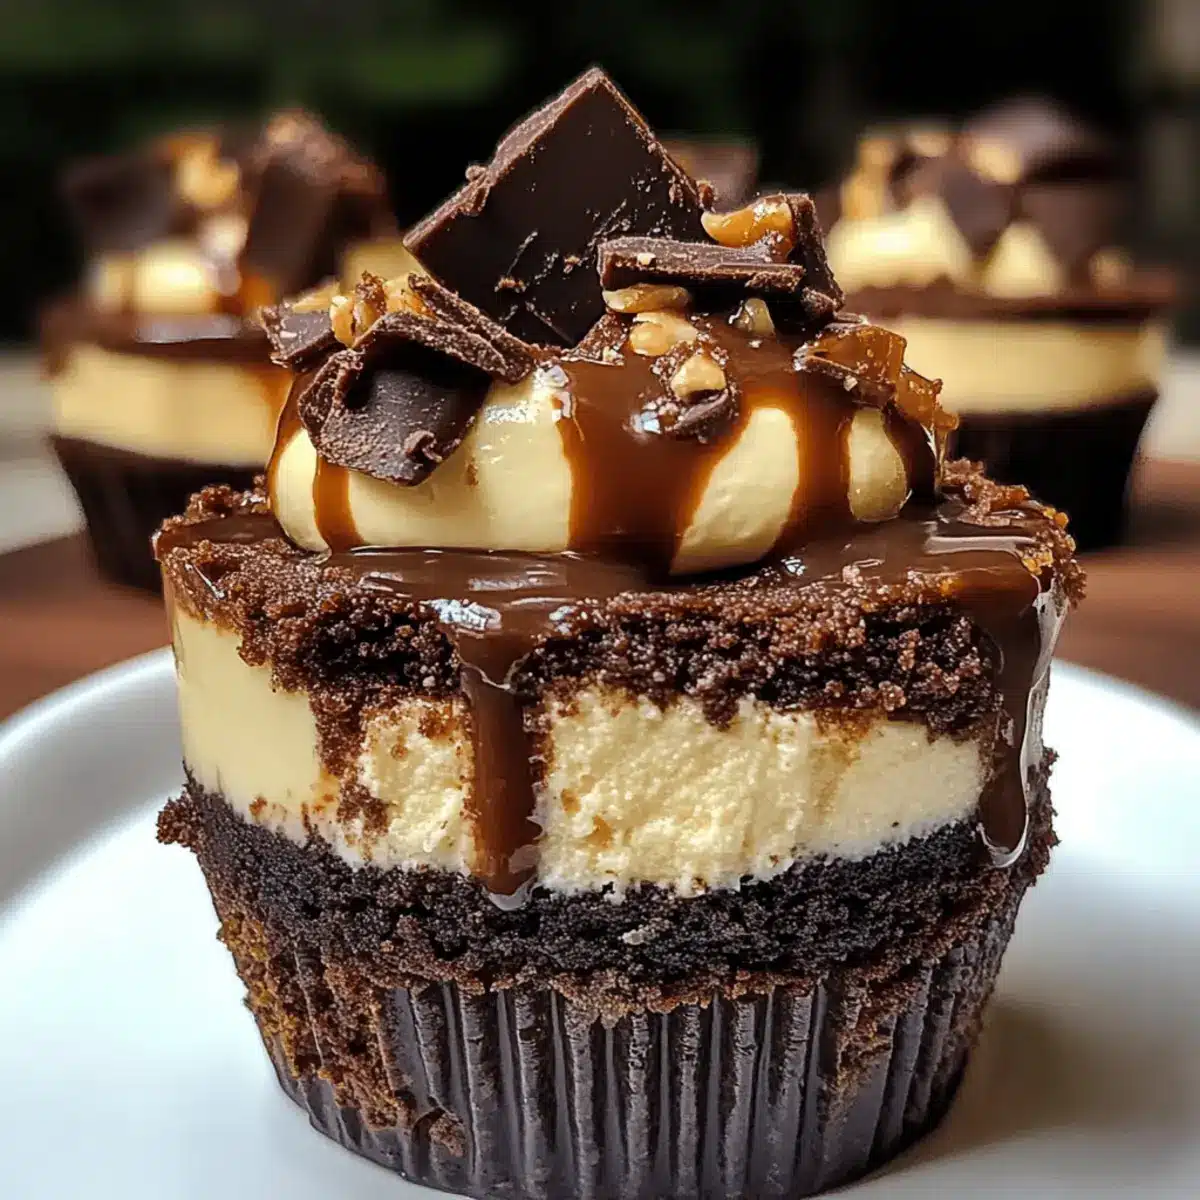
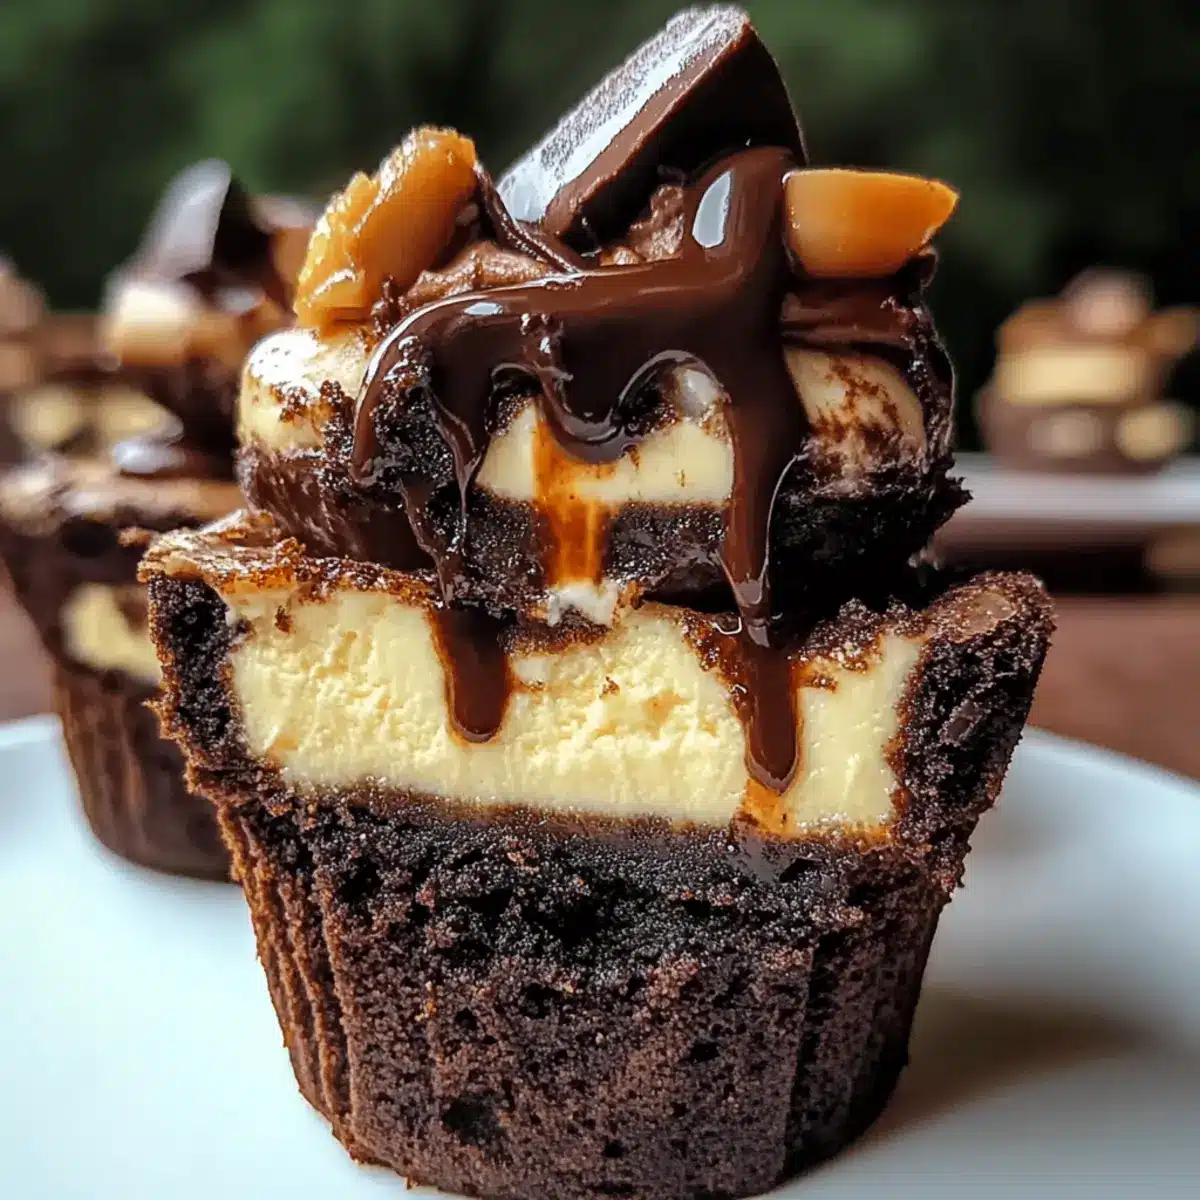
While rummaging through my pantry one afternoon, I stumbled upon the perfect combination of ingredients just calling out to be transformed into something extraordinary. Enter the Loaded Brownie Cheesecake Cups, where rich, fudgy brownies collide with the creamy goodness of cheesecake in a delightful mini dessert! Not only are these sweet gems a breeze to whip up, but they also make a stunning centerpiece for any gathering, impressing friends and family with minimal effort. Plus, they’re easily customizable with tempting variations like Peanut Butter Swirl or Mint Chocolate to suit any palate. So, are you ready to elevate your dessert game and dive into this decadent treat? Let’s get started!
Why Are Loaded Brownie Cheesecake Cups Perfect?
Decadence in Every Bite: These Loaded Brownie Cheesecake Cups deliver an irresistible blend of fudgy brownie and creamy cheesecake that will have your taste buds dancing.
Quick and Easy: With minimal prep time and simple ingredients, they are perfect for both novice and experienced bakers.
Endless Customization: Whether you crave a Peanut Butter Swirl or Mint Chocolate twist, these cups can easily adapt to your flavor desires, ensuring everyone finds their favorite.
Eye-Catching Presentation: Their individual servings are not only adorable but also make for a stunning dessert display, perfect for gatherings or potlucks.
Gluten-Free Option: You can easily switch to a 1:1 gluten-free blend for those who have dietary restrictions, making these decadent treats accessible for everyone.
Crowd-Pleasing Delight: Everyone loves brownies and cheesecake, making these Loaded Brownie Cheesecake Cups an instant hit at any occasion—whether it’s a birthday party or a cozy family gathering. Don’t forget to check out Pumpkin Cheesecake Cookies for another delightful twist on classic flavors!
Loaded Brownie Cheesecake Cup Ingredients
Get ready to create magic with these delightful dessert cups!
For the Brownie Base
- Butter – Adds richness and moisture; use unsalted for better control over salt levels.
- Sugar – Provides the necessary sweetness for both layers.
- Eggs – Offer structure and moisture; ensure they’re room temperature for the best blending.
- Vanilla Extract – Enhances flavor; can be substituted with almond extract for a different taste.
- Cocoa Powder – Essential for that deep chocolate flavor; opt for high-quality cocoa for richer results.
- All-Purpose Flour – Gives structure to the brownie; a gluten-free blend can be used for those with dietary restrictions.
- Salt – Balances sweetness and enhances all the flavors.
- Chocolate Chips – Added for gooeyness; mini chips distribute evenly throughout the batter.
For the Cheesecake Layer
- Cream Cheese – The star of the cheesecake layer; full-fat yields the best creaminess.
- Sour Cream – Adds tanginess and moisture to the cheesecake; Greek yogurt can work as a substitutive option.
- Sugar – Sweetens the cheesecake mixture, making it perfectly balanced.
Optional Toppings
- Mini Chocolate Chips – For an extra layer of chocolate goodness on top.
- Peanut Butter or Mint Chocolate – Perfect for creating the delicious variations you might crave!
These Loaded Brownie Cheesecake Cups are perfect for sweet-toothed guests or simply to indulge in yourself!
Step‑by‑Step Instructions for Loaded Brownie Cheesecake Cups
Step 1: Prepare Oven & Muffin Tin
Preheat your oven to 325°F (165°C). While it heats, prepare a muffin tin by lining it with paper or silicone liners, then lightly spray the liners with non-stick spray. This ensures your Loaded Brownie Cheesecake Cups release easily after baking, allowing for a beautiful presentation.
Step 2: Make Brownie Base
In a mixing bowl, whisk together melted butter and sugar until well combined. Beat in the eggs and vanilla extract until smooth. In a separate bowl, combine the dry ingredients—cocoa powder, flour, and salt. Gradually fold the dry mixture into the wet one and stir in the chocolate chips. Fill each muffin cup one-third full with this delicious batter and bake for 10-12 minutes, or until just set.
Step 3: Prepare Cheesecake Layer
While the brownie bases are baking, prepare the cheesecake layer. In a mixing bowl, beat softened cream cheese until creamy and smooth. Gradually mix in the sugar, then add the eggs one at a time, beating well after each addition. Finally, fold in the sour cream and vanilla extract until fully incorporated, creating a luscious filling for your Loaded Brownie Cheesecake Cups.
Step 4: Assemble & Bake
Once the brownie bases have baked, remove them from the oven. Carefully pour the cheesecake mixture over each brownie base, filling them to the top. If you desire, sprinkle mini chocolate chips or your choice of toppings on top. To achieve even baking, place the muffin tin into a larger baking dish filled with water and bake for 20-25 minutes. The edges should be set, while the center may still jiggle slightly.
Step 5: Cool Gradually
After baking, turn off the oven and crack the door open, allowing the Loaded Brownie Cheesecake Cups to cool for about 30 minutes inside. This gradual cooling prevents cracking. Once cool, transfer the cups to a wire rack until they reach room temperature. Refrigerate for at least 4 hours, or overnight, to allow the flavors to meld beautifully and the texture to firm up.
Make Ahead Options
These Loaded Brownie Cheesecake Cups are a game-changer for meal prep enthusiasts! You can prepare the brownie base up to 24 hours in advance by whisking together the ingredients and baking them as directed. Once cooled, store the brownie cups in an airtight container to maintain their fudgy texture. The cheesecake layer can also be made ahead; simply prepare it and refrigerate it for up to 3 days. When you’re ready to assemble, pour the cheesecake over the brownie bases and bake as instructed. This method not only saves time but also ensures you’ll have delicious dessert cups on hand for busy weeknights or spontaneous gatherings!
Expert Tips for Loaded Brownie Cheesecake Cups
-
Room Temperature Ingredients: Ensure your cream cheese and eggs are at room temperature to avoid clumps and ensure a smooth cheesecake layer.
-
Water Bath Importance: Using a water bath helps in even baking and significantly reduces the chances of cracking. Don’t skip this step!
-
Cool Slowly: Avoid rushing the cooling process to prevent sinking or cracking. Leaving the cupcakes in the oven with the door cracked helps maintain a stable temperature.
-
Correct Baking Time: Keep a close eye during the baking process. You want the edges set but the center to have a slight jiggle—it’ll set perfectly as it cools!
-
Experiment with Toppings: Don’t hesitate to get creative with toppings! Mini chocolate chips or a drizzle of peanut butter or mint chocolate can elevate your Loaded Brownie Cheesecake Cups even further.
Loaded Brownie Cheesecake Cup Variations
Feel free to get creative with your Loaded Brownie Cheesecake Cups by adding your favorite flavors and twists!
-
Peanut Butter Swirl: Drizzle warm peanut butter into the cheesecake mixture before baking for that creamy, nutty flavor. Your taste buds will rejoice at the blend of chocolate and peanut butter bliss.
-
Mint Chocolate: Add peppermint extract and mint chocolate chips to the filling for a refreshing minty twist. This variation creates an exhilarating combination reminiscent of a decadent mint chocolate dessert!
-
Gluten-Free: Substitute all-purpose flour with a 1:1 gluten-free blend to accommodate gluten sensitivities. Everyone deserves a bite of this sweet indulgence!
-
Nutty Crunch: Fold in chopped nuts like walnuts or pecans into the brownie layer for an added crunch and richness. The texture will keep each bite exciting and flavorful, providing a delightful contrast.
-
Fruit Infusion: Incorporate fresh berries, like raspberries or strawberries, into the cheesecake layer for a burst of fruity flavor. It’s a refreshing surprise that balances the sweetness perfectly.
-
Caramel Drizzle: Drizzle caramel sauce over the baked cups for an indulgent touch. It adds a beautiful finish and takes these treats to an even more decadent level.
-
Coconut Bliss: Mix shredded coconut into the brownie layer for a tropical twist. Pairing chocolate and coconut creates a delightful flavor that feels like a sweet getaway!
-
Coffee Kick: Mix in a tablespoon of espresso powder for a mocha-inspired fill that complements the chocolate beautifully. This adds depth and an energizing pep to your dessert!
Don’t forget to try these variations alongside classic favorites like the exquisite Blueberry Cheesecake Crumble or the delightful Cottage Cheese Brownie for an even broader dessert experience!
Storage Tips for Loaded Brownie Cheesecake Cups
Fridge: Keep your Loaded Brownie Cheesecake Cups in an airtight container in the refrigerator for up to 5 days to maintain their freshness and quality.
Freezer: For longer storage, freeze the cups for up to 3 months. Place them in a freezer-safe container separated by parchment paper to prevent sticking.
Thawing: To enjoy, simply thaw the frozen cheesecake cups overnight in the refrigerator before serving. This helps preserve texture and flavor.
Reheating: If you prefer them warm, gently microwave the cups for about 10-15 seconds. Just be careful not to overheat; you want the creamy cheesecake layer to remain delightful!
What to Serve with Loaded Brownie Cheesecake Cups
These delightful dessert cups are perfect for elevating any dinner table; let’s create the ultimate sweet experience together!
-
Whipped Cream: A dollop of freshly whipped cream adds a light, airy contrast to the rich, fudgy cups, elevating each bite.
-
Fresh Berries: Sweet and tangy berries like strawberries or raspberries cut through the richness, offering a refreshing burst with every spoonful.
-
Mint Leaf Garnish: A sprig of fresh mint not only adds color but also provides a delightful, aromatic finish that complements the chocolate flavors elegantly.
-
Chocolate Sauce: Drizzling warm chocolate sauce over the cups enhances their decadent nature, making them feel extra indulgent and inviting.
-
Coffee: A cup of coffee pairs beautifully, balancing the sweetness while enhancing the chocolate notes and providing a warm, cozy touch.
-
Cheesecake Platter: Serve alongside a selection of mini cheesecakes or cheesecake bites for a variety of cheesecake flavors, creating a truly lavish dessert spread.
-
Vanilla Ice Cream: A scoop of creamy vanilla ice cream adds a refreshing contrast and a soothing temperature change, perfect for a rich dessert like this.
-
Chocolate Covered Pretzels: The sweet and salty crunch of chocolate-covered pretzels adds a delightful texture contrast that complements the creamy cheesecake cups perfectly.
Loaded Brownie Cheesecake Cups Recipe FAQs
What ingredients should I look for in the brownies to ensure they’re ripe and fresh?
Absolutely! For the richest flavor, select high-quality cocoa powder that isn’t expired and has a deep, vibrant color. Fresh eggs are crucial—opt for ones that are unrefrigerated and have no cracks. Unsalted butter should be fresh and at room temperature to combine nicely with the sugar.
How should I store Loaded Brownie Cheesecake Cups?
Store your Loaded Brownie Cheesecake Cups in an airtight container in the refrigerator for up to 5 days. This keeps them fresh, moist, and delicious! If you need to keep them longer, they can be frozen for up to 3 months—just make sure they’re in a freezer-safe container.
What is the best way to freeze these dessert cups?
To freeze your Loaded Brownie Cheesecake Cups, first cool them completely. Next, wrap each cup tightly in plastic wrap and place them in a freezer-safe container, layering parchment paper in between to prevent sticking. They can be stored this way for up to 3 months. When you’re ready to enjoy, just thaw them overnight in the refrigerator.
What if my brownies sink or crack while baking?
Very! If your Loaded Brownie Cheesecake Cups sink, it’s usually due to a rushed cooling process. Make sure to turn off the oven, crack the door, and let them cool gradually inside for at least 30 minutes. If they crack, using a water bath while baking helps ensure even heat distribution and reduces cracking, so don’t skip that step!
Are Loaded Brownie Cheesecake Cups suitable for gluten-free diets?
Yes, indeed! Simply substitute the all-purpose flour with a 1:1 gluten-free blend, and you can enjoy these decadent dessert cups without any gluten concerns. Always read the labels on your ingredients to ensure there are no hidden gluten sources.
Can pets share these brownie cheesecake cups too?
No, it’s best to keep these Loaded Brownie Cheesecake Cups entirely for human consumption. Ingredients like chocolate and sugar aren’t safe for pets and can cause health issues. Always treat your furry friends with snacks specifically made for them!
Loaded Brownie Cheesecake Cups: A Rich Treat to Indulge In
Ingredients
Equipment
Method
- Preheat your oven to 325°F (165°C). Prepare a muffin tin with liners and spray with non-stick spray.
- In a bowl, whisk together melted butter and sugar. Beat in eggs and vanilla until smooth.
- Combine cocoa powder, flour, and salt in a separate bowl. Fold dry mixture into wet mixture and mix in chocolate chips. Fill muffin cups a third full and bake for 10-12 minutes.
- In a bowl, beat cream cheese until creamy. Mix in sugar and eggs one by one, then fold in sour cream and vanilla.
- Pour cheesecake mixture over brownie bases. Top with mini chocolate chips if desired. Bake in a water bath for 20-25 minutes.
- Turn off oven and crack door open; cool cups for 30 minutes. Transfer to wire rack; refrigerate for at least 4 hours.
Leave a Reply