
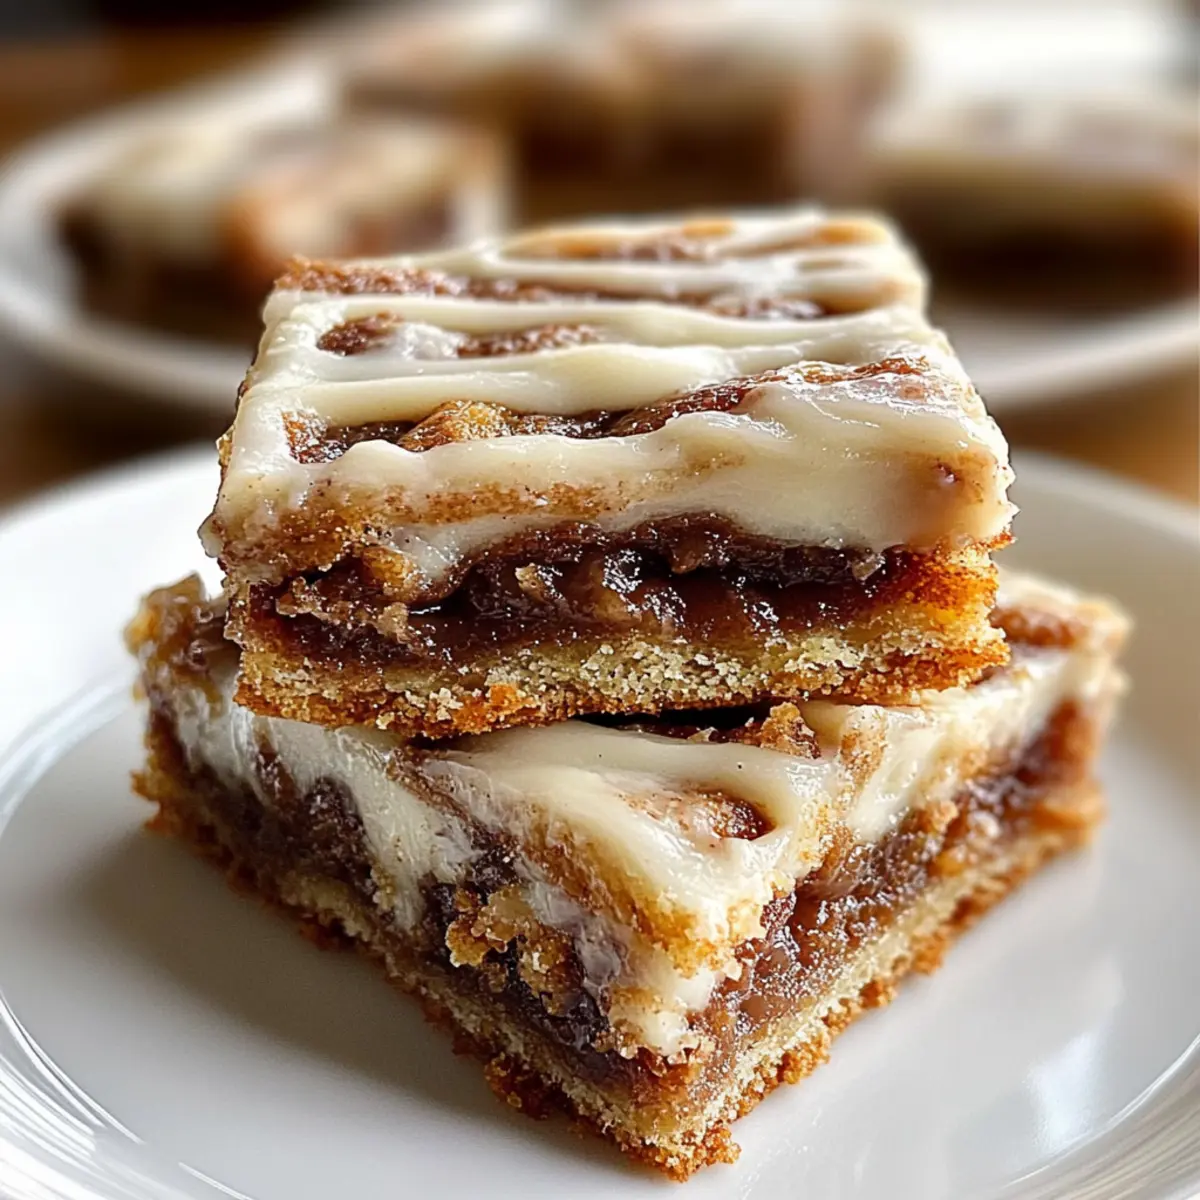
As I stood in my kitchen, awash in the sweet scent of brown sugar and warm cinnamon, a small moment of triumph hit me. Instead of the lengthy process of crafting traditional cinnamon rolls, I was whipping up a batch of Cinnamon Roll Bliss Bars—delightfully gooey and completely yeast-free. These bars are perfect for those busy weeknights when you crave a comforting dessert without all the hassle. Plus, they slice beautifully, making them an impressive addition to any brunch table. Ready to experience the joy of cinnamon rolls in a fraction of the time? Let’s dive into this delightful recipe together!

Why Choose Cinnamon Roll Bliss Bars?
Quick and Easy: You’ll love how this recipe eliminates the long waiting times associated with traditional cinnamon rolls.
No Yeast Required: Skip the yeast headaches, as these bliss bars use baking powder for a simple yet delightful rise.
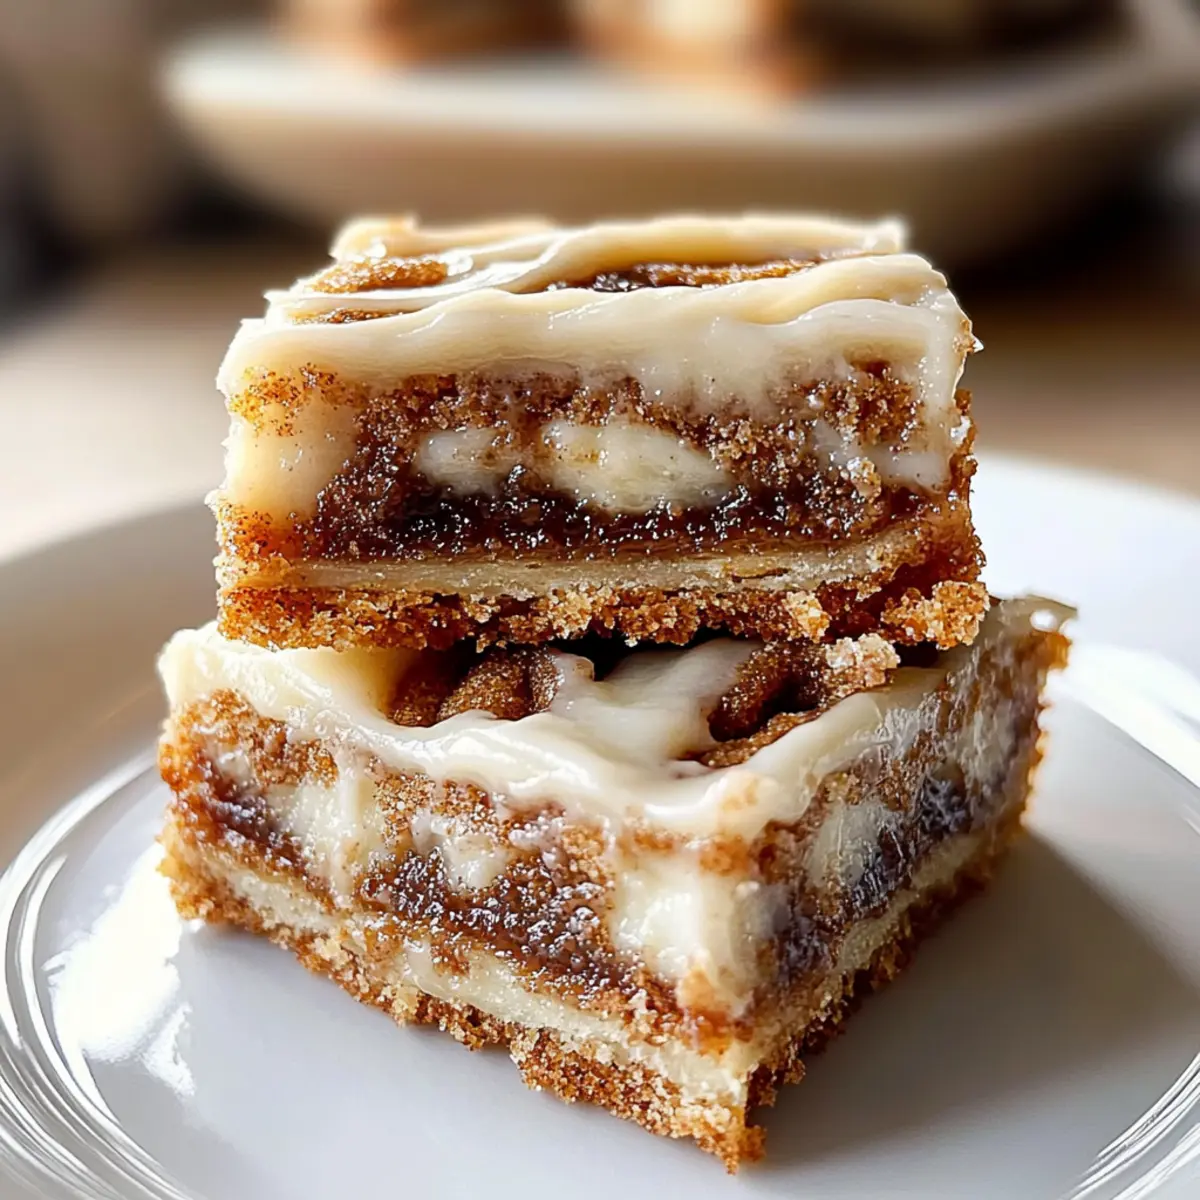
Comfort Food Classic: Experience the rich, gooey texture that combines the comfort of cinnamon rolls with the convenience of bars.
Perfect for Sharing: Their easy-to-slice nature makes them ideal for sharing at brunch or dessert tables, ensuring everyone can indulge!
Versatile Variations: Feel free to get creative—try adding chopped nuts or swapping spices for a personalized touch, much like my Cinnamon Roll Protein Bites.
Get ready to impress your friends and family with these delightful bars!
Cinnamon Roll Bliss Bars Ingredients
For the Dough
• All-purpose flour – Forms the base and provides structure; can be substituted with a gluten-free flour blend.
• Granulated sugar – Sweetens the dough and enhances browning; no substitution recommended.
• Brown sugar – Adds rich caramel notes to the filling; you can use light or dark based on your preference.
• Unsalted butter – Provides moisture and flavor; ensure it is softened, not melted for the best texture.
• Baking powder – Acts as the leavening agent instead of yeast, ensuring a tender texture.
• Salt – Balances sweetness; don’t omit as it enhances the overall flavor.
• Eggs – Help bind the ingredients and provide moisture; make sure they’re at room temperature.
• Vanilla extract (alcohol-free) – Adds depth of flavor; can be swapped with almond extract for a different twist.
For the Filling
• Cinnamon – The core flavor that brings the cinnamon roll experience; essential for blissful bars.
• Cardamom – Enhances the spice profile; optional but highly recommended for added complexity.
• Melted butter – Combines with cinnamon and sugar for the ultimate filling; use unsalted for control over seasoning.
For the Frosting
• Cream cheese – Provides a tangy sweetness to the frosting, making it irresistibly delightful.
• Powdered sugar – Sweetens and thickens the frosting, ensuring a creamy texture.
• Milk or cream – Adjusts the frosting consistency; choose heavy cream for a richer glaze.
These Cinnamon Roll Bliss Bars will have everyone reaching for seconds!
Step‑by‑Step Instructions for Cinnamon Roll Bliss Bars
Step 1: Preheat and Prepare
Begin by preheating your oven to 350°F (175°C). While it warms up, take a 9×13 inch baking pan and line it with parchment paper, ensuring the paper hangs over the edges for easy removal later. This handy method will make slicing your Cinnamon Roll Bliss Bars a breeze when they’re baked to perfection!
Step 2: Cream the Butters and Sugars
In a mixing bowl, combine the softened unsalted butter, granulated sugar, and brown sugar. Use a hand or stand mixer to beat the mixture until light and fluffy, about 3 minutes. This step incorporates air into your dough, which is key for achieving that delightful, gooey texture in your forthcoming Cinnamon Roll Bliss Bars.
Step 3: Add the Eggs and Vanilla
Once your butter mixture is light and fluffy, gradually add the eggs, one at a time, allowing each to fully incorporate before adding the next. Follow this by mixing in the vanilla extract until combined. This process ensures that your wet ingredients are perfectly blended, setting a solid foundation for your bars.
Step 4: Mix the Dry Ingredients
In a separate bowl, whisk together the all-purpose flour, baking powder, and salt. Gradually add this dry mixture to your wet ingredients, stirring until everything is just combined. Be careful not to over-mix; you want to maintain a tender texture in your Cinnamon Roll Bliss Bars which is reminiscent of traditional cinnamon rolls.
Step 5: Shape the Dough
Set aside 1 cup of the dough for later. Take the remaining dough and press it evenly into the bottom of your prepared baking pan. Use your hands or a spatula to ensure a smooth, even layer that forms the base of your delicious Cinnamon Roll Bliss Bars. It should look slightly puffy and cover the pan completely.
Step 6: Create the Filling
In another bowl, mix melted unsalted butter, brown sugar, cinnamon, and cardamom until smooth. Carefully spread this mixture over the pressed dough, ensuring you leave a small border around the edges. This swirl of filling will add richness and warmth to every bite of your Cinnamon Roll Bliss Bars.
Step 7: Add the Top Layer
Using the reserved cup of dough, drop spoonfuls over the cinnamon filling. Use a knife or a toothpick to gently swirl the dough into the filling, creating a marbled effect. This step is essential; it adds visual appeal and ensures pockets of gooey goodness in your bars, making them simply irresistible.
Step 8: Bake to Perfection
Place your baking pan in the preheated oven and bake for 28 to 32 minutes. Keep an eye on the edges, which should turn golden brown, while the center remains slightly soft and glossy. The delightful aroma wafting through your kitchen will signal that your Cinnamon Roll Bliss Bars are on the verge of being ready.
Step 9: Cool the Bars
Once baked, remove the pan from the oven and allow the Cinnamon Roll Bliss Bars to cool completely in the pan on a wire rack. This cooling time is crucial to letting the bars set properly and makes frosting easier without melting it into a gooey mess!
Step 10: Prepare the Cream Cheese Frosting
In a mixing bowl, beat together cream cheese and softened butter until smooth. Gradually add in powdered sugar and milk, mixing until you achieve your desired frosting consistency. This creamy, tangy topping will bring an indulgent finish to your Cinnamon Roll Bliss Bars, making each slice even more delightful.
Step 11: Frost and Slice
Once the bars have cooled, spread the cream cheese frosting generously over the top. Allow it to set slightly before slicing your bars into squares. Each piece will be a perfect blend of cinnamon sweetness and creaminess, ready to share or enjoy all on your own!
How to Store and Freeze Cinnamon Roll Bliss Bars
Room Temperature: Store your Cinnamon Roll Bliss Bars in an airtight container at room temperature for up to 3 days to maintain their gooey texture.
Fridge: If you prefer a chill, refrigerate the bars in an airtight container for up to a week; just allow them to come to room temperature before enjoying.
Freezer: For long-term storage, freeze the unfrosted bars in a single layer; once frozen, transfer them to a freezer-safe bag or container and enjoy for up to 2 months.
Reheating: To savor that fresh-baked taste, reheat individual bars in the microwave for 10-15 seconds; they’ll be warm and gooey, perfect for satisfying your sweet tooth!
What to Serve with Cinnamon Roll Bliss Bars?
Indulging in these gooey delights opens the door to a full meal experience, perfectly suited for any gathering or cozy dessert night.
-
Rich Coffee: The bold flavor of coffee complements the sweetness of the bars, creating a delightful balance that elevates each bite.
-
Fresh Fruit Salad: A fresh assortment of seasonal fruits adds a refreshing, tart contrast to the sweetness of the bars, making for a well-rounded dessert spread.
-
Vanilla Ice Cream: The creamy richness of vanilla ice cream drizzled over warm bars creates an irresistible treat that melts beautifully together.
-
Maple Syrup Drizzle: A light drizzle of maple syrup enhances the warm flavors of cinnamon and brown sugar, adding an extra layer of sweetness and depth.
-
Nutty Granola: Mix in a handful of nutty granola for a crunchy topping, introducing delightful texture that beautifully offsets the gooey bars.
-
Chai Tea: Pairing your dessert with a steaming cup of chai tea warms the soul, harmonizing the spiced flavors in the bars with earthy undertones.
-
Chocolate Sauce: For the ultimate indulgence, drizzle rich chocolate sauce over your Cinnamon Roll Bliss Bars, creating a luxurious dessert experience that will leave everyone craving more.
-
Caramel Sauce: A sticky layer of caramel sauce adds sweetness and an irresistible richness, enhancing the cinnamon goodness of the bars.
Make Ahead Options
These Cinnamon Roll Bliss Bars are perfect for meal prep enthusiasts! You can prepare the dough and filling up to 24 hours in advance, storing them separately in airtight containers in the refrigerator. Simply cream the butter and sugars, mix in the eggs and vanilla, then combine with the dry ingredients. For the filling, mix the melted butter, brown sugar, cinnamon, and cardamom ahead of time and keep it cold. When you’re ready to bake, just press the dough into the pan, swirl the filling, and bake as directed. This way, you can enjoy the gooey goodness of Cinnamon Roll Bliss Bars with minimal effort, making them a fantastic option for busy weeknights!
Cinnamon Roll Bliss Bars Variations
Feel free to get creative and explore these delightful twists on your Cinnamon Roll Bliss Bars!
-
Nuts Addition: Add chopped walnuts or pecans into the filling for a delightful crunch that complements the gooey texture. Each bite will offer a pleasing contrast that enhances the overall experience.
-
Whole Wheat Swap: Replace half the all-purpose flour with whole wheat for a nuttier flavor, adding depth to your bars. This swap gives a unique twist without sacrificing the delicious essence of cinnamon rolls.
-
Spice It Up: Experiment with different spices like nutmeg or allspice in the filling to create a complex flavor profile. The warmth of these spices will create an inviting aroma that fills your kitchen.
-
Cocoa Delight: Stir in a few tablespoons of cocoa powder into the dough for a chocolatey version that marries beautifully with the cinnamon filling. Chocolate lovers will adore this rich addition!
-
Fruit Fusion: Incorporate dried fruits like cranberries or raisins for a fruity burst in every bite. This twist adds delightful sweetness and a chewy texture, balancing the richness of the bars.
-
Gluten-Free: Swap the all-purpose flour with a gluten-free flour blend to make these bars suitable for those with dietary restrictions. They will still be tender, soft, and unbelievably delicious!
-
Frosting Flavor Variations: Add a splash of almond extract into the cream cheese frosting for an equally delightful twist that pairs wonderfully with the cinnamon flavors. It transforms your bars into a gourmet treat!
If you’re looking for more delicious ideas, check out my Cinnamon Roll Protein Bites for a healthy snack or try my Oatmeal Chocolate Chip Bars for a different sweet treat! Enjoy customizing your Cinnamon Roll Bliss Bars!
Expert Tips for Cinnamon Roll Bliss Bars
Timing Matters: Start with the proper cooling time; if you frost the bars too soon, the frosting will melt and ruin the creamy finish.
Proper Butter Consistency: Make sure your butter is softened, not melted, to achieve the best texture for your Cinnamon Roll Bliss Bars.
Don’t Over-Mix: When combining wet and dry ingredients, avoid over-mixing; this keeps your bars tender and delightful, similar to classic cinnamon rolls.
Even Layering: Press the dough evenly into the pan for a good base; a thick or uneven layer can result in inconsistent baking.
Watch the Baking Time: Keep an eye on the bars as they bake; develop that golden edge while ensuring the center remains slightly soft for maximum gooeyness.

Cinnamon Roll Bliss Bars Recipe FAQs
What type of flour should I use for Cinnamon Roll Bliss Bars?
You can use all-purpose flour for the Cinnamon Roll Bliss Bars, which provides the perfect structure. If you’re looking for a gluten-free option, a gluten-free flour blend works well too! Just ensure it contains xanthan gum for proper texture.
How long can I store Cinnamon Roll Bliss Bars?
Store your Cinnamon Roll Bliss Bars in an airtight container at room temperature for up to 3 days. If you can resist them that long! For longer storage, you can refrigerate them for up to a week or freeze them unfrosted for up to 2 months.
Can I freeze Cinnamon Roll Bliss Bars?
Absolutely! To freeze, first let the bars cool completely. Once cool, arrange the unfrosted bars in a single layer on a baking sheet and freeze until solid. Then, transfer them to a freezer-safe bag or container. This method prevents them from sticking together. When you’re ready to indulge, simply thaw them in the fridge or on the counter!
What if my Cinnamon Roll Bliss Bars are too gooey in the center?
If you find your bars are too gooey, it could be due to underbaking. To get that perfect gooey center, bake them until the edges turn golden brown, but the center remains slightly soft. Remember, they continue to cook a little while cooling, so it’s better to err on the side of slightly underbaking than overbaking. If they still seem too soft, you can return them to the oven for a few extra minutes, checking frequently.
Are Cinnamon Roll Bliss Bars safe for people with egg allergies?
Unfortunately, this recipe does contain eggs, which help bind the ingredients and add moisture. However, you can substitute with flax eggs (1 tablespoon ground flaxseed mixed with 3 tablespoons water, allowed to sit for 5 minutes equals one egg) or a commercial egg replacer for a similar binding effect. Just be mindful of how this may change the texture slightly.
Can I use different spices in the Cinnamon Roll Bliss Bars?
Yes! Feel free to get creative with spices. Nutmeg or allspice can add unique flavors to your filling. I often switch up the spices based on what I have on hand or my mood. Just remember, small amounts can make a big difference, so start lightly and adjust to taste!
Cinnamon Roll Bliss Bars: Your Quick, Gooey Dessert Delight
Ingredients
Equipment
Method
- Preheat the oven to 350°F (175°C) and line a 9x13 inch baking pan with parchment paper.
- In a mixing bowl, combine softened unsalted butter, granulated sugar, and brown sugar. Beat until light and fluffy, about 3 minutes.
- Gradually add the eggs one at a time, mixing in vanilla extract until combined.
- In a separate bowl, whisk together all-purpose flour, baking powder, and salt. Gradually add to wet ingredients, stirring until just combined.
- Set aside 1 cup of dough. Press remaining dough into the bottom of the prepared baking pan.
- In another bowl, mix melted butter, brown sugar, cinnamon, and cardamom until smooth. Spread over the pressed dough.
- Drop spoonfuls of reserved dough over the cinnamon filling and swirl with a knife or toothpick.
- Bake in the preheated oven for 28 to 32 minutes, until edges are golden while the center is slightly soft.
- Allow to cool completely in the pan on a wire rack.
- For frosting, beat cream cheese and butter until smooth. Gradually add powdered sugar and milk until desired consistency.
- Spread frosting over cooled bars, then slice into squares.
Leave a Reply