
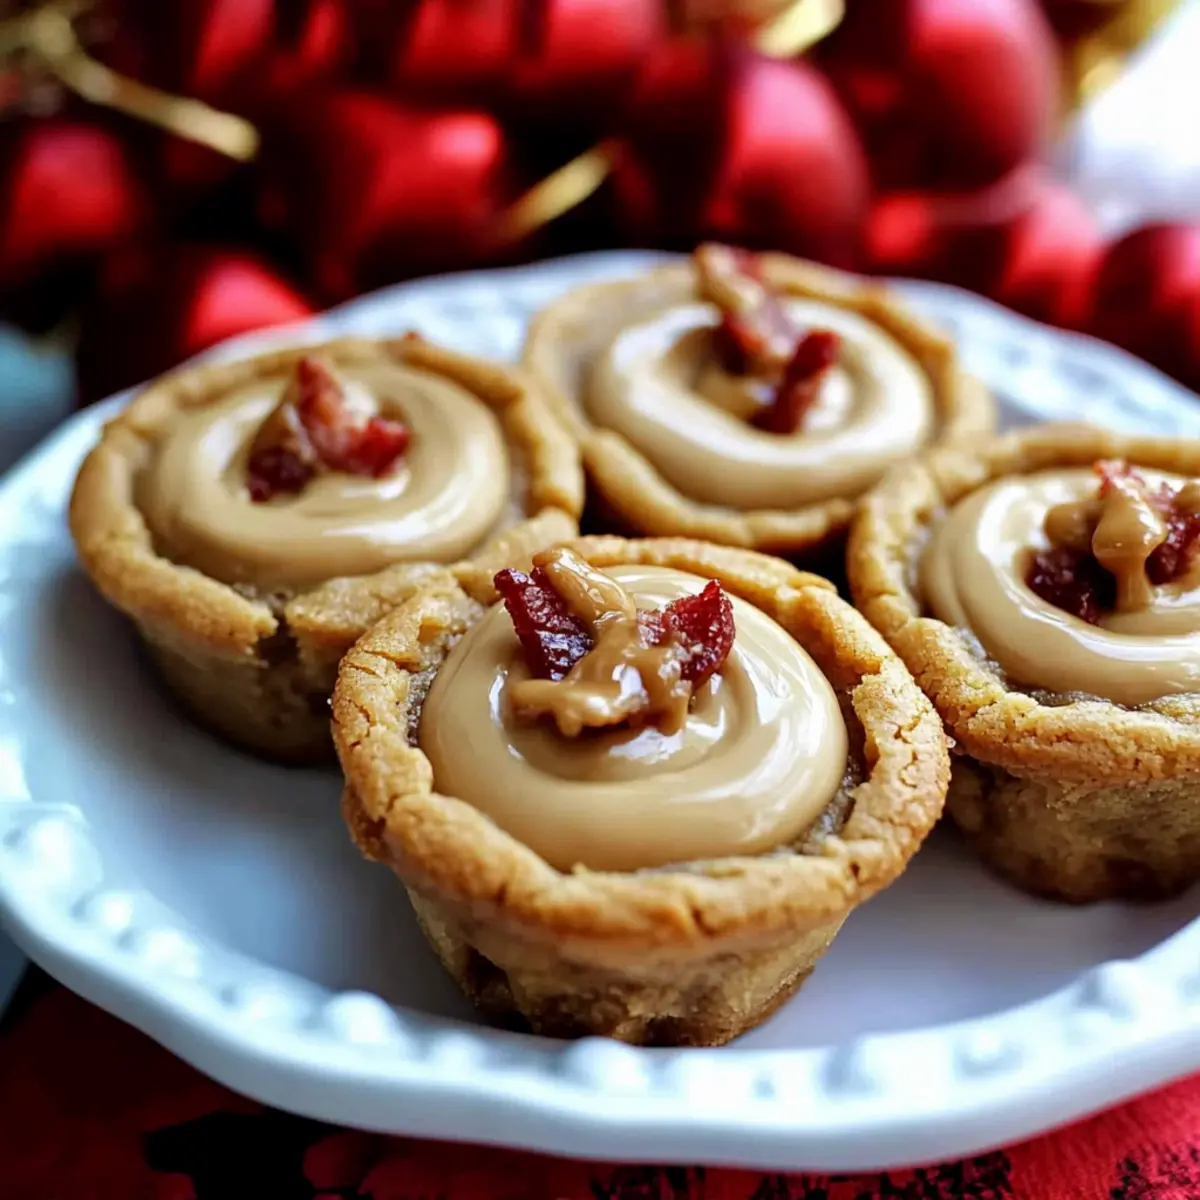
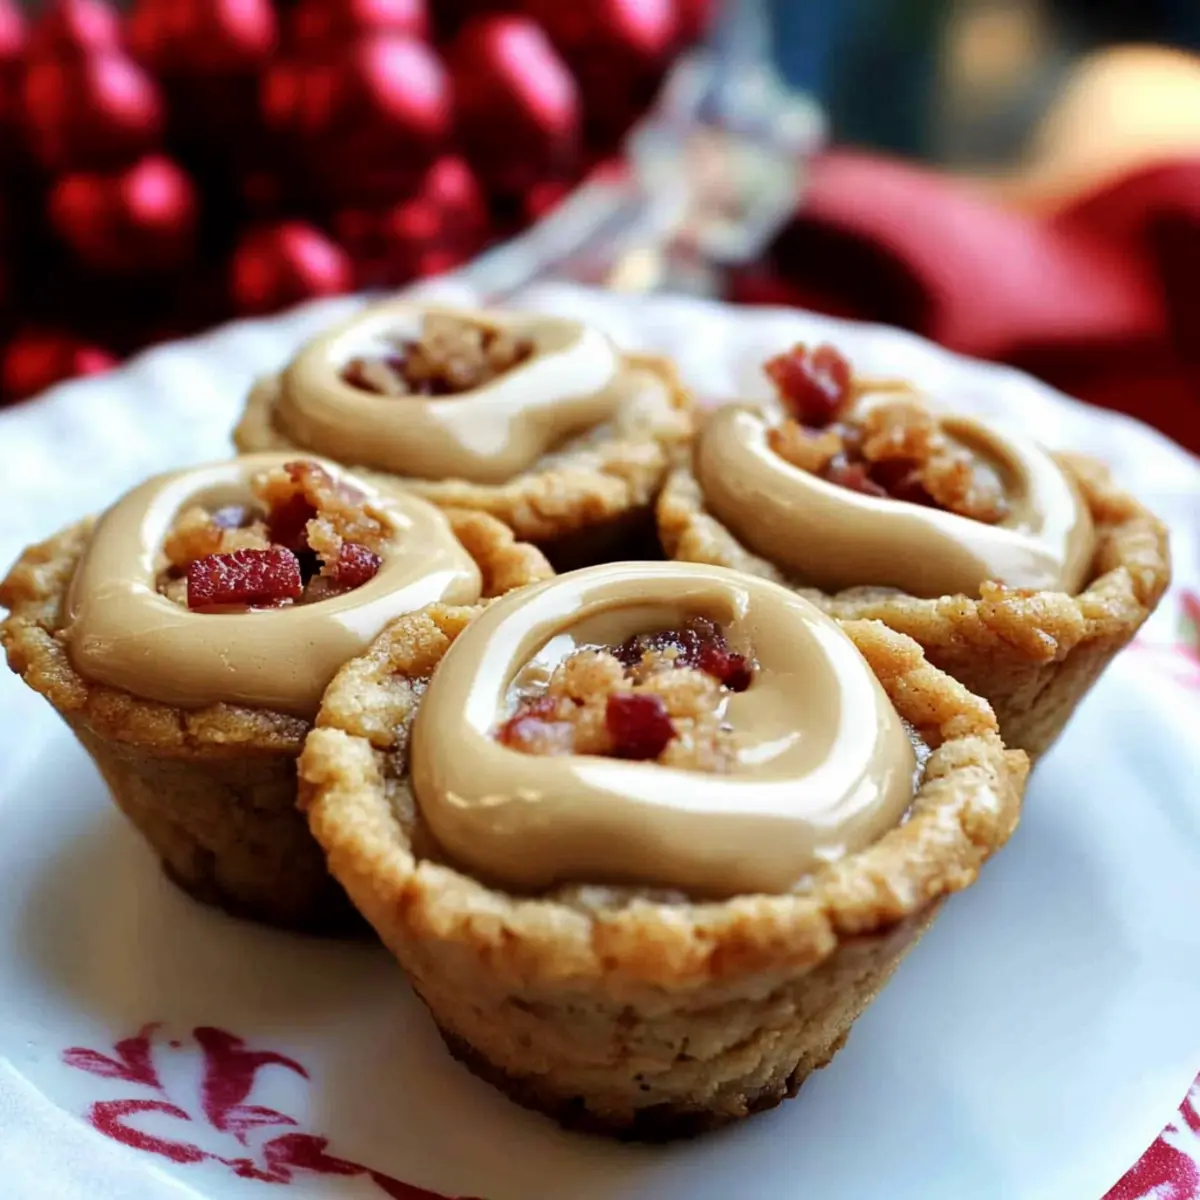
As the rich aroma of freshly baked cookies wafted through my kitchen, I couldn’t help but feel excited about the delightful surprise waiting inside these Elvis Inspired Cookie Cups. With each bite, you’re met with a soft, chewy banana base that cradles a sweet and creamy peanut butter filling, complemented by a sprinkling of crunchy bacon. This recipe is not just about indulging in a unique flavor combination; it’s also a fun twist on holiday baking that’s sure to make any gathering special. Perfect for those who are looking to elevate their dessert game, these cookie cups are the ideal blend of nostalgic tastes and modern flair. Are you ready to discover how to whip up these show-stopping treats in your kitchen?

Why Are Elvis Inspired Cookie Cups Special?
Unique Flavor: The blend of peanut butter, banana, and bacon creates a savory-sweet explosion in each bite.
Crowd-Pleaser: Perfect for gatherings, these cookie cups bring delight to holiday celebrations; they’re a definite conversation starter!
Easy to Make: With a straightforward recipe, you can impress friends and family without fuss—just like my Maple Pecan Cookies!
Versatile Twist: Don’t hesitate to experiment by swapping peanut butter for almond butter or using dark chocolate chips.
Make-Ahead Magic: Prepare the dough in advance and enjoy freshly baked treats anytime! These cookie cups are sure to be a hit.
Elvis Inspired Cookie Cups Ingredients
For the Cookie Cups
- All-purpose flour – Provides structure and texture; using unbleached flour yields the best results.
- Cornstarch – Contributes to a softer, chewy cookie texture.
- Salt – Enhances the sweetness and balances the overall flavors.
- Baking powder & Baking soda – Key leavening agents that help the cookies rise and remain fluffy.
- Light brown sugar – Adds moisture and a rich flavor profile.
- Granulated sugar – Helps achieve sweetness and golden-brown edges.
- Unsalted butter – Ensures richness and moisture; margarine is not recommended.
- Egg & Egg yolks – Act as binders to create a soft, tender cookie.
- Vanilla extract – Imparts a warm, sweet flavor to the dough.
- Precooked bacon – Provides a savory crunch; be sure to chop finely and ensure it’s crispy.
- Dried banana chips – Offers sweetness and a chewy bite; chop finely for even mixing.
For the Filling
- Peanut butter chips – Boosts the peanut butter flavor; feel free to swap with your favorite chips.
- Heavy cream – Creates a smooth filling when combined with the other ingredients.
- Unsalted butter (for filling) – Adds richness to the luscious peanut butter mixture.
- Corn syrup – Keeps the filling smooth and adds a beautiful shine.
For the Finishing Touch
- Honey – Adds sweetness and moisture; drizzle generously into the cookie cavities.
Get ready to enjoy your homemade Elvis Inspired Cookie Cups—these tasty treats are sure to become a favorite!
Step‑by‑Step Instructions for Elvis Inspired Cookie Cups
Step 1: Prepare the Cookie Dough
In a mixing bowl, whisk together 2 cups of all-purpose flour, 1 teaspoon of cornstarch, ½ teaspoon of salt, 1 teaspoon of baking powder, and ½ teaspoon of baking soda. In a separate bowl, cream together ½ cup of melted unsalted butter with ½ cup of light brown sugar and ½ cup of granulated sugar until fluffy. Add in 1 egg, 1 egg yolk, and 1 teaspoon of vanilla extract, mixing well. Gradually combine the wet and dry ingredients, folding in ½ cup of chopped precooked bacon and ½ cup of chopped dried banana chips.
Step 2: Chill the Cookie Dough
Cover the cookie dough with plastic wrap and refrigerate for at least 2 hours, or ideally overnight. Chilling the dough helps the flavors to meld and ensures a chewy texture for your Elvis Inspired Cookie Cups. Once well-chilled, remove the dough from the fridge and let it sit at room temperature for 10-15 minutes for easier handling.
Step 3: Preheat the Oven
Preheat your oven to 350°F (175°C). This temperature will ensure that your cookie cups bake evenly and develop a beautiful golden color. While the oven warms up, gather your greased mini-muffin tin, ready for shaping your cookie cups.
Step 4: Shape the Cookie Cups
Scoop out tablespoons of the chilled dough and press them firmly into the greased mini-muffin cups, making sure to cover the base and create a small cavity in the center. This will form the perfect little cup to hold your delicious filling. Aim for a thickness of about ¼ inch at the edges for even baking.
Step 5: Bake the Cookie Cups
Slide the mini-muffin tin into your preheated oven and bake for 15-20 minutes, or until the edges are golden brown and the tops look set. If you want a nice cavity to fill later, use the handle of a wooden spoon to gently press down the centers while the cookie cups are still warm from the oven.
Step 6: Prepare the Peanut Butter Filling
In a microwave-safe bowl, combine 1 cup of peanut butter chips, ¼ cup of heavy cream, 2 tablespoons of unsalted butter, and 2 tablespoons of corn syrup. Microwave the mixture in 30-second intervals, stirring until it’s completely smooth and combined. This delicious filling will complement your Elvis Inspired Cookie Cups perfectly.
Step 7: Fill the Cookie Cups
Once your cookie cups have cooled completely, carefully spoon the rich peanut butter filling into each cavity until they are all generously filled. The warm, gooey filling will make these cookie cups truly irresistible and bring the unique flavor profile of the Elvis Inspired Cookie Cups to life.
Step 8: Finish with a Honey Drizzle
To add the final touch, drizzle honey into each filled cookie cup, ensuring it cascades down into the delicious peanut butter mixture. Allow the cookie cups to cool completely until the honey sets into the filling. This final step elevates your Elvis Inspired Cookie Cups, making them a splendid addition to any holiday gathering or festive occasion.
How to Store and Freeze Elvis Inspired Cookie Cups
Fridge: Keep your Elvis Inspired Cookie Cups in an airtight container in the fridge for up to one week to maintain freshness and flavor.
Freezer: For longer storage, freeze the filled cookie cups in an airtight container for up to three months. Thaw in the fridge before enjoying.
Dough Storage: The unbaked cookie dough can be tightly wrapped and frozen for up to three months. Thaw overnight in the fridge before baking.
Reheating: To enjoy warm cookie cups, microwave for 10-15 seconds. Add a fresh drizzle of honey for an irresistible touch!
What to Serve with Elvis Inspired Cookie Cups?
As you savor the delightful blend of chewy, sweet, and savory flavors in your homemade treats, why not round out your meal with some perfect pairings?
-
Creamy Vanilla Ice Cream: A scoop of vanilla ice cream adds a cold and creamy contrast, enhancing the flavor profile of the cookie cups beautifully.
-
Fruity Smoothie: A refreshing banana and berry smoothie balances the richness of the cookie and brings a splash of color to your dessert table.
-
Spiced Coffee: The warmth and spiciness of a cup of cinnamon or nutmeg-infused coffee complements the Elvis Inspired Cookie Cups’ flavors perfectly.
-
Chocolate Milkshake: Rich and indulgent, a chocolate milkshake can turn your dessert into an exciting treat that kids (and adults) will love.
-
Mixed Berry Salad: A vibrant berry salad with a touch of mint offers a refreshing tartness and a juicy contrast, setting off the sweet cookie cups nicely.
-
Salted Caramel Sauce: Drizzling a bit of warm salted caramel on top of each cup can elevate them to divine dessert status, playing beautifully with the sweet and savory elements.
-
Chilled Sparkling Water: The refreshing fizz of sparkling water provides a light palate cleanser and enhances the tasting experience of your cookie cups.
-
Chocolate-Covered Bacon: For those who want to go the extra mile, this unique treat ties in with the bacon in the cookie cups while adding a fun twist.
With these pairings, your Elvis Inspired Cookie Cups will shine even brighter on any dessert table!
Expert Tips for Elvis Inspired Cookie Cups
-
Chill for Best Texture: Refrigerating the dough for at least 2 hours allows the flavors to meld, resulting in a chewier texture for your Elvis Inspired Cookie Cups.
-
Handle Egg Yolk Carefully: Use only egg yolks as specified; substituting whole eggs can lead to a denser cookie.
-
Quality Ingredients Matter: Always opt for high-quality bacon and peanut butter chips. They significantly enhance the flavor of your cookie cups!
-
Chop Uniformly: Finely chop your bacon and banana chips to ensure even distribution in the dough, avoiding any overpowering bits.
-
Use a Muffin Tin: A mini-muffin tin creates perfectly shaped cups, making the filling even more enjoyable!
-
Cool Before Filling: Allow the cookie cups to cool completely before adding the peanut butter filling to prevent it from melting away.
Make Ahead Options
These Elvis Inspired Cookie Cups are perfect for meal prep, allowing you to indulge in their unique flavors with minimal fuss! You can prepare the cookie dough up to 24 hours in advance by mixing all the ingredients, then chilling it in the refrigerator. For even better flavor, you can refrigerate the dough overnight. Once you’re ready to bake, simply shape your cookie cups and bake them fresh. The peanut butter filling can also be made up to 3 days ahead and stored in an airtight container in the fridge. When you’re ready to serve, just fill the cooled cookie cups with the peanut butter mixture and drizzle with honey for that sweet finishing touch—ensuring each bite is just as delightful as when freshly made!
Elvis Inspired Cookie Cups Variations
Feel free to add your own flare to these delightful cookie cups; let your creativity shine!
-
Nut-Free: Swap peanut butter for sunflower seed butter for a tasty, allergen-friendly option.
-
Chocolate Lovers: Use dark chocolate chips instead of peanut butter chips for a rich, luxurious twist. It’s an indulgence you won’t regret!
-
Banana Boost: Incorporate mashed ripe bananas into the dough for an extra fruitiness, enhancing the base flavor.
-
Bacon Alternatives: For a lighter version, try turkey bacon or even crispy chickpeas for unexpected crunch.
-
Spiced Up: Add a dash of cinnamon or nutmeg to the cookie dough for a warm, aromatic note that perfectly complements the banana.
-
Chunky Style: Mix in chopped walnuts or pecans for added texture and flavor—each bite will be a delightful surprise.
-
Fruity Finish: For a splash of freshness, top with a slice of fresh banana or a sprinkle of crushed dried fruit before drizzling with honey.
-
Salted Caramel Drizzle: Elevate the experience by drizzling warm salted caramel sauce over your filled cookie cups. A match made in dessert heaven!
As you experiment, keep in mind these variations will still shine alongside other recipes like the Gooey Salted Bar or the delicious Pumpkin Cheesecake Cookies. Happy baking!
Elvis Inspired Cookie Cups Recipe FAQs
What type of bananas should I use for the cookie cups?
Absolutely! Use ripe bananas that are speckled with brown spots for the best flavor. Overripe bananas bring out more natural sweetness, making your cookie cups even tastier.
How long can I store the Elvis Inspired Cookie Cups?
You can store these delicious cookie cups in an airtight container in the fridge for up to one week. Just make sure they are fully cooled before sealing to prevent sogginess.
Can I freeze the cookie cups and how?
Very! To freeze your Elvis Inspired Cookie Cups, place them in a single layer in an airtight container or freezer bag, being sure to separate layers with parchment paper. They can be frozen for up to three months. When you’re ready to enjoy them, simply thaw in the fridge overnight and warm them up for a few seconds in the microwave for that fresh-baked taste!
What should I do if my cookie cups are too puffy?
If you find that your cookie cups have risen too much during baking, don’t worry! Use the handle of a wooden spoon about 5 minutes into baking to gently press down the centers and create a cavity. This little trick ensures you have enough space for the delectable filling.
Are these cookie cups suitable for those with nut allergies?
It’s essential to be cautious! The Elvis Inspired Cookie Cups contain peanut butter chips, which are not safe for individuals with nut allergies. You could consider using a nut-free butter alternative, such as sun butter, as a possible replacement to make a safe and delicious version for everyone.
How to ensure the best chewiness in my cookies?
For the best chewy cookie texture, always refrigerate your cookie dough for at least two hours before baking—this step is vital! Additionally, measuring your ingredients accurately and not over mixing the dough will help maintain that perfect chewiness in your Elvis Inspired Cookie Cups.

Elvis Inspired Cookie Cups: Chewy Sweet & Savory Treats
Ingredients
Equipment
Method
- In a mixing bowl, whisk together flour, cornstarch, salt, baking powder, and baking soda.
- In a separate bowl, cream together melted butter, light brown sugar, and granulated sugar until fluffy. Add egg, egg yolk, and vanilla extract, mixing well.
- Gradually combine wet and dry ingredients, folding in chopped bacon and dried banana chips.
- Cover the dough with plastic wrap and refrigerate for at least 2 hours.
- Preheat your oven to 350°F (175°C).
- Scoop out tablespoons of the chilled dough and press them into a greased mini-muffin tin.
- Bake for 15-20 minutes, or until golden brown. Press down centers gently to form a cavity.
- In a microwave-safe bowl, combine peanut butter chips, heavy cream, unsalted butter, and corn syrup. Microwave in 30-second intervals, stirring until smooth.
- Once cooled, fill each cookie cup with the peanut butter mixture.
- Drizzle honey into each filled cookie cup and allow to cool completely.
Leave a Reply