
As I pulled the warm baked pears from the oven, the sweet, inviting aroma enveloped the kitchen, whispering promises of indulgence without the guilt. This recipe for Baked Pears with Berries, Honey, Walnuts & Blue Cheese transforms the humble pear into an elegant dessert that’s simple to prepare and deliciously versatile. With just a handful of ingredients, including vibrant berries and creamy blue cheese, it strikes the perfect balance between indulgence and health. Not only is this dish gluten-free, making it a great choice for everyone, but it also brings a delightful crunch from walnuts that pairs beautifully with each tender bite. Whether you’re hosting a dinner party or enjoying a quiet night in, this recipe is bound to impress. Are you ready to elevate your dessert game? Let’s dive into this flavorful journey!
Why Try Baked Pears with Berries?
Health-Conscious Indulgence: Revel in a dessert that’s just as nutritious as it is delicious.
Elegant Presentation: Perfectly baked pears look stunning on any table, impressing guests effortlessly.
Flavor Harmony: The contrasting flavors of sweet pears, tart berries, and creamy blue cheese create a unique taste experience.
Flexible Recipe: Swap out the blue cheese for goat cheese or even a nut-based alternative to suit your palate.
Quick to Prepare: With minimal prep and just 20 minutes of baking, you can serve a gourmet dessert in no time.
This dish pairs wonderfully with Greek yogurt for added creaminess or even a light dessert wine, making it a versatile choice for any occasion!
Baked Pears with Berries Ingredients
• Ready to create a deliciously simple dessert? Here’s what you’ll need!
For the Pears
- Pears – The centerpiece of this dish, ripe pears lend natural sweetness and a tender texture when baked.
- Butter – Provides richness and helps in caramelizing; feel free to substitute with a vegan option for healthier diets.
For the Toppings
- Mixed Berries – Fresh blueberries, raspberries, or blackberries add a beautiful burst of color and tang; frozen berries can work, but may change the texture slightly.
- Walnuts – Adding delightful crunch and healthy fats; sunflower or pumpkin seeds can replace them for a nut-free option.
- Blue Cheese – Introduces a creamy, tangy flavor; goat cheese, feta, or vegan cheese alternatives are perfect substitutes.
- Honey – Ensures a delectable glaze and sweetness; try maple syrup as a great vegan alternative.
- Fresh Thyme – An optional garnish that brings a touch of earthiness to elevate the dish both in flavor and visuals.
Enjoy crafting your Baked Pears with Berries, Honey, Walnuts & Blue Cheese!
Step‑by‑Step Instructions for Baked Pears with Berries, Honey, Walnuts & Blue Cheese
Step 1: Preheat Your Oven
Begin by preheating your oven to 350°F (175°C). While the oven heats up, prepare a baking sheet by lining it with parchment paper or lightly greasing it with butter. This setup will ensure the baked pears with berries, honey, walnuts, and blue cheese don’t stick, making cleanup a breeze.
Step 2: Prepare the Pears
Take your ripe pears and carefully halve them lengthwise, removing the core with a teaspoon or knife for safety. Place the pear halves cut-side up on the prepared baking sheet. Brush the tops generously with melted butter to promote caramelization and enhance flavor during baking.
Step 3: Bake the Pears
Slide the baking sheet into the preheated oven and bake for about 15-20 minutes. You’ll know the pears are ready when they are tender but hold their shape; they should become slightly golden around the edges. Keep an eye on them as they bake to achieve the perfect texture!
Step 4: Add the Toppings
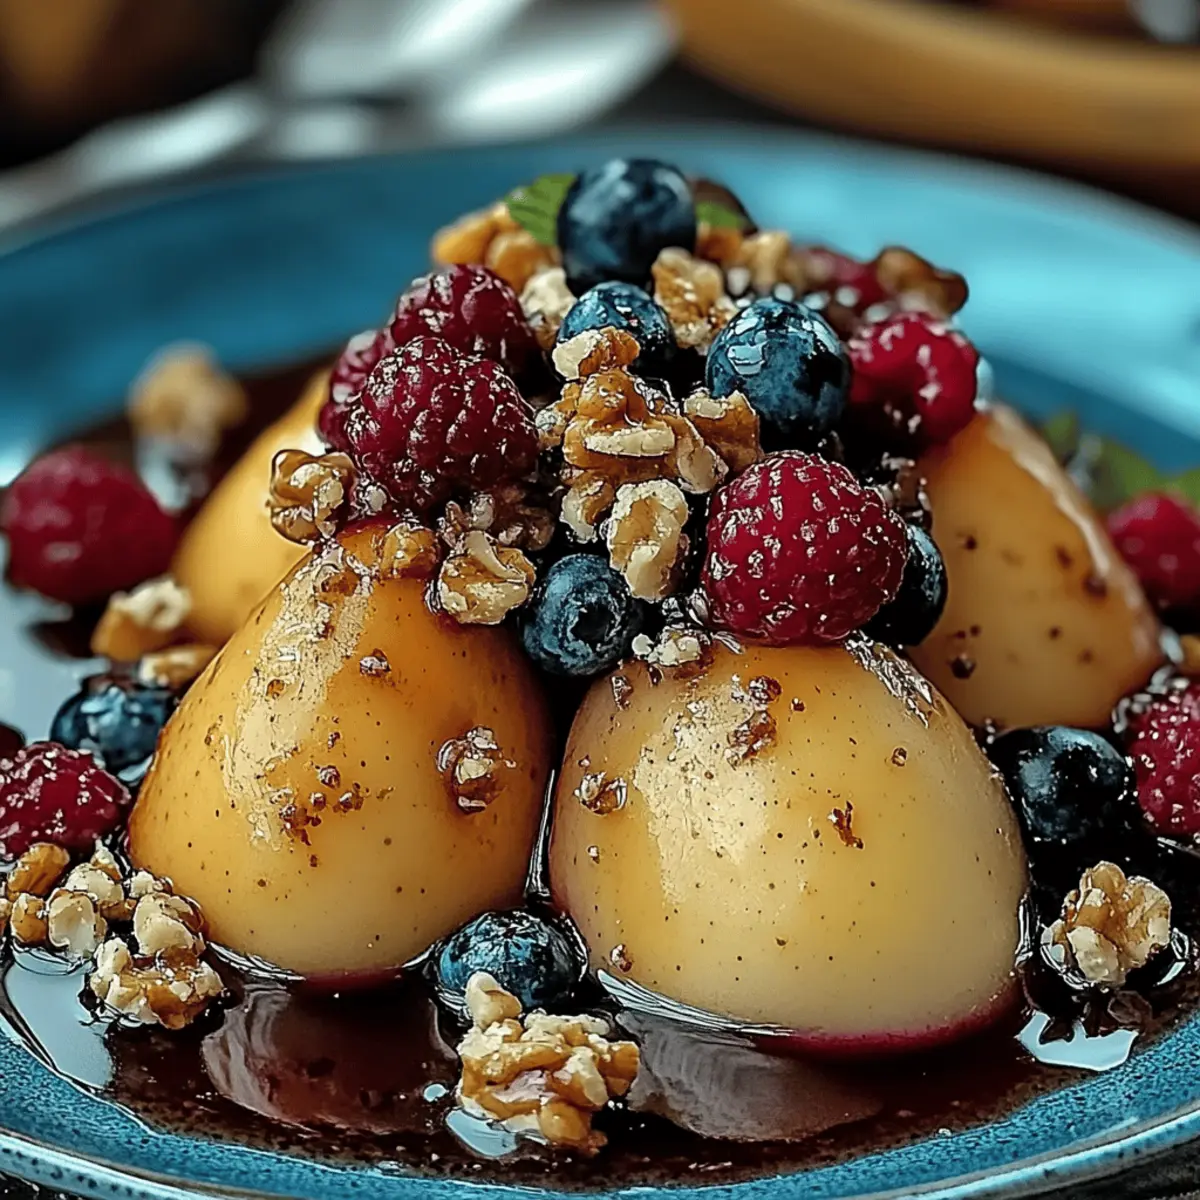
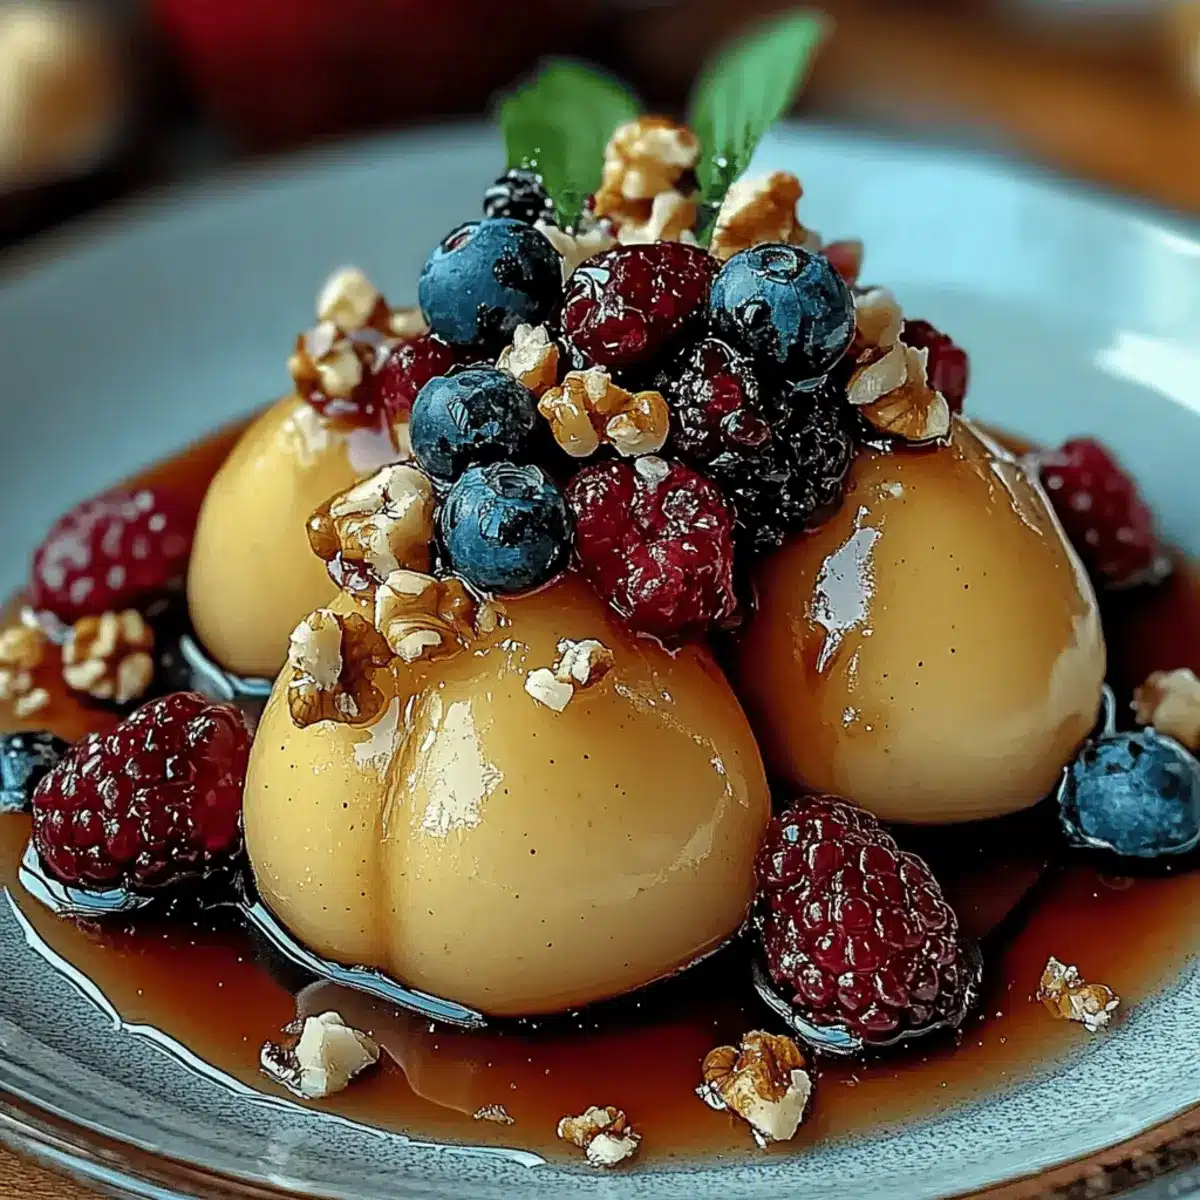
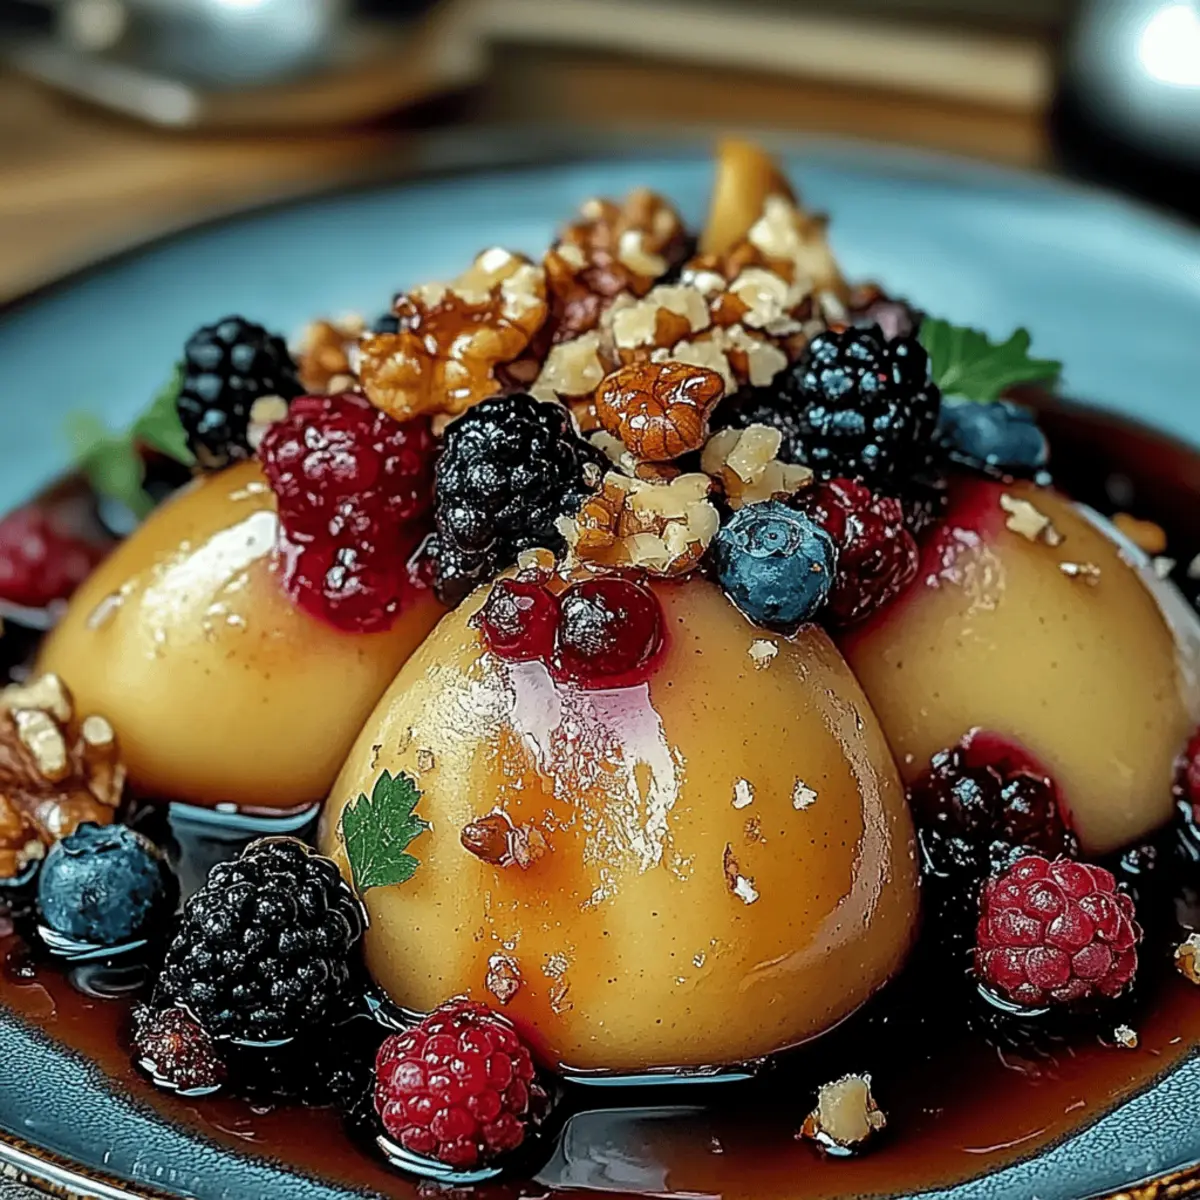
Once the pears have cooled slightly, it’s time to elevate your Baked Pears with Berries, Honey, Walnuts & Blue Cheese. First, pile on the mixed berries, scattering them atop each pear half. Next, sprinkle crumbled blue cheese over the berries, followed by a generous handful of walnuts for that delightful crunch and nutty flavor.
Step 5: Drizzle with Honey
With the toppings in place, finish your elegant dish by drizzling honey over each pear. This sweet glaze will melt into the warm ingredients, enhancing the overall flavor. If you prefer a vegan option, swap the honey for maple syrup for a similar sweetness that complements the dish beautifully.
Step 6: Garnish and Serve
For a final touch, you can sprinkle fresh thyme over the tops of the pears, adding an earthy freshness that enhances the flavor profile. Serve the baked pears warm or at room temperature, and watch as your guests delight in this beautiful and healthy dessert of baked pears with berries, honey, walnuts, and blue cheese!
What to Serve With Baked Pears with Berries, Honey, Walnuts & Blue Cheese
Transform your delightful dessert into a memorable meal by pairing it with enchanting sides and beverages.
- Creamy Greek Yogurt: This rich, tangy addition balances the sweetness of the pears while providing a satisfying creaminess.
- Herbal Tea: A fragrant cup complements the warm fruit and enhances the cozy feel of your dessert.
- White Wine: A light, fruity dessert wine elevates the flavors and adds a touch of sophistication to your dining experience.
- Vanilla Ice Cream: The cold creaminess contrasts beautifully with warm baked pears, creating an irresistible dessert duo.
- Fresh Arugula Salad: A crisp, peppery salad brightens the meal, providing a fresh backdrop to the sweetness of the pears.
- Chocolate Drizzle: A drizzle of melted dark chocolate over the baked pears adds decadence, pairing beautifully with the blue cheese.
- Honeyed Walnuts: Serve extra walnuts drizzled with honey on the side for crunchy bites that echo the dish’s flavors.
Each pairing offers a unique twist, ensuring your baked pears shine at the center of a beautifully crafted meal!
Make Ahead Options
These Baked Pears with Berries, Honey, Walnuts & Blue Cheese are perfect for busy home cooks who love to meal prep! You can prepare the pears by halving and coring them up to 24 hours in advance; simply brush them with melted butter and store them in an airtight container in the fridge to prevent browning. The mixed berries can also be washed and prepped ahead of time, lasting up to 3 days. When you’re ready to bake, just arrange the prepped pears on a baking sheet, bake for about 15-20 minutes, and add the fresh toppings right before serving for restaurant-quality results without the last-minute rush.
How to Store and Freeze Baked Pears with Berries, Honey, Walnuts & Blue Cheese
- Fridge: Store any leftover baked pears in an airtight container in the refrigerator for up to 3 days to maintain their flavor and texture.
- Freezer: If you’d like to preserve the dish longer, freeze the baked pears before adding toppings. Wrap them tightly in plastic wrap and store in a freezer-safe container for up to 2 months.
- Reheating: When ready to enjoy, thaw the pears in the fridge overnight and reheat in a 350°F (175°C) oven for about 10-15 minutes before adding the toppings.
- Serving Tips: For the best experience, add fresh toppings such as berries, walnuts, and a drizzle of honey right before serving your baked pears for a delightful finish.
Expert Tips for Baked Pears
- Choose the Right Pears: Opt for firm, ripe pears to maintain their shape and texture while baking; overripe pears may turn mushy.
- Perfectly Core the Pears: Use a teaspoon or a small knife for easy and safe coring; this ensures even cooking and looks great for presentation.
- Watch the Baking Time: Keep a close eye on the pears while baking; they’re perfect when tender but not falling apart, usually 15-20 minutes.
- Customize Your Toppings: Feel free to swap blue cheese with goat cheese or a nut-based alternative for different flavor profiles while enjoying baked pears with berries.
- Prep Ahead: To save time, bake the pears in advance and reheat briefly before serving, allowing you to enjoy your guests without stress.
Baked Pears with Berries Variations
Feel free to customize this delightful dessert to match your taste preferences or dietary needs!
-
Dairy-Free: Substitute blue cheese with a creamy nut-based vegan cheese for a rich and flavorful alternative.
-
Nut-Free: Replace walnuts with sunflower or pumpkin seeds to maintain that satisfying crunch while keeping it nut-free. This swap still delivers a delightful texture.
-
Spiced Pears: Sprinkle cinnamon or nutmeg over the pears before baking for a cozy, warm flavor that’ll make your kitchen smell amazing. A dash of spice can elevate the entire dish!
-
Berry Medley: Experiment with different berry combinations like cranberries or strawberries for a unique flavor twist. Each berry brings its own charm to your baked pears!
-
Maple Sweetness: Replace honey with maple syrup for a sweet glaze that has a rich, earthy flavor. It’s a wonderful alternative for those following vegan recipes.
-
Zesty Kick: Add a splash of lemon or orange juice to the top before baking for a hint of citrus that brightens the overall flavor profile. The zing blends beautifully with the sweetness of the pears.
-
Creamy Contrast: Serve your pears with a dollop of Greek yogurt or whipped coconut cream for added creaminess and protein, creating a balance of texture and richness.
This versatile recipe pairs beautifully with a light dessert wine or even alongside a warm cup of your favorite herbal tea, making it a perfect ending to any meal. Enjoy exploring your own variations while nourishing both your taste buds and soul!

Baked Pears with Berries, Honey, Walnuts & Blue Cheese Recipe FAQs
How do I choose the right pears for this recipe?
Absolutely! For the best results, use firm but ripe pears, such as Bartlett or Bosc. Look for pears that are slightly soft to the touch but not mushy—this ensures they will yield a tender texture while holding their shape when baked. Avoid pears with dark spots or blemishes.
What is the best way to store leftover baked pears?
Very good question! Store any leftover baked pears with berries in an airtight container in the refrigerator for up to 3 days. To reheat, simply pop them back in a preheated oven at 350°F (175°C) for about 10 minutes to warm them up while refreshing the flavors.
Can I freeze baked pears? If so, how?
Certainly! To freeze baked pears with berries, I recommend freezing them before adding the toppings. Wrap each pear half tightly in plastic wrap, then place them in a freezer-safe container. They can be stored like this for up to 2 months. When you’re ready to enjoy, thaw the pears in the fridge overnight and reheat as previously mentioned!
What dietary considerations should I keep in mind?
It’s important! If you’re serving these baked pears to guests with dietary restrictions, you can easily substitute ingredients. Use vegan butter and a maple syrup for a dairy-free and vegan alternative. Additionally, for nut allergies, replace walnuts with sunflower or pumpkin seeds to enjoy that same delightful crunch.
Why did my baked pears turn out mushy?
Great question! If your baked pears turned out mushy, it could be because you used overripe pears. Always opt for firm, ripe pears to maintain structure. Additionally, avoid leaving them in the oven for too long; baking for just 15-20 minutes is key. A gentle touch will help them stay tender while not becoming mushy.
Can I use other fruits or ingredients?
Definitely! This recipe is quite flexible. You can substitute mixed berries with other fruits like sliced peaches or apples for a different flavor profile. The blue cheese can be swapped for goat cheese or feta if you prefer a milder taste. Feel free to experiment based on what you have available or your personal taste!
Baked Pears with Berries, Honey, Walnuts & Blue Cheese Bliss
Ingredients
Equipment
Method
- Preheat your oven to 350°F (175°C) and prepare a baking sheet lined with parchment paper.
- Halve the pears lengthwise and remove the core. Place cut-side up on the baking sheet and brush with melted butter.
- Bake the pears in the preheated oven for 15-20 minutes until tender but holding shape.
- Cool the pears slightly, then top each half with mixed berries, crumbled blue cheese, and walnuts.
- Drizzle honey over the topped pears. Substitute with maple syrup for a vegan option.
- Garnish with fresh thyme and serve warm or at room temperature.
Leave a Reply