
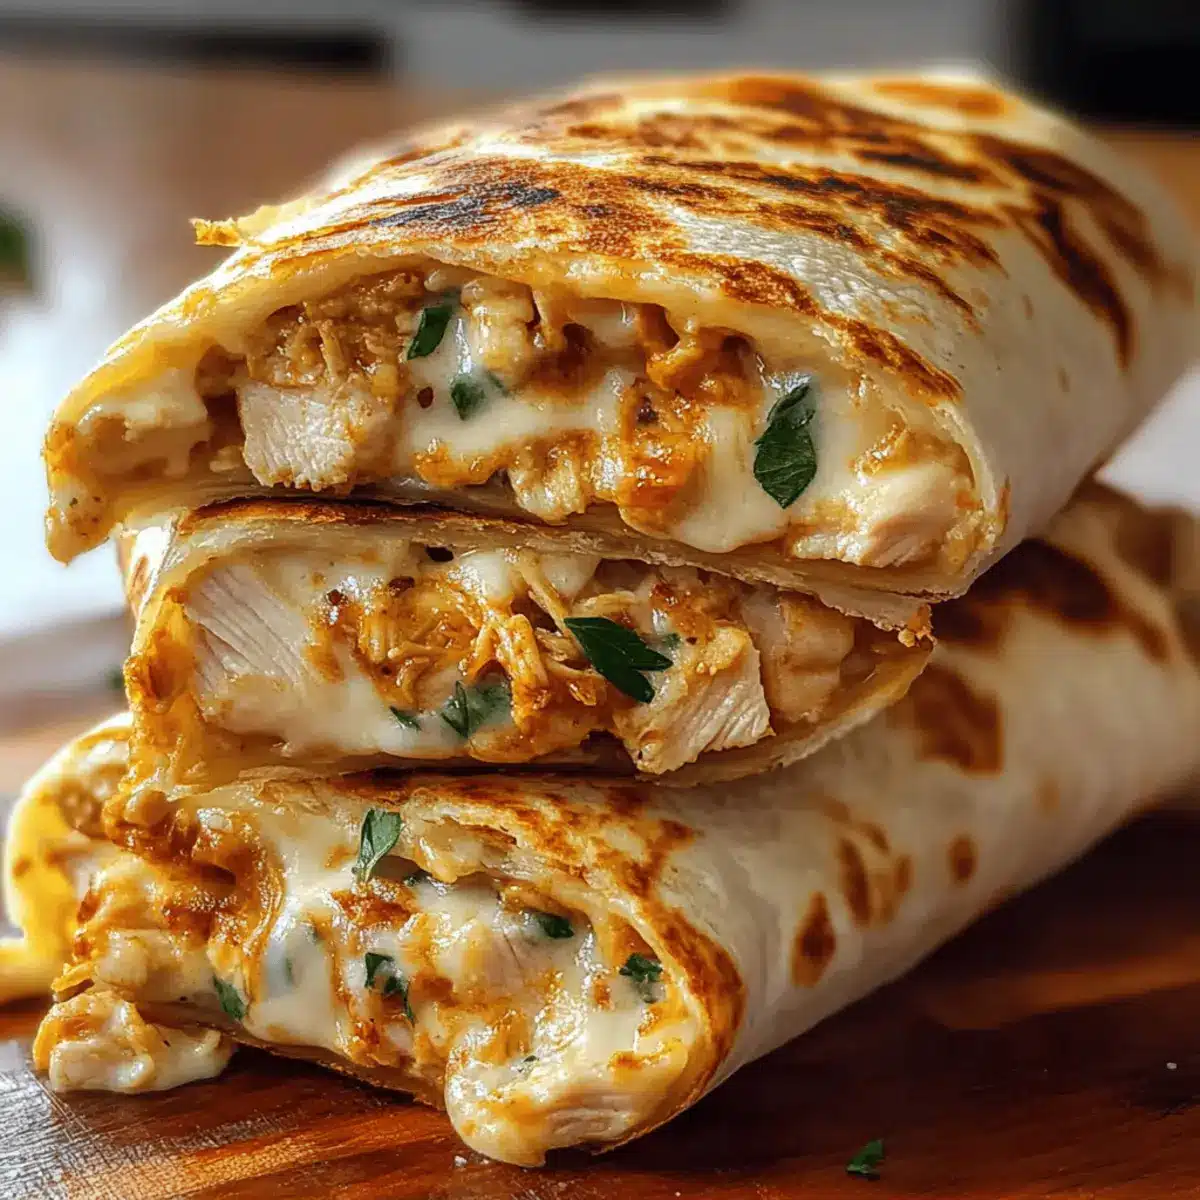
As I sat down with a plate of warm, cheesy garlic chicken wraps fresh off the skillet, I couldn’t help but relish the cozy embrace of comfort food. The essence of garlic mingling with melted cheese creates an irresistible allure that makes these wraps a go-to for quick lunches and satisfying dinners alike. These Cheesy Garlic Chicken Wraps not only offer a burst of flavor but also feature a delightful flexibility that allows you to customize them with your favorite cheeses and fillings. Whether you’re whipping them up for a busy weeknight meal or a casual get-together, they’re incredibly easy to prepare and can even cater to gluten-free diets! Curious about how to get that golden, crispy perfection? Let’s dive into this delightful recipe together!
Why Choose Cheesy Garlic Chicken Wraps?
Flavorful Explosion: Each bite bursts with the irresistible combination of savory garlic and melty cheese, sure to please any palate.
Customizable Goodness: Easily adapt the recipe to suit your favorite ingredients—switch up the cheese or toss in sautéed veggies for an extra nutritional boost.
Quick and Easy: These wraps come together in no time, making them perfect for busy weeknight dinners or spontaneous gatherings with friends.
Crowd-Pleasing Delight: Every wrap brings comfort food vibes that everyone will love, keeping guests coming back for seconds.
Meal Prep Friendly: Make-ahead options mean you can prepare them in advance, store them in the fridge, and reheat them for that golden crispiness later!
For more delicious comfort food ideas, check out our guide on easy weeknight dinners.
Cheesy Garlic Chicken Wraps Ingredients
For the Filling
• Chicken – Provides the main protein and hearty base; use rotisserie chicken for quicker preparation.
• Garlic – Adds bold flavor and aroma; fresh garlic is preferred for the best taste.
• Cheese (Mozzarella, Cheddar) – Delivers meltiness and richness; try pepper jack for heat or gouda for creaminess.
For the Wraps
• Tortillas – Encases the filling; opt for gluten-free tortillas to suit dietary needs.
• Olive Oil – Used for sautéing garlic and adds flavor; can swap with butter for a richer taste.
• Butter – Used for toasting wraps to golden perfection and enhances flavor.
For Garnish
• Parsley (optional) – Fresh garnish for a pop of color and flavor enhancement.
Enjoy crafting these delightful Cheesy Garlic Chicken Wraps that promise gooey goodness in every bite!
Step‑by‑Step Instructions for Cheesy Garlic Chicken Wraps
Step 1: Cook the Chicken
Begin by seasoning your chicken lightly with salt and pepper. You can use rotisserie chicken for a quicker preparation. Cook the chicken by baking it in the oven at 375°F (190°C) for about 25 minutes, or sauté in a pan over medium heat until cooked through. Once fully cooked, dice the chicken into small pieces and set aside.
Step 2: Infuse Garlic Flavor
In a medium skillet, heat 2 tablespoons of olive oil over medium heat until shimmering. Add 3-4 cloves of minced garlic and sauté for about 30 seconds, just until the garlic turns golden and fragrant. Be careful not to burn it, as that will impart a bitter taste to your Cheesy Garlic Chicken Wraps.
Step 3: Combine Ingredients
Add the diced chicken to the skillet with the garlic, stirring gently to coat the chicken evenly with the aromatic oil. Remove the skillet from heat and mix in 1 cup of shredded cheese—try a combination of mozzarella and cheddar—allowing it to melt into the warm chicken. This creates a comforting, gooey filling for your wraps.
Step 4: Assemble Wraps
Take a large tortilla and lay it flat on a clean surface. Spoon a generous portion of the cheesy chicken mixture onto the center, spreading it out slightly. Roll the tortilla tightly, like a burrito, ensuring the filling is wrapped securely. Repeat this process for each tortilla until all the filling is used up.
Step 5: Toast Wraps
In the same skillet, melt 1 tablespoon of butter over medium heat. Place the wraps seam-side down in the skillet and toast for 2-3 minutes until golden brown and crispy. Carefully flip each wrap, adding a little more butter if needed, and cook for an additional 2-3 minutes until both sides are beautifully browned.
Step 6: Serve
Once toasted, allow the wraps to rest for a minute to cool slightly, making them easier to handle. Slice each wrap in half and garnish with fresh parsley if desired. Serve your Cheesy Garlic Chicken Wraps warm, either on their own or with your favorite dipping sauce!
Expert Tips for Cheesy Garlic Chicken Wraps
-
Use Pre-Cooked Chicken: Save time by using rotisserie chicken; it simplifies the recipe and delivers great flavor without the effort.
-
Perfect Garlic Infusion: Be cautious while sautéing garlic; cooking it just until golden enhances the flavor. Burnt garlic will spoil your cheesy garlic chicken wraps.
-
Cheese Combinations: Experiment with different cheeses like gouda or pepper jack to find your perfect flavor. Mixing cheeses can create a delightful richness.
-
Wrap It Right: Roll your tortillas tightly to avoid any filling spillage during toasting. This ensures crispy edges and a satisfying bite every time.
-
Reheat for Crispiness: Always reheat wraps in a skillet or toaster oven instead of the microwave. This keeps the outside crispy and avoids sogginess.
-
Customize Your Fillings: Feel free to add sautéed veggies like bell peppers or spinach for an extra nutritional boost in your cheesy garlic chicken wraps!
How to Store and Freeze Cheesy Garlic Chicken Wraps
-
Room Temperature: Leftover wraps should be stored at room temperature for no more than 2 hours to prevent bacterial growth.
-
Fridge: Store unused Cheesy Garlic Chicken Wraps in an airtight container for up to 3 days. Reheat in a skillet to maintain crispiness.
-
Freezer: Wrap individual portions tightly in plastic wrap, then place in a freezer-safe bag or container. They can be frozen for up to 2 months.
-
Reheating: For the best results, reheat frozen wraps in a skillet or toaster oven until heated through and crispy, rather than using a microwave.
Make Ahead Options
These Cheesy Garlic Chicken Wraps are ideal for meal prep enthusiasts looking to save time during busy nights! You can prepare the cheesy chicken filling up to 24 hours in advance and store it in an airtight container in the refrigerator. To maintain quality, ensure the mixture is allowed to cool completely before refrigerating. When you’re ready to enjoy your wraps, simply reheat the filling in a skillet over medium heat until warmed through, then assemble the wraps as directed. Toast them in a buttered skillet until golden and crispy just before serving to achieve that delightful crunch, ensuring your wraps retain all their gooey, comforting goodness.
What to Serve with Cheesy Garlic Chicken Wraps
There’s nothing quite like the delight of pairing a hearty wrap with delicious sides that elevate your meal experience.
-
Fresh Green Salad: Crisp greens mixed with a tangy vinaigrette provide a refreshing contrast to the warm, cheesy wraps.
-
Seasoned Potato Wedges: Crispy, seasoned potatoes complement the gooey nature of the wraps while adding a satisfying crunch.
-
Tomato Soup: A warm bowl of tomato soup serves as a comforting dip, enhancing the flavors of melted cheese and garlic.
-
Coleslaw: Creamy coleslaw adds a crunchy texture and a bit of zing, perfectly balancing out the richness of the wrap.
-
Roasted Vegetables: Charred seasonal veggies contribute earthy flavors, bringing a wholesome element to your meal.
-
Fruit Skewers: Fresh fruit skewers can provide a sweet, juicy bite that contrasts beautifully with the savory chicken and cheese.
-
Garlic Bread: For those who love garlic, pairing these wraps with warm, buttery garlic bread will amplify that delicious flavor.
-
Sparkling Lemonade: A chilled glass of sparkling lemonade adds a zesty and refreshing finish, perfect for cleansing the palate.
-
Chocolate Chip Cookies: End your meal on a sweet note with soft chocolate chip cookies—comfort food at its best!
Cheesy Garlic Chicken Wraps Variations
Feel free to unleash your creativity and tailor these wraps to your taste buds with exciting twists and substitutions!
-
Dairy-Free: Swap cheese with a plant-based mozzarella for the same meltiness without the dairy. Nutritional yeast can also be added for a cheesy flavor!
-
Spicy Kick: Incorporate diced jalapeños or a drizzle of hot sauce into the chicken mixture. This adds just the right amount of heat to elevate flavor!
-
Extra Veggies: Toss in sautéed spinach, bell peppers, or mushrooms for a nutritious boost. Each added veggie brings a pop of color and crunch, enhancing both taste and texture.
-
Gluten-Free: Opt for gluten-free tortillas to make this recipe accommodating for gluten-sensitive friends and family. Enjoy the same deliciousness without missing out!
-
Creamy Texture: Add a dollop of cream cheese or sour cream to the filling mixture for a richer, creamier experience that melts beautifully with the other ingredients.
-
Mediterranean Twist: Use feta cheese and add some chopped olives or sun-dried tomatoes. This will give your wraps a fresh and zesty Mediterranean flair, making each bite truly special.
-
Herbed Goodness: Sprinkle in fresh herbs like cilantro or basil before rolling up your wraps. Fresh herbs can elevate the flavor profile, giving a refreshing burst with each bite.
-
Loaded with Flavor: Mix in spices like cumin or smoked paprika to your filling. This adds a warm, earthy richness that pairs brilliantly with the chicken and cheese.
Explore these variations to discover new favorites, and don’t forget to enjoy your Cheesy Garlic Chicken Wraps with a refreshing side of salad or a comforting bowl of tomato soup—a cozy match made in heaven!
Cheesy Garlic Chicken Wraps Recipe FAQs
How do I select the best garlic for my wraps?
Absolutely! For the best flavor in your Cheesy Garlic Chicken Wraps, always use fresh garlic. Look for firm cloves with no dark spots or sprouting. Fresh garlic will deliver a bold, aromatic punch that enhances the overall taste of your dish.
What’s the best way to store leftover wraps?
Very! After enjoying your wraps, store any leftovers in an airtight container in the refrigerator. They’ll stay fresh for up to 3 days. When reheating, I recommend using a skillet to bring back that delightful crispiness!
Can I freeze Cheesy Garlic Chicken Wraps?
Absolutely! To freeze your wraps, wrap each one individually in plastic wrap, then place them in a freezer-safe bag. They can last up to 2 months in the freezer. When ready to eat, reheat them in a skillet for that golden, crispy texture!
What if my wraps are soggy after cooking?
Don’t worry! If your wraps turn out soggy, it’s often due to using too much filling or not toasting them properly. Ensure you roll them tightly, and toast them in a skillet until they’re golden brown on both sides. For leftovers, remember to reheat them in a skillet to maintain that crispy exterior.
Are there any dietary considerations for pets or allergies?
Very! This recipe is rich and delicious for humans but might not be safe for pets due to garlic. Always check for allergies, especially with cheese. If you have lactose intolerance, consider using lactose-free cheese or a dairy alternative to enjoy these Cheesy Garlic Chicken Wraps without concern.
Can I customize the cheese used in my wraps?
Absolutely! Feel free to experiment with different cheeses in your Cheesy Garlic Chicken Wraps. Try using pepper jack for a bit of heat, or gouda for creaminess. Mixing and matching cheeses can create that personalized flavor you’ll love!

Cheesy Garlic Chicken Wraps for a Cozy Night In
Ingredients
Equipment
Method
- Season the chicken lightly with salt and pepper, bake at 375°F for 25 minutes or sauté until cooked through, then dice.
- Heat olive oil in a skillet, add minced garlic and sauté until golden, about 30 seconds.
- Add diced chicken to the skillet with garlic, mixing thoroughly. Remove from heat and mix in shredded cheese until melted.
- Spread cheesy chicken filling onto each tortilla and roll tightly, sealing the filling inside.
- Melt butter in the skillet, toast wraps seam-side down for 2-3 minutes until golden, flipping to toast both sides.
- Slice each wrap in half, garnish with fresh parsley if desired, and serve warm.
Leave a Reply