
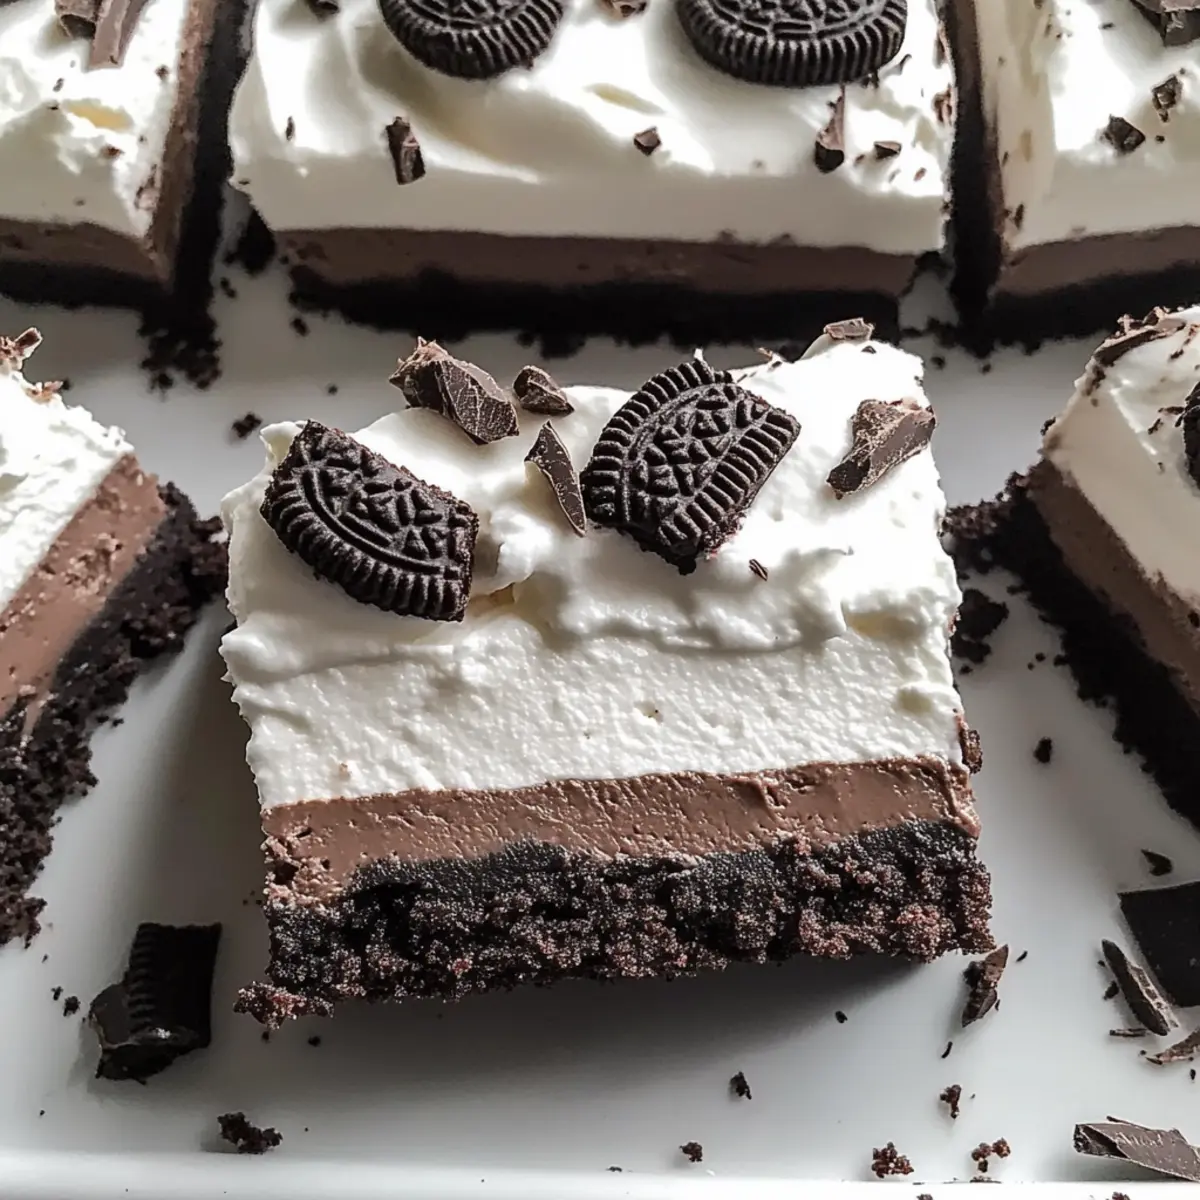
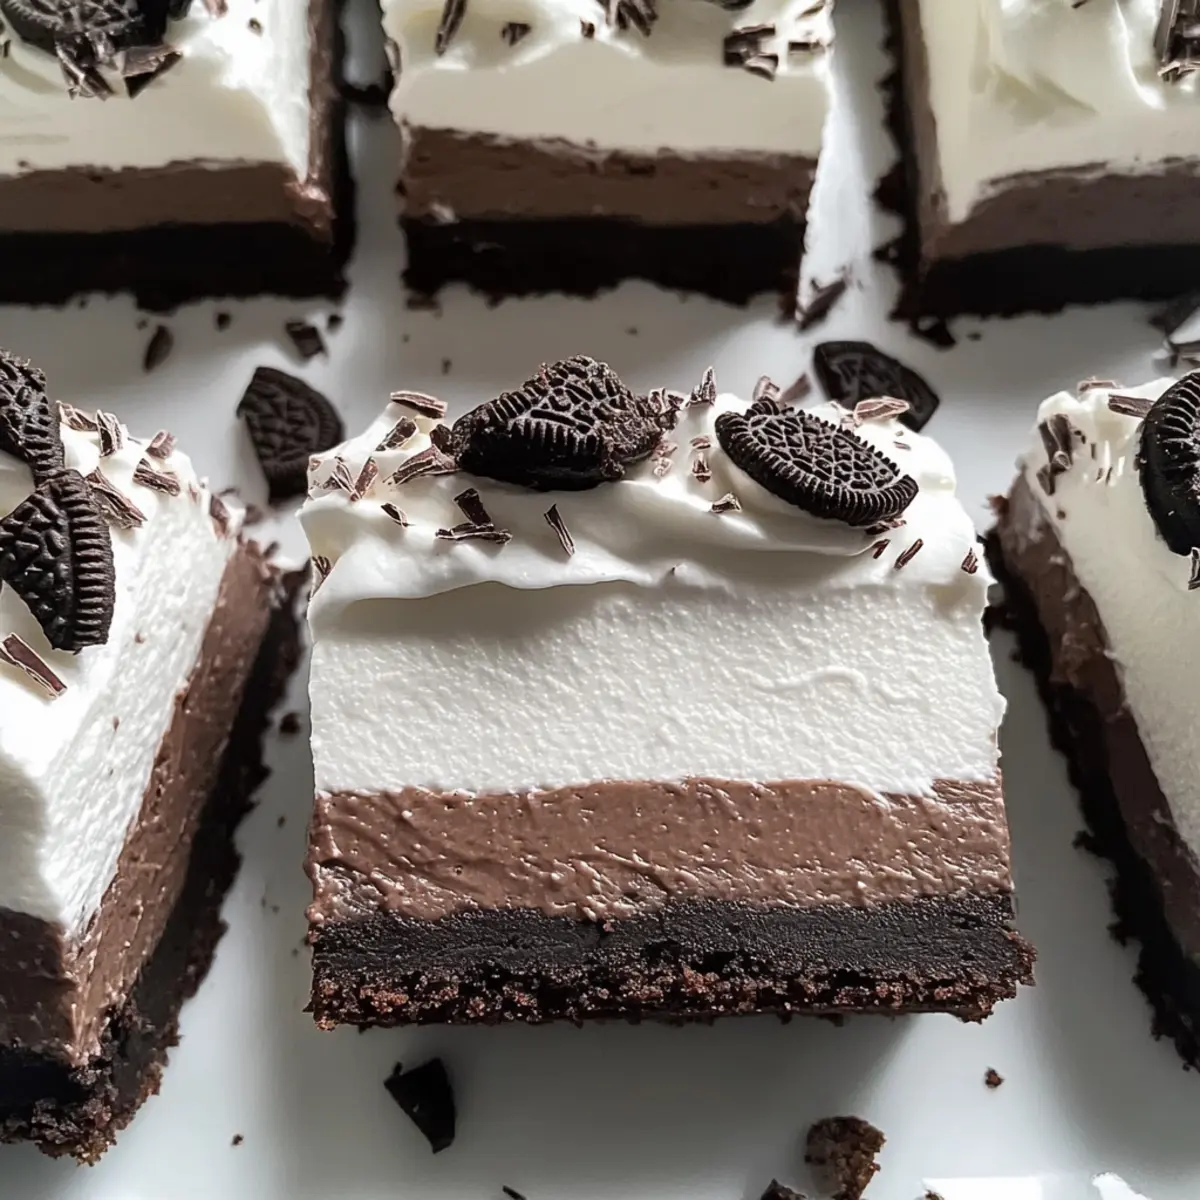
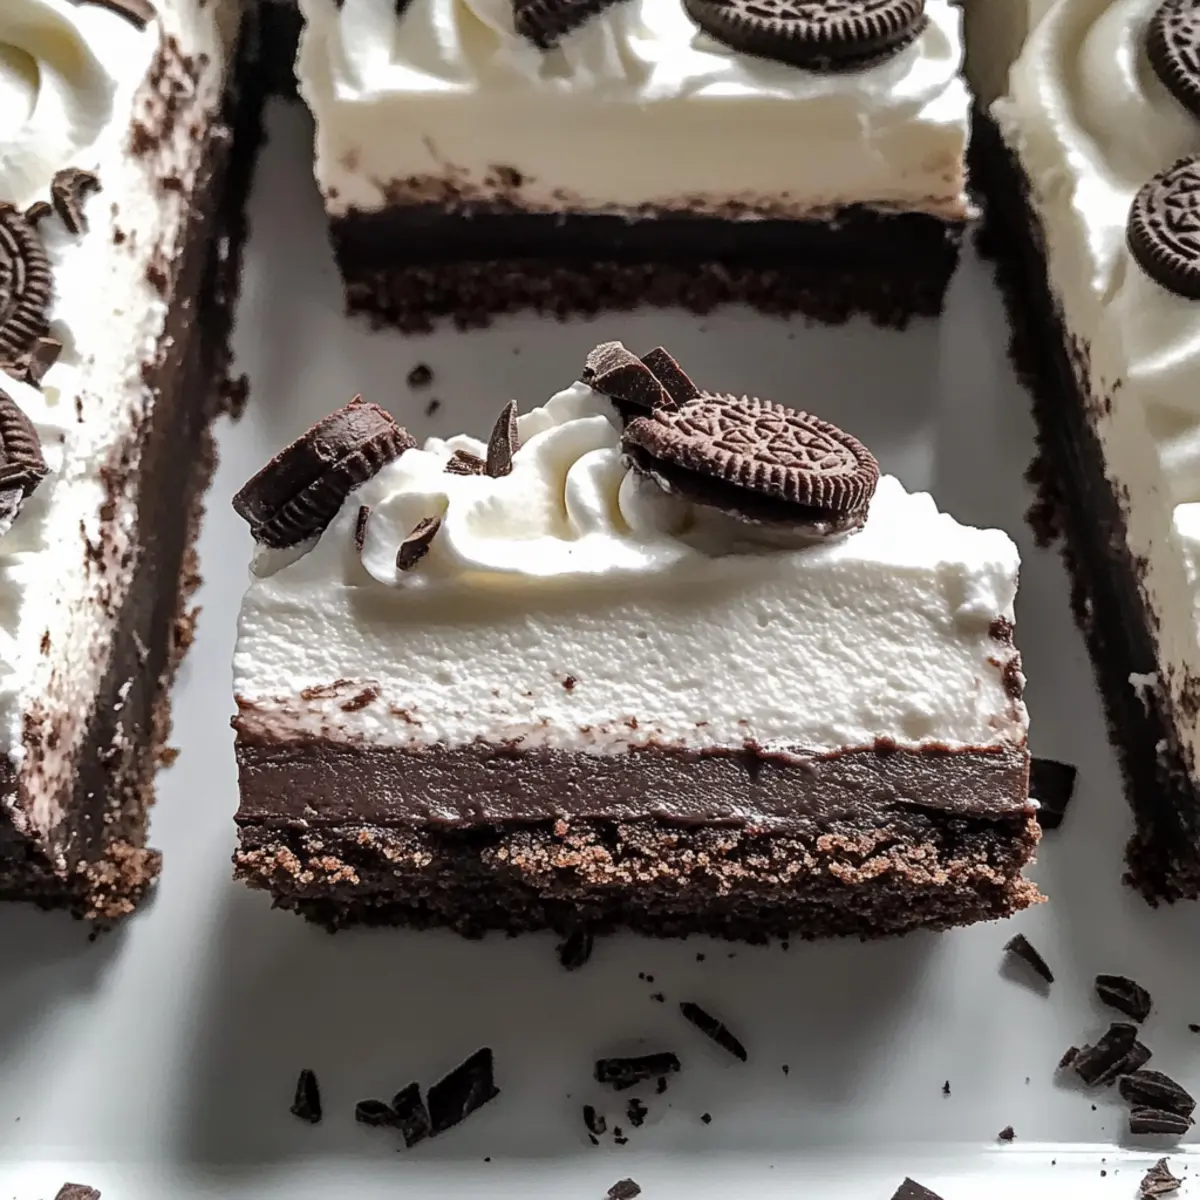
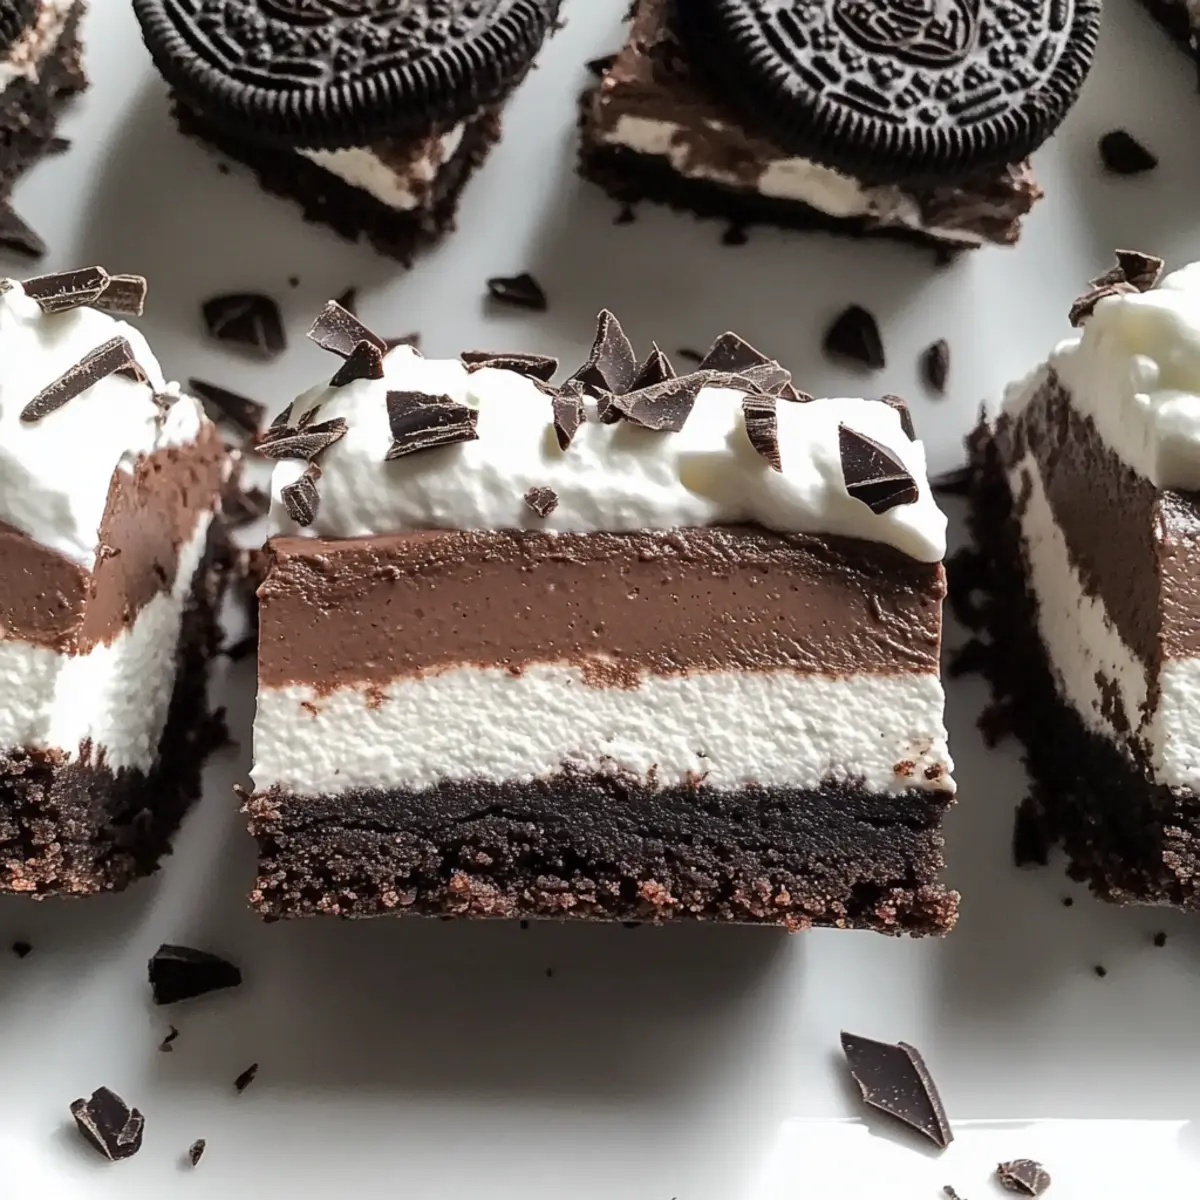
As I flipped through my old recipe book, a wave of nostalgia washed over me, bringing back memories of family gatherings filled with laughter and indulgent treats. One dessert always stole the show: Chocolate Cream Pie Bars. This incredible no-bake delight features a crispy Oreo crust cradling a creamy, luscious chocolate filling that’s simply impossible to resist. Not only are these bars effortless to whip up ahead of time, making them perfect for potlucks, but they’re also easily adaptable for gluten-free and dairy-free diets. Imagine presenting these chilled delights at your next gathering and watching as everyone reaches for seconds! Curious about how to create this creamy masterpiece? Let’s dive in.
Why are Chocolate Cream Pie Bars so beloved?
Irresistible creaminess: The velvety chocolate filling melts in your mouth, providing a luxurious taste experience.
Effortlessly easy: This no-bake recipe takes minimal time and skill, ensuring anyone can make it.
Versatile options: Easily modify for dietary preferences—choose gluten-free Oreos or vegan butter without losing flavor!
Crowd-pleaser: Ideal for parties, gatherings, or just a sweet treat at home, these bars will be a hit.
Looking for other sweet inspirations? Try my Chocolate Peanut Butter muffins or whip up some delightful Salted Caramel Chocolate bars for even more delicious options!
Chocolate Cream Pie Bars Ingredients
For the Crust
- Oreo cookie crumbs – Perfect base for the crust; swap with gluten-free Oreos for a gluten-free option.
- Unsalted butter (5 tbsp) – Binds the crumbs together; use vegan butter for a dairy-free alternative.
For the Filling
- Heavy whipping cream (1 cup) – Adds that rich creaminess; can use coconut cream for a dairy-free option.
- Semi-sweet chocolate chips (5 oz) – Essential for that rich chocolate flavor; opt for high-quality brands or dark chocolate for a deeper taste.
- Full-fat cream cheese (6 oz) – Provides luscious texture; Neufchâtel cheese can lighten it up if desired.
- Powdered sugar (1 ½ cups) – Sweetens the filling; can reduce for a less sweet version or use a sugar substitute.
- Unsweetened cocoa powder (⅓ cup) – Boosts chocolate richness; Dutch-processed cocoa results in a milder flavor.
- Vanilla extract (2 tsp) – Enhances overall flavor; make sure to use pure vanilla for the best taste.
- Salt (½ tsp) – Balances sweetness while enhancing flavors.
For Topping
- Additional heavy cream (for topping) – Whipped to perfection for an outstanding finishing touch; sugar can be added for sweetness.
- Chocolate shavings – An elegant garnish to elevate presentation and indulge your guests further.
Now that you have all the ingredients for your irresistible Chocolate Cream Pie Bars, you’re one step closer to bringing a slice of creamy joy to your gathering!
Step‑by‑Step Instructions for Chocolate Cream Pie Bars
Step 1: Prepare the Crust
Preheat your oven to 350°F (175°C) and line an 8×8-inch baking pan with parchment paper for easy removal. In a medium bowl, pulse Oreo cookie crumbs into fine particles and mix in melted butter until well combined. Press this mixture firmly into the bottom of the prepared pan, ensuring an even layer. Bake for 10 minutes until set, then allow it to cool completely.
Step 2: Whip the Cream
While the crust cools, grab a mixing bowl and pour in 1 cup of heavy whipping cream. Using a hand mixer, whip the cream on medium speed until soft peaks form. Then, add powdered sugar to taste. Increase the speed until stiff peaks are reached, which should take about 3-4 minutes. Once ready, cover and chill the whipped cream while you prepare the filling.
Step 3: Melt the Chocolate
In a heatproof bowl over simmering water, melt 5 oz of semi-sweet chocolate chips along with the remaining 5 tablespoons of butter. Stir occasionally until the mixture is smooth and fully melted, then remove it from the heat and let it cool slightly. It’s crucial to cool this mixture to prevent it from melting the cream cheese later in the recipe.
Step 4: Prepare the Filling
In a large mixing bowl, beat 6 oz of cream cheese on medium speed until creamy and smooth, about 2 minutes. Gradually add in 1 ½ cups of powdered sugar, ⅓ cup of unsweetened cocoa powder, 2 teaspoons of vanilla extract, and ½ teaspoon of salt. Mix everything until fully combined, then add the cooled chocolate mixture, blending until smooth and luscious.
Step 5: Fold in Whipped Cream
Gently fold in half of the chilled whipped cream into your chocolate filling with a spatula until just combined. This will give your filling airy texture. Then, carefully fold in the remaining whipped cream until fully incorporated, ensuring not to deflate the mixture too much. The result should be a light and fluffy chocolate filling perfect for your Chocolate Cream Pie Bars.
Step 6: Assemble the Bars
Spread the chocolate filling evenly over the cooled crust using a spatula, smoothing it out for a nice finish. Take your time to create an even layer that covers the crust thoroughly. Once done, cover the baking pan with plastic wrap or foil, making sure it’s airtight to maintain freshness.
Step 7: Chill to Set
Place the assembled Chocolate Cream Pie Bars in the refrigerator and let them chill for at least 3 hours, preferably overnight. This allows the filling to set properly and enhances the flavors, making the bars even more delectable.
Step 8: Finish with Topping
When ready to serve, whip additional heavy cream until soft peaks form. Spread this whipped cream over the chilled bars for an elegant touch. For garnish, sprinkle chocolate shavings on top, enhancing both the flavor and presentation of your Chocolate Cream Pie Bars.
Step 9: Serve and Enjoy
Carefully lift the bars from the pan using the edges of the parchment paper. Slice them with a hot knife for clean edges and serve cold. Perfectly indulgent, these Chocolate Cream Pie Bars are ready to impress your family and friends!
Make Ahead Options
These Chocolate Cream Pie Bars are perfect for busy cooks looking to save time during hectic weeks! You can prepare the crust and filling up to 24 hours in advance. Simply follow the first four steps—baking the crust and preparing the chocolate filling—then cover and refrigerate them separately. Additionally, you can whip the cream for the topping ahead and store it in an airtight container in the fridge for up to 3 days. When ready to serve, simply bring everything together by spreading the filling over the crust, topping with the whipped cream, and garnishing with chocolate shavings. This way, you can have your dessert ready with minimal effort while maintaining that delightful, creamy quality!
Storage Tips for Chocolate Cream Pie Bars
- Fridge: Store the Chocolate Cream Pie Bars in an airtight container in the refrigerator for up to 4 days. This keeps their creamy texture intact while allowing the flavors to meld beautifully.
- Freezer: For longer storage, individually wrap slices in plastic wrap and place them in a freezer-safe container. They can be frozen for up to 2 months.
- Thawing: When ready to enjoy, simply thaw your Chocolate Cream Pie Bars in the refrigerator for a few hours or overnight. This ensures they stay cool and delicious when served.
- Reheating: These bars are best enjoyed chilled and do not require reheating. Serving them cold accentuates their rich chocolate flavor and creamy filling.
What to Serve with Chocolate Cream Pie Bars
Indulging in creamy Chocolate Cream Pie Bars calls for delightful companions that enhance their rich, chocolaty goodness.
-
Fresh Berries: Bright, juicy strawberries or raspberries provide a tart contrast to the creamy bars, adding freshness with each bite. These vibrant fruits not only boost the dessert’s flavor but also make for a stunning presentation.
-
Vanilla Ice Cream: A scoop of this classic companion adds a creamy, cold element that complements the rich chocolate filling perfectly. The melty vanilla mingles beautifully with the luscious bars.
-
Coffee: A warm cup of coffee brings out the chocolate’s subtle notes and makes for a comforting pairing. This rich flavor combination is perfect for any coffee lover.
-
Mint Leaves: A sprinkle of fresh mint adds both color and a refreshing aroma. The cool minty flavor brightens the dessert and is a delightful surprise alongside the chocolate.
-
Caramel Sauce: Drizzling a touch of sweet, buttery caramel over each slice elevates the dessert experience to new heights. This sticky sweetness creates a wonderful contrast with the dark chocolate.
-
Chopped Nuts: Adding toasted almonds or walnuts introduces a crunchy texture that beautifully complements the creamy filling. This adds depth and an irresistible crunch to each bite.
-
Chocolate Ganache: For the ultimate chocolate lover, pouring warm chocolate ganache over each bar creates an even richer, more decadent moment. This indulgent addition takes the bars to a whole new level!
-
Sparkling Water: For a refreshing drink, consider serving sparkling water with lemon or lime. The bubbles cleanse the palate, making every bite of the bars taste even better.
Enjoy these pairings to create a memorable dessert spread featuring your delicious Chocolate Cream Pie Bars!
Chocolate Cream Pie Bars Variations
Feel free to get creative with this recipe and make it your own!
- Gluten-Free: Use gluten-free Oreos or a gluten-free cookie crumb mix to keep the crust deliciously intact without the gluten.
- Dairy-Free: Swap unsalted butter with vegan butter and use coconut cream instead of heavy whipping cream for a rich, dairy-free experience.
- Mocha Twist: Fold in a teaspoon of espresso powder into the filling for an enticing mocha flavor, perfect for coffee lovers.
- Nutty Addition: Mix chopped nuts, such as walnuts or pecans, into the crust for added crunch and texture that complements the creamy filling beautifully.
- Dark Chocolate Delight: Use dark chocolate chips instead of semi-sweet for a deeper, more intense chocolate flavor that elevates the bars.
- Coconut Fling: Incorporate shredded coconut into the filling or as a topping for a tropical twist that adds extra chewiness and flavor.
- Minty Fresh: Add a few drops of peppermint extract for a refreshing mint chocolate experience that’s perfect during the holidays.
- Salted Caramel: Drizzle salted caramel sauce over the bars just before serving for an extra layer of flavor that perfectly balances the sweetness.
These variations not only cater to different preferences but also add exciting new dimensions to the classic Chocolate Cream Pie Bars. If you’re in the mood for other sweet treats, try my delightful Chocolate Peanut Butter muffins or the irresistible Salted Caramel Chocolate bars! Enjoy mixing and matching!
Expert Tips for Chocolate Cream Pie Bars
- Chill Time Matters: Allow the bars to chill overnight for enhanced flavor and perfect texture; this is key for the best Chocolate Cream Pie Bars.
- Temperature Control: Make sure the melted chocolate is cool before adding it to the cream cheese to avoid a soupy filling.
- Clean Slices: Use a hot knife to slice the bars, ensuring clean edges for an appealing presentation.
- Watch the Filling: If your filling appears too runny, pop it back in the fridge for an extra 30 minutes before serving.
- Ingredient Freshness: Keep all ingredients chilled before mixing to maintain that heavenly creamy texture.
Chocolate Cream Pie Bars Recipe FAQs
How do I select the right Oreo cookie crumbs?
When selecting Oreo cookie crumbs for your Chocolate Cream Pie Bars, look for packages that are fresh and have no signs of moisture or discoloration. If you’re opting for a gluten-free version, make sure the label clearly states “gluten-free.” For the best flavor, I recommend using classic Oreos, but feel free to experiment with seasonal flavors for a fun twist!
How should I store leftover Chocolate Cream Pie Bars?
To keep your Chocolate Cream Pie Bars fresh, store them in an airtight container in the refrigerator for up to 4 days. This helps to maintain their rich, creamy texture while allowing the flavors to meld beautifully. If you have leftovers, I suggest covering them tightly with plastic wrap or placing them in a sealed container to prevent them from drying out.
Can I freeze Chocolate Cream Pie Bars?
Absolutely! You can freeze your Chocolate Cream Pie Bars for up to 2 months. Simply cut the bars into individual slices, wrap each slice tightly in plastic wrap, and place them in a freezer-safe container. When you’re ready to enjoy them, thaw them in the refrigerator for a few hours or overnight for the best texture and flavor.
What should I do if my filling is too runny?
If your chocolate filling turns out too runny, don’t fret! Simply refrigerate it for an additional 30 minutes before serving. This allows it to firm up and set properly. Also, ensure your melted chocolate is cooled before incorporating it into the cream cheese, as warm chocolate can cause the filling to lose its desired consistency.
Are there any dietary considerations for pets or allergies?
Yes! While these Chocolate Cream Pie Bars are a delicious treat for humans, they are not suitable for pets, especially dogs, due to ingredients like chocolate and cream cheese which can be toxic. Additionally, if you or your guests have allergies, make sure to check labels on the cookie crumbs and chocolate for allergens like gluten or dairy. I recommend gluten-free Oreo cookies and dairy-free substitutes to cater to different dietary needs without sacrificing flavor.
Irresistibly Creamy Chocolate Cream Pie Bars You'll Love
Ingredients
Equipment
Method
- Preheat your oven to 350°F (175°C) and line an 8x8-inch baking pan with parchment paper. Pulse Oreo crumbs and mix with melted butter, then press into the prepared pan. Bake for 10 minutes, then cool completely.
- In a mixing bowl, whip 1 cup of heavy whipping cream on medium speed until soft peaks form. Add powdered sugar to taste and whip until stiff peaks are reached. Chill the whipped cream.
- Melt 5 oz of semi-sweet chocolate chips with the remaining 5 tablespoons of butter over simmering water until smooth. Cool slightly.
- Beat 6 oz of cream cheese until smooth. Gradually mix in powdered sugar, cocoa powder, vanilla extract, and salt. Add the cooled chocolate mixture and blend until smooth.
- Fold in half of the whipped cream into the chocolate filling until combined, then fold in the remaining whipped cream.
- Spread the chocolate filling over the cooled crust evenly. Cover the pan with plastic wrap or foil.
- Chill the assembled bars in the refrigerator for at least 3 hours, ideally overnight.
- Whip additional heavy cream until soft peaks form. Spread over the chilled bars and garnish with chocolate shavings.
- Lift the bars from the pan using the parchment paper. Slice with a hot knife and serve cold.
Leave a Reply