
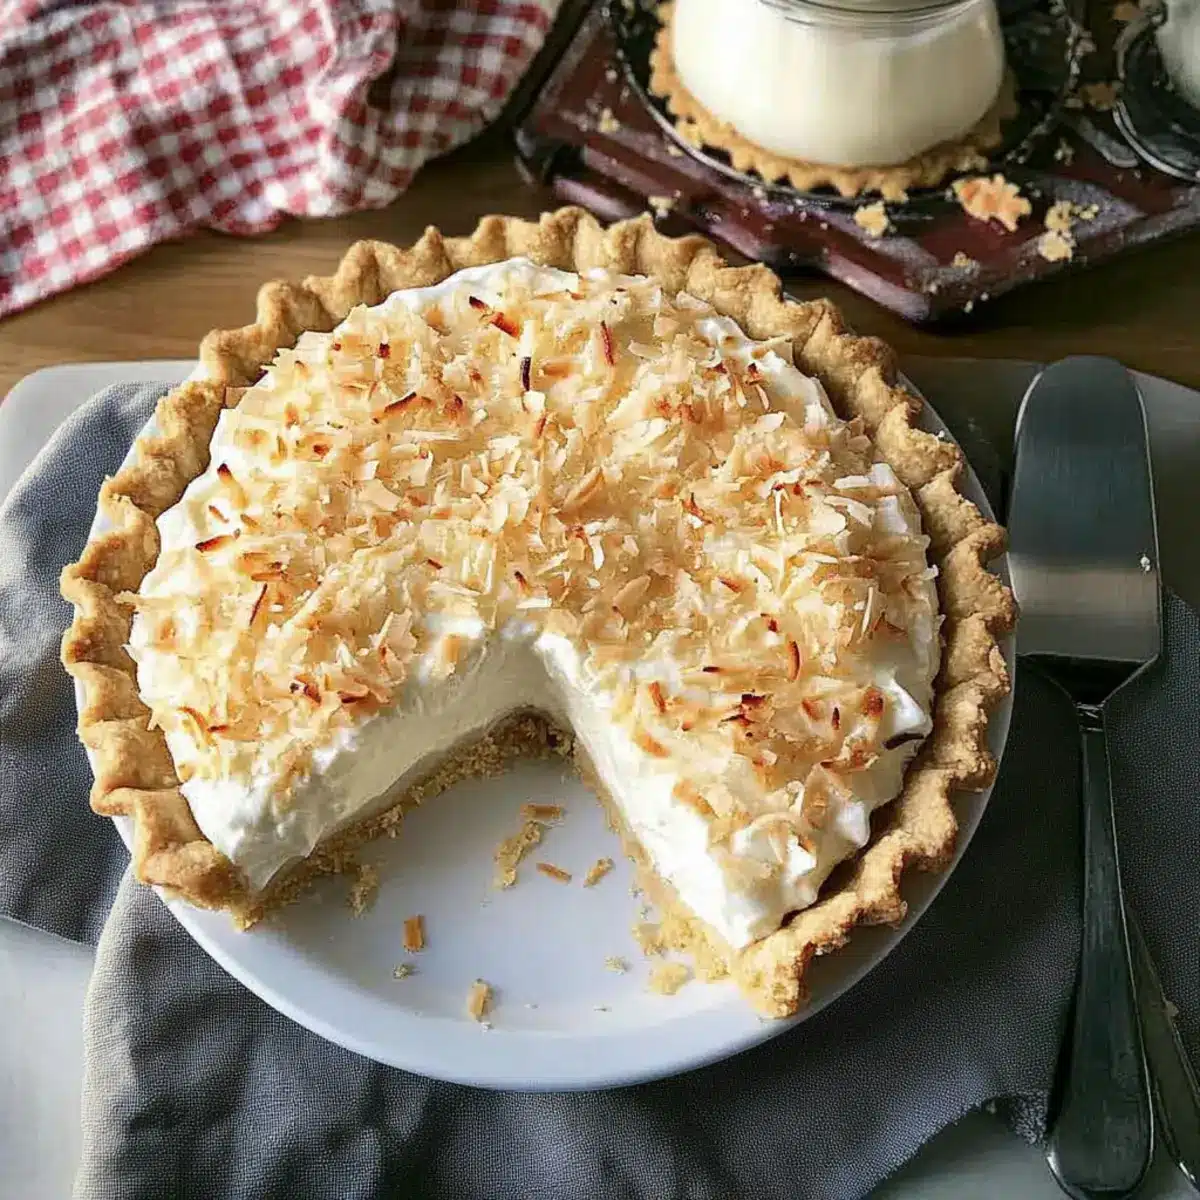
Stepping into my kitchen, I’m often met with the fragrant whispers of coconut floating like a gentle breeze, and that’s when I know it’s time to whip up my beloved Coconut Cream Pie. This creamy delight isn’t just a dessert; it’s a slice of nostalgia, a sweet escape from the chaos of fast food, and a go-to for gatherings filled with laughter. The beauty of this Coconut Cream Pie lies in its simplicity—complete with a homemade graham cracker crust and a luscious, velvety filling that can be whipped up in no time. Whether you’re hosting friends or enjoying a quiet night in, this crowd-pleaser is sure to impress! And if you’re feeling adventurous, there are delicious variations to explore, from banana layers to dreamy chocolate twists. What’s your favorite way to indulge in this classic dessert?
Why is Coconut Cream Pie so irresistible?
Creamy Delight: This Coconut Cream Pie is a blissful treat that encapsulates rich flavors and a smooth texture, making each bite a heavenly escape.
Simplicity: The step-by-step process allows anyone, regardless of skill level, to create this stunning dessert with ease.
Versatile Variations: Whether you prefer a traditional version, a Banana Coconut Cream Pie for added sweetness, or a Chocolate Coconut Cream Pie for a twist, there’s a variation for every palate.
Crowd-Pleaser: Perfect for any occasion, from summer barbecues to cozy family dinners, this pie is sure to be the star of your dessert table.
Quick and Easy: With minimal ingredients and no-fuss preparation, you’ll have this showstopper ready to impress in no time. Don’t forget to check out other delightful recipes like Enchiladas Sour Cream for your next gathering!
Coconut Cream Pie Ingredients
• Discover the essentials for a perfect Coconut Cream Pie!
For the Crust
- 1 sheet refrigerated pie crust – Provides an easy base; homemade graham cracker crust adds extra flavor.
For the Filling
- ¾ cup sugar – Sweetens the pie; substitute with coconut sugar for a unique flavor.
- 3 tablespoons all-purpose flour – Thickens the pudding mixture; can replace with 1 tablespoon cornstarch for a smoother texture.
- ⅛ teaspoon salt – Enhances the filling’s flavor.
- 3 cups whole milk – Creates a rich custard base; coconut milk can strengthen the coconut flavor.
- 3 large eggs, beaten – Adds richness and structure to the filling.
- 1½ cups sweetened shredded coconut, toasted, divided – Boosts coconut flavor and provides texture; toasting improves flavor and color.
- 1 tablespoon butter – Contributes additional richness.
- 1½ teaspoons vanilla extract – Balances flavors and adds warmth.
For Topping (Optional)
- Whipped cream – Lightens the dessert; use fresh for the best taste.
- Additional toasted coconut – Enhances presentation and flavor.
Step‑by‑Step Instructions for Coconut Cream Pie
Step 1: Prepare the Pie Crust
Begin by preheating your oven to 400°F (200°C). If using a refrigerated pie crust, unroll it and transfer it into a pie dish. Flute the edges for a lovely finish and chill the crust in the refrigerator for 30 minutes. This step ensures your Coconut Cream Pie has a crisp base that won’t become soggy.
Step 2: Blind Bake the Crust
After chilling, line the crust with aluminum foil and fill it with pie weights or dried beans. Bake for 15–20 minutes, until the edges are golden. Carefully remove the foil and weights, then return the crust to the oven for an additional 3–6 minutes until fully baked and golden. Let the crust cool on a wire rack before filling.
Step 3: Make the Coconut Filling
In a medium saucepan, whisk together sugar, flour, and salt. Gradually pour in the 3 cups of whole milk, mixing well. Cook the mixture over medium-high heat, stirring frequently, until it thickens and bubbles, about 8–10 minutes. Continue stirring for another 2 minutes until the filling reaches a pudding-like consistency, perfect for your Coconut Cream Pie.
Step 4: Temper the Eggs
In a separate bowl, beat the 3 large eggs. To avoid scrambling them, slowly whisk in 1 cup of the hot pudding mixture into the eggs, blending well. Once combined, return the egg mixture to the saucepan with the remaining pudding. Cook over medium heat, stirring constantly until it just begins to boil, ensuring a rich and velvety texture.
Step 5: Add Coconut and Flavorings
Remove the saucepan from heat and stir in the toasted coconut, tablespoon of butter, and 1½ teaspoons of vanilla extract. This adds depth of flavor that makes the Coconut Cream Pie irresistible! Blend everything until smooth, allowing the warm mixture to melt the butter perfectly.
Step 6: Assemble the Pie
Pour the creamy coconut filling into the cooled pie crust, spreading it evenly. For a glorious presentation, sprinkle the remaining toasted coconut generously on top of the filling. This not only enhances the flavor but also adds a delightful crunch that complements the creamy filling.
Step 7: Chill Before Serving
Cover the pie with plastic wrap and refrigerate for at least 4 hours or until fully set. This chilling step is crucial for achieving the perfect slice of your Coconut Cream Pie. Once chilled, slice into beautiful servings and enjoy the creamy texture with friends and family!
Coconut Cream Pie Variations & Substitutions
Feel free to make this Coconut Cream Pie your own with these delightful twists that will elevate the classic recipe!
-
Banana Coconut Cream Pie: Layer sliced bananas beneath the filling for an unexpected sweetness that takes this pie to the next level. The combination of creamy coconut and fresh banana is simply heavenly!
-
Chocolate Coconut Cream Pie: Add ¼ cup of cocoa powder to your pudding mixture for a chocolatey twist. It’s a rich, indulgent treat that combines two favorites into one delectable slice.
-
No-Bake Coconut Cream Pie: Use a store-bought graham cracker crust and prepare the filling without baking it. Just refrigerate until set for a quick and easy dessert that’s perfect for warm days.
-
Lightened-Up Version: Substitute half the sugar with a sugar alternative like Stevia or erythritol. This allows you to enjoy the flavors of Coconut Cream Pie with a lighter calorie count.
-
Toasted Coconut Topping: For an extra layer of flavor and texture, make sure to toast the shredded coconut beforehand. The nutty aroma of browned coconut will tantalize your senses.
-
Coconut Milk: Swap out whole milk for coconut milk for an intensified coconut flavor that’s perfect for true coconut lovers. This will make your pie ultra creamy and delicious!
-
Nutty Crust Option: Instead of a traditional crust, crush up your favorite nuts and mix them with a little butter to create a nut-based crust. Almonds or pecans work wonderfully here and add a delightful crunch.
-
Get Spicy: Sprinkle a touch of cinnamon or nutmeg into the filling to warm up the flavors and add a cozy twist to this classic dessert. It’s a small change that makes a big impact!
Don’t forget about complementing this Coconut Cream Pie with wonderful recipes like Cream Cheese Pound or Decadent Creamy Alfredo Lasagna Soup for a perfect meal. Enjoy experimenting!
Storage Tips for Coconut Cream Pie
Fridge: Keep leftover Coconut Cream Pie in an airtight container in the fridge for up to 3 days. This helps maintain its freshness and texture.
Freezer: For longer storage, freeze the pie for up to 2 months. Wrap it tightly in plastic wrap and aluminum foil to prevent freezer burn.
Reheating: If desired, thaw the pie in the fridge overnight before serving. Enjoy it cold or let it sit at room temperature for about 30 minutes to slightly soften the filling.
Best Served Fresh: While the Coconut Cream Pie can be stored, it’s best enjoyed fresh for the perfect balance of crisp crust and creamy filling.
Make Ahead Options
These Coconut Cream Pie preparations are perfect for busy home cooks looking to save time! You can prepare the pie crust and filling up to 24 hours in advance. Simply bake the crust, allow it to cool, and store it in an airtight container at room temperature. For the filling, whisk together the ingredients and refrigerate it in a separate container. When you’re ready to serve, pour the chilled filling into the pre-baked crust, sprinkle with toasted coconut, and let it set for a few minutes. This method ensures every slice remains as delectable as if it were freshly made! Enjoy a stress-free dessert that tastes just as luscious and creamy!
Expert Tips for Coconut Cream Pie
-
Blind Baking: Always blind bake your crust to avoid a soggy bottom; it ensures a perfectly crisp texture for your Coconut Cream Pie.
-
Filling Thickness: For a firmer filling, substitute some flour with cornstarch or increase cooking time until thickened to achieve your desired consistency.
-
Toasting Coconut: Toast your shredded coconut carefully; keep an eye on it to prevent burning, as it can quickly go from golden to charred.
-
Chilling Time: Ensure you chill the pie for at least 4 hours before serving. This allows the filling to set properly and enhances the texture.
-
Flavor Enhancements: Experiment with different extracts like coconut or almond for an interesting twist in your Coconut Cream Pie.
What to Serve with Irresistible Coconut Cream Pie
Indulging in a slice of Coconut Cream Pie transports you to sun-soaked shores, making it the perfect centerpiece for a delightful meal.
- Fresh Fruit Salad: Bright, juicy fruits like pineapple and berries elevate the tropical vibes and offer a refreshing contrast to the creamy pie.
- Grilled Shrimp Skewers: These savory bites provide a nice balance with their smoky flavor, perfectly complementing the pie’s sweetness.
- Coconut Rice: Enhance the coconut theme with this subtly sweet side dish, a warm complement to the cool, creamy dessert.
Serve each dish with love; the warmth of grilled dishes alongside the cooling pie creates a lovely meal experience.
- Iced Tea with Mint: A refreshing drink that cuts through the richness of the pie, adding a sip of coolness with every bite.
- Chocolate Dipped Strawberries: A sweet, decadent addition that pairs beautifully with the coconut flavor while adding a touch of elegance.
- Whipped Cream Topping: For added indulgence, top your pie with freshly whipped cream, making each slice even more irresistible.
- Mango Sorbet: This light, fruity sorbet provides a refreshing cleanse to the palate after the rich pie.
- Toasted Coconut Macaroons: A great way to enhance the coconut experience, offering chewy textures that contrast delightfully with the creamy pie.

Coconut Cream Pie Recipe FAQs
How do I choose the right coconuts for my pie?
Absolutely! Opt for sweetened shredded coconut that is moist and has a good amount of toastiness to enhance the flavor. When selecting fresh coconuts, look for those that feel heavy for their size, with no cracks or dark spots. If you can tap it and hear the water sloshing inside, it’s likely fresh!
How do I store Coconut Cream Pie?
To keep your delicious Coconut Cream Pie fresh, store it in an airtight container in the refrigerator for up to 3 days. Make sure to cover the pie with plastic wrap or foil to prevent it from absorbing any odors from the fridge. While refrigeration is essential, keep in mind that the crust will soften over time.
Can I freeze Coconut Cream Pie?
Absolutely! To freeze your Coconut Cream Pie, wrap it tightly in plastic wrap followed by aluminum foil to prevent freezer burn. It can be stored in the freezer for up to 2 months. When you’re ready to enjoy, thaw it in the fridge overnight before serving for the best texture. Let it sit out for about 30 minutes to regain its lovely creamy consistency.
What can I do if my filling isn’t thickening?
Very! If your filling isn’t thickening properly, ensure you’re cooking it long enough. Cook over medium-high heat while continuously stirring until it bubbles and thickens, usually about 8-10 minutes. If you want to adjust the consistency later, consider adding a little cornstarch mixed with water and cook until thickened, stirring constantly.
Is Coconut Cream Pie safe for people with nut allergies?
Coconut is often classified as a fruit and not a nut, but some people with nut allergies may still react to it. It’s always best to consult with a healthcare provider if there are any concerns about allergies. If you’re serving this dessert to guests, be sure to ask about allergies beforehand for a worry-free experience!
What should I do if the coconut filling is lumpy after cooking?
Don’t worry! If your coconut filling is lumpy, simply use an immersion blender or a whisk to smooth it out before pouring it into the crust. Alternatively, you can strain the filling through a fine-mesh sieve to remove any lumps, ensuring a velvety texture for your Coconut Cream Pie. Happy baking!
Creamy Coconut Cream Pie: Simple Bliss in Every Bite
Ingredients
Equipment
Method
- Preheat your oven to 400°F (200°C). If using a refrigerated pie crust, unroll it and transfer it into a pie dish. Flute the edges for a lovely finish and chill the crust in the refrigerator for 30 minutes.
- Line the crust with aluminum foil and fill it with pie weights or dried beans. Bake for 15–20 minutes, until the edges are golden. Carefully remove the foil and weights, then return the crust to the oven for an additional 3–6 minutes until fully baked and golden.
- In a medium saucepan, whisk together sugar, flour, and salt. Gradually pour in the whole milk, mixing well. Cook over medium-high heat, stirring frequently, until it thickens and bubbles, about 8–10 minutes.
- In a separate bowl, beat the eggs. Slowly whisk in 1 cup of the hot pudding mixture to avoid scrambling the eggs. Once combined, return the egg mixture to the saucepan with the remaining pudding and cook over medium heat until it just begins to boil.
- Remove the saucepan from heat and stir in the toasted coconut, butter, and vanilla extract until smooth.
- Pour the creamy coconut filling into the cooled pie crust. Sprinkle the remaining toasted coconut on top.
- Cover the pie with plastic wrap and refrigerate for at least 4 hours or until fully set. Once chilled, slice and enjoy.
Leave a Reply