
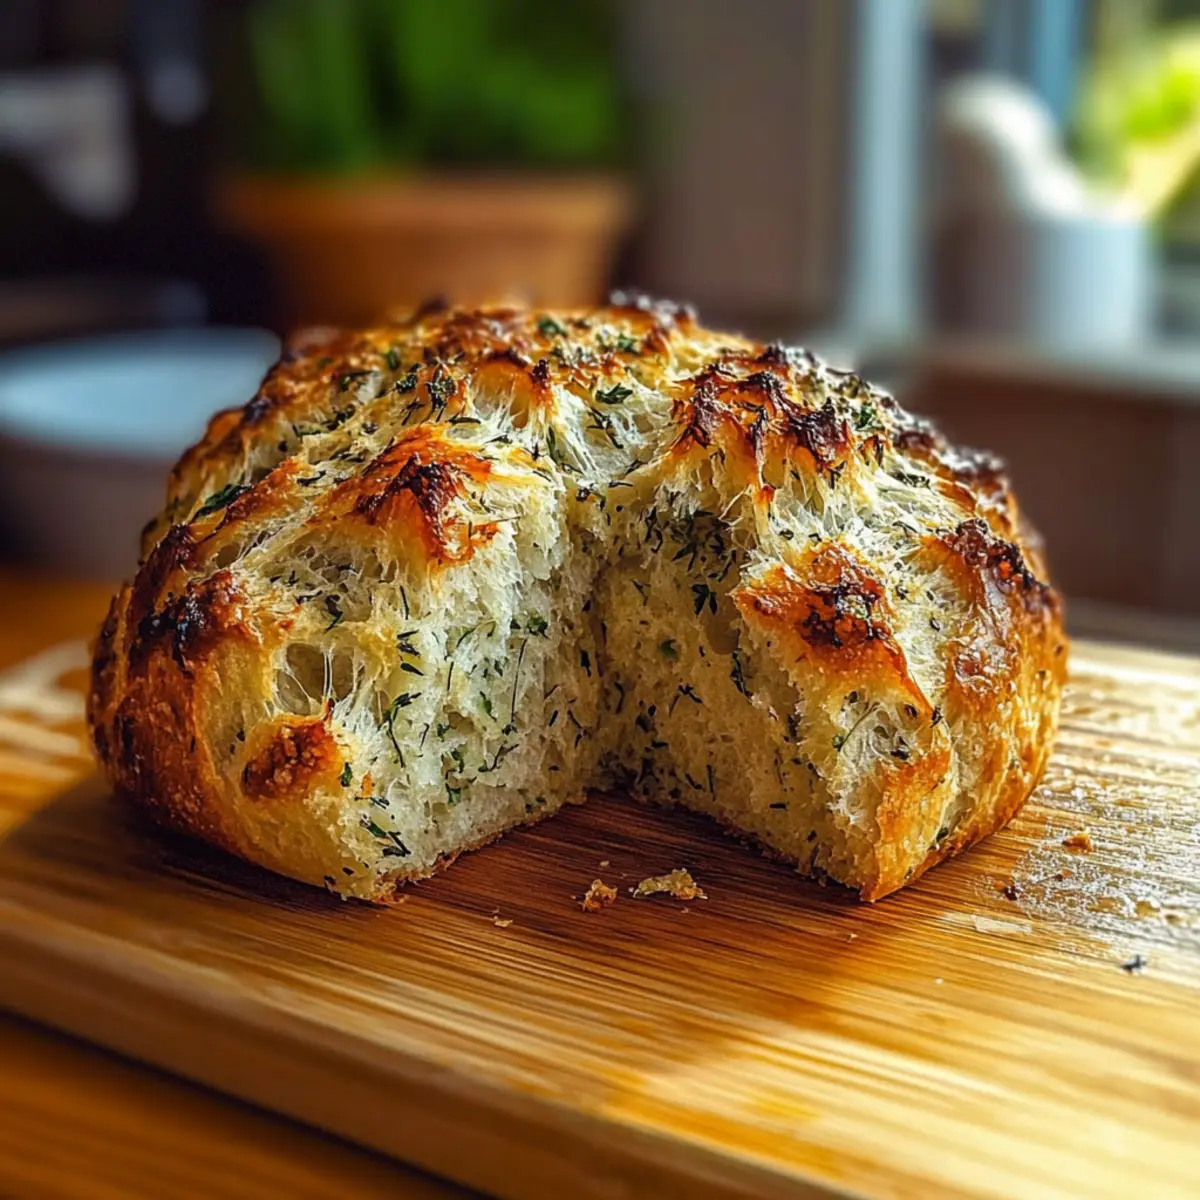
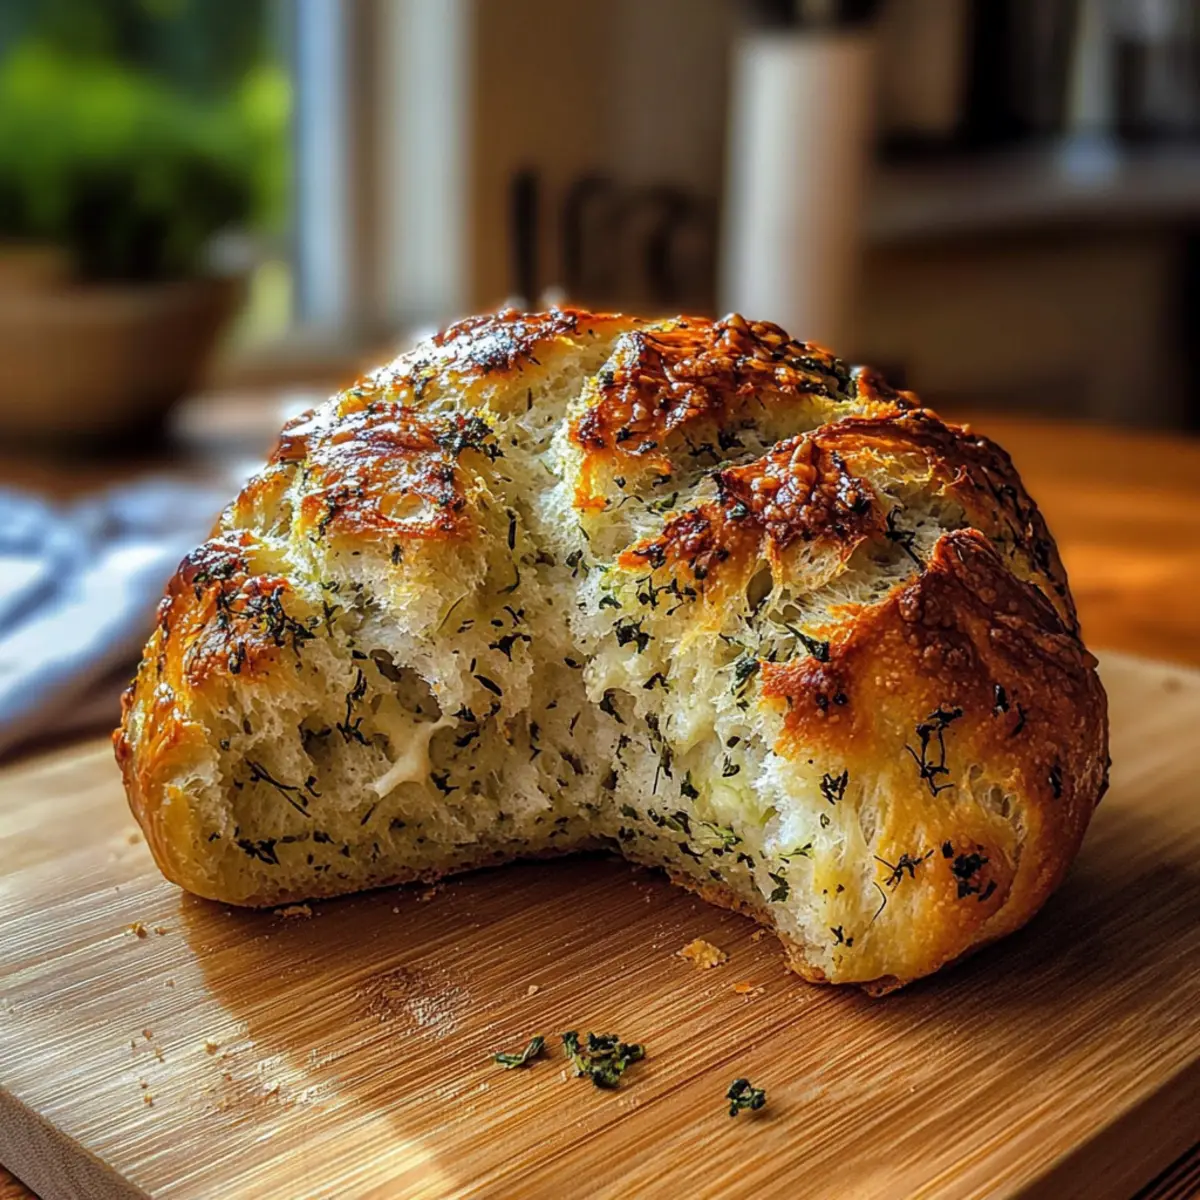
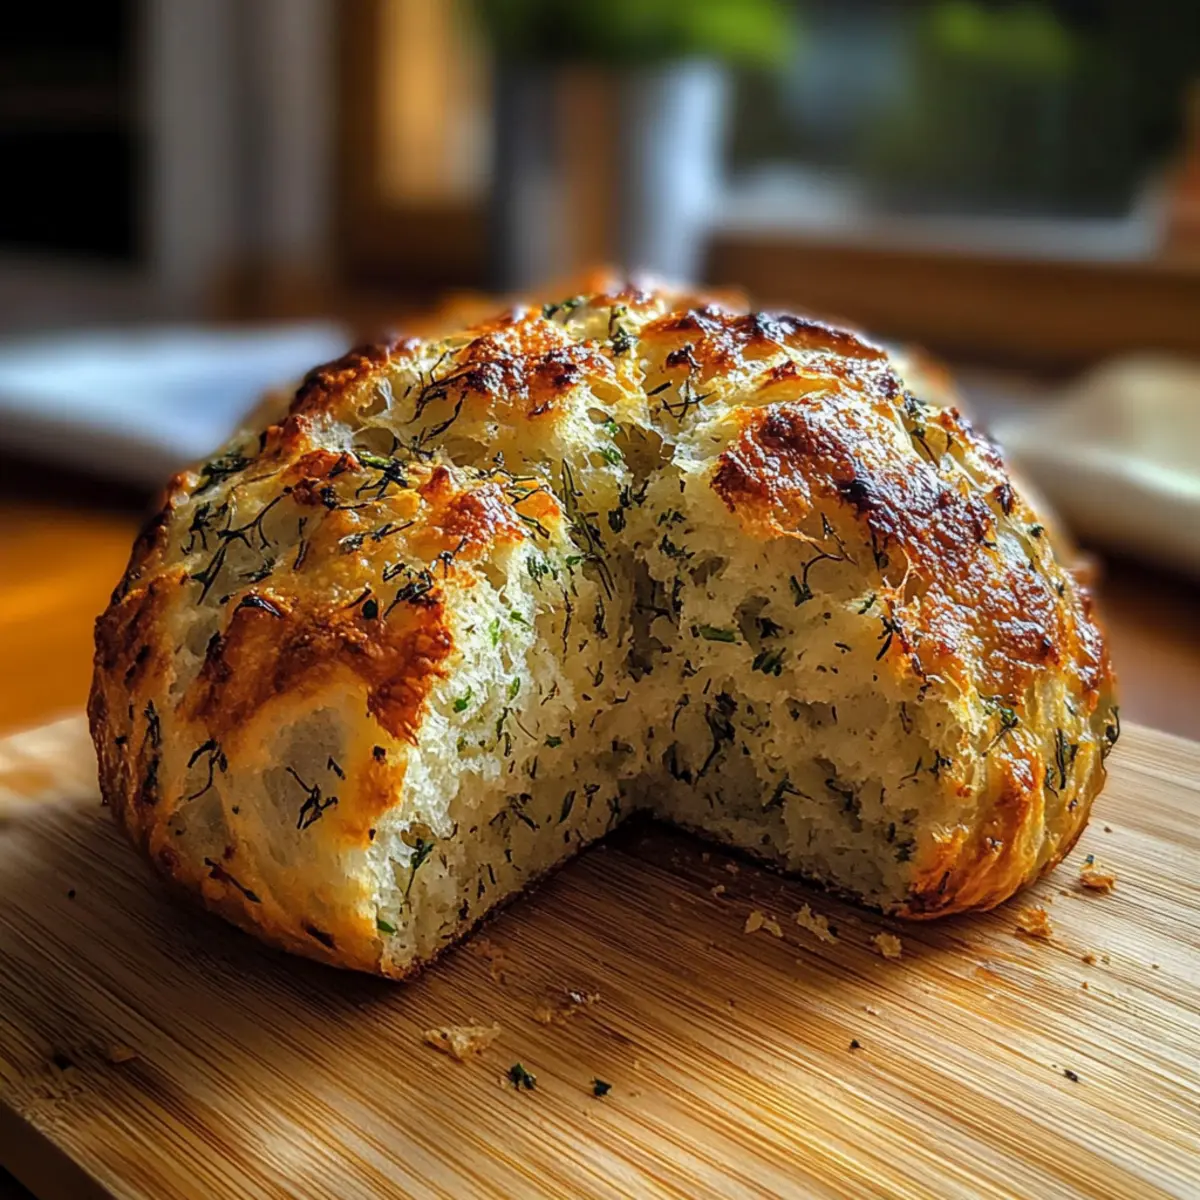
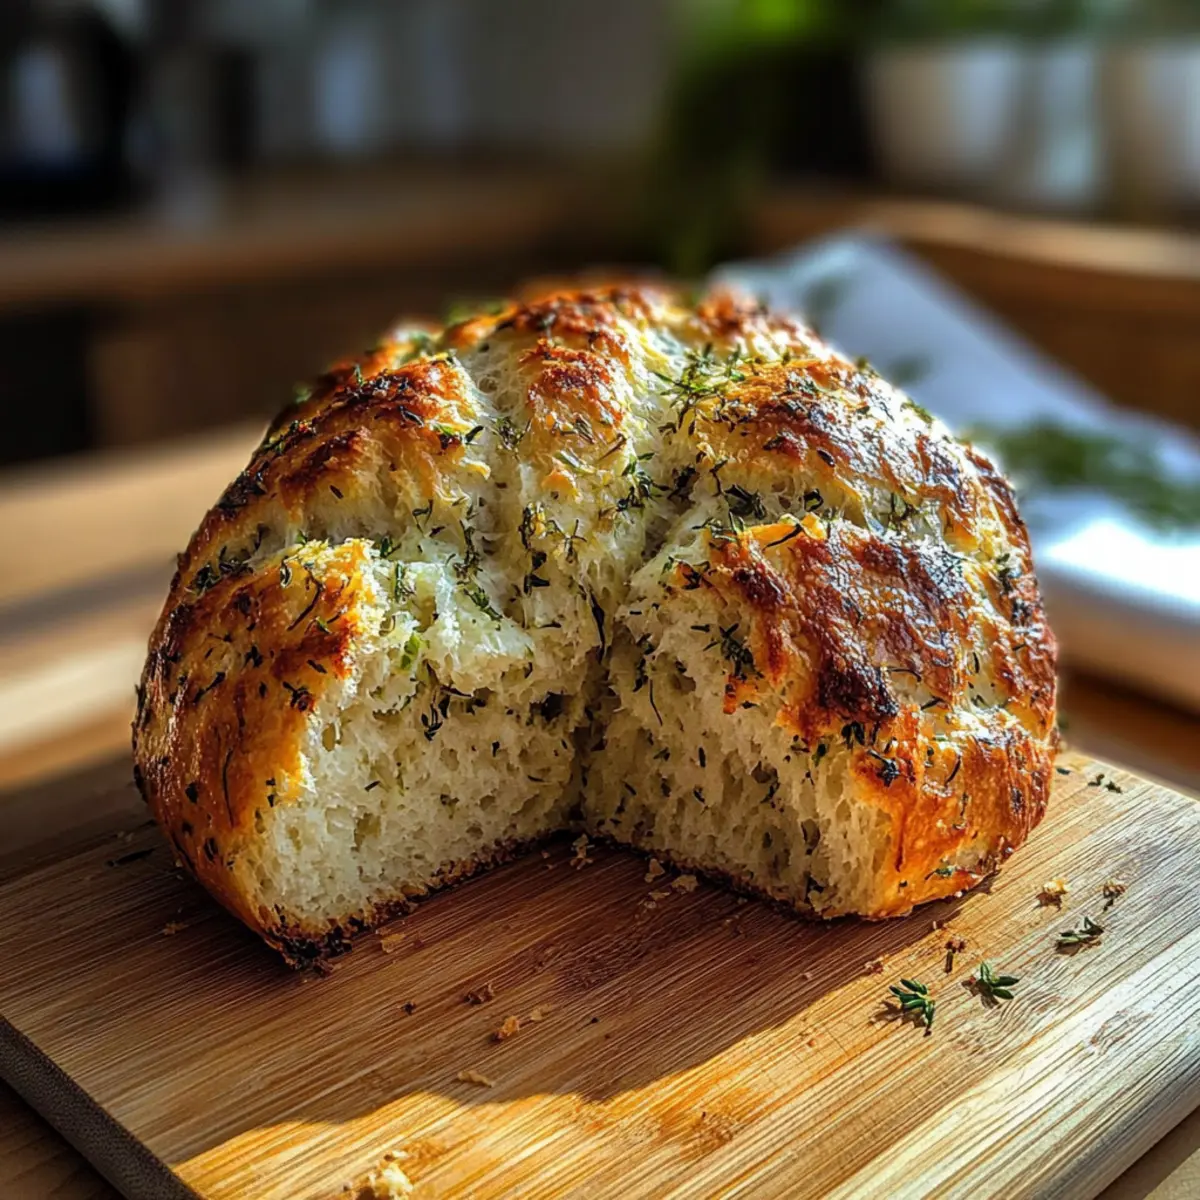
As the aroma of baking bread envelops my kitchen, I can’t help but think of the warmth and comfort it brings to every meal. Today, I’m excited to share my twist on a classic with this Garlic Herb Dutch Oven Bread. With minimal effort and just a few pantry staples, you can create a rustic, artisan loaf that looks and tastes like it came from a bakery. This easy recipe is not only vegan-approved and dairy-free, but it also packs a punch with its crispy crust and soft, herb-infused interior. Whether you’re enjoying a cozy dinner at home or looking to impress guests, this bread is the perfect sidekick for soups or a delightful snack on its own. Curious to discover how to bring that bakery vibe right into your kitchen? Let’s get started!
Why is this bread so irresistible?
Freshly Baked Delight: The enticing aroma of this Garlic Herb Dutch Oven Bread fills your home, making it impossible to resist.
Vegan and Dairy-Free: Enjoy a delicious bread that fits into various dietary preferences without compromising on taste.
Artisan Quality at Home: With simple ingredients and a hands-off approach, you’ll create a loaf that rivals bakery offerings.
Versatile Pairings: Perfect with soups, as a base for bruschetta, or simply enjoyed warm with a bit of olive oil. For more enticing bread ideas, check out my Cheesy Garlic Chicken recipes.
Effortless Preparation: With minimal active time and a long resting period, you can easily whip up this beautiful bread without fussing over every detail.
Unique Flavor Variations: Personalize your bread with your favorite herbs or spices – the possibilities are endless!
Garlic Herb Dutch Oven Bread Ingredients
- For the Bread
• All-Purpose Flour – Essential for structure; you can use bread flour for a chewier texture.
• Salt – Enhances flavor and strengthens the dough; avoid substitutions for the best results.
• Instant Yeast – Leavens the bread quickly; you may use active dry yeast, but it will need proofing first.
• Warm Water – Activates yeast and hydrates the flour; ensure it’s warm to the touch, not hot.
• Garlic (minced) – Delivers a punch of flavor; garlic powder can work in a pinch if fresh isn’t available.
• Fresh Herbs (rosemary, thyme) – Adds delightful aromatics; feel free to substitute with oregano, basil, or sage.
• Olive Oil – Contributes richness and prevents sticking; any neutral cooking oil can be used instead.
Let’s gather our ingredients and embark on this delightful baking adventure! Don’t forget, this Garlic Herb Dutch Oven Bread is vegan-approved, making it a perfect fit for various dietary choices.
Step‑by‑Step Instructions for Garlic Herb Dutch Oven Bread
Step 1: Prepare Dough
In a large mixing bowl, combine the all-purpose flour, salt, and instant yeast. Pour in the warm water, then add the minced garlic and your choice of fresh herbs. Mix everything until fully combined, resulting in a shaggy dough. Ensure all dry ingredients are incorporated, as this mixture will lead to your delicious Garlic Herb Dutch Oven Bread.
Step 2: Rest
Cover the bowl tightly with plastic wrap or a clean kitchen towel and let the dough rest at room temperature for 12 to 18 hours. This long resting period is essential for developing flavor and gluten structure. When the dough is ready, it should be bubbly and have doubled in size, showcasing the fermentation that has occurred during the resting time.
Step 3: Preheat
About 30 minutes before the dough is ready, preheat your oven to 230°C (450°F). Place your empty Dutch oven inside to heat thoroughly; this step is vital for achieving a nice crust. Allow the Dutch oven to heat for at least 30 minutes, which ensures a hot environment for your Garlic Herb Dutch Oven Bread to rise beautifully as it bakes.
Step 4: Shape Dough
Carefully transfer the rested dough onto a well-floured surface. Gently fold and shape it into a round loaf, taking care not to deflate it too much. Dust the top lightly with more flour to prevent sticking. This shaping process will give your Garlic Herb Dutch Oven Bread its artisanal look, making it perfect for impressing family and friends.
Step 5: Bake
Once the Dutch oven is preheated, carefully remove it from the oven using oven mitts. Coat the bottom with a drizzle of olive oil to prevent sticking. Place your shaped dough inside the hot pot, cover it with the lid, and return it to the oven. Bake for 30 minutes to let it achieve that gorgeous oven spring and initial crust formation.
Step 6: Finish Baking
After 30 minutes, remove the lid from the Dutch oven to allow the crust to brown beautifully. Continue baking for an additional 15 to 20 minutes until the crust is a rich golden brown and sounds hollow when tapped. The aroma of your Garlic Herb Dutch Oven Bread will fill the kitchen, creating the perfect enticing atmosphere.
Step 7: Cool
Once baked to perfection, carefully transfer the bread to a wire rack and let it cool completely. This cooling step is crucial for preserving the crumb structure and preventing soggy slices. As the bread cools, the flavors will continue to develop, leaving you with the most delicious homemade Garlic Herb Dutch Oven Bread ready to be sliced and shared.
Expert Tips for Garlic Herb Dutch Oven Bread
- Adequate Resting: Allow the dough to rest for 12 to 18 hours. This crucial step develops flavor and gluten, ensuring a delightful bread texture.
- Hot Dutch Oven: Preheat your Dutch oven for at least 30 minutes. This helps create a crisp crust and perfect oven spring during baking.
- Handle Dough Gently: When shaping, be careful not to deflate the dough too much. Maintaining air bubbles is key to that soft, airy interior.
- Prevent Soggy Slices: Let the bread cool completely on a wire rack before slicing. Cutting too soon can lead to squished, gummy slices.
- Herb Flexibility: Experiment with different herbs or spices in your Garlic Herb Dutch Oven Bread to tailor the flavor to your taste.
Make Ahead Options
For busy home cooks, this Garlic Herb Dutch Oven Bread is ideal for meal prep! You can prepare the dough up to 24 hours in advance by following the mixing and resting steps—just be sure to cover it tightly to prevent it from drying out. After the initial resting period, shape the dough and refrigerate it for up to 3 days. When you’re ready to bake, simply let it sit at room temperature for about 30 minutes while you preheat your oven and Dutch oven. This method maintains the bread’s quality, ensuring it’s just as delicious and aromatic when baked. Enjoy the convenience of having fresh, homemade bread without the last-minute rush!
Garlic Herb Dutch Oven Bread Variations
Feel free to let your creativity shine by customizing this delightful Garlic Herb Dutch Oven Bread recipe to suit your taste!
- Vegan Approval: Replace any animal-based ingredients (like honey or dairy) with plant-based alternatives; this recipe is already a fantastic vegan option!
- Herbal Delights: Substitute rosemary and thyme with your favorite herbs such as dill or sage for a unique twist. Let your herb garden inspire you!
- Roasted Garlic: Swap fresh minced garlic for roasted garlic for a milder, deliciously sweet flavor. It adds a beautiful depth that will enchant your palate.
- Cheesy Touch: Fold in some vegan cheese or nutritional yeast into the dough for a sumptuous cheesy flavor, perfect for pairing with soups.
- Add Some Heat: Sprinkle in red pepper flakes or chopped jalapeños for a spicy kick that elevates this bread to the next level. Spice lovers will thank you!
- Flavor Infusion: Experiment with different oils, such as infused olive oils (like chili or basil) to bring an extra layer of flavor to your bread.
- Whole Wheat Option: Try swapping half of the all-purpose flour with whole wheat flour for a heartier texture and added nutrients.
- Seed Topping: Before baking, brush the surface with water and sprinkle sesame or poppy seeds for an extra crunch and nutty flavor. They’ll provide a delightful contrast to the soft interior.
Whichever variations you choose, this adaptable recipe will keep your dinners exciting! Want more inspiration for side dishes? Check out my Cheesy Garlic Chicken recipe for a mouthwatering pairing that complements this bread beautifully!
How to Store and Freeze Garlic Herb Dutch Oven Bread
- Room Temperature: Store leftover bread in a cloth bag or wrapped in foil at room temperature for up to 2 days to maintain its crust.
- Fridge: If you prefer to keep it longer, you can refrigerate it in an airtight container, but note that this may soften the crust. Best used within 3 days.
- Freezer: For extended storage, slice your Garlic Herb Dutch Oven Bread and freeze in an airtight container for up to 3 months. This way, you can enjoy a slice whenever you crave it!
- Reheating: To reheat, simply wrap slices in foil and warm in the oven at 180°C (350°F) for 10-15 minutes, or toast until crispy.
What to Serve with Garlic Herb Dutch Oven Bread
This delightful loaf deserves a full spread that enhances its rustic flavors and comforting aroma.
- Savory Tomato Soup: The rich, tangy flavors complement the herby notes in the bread, making each dip an experience to savor.
- Mixed Green Salad: Light and refreshing, adding a zesty vinaigrette brings brightness that contrasts wonderfully with the warm, hearty bread.
- Roasted Vegetables: Earthy vegetables with caramelized edges bring depth and texture, making your meal feel wholesome and satisfying.
- Bruschetta Topping: Fresh tomatoes, basil, and a drizzle of balsamic glaze atop slices of bread create an irresistible bite bursting with flavor.
- Garlic and Herb Olive Oil Dip: A bowl of this fragrant olive oil dip invites everyone to tear and share, enhancing the bread’s garlic goodness.
- Vegan Chili: A warm bowl of hearty chili pairs perfectly, offering a cozy, comforting meal together with your fresh-baked loaf.
- Sparkling Water with Lime: The refreshing fizz and citrusy zing cleanse the palate, making each bite of bread feel light and airy.
- Homemade Hummus: Creamy and rich, it provides a delicious option for spreading on the warm slices, making for a fun appetizer or snack.
Garlic Herb Dutch Oven Bread Recipe FAQs
How do I select fresh herbs for this bread?
Absolutely! When selecting fresh herbs like rosemary or thyme, look for vibrant green leaves without any browning or wilting. The aroma should be fragrant and strong. If you can’t find fresh herbs, dried versions will suffice; just use about one-third of the amount as dried herbs are more concentrated.
What’s the best way to store leftover Garlic Herb Dutch Oven Bread?
To keep your leftover bread fresh, wrap it tightly in foil or a clean cloth bag and store it at room temperature for up to 2 days. This method helps maintain the crispy crust. For longer storage, slice it and freeze in an airtight container for up to 3 months. Just remember to thaw at room temperature before toasting or reheating!
Can I freeze the Garlic Herb Dutch Oven Bread?
Yes! For best results, slice your Garlic Herb Dutch Oven Bread before freezing to make it easy to grab a piece whenever you want. Wrap each slice in plastic wrap or aluminum foil and place them in an airtight container. This way, you can enjoy a slice any time within 3 months!
Why is my bread dough too sticky?
If your dough is sticky, you may have added too much water. When mixing, it’s important to aim for a shaggy consistency. If necessary, sprinkle in a little extra flour until the dough is manageable. On the other hand, if it feels too dry, add a splash of warm water gradually until the desired texture is reached.
Is this recipe suitable for my gluten-free diet?
While this Garlic Herb Dutch Oven Bread is designed for all-purpose flour, you can experiment with gluten-free flour blends specifically made for baking. Just be sure to follow the manufacturer’s instructions for best results, as gluten-free flour may affect texture and rise.
Can I give this bread to my pet?
It’s best to refrain from sharing bread with your pet, especially since it contains ingredients like garlic and salt which can be harmful to them in large quantities. If you want to share some love with your furry friend, consider making them a dog-safe treat instead!
Garlic Herb Dutch Oven Bread: Your New Cozy Favorite
Ingredients
Equipment
Method
- In a large mixing bowl, combine the all-purpose flour, salt, and instant yeast. Pour in the warm water, then add the minced garlic and your choice of fresh herbs. Mix until fully combined to form a shaggy dough.
- Cover the bowl tightly with plastic wrap or a kitchen towel and let the dough rest at room temperature for 12 to 18 hours.
- Preheat your oven to 230°C (450°F) about 30 minutes before the dough is ready, placing your empty Dutch oven inside.
- Transfer the rested dough onto a floured surface and shape into a round loaf. Dust the top with flour.
- Once the Dutch oven is preheated, remove it carefully, coat with olive oil, and place the shaped dough inside. Cover and bake for 30 minutes.
- Remove the lid and continue baking for 15 to 20 minutes until the crust is golden brown.
- Transfer the baked bread to a wire rack and let it cool completely before slicing.
Leave a Reply