
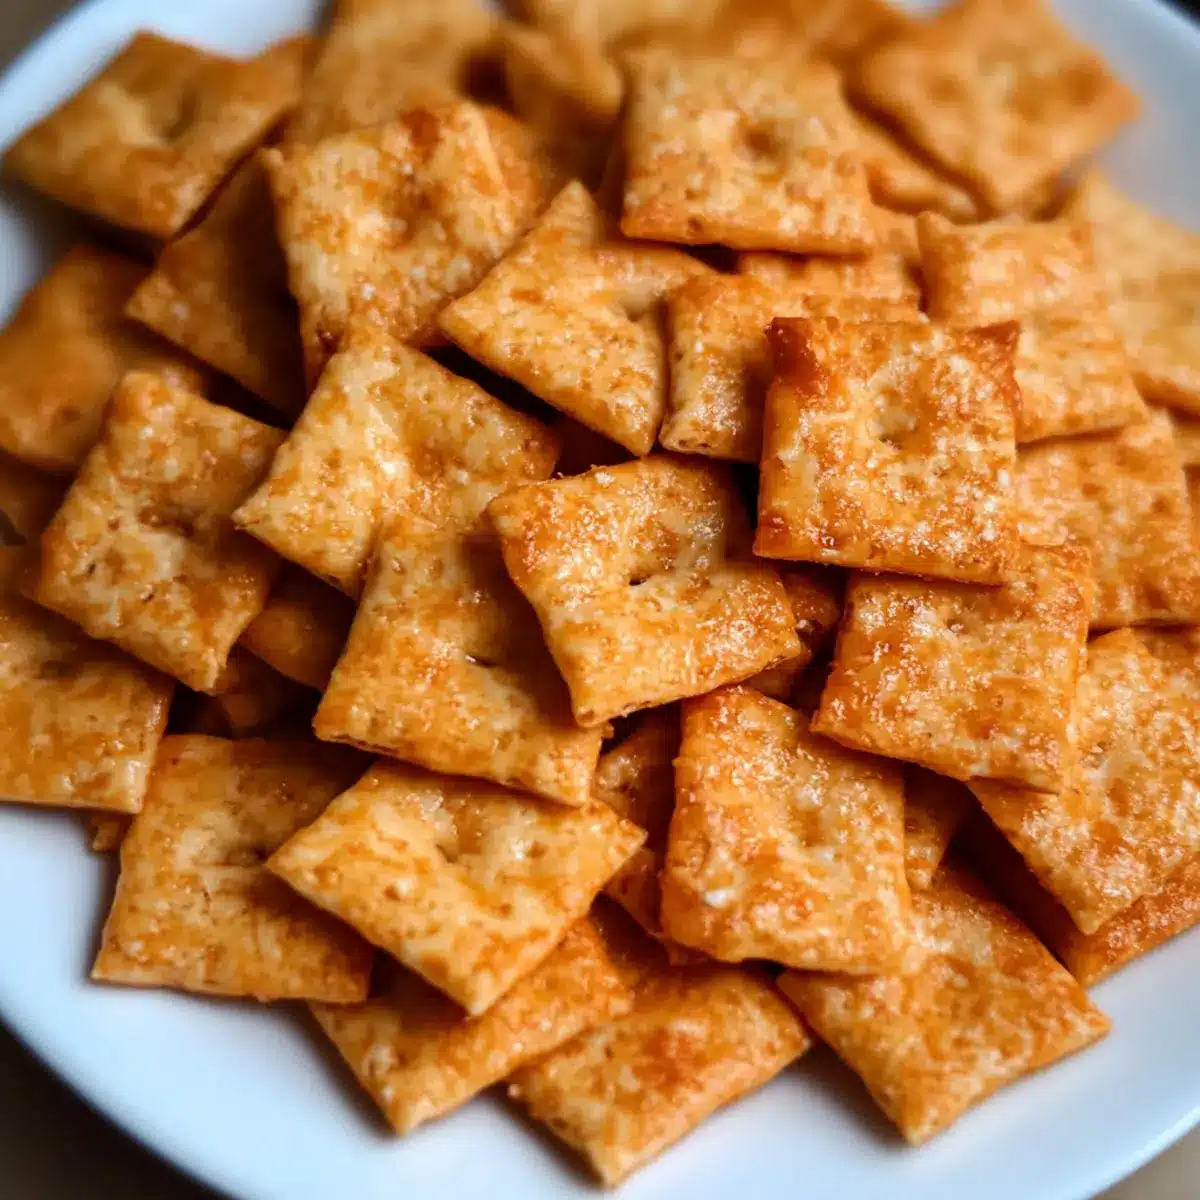
The aroma of freshly baked crackers filled my kitchen, and I couldn’t help but smile as I pulled out a golden batch of my homemade Sourdough Cheez-Its. These little bites pack a delightful crunch and cheesy flavor that keep both kids and adults coming back for more. With only real cheddar cheese and no preservatives, this recipe combines convenience and wholesomeness, proving that snacking can be both easy and delicious. Best of all, you can whip up a batch in under two hours, or let the dough chill overnight to enhance the flavors even further! Are you ready to elevate your snacking game with these cheesy delights?

Why make Sourdough Cheez-Its at home?
Homemade Sourdough Cheez-Its are the ultimate snack that’s both crunchy and cheesy! Quick and easy, this recipe allows you to whip up a batch in just under two hours. Wholesome ingredients mean you can feel good about serving these to your family, free from preservatives. Versatile options like swapping in different cheeses or adding your favorite spices invite creativity. Whether you’re enjoying them solo or with dips, these crackers are sure to impress – perfect for game nights or lunchboxes! For a sweet twist on homemade treats, try out my Cinnamon Roll Coffee next!
Sourdough Cheez-Its Ingredients
A delightful array of simple ingredients awaits!
For the Crackers
- Cheddar Cheese – Freshly shredded for a rich, cheesy flavor that’ll keep you coming back for more.
- Sourdough Discard – Adds a mild tang; can be swapped with an active starter if you prefer.
- Unsalted Butter – Cold and cubed, it enriches the flavor and ensures a wonderfully crunchy texture.
- All-Purpose Flour – Provides the structure of your crackers; feel free to substitute with whole wheat for a healthier option.
- Garlic Powder – Infuses a depth of flavor you’ll love; don’t skip this one!
- Onion Powder – Enhances savory notes, bringing out the best in your cheesy snack.
- Salt – Use flaky salt for topping—this balances the flavors and adds an irresistible crunch.
These Sourdough Cheez-Its are ready to transform your snacking routine with wholesome goodness!
Step‑by‑Step Instructions for Sourdough Cheez-Its
Step 1: Prepare Dough
In a food processor, combine shredded cheddar cheese, sourdough discard, cold cubed unsalted butter, all-purpose flour, garlic powder, onion powder, and salt. Pulse until the mixture resembles wet sand. When pressed between your fingers, it should hold together without crumbling. This creates the base for your Sourdough Cheez-Its, ensuring a rich, cheesy flavor throughout.
Step 2: Chill Dough
Transfer the dough onto a clean work surface and shape it into a flat disc about an inch thick. Wrap the disc tightly in plastic wrap and chill in the refrigerator for at least 30 minutes; for a more developed flavor, chill for up to 2 days. Chilling the dough helps solidify the fats and makes rolling it out easier later on.
Step 3: Preheat Oven
While the dough chills, preheat your oven to 350°F (175°C). Line a baking sheet with parchment paper to prevent the Sourdough Cheez-Its from sticking while baking. The oven needs to be hot enough to ensure that your crackers turn golden brown and crispy, so don’t skip this step!
Step 4: Shape Crackers
Once chilled, remove the dough from the refrigerator and place it on a lightly floured surface. Use a rolling pin to roll it out to a thickness of about 1/16 inch. Cut the rolled dough into squares using a sharp knife or pizza cutter, and use a toothpick to dock each square with small holes to prevent puffing during baking.
Step 5: Bake
Transfer the shaped crackers onto the prepared baking sheet, ensuring they’re spaced apart. Bake in the preheated oven for 18-22 minutes, or until the edges are golden brown and the crackers are crisp to the touch. Keep an eye on them, as baking times may vary based on your oven’s specifics.
Step 6: Cool & Store
Once baked, remove the Sourdough Cheez-Its from the oven and allow them to cool completely on the baking sheet. Once cooled, transfer the crackers to an airtight container for storage. They stay fresh at room temperature for several weeks, or you can freeze them for up to two months for a longer-lasting snack!
Make Ahead Options
These cheesy Sourdough Cheez-Its are a fantastic choice for meal prep, offering convenience and flavor! You can prepare the dough up to 3 days in advance. Simply follow the recipe steps to create the dough, then wrap it tightly in plastic and refrigerate until you’re ready to bake. Chilling for longer allows the flavors to develop even further, keeping the quality just as delightful as fresh dough. When you’re ready to enjoy your homemade crackers, roll out the chilled dough, cut into squares, dock, and bake as instructed. This way, you’ll serve up crunchy, cheesy goodness with minimal effort on busy weeknights!
What to Serve with Cheesy Sourdough Cheez-Its
Elevate your snacking experience with delightful pairings that enhance the cheesy crunch in every bite.
-
Creamy Hummus: A smooth, rich dip that beautifully contrasts the crunch of the Sourdough Cheez-Its. Perfect for dunking and adds a nutritious flair to your snack time.
-
Classic Tomato Soup: The warmth and acidity of tomato soup harmonize with the salty, cheesy flavor of the crackers, creating a cozy, satisfying experience.
-
Fresh Veggie Platter: Serve with an array of colorful, crunchy vegetables like carrots and bell peppers to add a fresh, crisp element that lightens up the snack table.
-
Savory Cheese Spread: An herb-infused cheese spread adds depth to your appetizer spread, striking a delicious balance with the homemade crackers.
-
Light Salad: A refreshing green salad tossed in a zesty vinaigrette contrasts the richness of the crackers, making for a well-rounded meal.
-
Sparkling Water or Lemonade: Refreshing drinks like fizzy water with a twist of lemon cleanse the palate, making each bite of Cheesy Sourdough Cheez-Its even more enjoyable.
-
Chocolate-Dipped Strawberries: For dessert, these sweet treats offer a luscious contrast to the savory crackers, ending your snacking adventure on a sweet note.
Expert Tips for Sourdough Cheez-Its
-
Dough Consistency: Ensure your dough resembles wet sand; a crumbling mixture won’t yield a good cracker texture.
-
Even Thickness: Roll the dough to a uniform 1/16 inch; uneven thickness can lead to inconsistent baking and texture.
-
Dock Carefully: Don’t skip docking the dough with a toothpick; this step prevents puffing and ensures a perfect crunch for your Sourdough Cheez-Its.
-
Chill for Flavor: Allowing the dough to chill not only makes it easier to roll but also enhances the flavors—consider chilling longer for a richer taste.
-
Cheese Variety: Feel free to experiment with different cheese types; just remember to avoid high-moisture options for the best crunch.
-
Storage Tips: Keep crackers in an airtight container to maintain freshness; for longer storage, freezing is a great option to preserve your delicious Sourdough Cheez-Its.
Storage Tips for Sourdough Cheez-Its
Room Temperature: Store fully cooled Sourdough Cheez-Its in an airtight container at room temperature for up to 3 weeks to retain their delightful crunch.
Fridge: If you have leftover crackers, refrigeration is not necessary, but you can keep them in the fridge for up to a week to prolong freshness.
Freezer: For longer storage, freeze Sourdough Cheez-Its in a freezer-safe bag or container for up to 2 months. Thaw at room temperature before enjoying them again.
Reheating: To revitalize the crunch, reheat the frozen crackers in a preheated oven at 350°F (175°C) for about 5-7 minutes.
Sourdough Cheez-Its Variations & Substitutions
Feel free to get creative with your Sourdough Cheez-Its and tailor them to your taste!
-
Cheese Swap: Substitute cheddar with parmesan or pepper jack for a new cheesy twist. Each cheese brings its unique flavor profile to the table, giving your crackers extra personality!
-
Whole Wheat Flour: For a healthier option, swap half of the all-purpose flour with whole wheat flour. This adds a nuttier flavor and boosts the nutritional content tremendously.
-
Spicy Kick: Add a teaspoon of cayenne or red pepper flakes to the dough for a spicy version. A little heat can elevate these crackers, making them irresistibly addictive!
-
Herb Infusion: Incorporate dried herbs like rosemary or thyme into the mix for an aromatic touch. It not only enhances the flavor but also makes your kitchen smell divine.
-
Vegan Option: Replace cheddar with nutritional yeast and use coconut oil instead of butter for a vegan alternative that doesn’t skimp on flavor. Who said plant-based can’t be cheesy?
-
Layered Flavors: Experiment by adding a sprinkle of smoked paprika or onion powder for a deeper flavor profile. Each will add a delightful depth that complements the cheese beautifully.
-
Dipping Partners: Serve with homemade dips like guacamole or a rich salsa to enjoy a festive snacking experience. Oh, and don’t forget to pair with my delicious Cinnamon Roll Coffee for a cozy afternoon treat!
-
Texture Twist: Try adding a handful of seeds like sesame or chia to the dough for added texture and a delightful crunch. It’s a simple addition that makes a big impact!
With these variations, your Sourdough Cheez-Its will always surprise and delight!
Sourdough Cheez-Its Recipe FAQs
What should I look for when choosing cheddar cheese?
Absolutely, fresh is best! When selecting cheddar cheese for your Sourdough Cheez-Its, look for a block of cheese rather than pre-shredded versions. Freshly shredded cheese melts and incorporates better into the dough, providing that gooey, cheesy flavor that’s essential. Aim for sharp cheddar for a more robust taste, and avoid cheese that shows dark spots or has an off smell, as this could indicate spoilage.
How should I store leftover Sourdough Cheez-Its?
Very simply! Once your Sourdough Cheez-Its have cooled completely, store them in an airtight container at room temperature, and they’ll last for up to three weeks. If you’re storing them for longer, freezing is a great option. Just ensure they are in a freezer-safe bag with as much air removed as possible to prevent freezer burn.
Can I freeze these crackers for later? How?
You can absolutely freeze Sourdough Cheez-Its! To do this, first ensure the crackers are thoroughly cooled. Then, lay them flat in a single layer on a baking sheet and freeze for about 1-2 hours until solid. Once frozen, transfer the crackers to a freezer-safe container or zip-lock bag—this prevents them from sticking together. Your homemade cheese crackers will stay fresh for up to 2 months. When ready to enjoy, thaw them at room temperature or reheat in a preheated oven at 350°F (175°C) for about 5-7 minutes to restore that crunch.
What if my dough is crumbly?
If your dough is crumbly, it might be because the ingredients weren’t combined thoroughly or you didn’t include enough fat from the butter. Don’t worry! While preparing the dough, keep pulsing it in the food processor until the mixture resembles wet sand that sticks together when pressed. If it still feels too dry, you can add a teaspoon of cold water, a little at a time, while mixing until it holds together properly.
Are these crackers safe for my dog?
Very! While the ingredients in Sourdough Cheez-Its are generally safe for dogs — cheddar cheese and flour included — it’s best to serve them only in moderation. Avoid giving your dog any with added salt or spices, especially garlic and onion, as they can be harmful to pets. Always check with your vet if you’re unsure about new treats!
Can I adapt this recipe for dietary restrictions?
Of course! There are plenty of options. If you’re looking for a gluten-free alternative, simply swap the all-purpose flour with a gluten-free flour blend, adjusting the ratio as needed for consistency. For a dairy-free version, you can experiment with vegan cheese or nutritional yeast combined with a bit of plant-based butter, which can also work wonderfully in this recipe. Always adjust the measurement according to the moisture level of the substitutes you’re using for the best results!
Homemade Sourdough Cheez-Its Perfect for Family Snacking
Ingredients
Equipment
Method
- In a food processor, combine shredded cheddar cheese, sourdough discard, cold cubed unsalted butter, all-purpose flour, garlic powder, onion powder, and salt. Pulse until the mixture resembles wet sand.
- Transfer the dough onto a clean work surface and shape it into a flat disc about an inch thick. Wrap the disc tightly in plastic wrap and chill in the refrigerator for at least 30 minutes; for a more developed flavor, chill for up to 2 days.
- While the dough chills, preheat your oven to 350°F (175°C). Line a baking sheet with parchment paper.
- Once chilled, remove the dough from the refrigerator and place it on a lightly floured surface. Use a rolling pin to roll it out to a thickness of about 1/16 inch. Cut the rolled dough into squares and use a toothpick to dock each square.
- Transfer the shaped crackers onto the prepared baking sheet, ensuring they’re spaced apart. Bake in the preheated oven for 18-22 minutes, or until edges are golden brown.
- Once baked, remove the Sourdough Cheez-Its from the oven and allow them to cool completely on the baking sheet before transferring to an airtight container.
Leave a Reply