
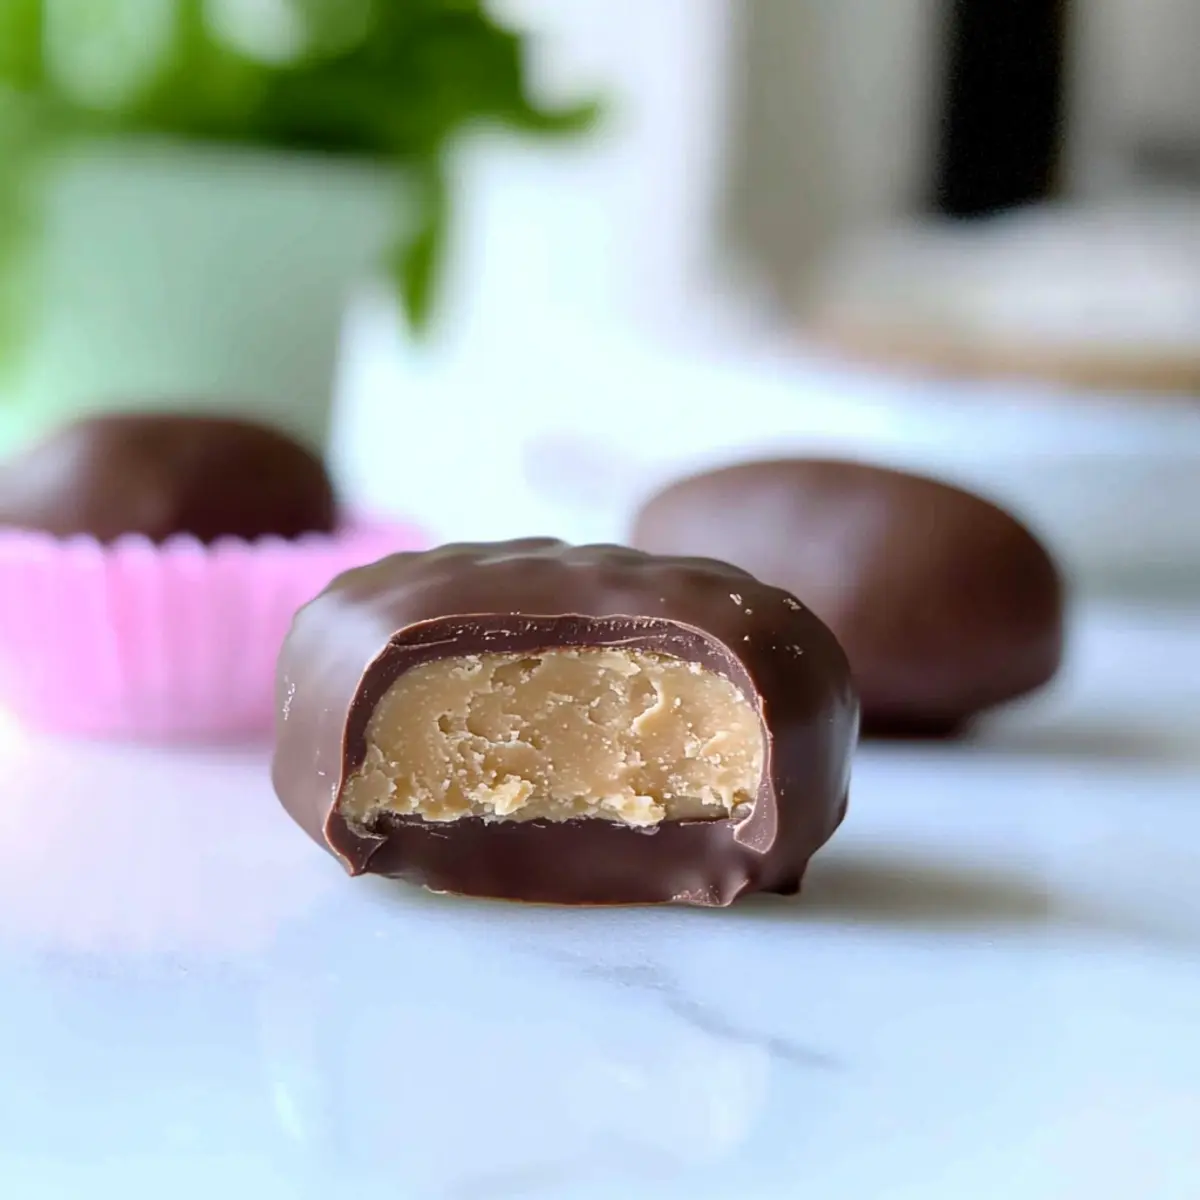
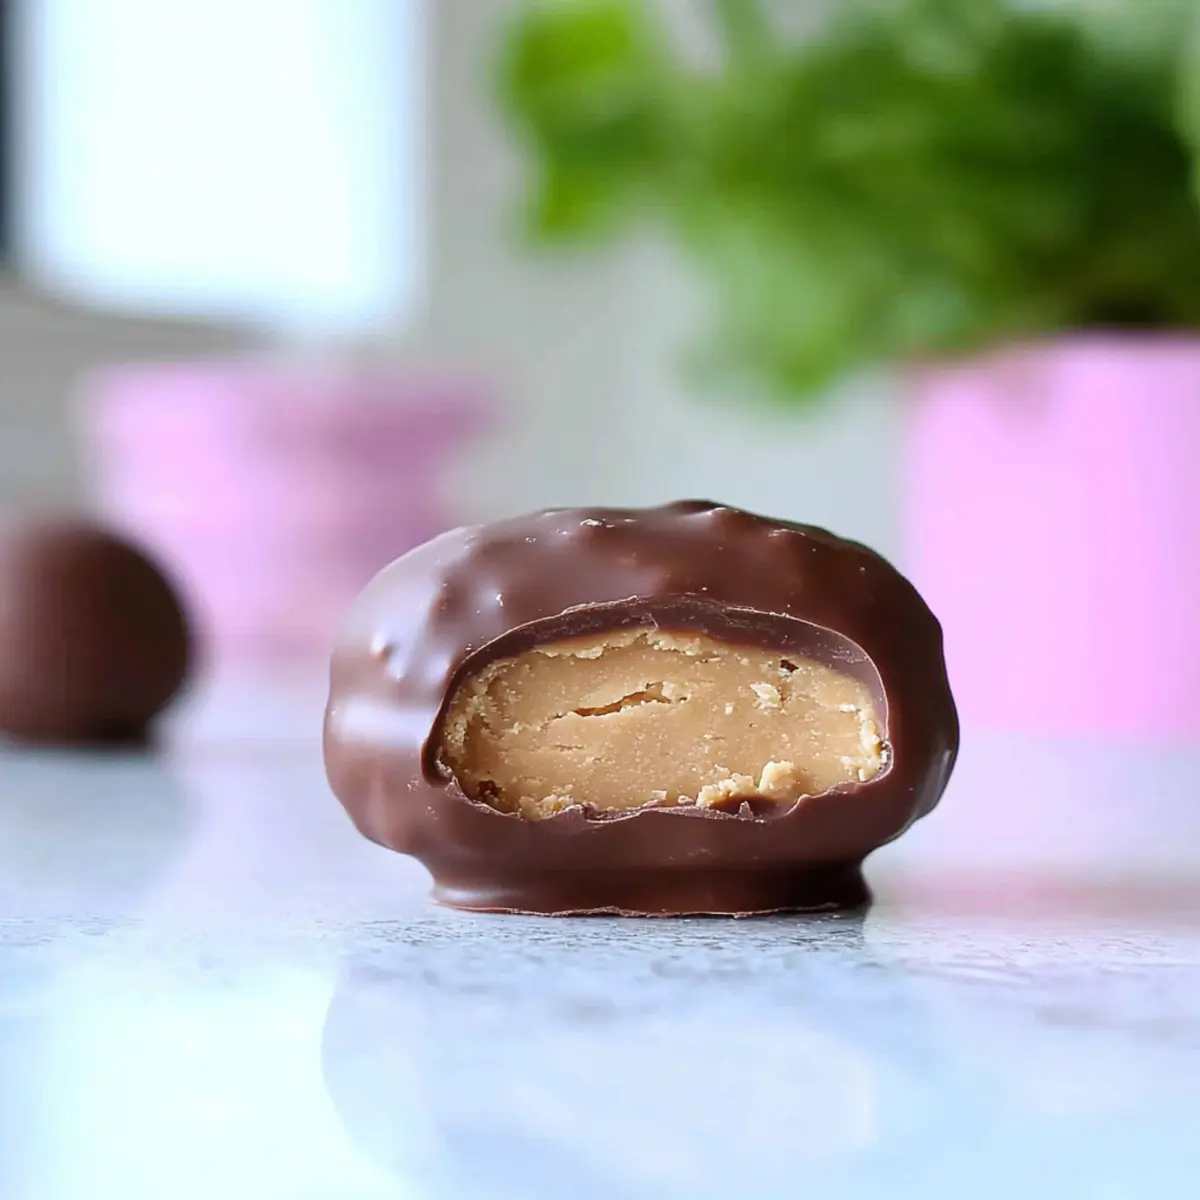
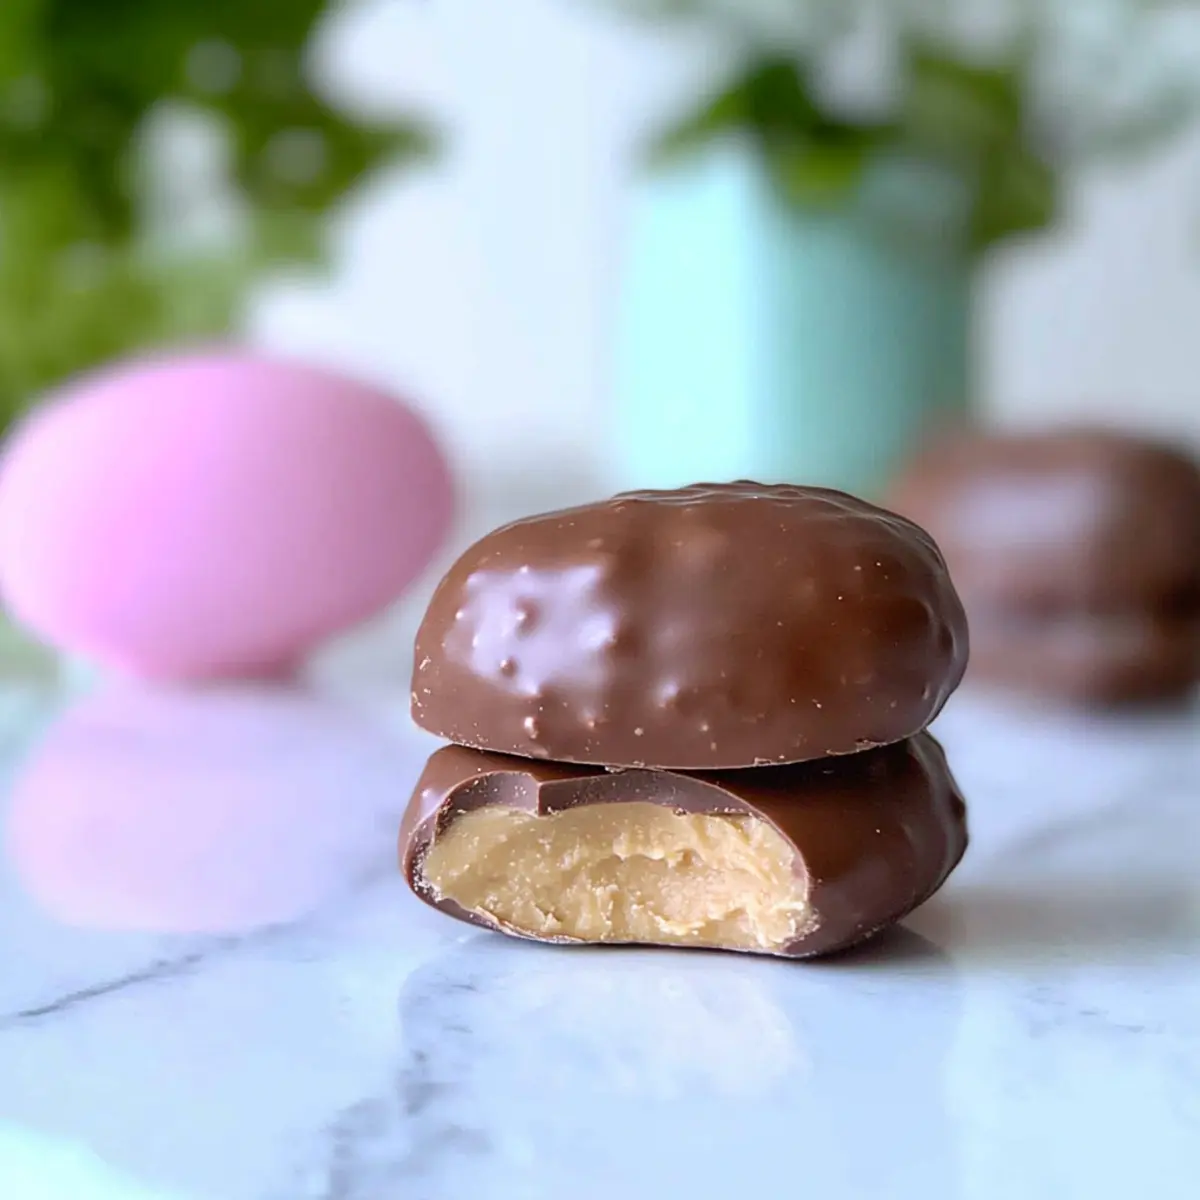
The aroma of melting chocolate wafts through my kitchen, and I can hardly contain my excitement. Easter is just around the corner, which means it’s time to whip up some Homemade Peanut Butter Eggs that would make even the biggest chocolate lover swoon! These creamy delights are not just a nostalgic nod to the beloved Reese’s version; they’re a homemade treat that brings warmth and joy to any Easter celebration. With their rich chocolate coating and irresistible peanut butter filling, they’re a breeze to make and perfect for sharing with family and friends. Plus, as a no-bake dessert, they won’t heat up your kitchen! So, are you ready to indulge in a sweet, creamy adventure that’s sure to make your heart—and taste buds—sing?
Why Make Homemade Peanut Butter Eggs?
Indulgent Flavor: These creamy Homemade Peanut Butter Eggs deliver a rich, satisfying flavor that rivals any store-bought candy. Easy to Prepare: No baking is required, making this a simple treat even novice cooks can master. Fun for Everyone: Gather your friends or family to create these Easter delights together—everyone will love getting in on the action! Customizable Options: Feel free to swap in flavored nut butters or dark chocolate for a twist that fits your taste. Want to serve something special? Try placing them in festive baskets, or check out these Savory Eggs Benedict Casserole ideas for brunch inspiration!
Homemade Peanut Butter Eggs Ingredients
For the Filling
• Creamy Peanut Butter – This is the heart of the filling, so opt for Jif or Skippy for that perfect creamy texture.
• Powdered Sugar – Sweetens the mixture while giving it a delightful, doughy consistency.
• Salted Butter – Melted and cooled to enhance the flavor and bind the filling perfectly.
• Whole Milk – A touch of creaminess that makes the filling extra irresistible.
For the Chocolate Coating
• Milk Chocolate Melting Wafers – Ideal for coating; they melt smoothly for that rich chocolate experience. Ghirardelli wafers are highly recommended!
• Sea Salt – Optional sprinkle on top to enhance the sweetness, bringing out the deliciousness of these Homemade Peanut Butter Eggs.
Step‑by‑Step Instructions for Homemade Peanut Butter Eggs
Step 1: Prepare the Peanut Butter Mixture
In a stand mixer, combine 1 cup of creamy peanut butter and 2 cups of powdered sugar on low speed until well blended. Gradually add in 2 tablespoons of whole milk followed by ½ cup of melted and cooled salted butter. Continue mixing until the filling is smooth and creamy, then transfer it to the refrigerator for 20-30 minutes to firm up.
Step 2: Shape the Peanut Butter Eggs
Line a cookie sheet with parchment paper for easy cleanup. Once the peanut butter mixture has chilled, use your hands to roll it into oval shapes, about 1 inch tall and 2 inches long, then gently flatten each piece. Work quickly to keep the filling cool, and once shaped, place them in the freezer for 45 minutes until they are firm.
Step 3: Melt the Chocolate Coating
While the peanut butter eggs are freezing, melt 12 ounces of milk chocolate melting wafers. You can do this in a microwave-safe bowl in 30-second intervals, stirring after each until completely smooth. Alternatively, use a double boiler on low heat. Ensure the chocolate is smooth and glossy, ready for dipping.
Step 4: Dip the Eggs in Chocolate
Take each frozen peanut butter egg and dip it into the melted chocolate using a fork, ensuring it is fully coated. Allow excess chocolate to drip off before returning the egg to the prepared parchment paper. If desired, sprinkle lightly with sea salt before the chocolate sets, adding a touch of flavor to your Homemade Peanut Butter Eggs.
Step 5: Chill and Serve
Once all the eggs are coated, place the cookie sheet back in the refrigerator to let the chocolate harden for at least 30 minutes. Once the coating is firm, remove them from the fridge and serve your delicious homemade peanut butter eggs chilled. Enjoy this delightful Easter treat with family and friends!

Make Ahead Options
These Homemade Peanut Butter Eggs are perfect for meal prep, allowing you to enjoy homemade treats without the last-minute rush! You can prepare the peanut butter filling and refrigerate it for up to 24 hours, keeping its delightful creaminess intact and preventing any browning. Just shape the eggs before you’re ready to dip them in chocolate. If you prefer, you can also freeze the formed eggs for up to 3 days—this helps maintain their texture while saving you valuable time! When you’re ready to serve, simply melt the chocolate, dip the eggs, and allow them to chill for about 30 minutes until the coating is set. You’ll have delicious, creamy Homemade Peanut Butter Eggs that are just as good, if not better, than store-bought!
Homemade Peanut Butter Eggs Variations
Feel free to get creative with these Homemade Peanut Butter Eggs; they can be easily customized to suit your tastes!
-
Nut Butter Swap: Try almond or cashew butter for a twist on the classic flavor. Each brings a unique taste profile that can surprise your palate!
-
Dark Chocolate Delight: Use dark chocolate melting wafers instead of milk chocolate for a more decadent experience. The rich flavor of dark chocolate contrasts beautifully with the creamy filling.
-
Flavor Infusion: Add a teaspoon of vanilla extract or a sprinkle of cinnamon to the peanut butter mixture for added warmth and depth. These subtle flavors elevate the traditional recipe to new heights.
-
Vegan Version: Substitute vegan butter and a non-dairy milk alternative to create a plant-based treat. Just ensure your chocolate wafers are dairy-free too!
-
Spicy Kick: Introduce a pinch of cayenne pepper or chili powder to the peanut butter filling for a surprising heat that plays delightfully with the sweetness.
-
Decorative Designs: Use melted white chocolate for drizzles over the top, or sprinkle colorful Easter-themed sprinkles for a playful touch. This makes your treats as visually appealing as they are delicious!
-
Peanut Butter Cup Variation: After dipping the eggs in chocolate, let them set before dipping them again for a thicker coating. This creates a more authentic candy bar feel that’s utterly irresistible.
For more ideas on how to indulge your sweet tooth, consider these Chocolate Peanut Butter Muffins or pair these sweets with Maple Pecan Cookies with Brown Butter for a delightful dessert spread!
Expert Tips for Homemade Peanut Butter Eggs
• Use Quality Peanut Butter: Ensure you choose a creamy brand like Jif or Skippy; natural varieties can make the filling oily and difficult to shape.
• Chill, Chill, Chill: Don’t rush the chilling process! Allow the mixture to firm up adequately in the fridge for easier shaping.
• Quick Shaping: Work swiftly when rolling the eggs; this prevents the filling from melting during handling.
• Perfect Chocolate Dip: Melt chocolate wafers until smooth, and avoid overcooking them. This ensures a glossy and professional coating on your Homemade Peanut Butter Eggs.
• Add a Special Touch: Experiment with colorful sprinkles or a drizzle of colored chocolate to decorate for Easter; it adds a festive flair!
Storage Tips for Homemade Peanut Butter Eggs
Refrigerator: Store your Homemade Peanut Butter Eggs in an airtight container in the fridge. They will stay fresh for up to 3 to 4 days, retaining their creamy texture.
Freezer: If you want to make these treats ahead of time, freeze them for up to 3 months. Ensure they are well-wrapped or stored in a freezer-safe container to prevent freezer burn.
Serving After Storage: Allow frozen eggs to thaw in the fridge for several hours before serving. This helps regain their creamy consistency without sacrificing flavor.
No Reheating Needed: These delicious eggs are best enjoyed chilled straight from the refrigerator or at room temperature; no reheating required!
What to Serve with Homemade Peanut Butter Eggs?
These delightful treats are a festive addition to your dessert table, inviting smiles and sweet moments.
-
Creamy Mashed Potatoes: The buttery, fluffy texture provides a comforting contrast, making your gathering feel extra special and homey.
-
Fresh Carrot Sticks: Crisp and refreshing, they add a pop of color while balancing the sweetness of the peanut butter eggs perfectly.
-
Mini Cheesecakes: These rich, creamy bites create an indulgent pairing that leaves everyone wanting more at your Easter celebration.
-
Berry Fruit Salad: A mix of juicy strawberries, blueberries, and raspberries adds a light and fresh element, enhancing the entire dessert experience.
-
Chocolate-Covered Strawberries: Staying in theme with chocolate, these delectable bites bring a luxurious touch that complements those peanut butter eggs beautifully.
-
Chilled Sweet Tea: The sweetness and refreshing chill of homemade sweet tea offers a delightful beverage option to wash down the rich treats.
-
Vanilla Ice Cream: A scoop of creamy vanilla ice cream provides a cool contrast that pairs deliciously with the chocolate coating of the eggs.
-
Coffee or Espresso: The rich, bold flavors of coffee round off the sweetness and elevate the tasting experience, perfect for adults enjoying these treats.
Homemade Peanut Butter Eggs Recipe FAQs
What type of peanut butter should I use?
Absolutely! For the best texture in your Homemade Peanut Butter Eggs, I recommend using creamy brands like Jif or Skippy. These varieties provide the perfect consistency for shaping the filling. Avoid natural peanut butters, as they can be too oily and may prevent the mixture from firming up correctly.
How should I store my Homemade Peanut Butter Eggs?
Store your Homemade Peanut Butter Eggs in an airtight container in the refrigerator for up to 3 to 4 days. This keeps them fresh and allows that creamy filling to stay delightful. Just make sure to keep them sealed well to prevent any drying out.
Can I freeze Homemade Peanut Butter Eggs? How do I do it?
Yes, you can freeze these tasty treats for up to 3 months! To do this, first allow the eggs to cool completely once dipped in chocolate. Then, place them in a single layer on a baking sheet and freeze until solid. After they are firm, transfer them to a freezer-safe container or wrap individually in plastic wrap to prevent freezer burn. When ready to enjoy, thaw them in the fridge for several hours, and they’ll regain that creamy texture!
What should I do if the filling is too sticky and hard to shape?
If your filling becomes too sticky while shaping, it’s best to return it to the refrigerator for an additional 10-15 minutes. This will firm it up and make it much easier to work with. If it’s still too sticky after chilling, try lightly greasing your hands with a small amount of oil to help roll the eggs without making a mess.
Are Homemade Peanut Butter Eggs suitable for everyone?
These delectable treats are delicious but not ideal for strict diets due to their sugar content. If you’re concerned about allergies, make sure to inform anyone with nut allergies about the use of peanut butter. Consider using sugar alternatives if you’re looking to reduce calories while maintaining sweetness, but this may alter the texture slightly.
Can I use alternatives for the chocolate coating?
Very! If you’re looking for a unique twist, feel free to swap the milk chocolate melting wafers for dark chocolate or even white chocolate. Just remember to adjust your melting method carefully since different chocolates have different melting points. Adding a drizzle of colored chocolate or using sprinkles can give a fun decorative touch, especially perfect for Easter celebrations!
Creamy Homemade Peanut Butter Eggs That Beat Store-Bought
Ingredients
Equipment
Method
- In a stand mixer, combine 1 cup of creamy peanut butter and 2 cups of powdered sugar on low speed until well blended.
- Gradually add in 2 tablespoons of whole milk followed by ½ cup of melted and cooled salted butter, mixing until smooth.
- Transfer the mixture to the refrigerator for 20-30 minutes to firm up.
- Line a cookie sheet with parchment paper. Shape the chilled peanut butter mixture into oval shapes and flatten them.
- Place the shaped eggs in the freezer for 45 minutes to firm up.
- Melt the chocolate wafers using a microwave or double boiler until smooth.
- Dip each frozen peanut butter egg into the melted chocolate, allowing excess chocolate to drip off.
- If desired, sprinkle lightly with sea salt before the chocolate sets.
- Place the coated eggs back in the refrigerator for at least 30 minutes to harden.
- Once the coating is firm, serve chilled and enjoy!
Leave a Reply