
As I rolled the final Chocolate Orange Bliss Ball, the sweet aroma of zesty citrus began to fill my kitchen, instantly lifting my mood. These delightful little bites are not only vegan and gluten-free but also quick to whip up in just ten minutes! The combination of rich chocolate and bright orange creates an irresistible treat that feels indulgent while remaining healthy. Perfect for a quick snack, a thoughtful homemade gift, or a lunchbox surprise, these bliss balls are a hit with everyone. Plus, they’re no-bake, so you can skip the oven and keep your kitchen cool. Curious about how to blend these flavors into little bites of joy? Let’s dive into the recipe!
Why Are Chocolate Orange Bliss Balls Amazing?
Deliciously Unique Flavor: The citrusy zing of orange perfectly complements the rich chocolate, creating a flavor explosion that’s a treat for your taste buds.
Quick and Easy: With just 10 minutes of prep time, you can have these delightful bites ready to enjoy or pack for later.
Healthy Indulgence: Packed with natural sugars and healthy fats, these bliss balls provide a guilt-free snacking option.
No-Bake Convenience: Skip the hassle of baking and keep your kitchen cool while still producing a delicious treat.
Crowd-Pleaser: Whether for a party or family gathering, these bliss balls are sure to impress both kids and adults alike.
Try these alongside my Oatmeal Chocolate Chip Bars for a delightful dessert duo that everyone will love!
Chocolate Orange Bliss Balls Ingredients
For the Bliss Balls
• Medjool Dates – Provide natural sweetness and binding; you can substitute with any sticky soft dates.
• Orange Rind – Adds vibrant citrus flavor to enhance the chocolate; fresh zest or flavored extracts work well.
• Almonds – Offer crunchy texture and healthy fats; cashews or macadamias can be used for a different crunch.
• Maple Syrup – Acts as a sweetener and binds the ingredients; honey is perfect if you’re opting for non-vegan.
• Cardamom – Introduces warm spice notes that complement the orange; you can switch to cinnamon for a cozy vibe.
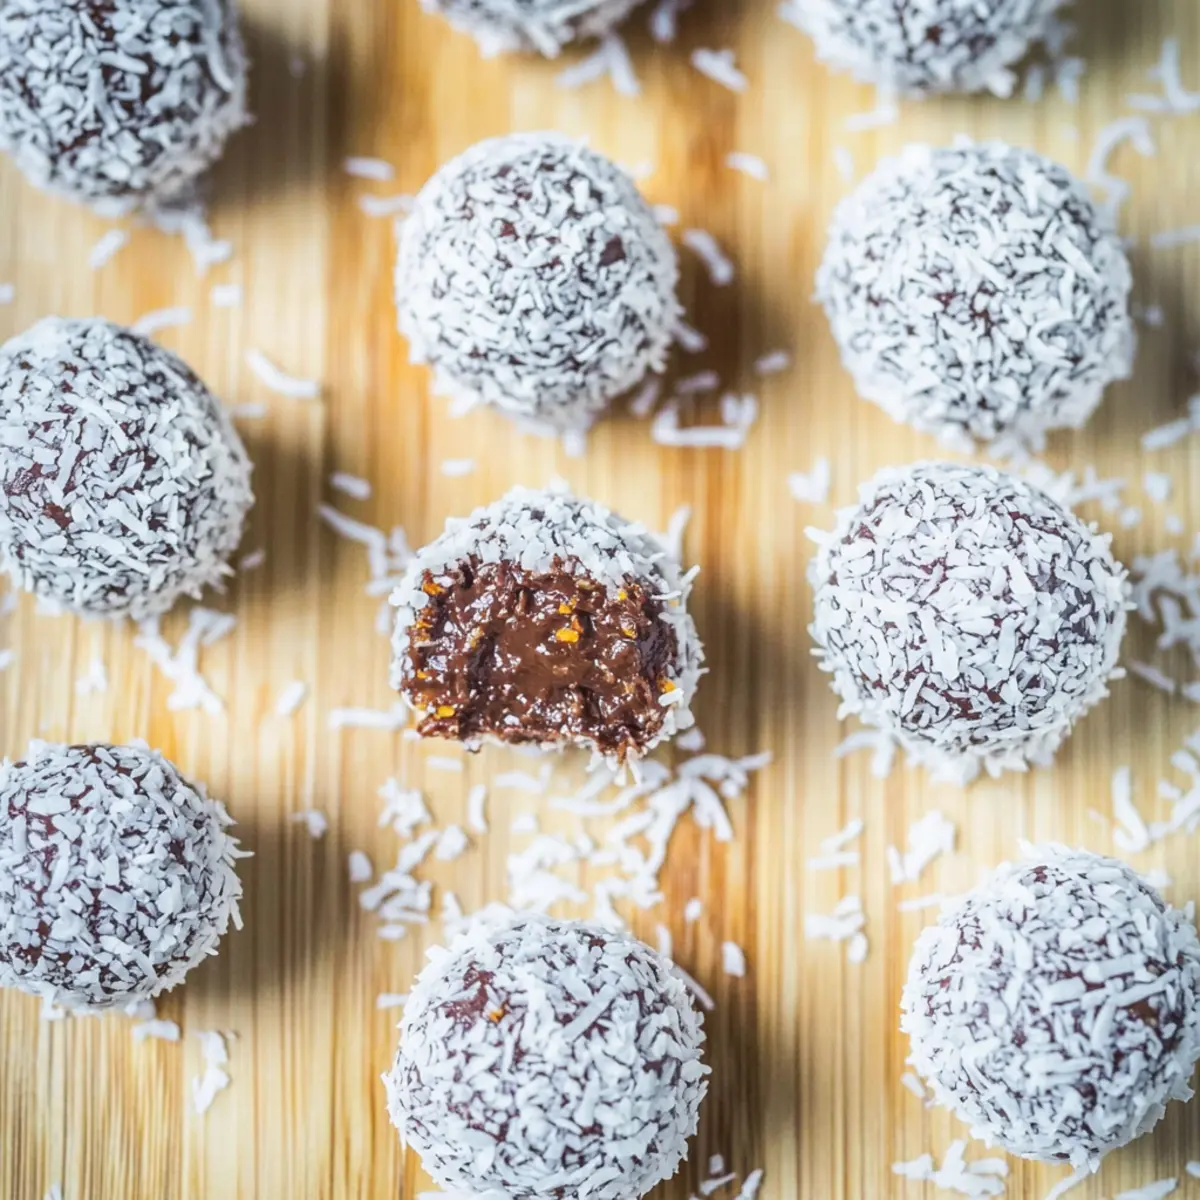
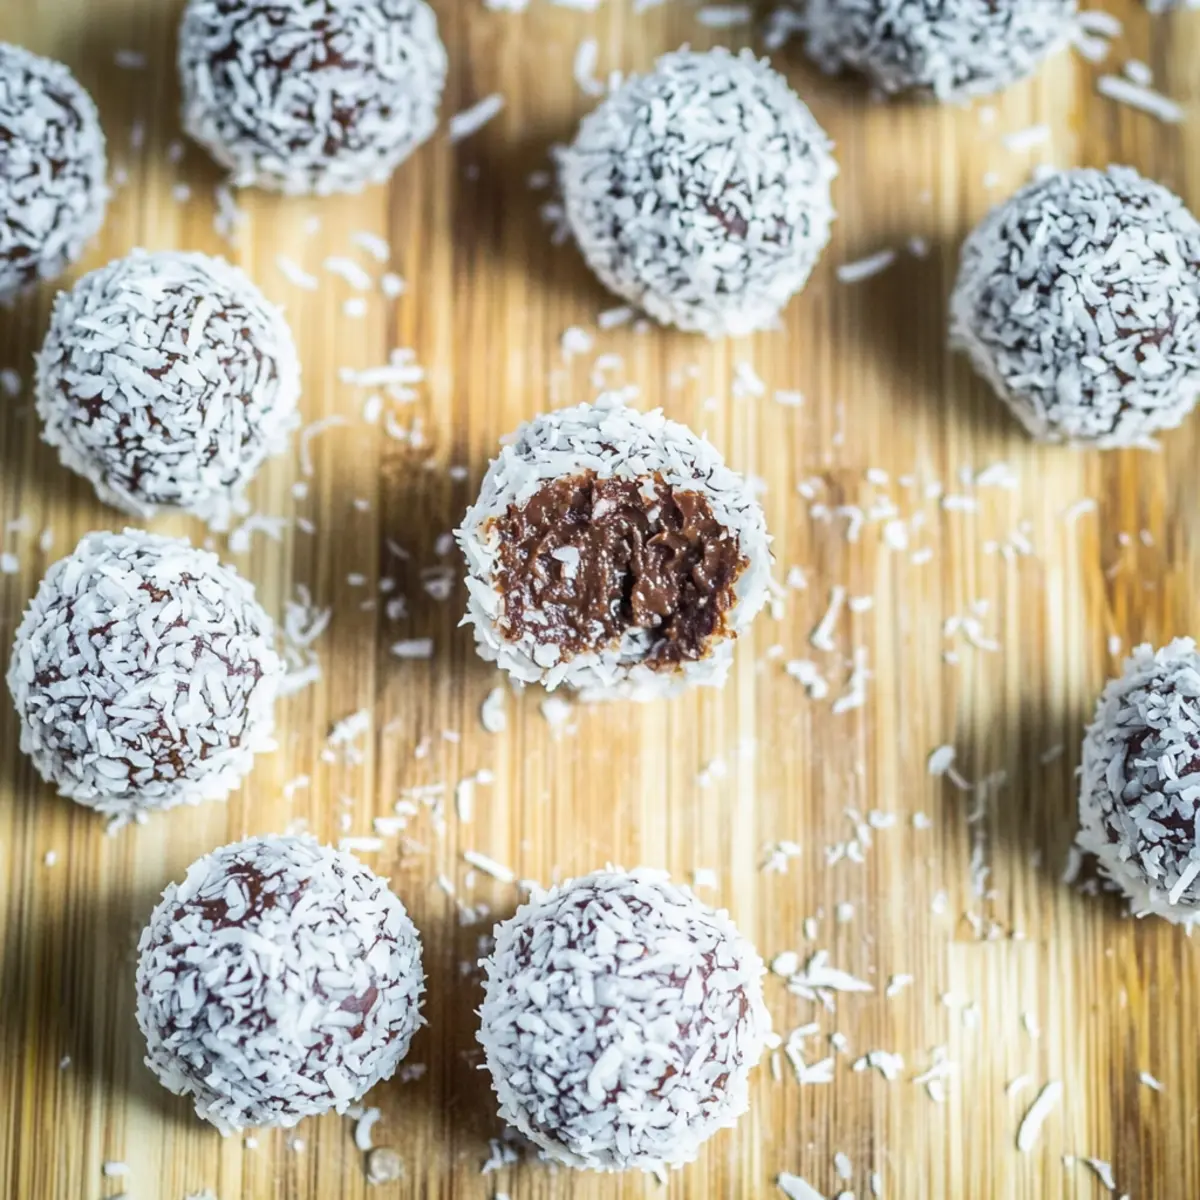
• Cocoa – Provides that rich chocolate flavor; raw cacao powder can intensify the chocolate experience.
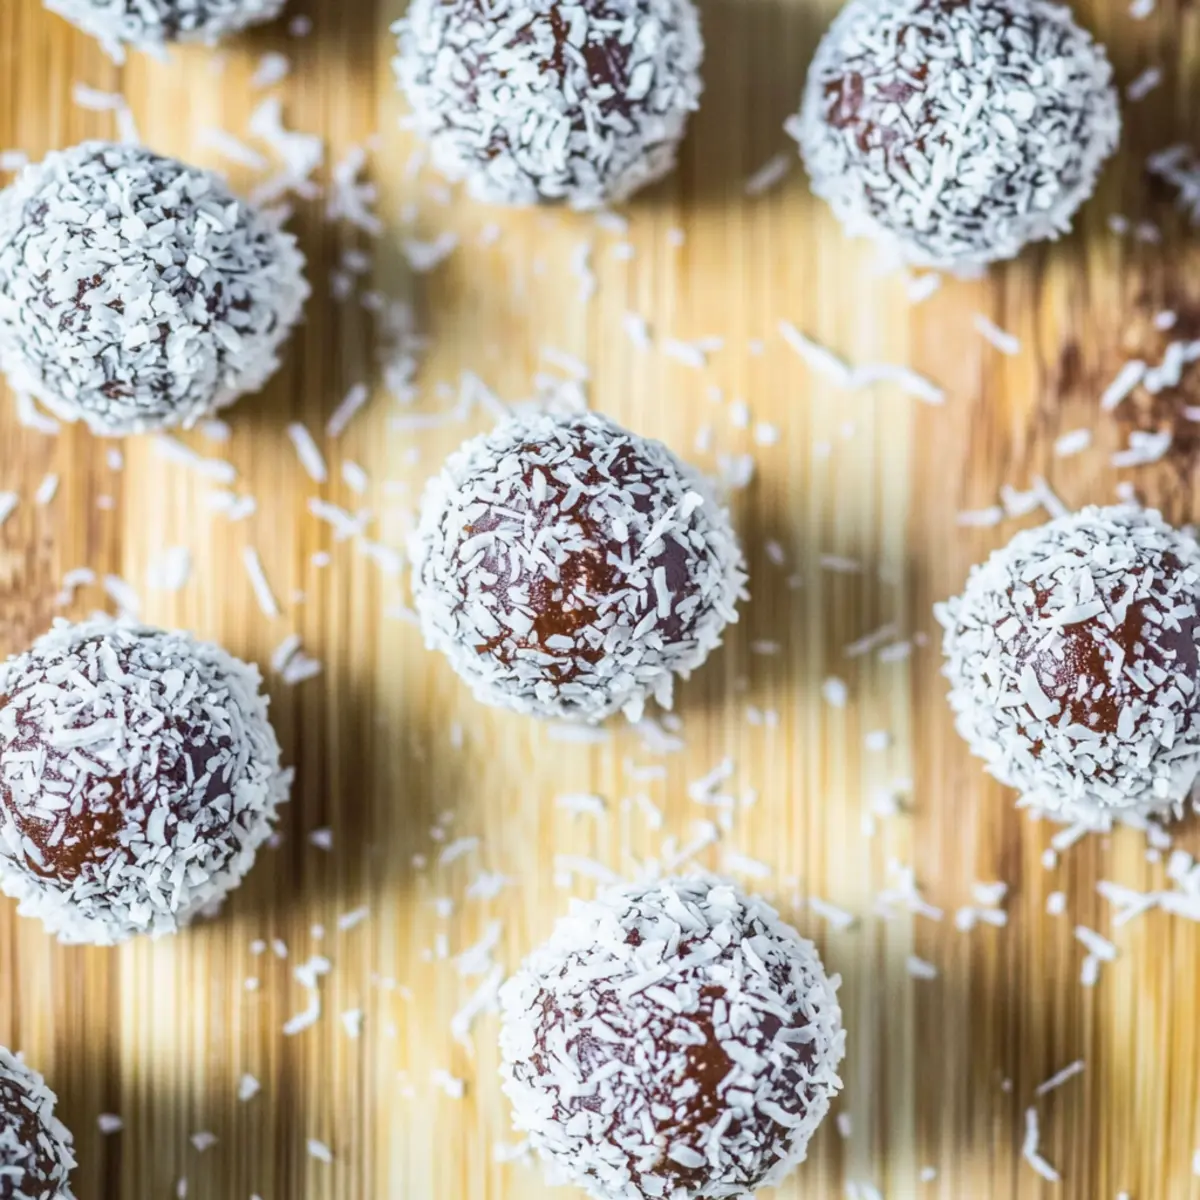
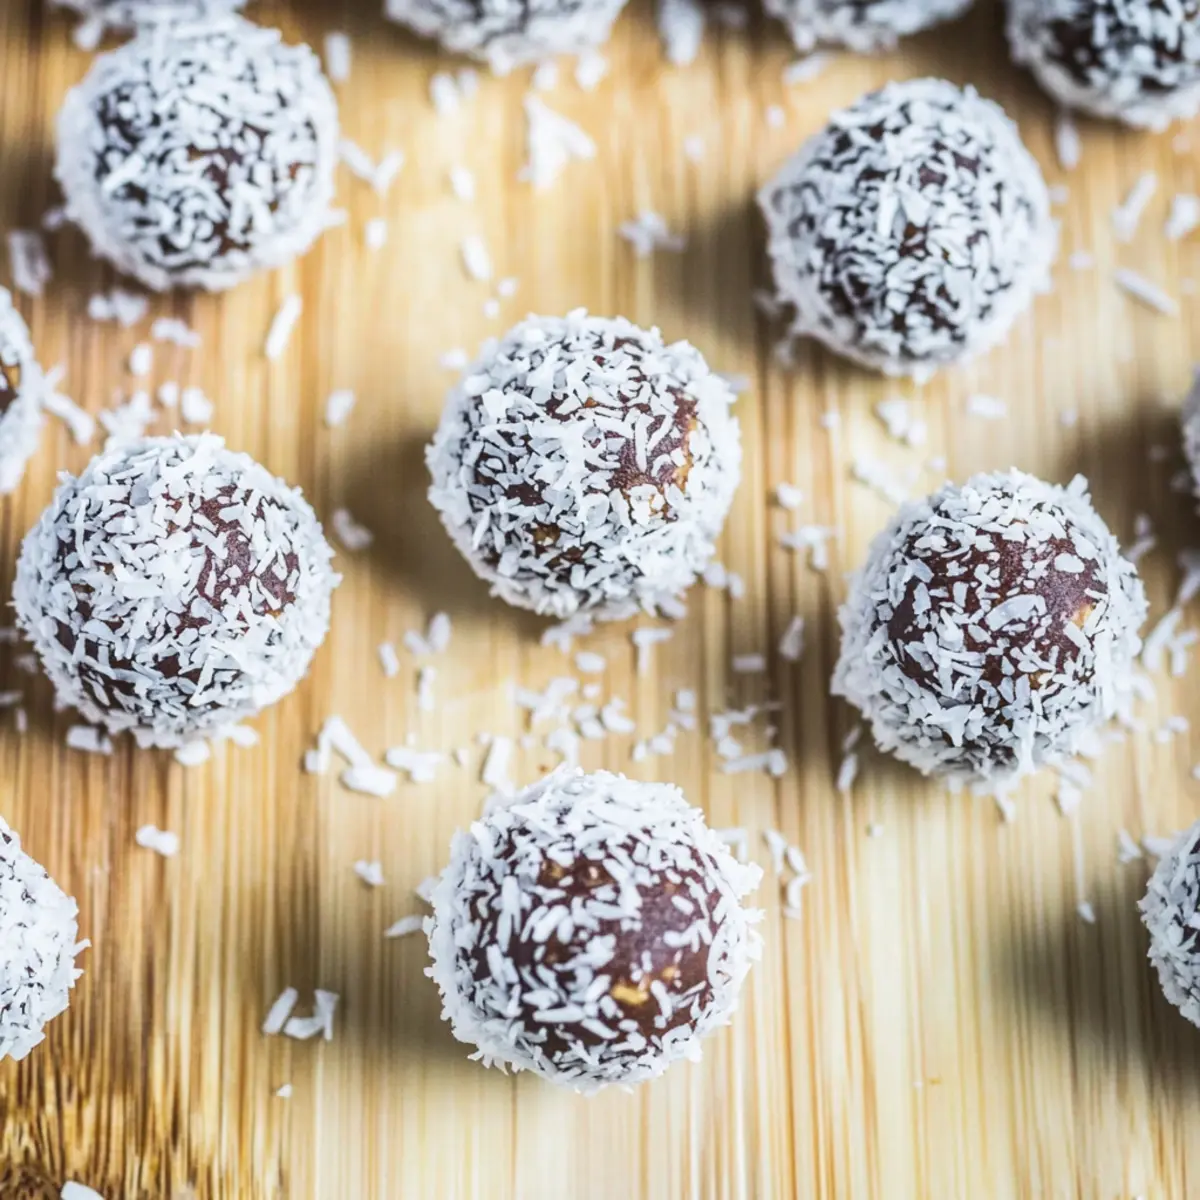
• Desiccated Coconut – Coats the bliss balls for added texture; finely chopped nuts or cocoa powder can also be used for rolling.
These Chocolate Orange Bliss Balls are not only a quick treat but also a fabulous way to enjoy health-conscious snacking!
Step‑by‑Step Instructions for Chocolate Orange Bliss Balls
Step 1: Blend Ingredients
In a high-speed blender or food processor, combine the Medjool dates, orange rind, almonds, maple syrup, cardamom, and cocoa. Blend until the mixture is sticky and well mixed, about 1-2 minutes. It should stick together when pressed. Make sure to scrape down the sides as needed for thorough blending.
Step 2: Form Balls
Once your Chocolate Orange Bliss Balls mixture is ready, use your hands to divide it into evenly sized portions, roughly the size of a tablespoon. Roll each portion in your palms to create a smooth ball. The warmth from your hands will help shape each ball perfectly, making them inviting and delightful.
Step 3: Coat and Chill
Take the desiccated coconut and pour it into a shallow dish. Roll each bliss ball in the coconut until completely coated. Place the coated balls on a lined baking sheet. Once all are ready, refrigerate them for at least 30 minutes to set, allowing the flavors to meld beautifully and the texture to firm up.
Expert Tips for Chocolate Orange Bliss Balls
-
Fresh Dates Reminder: Use soft Medjool dates for the best texture; dry dates might need soaking in warm water for 10 minutes before blending.
-
Moisture Control: If your mixture feels too dry, add a splash of water or extra maple syrup to ensure the bliss balls hold together nicely.
-
Handy Rolling Trick: Lightly wet your hands while rolling the balls to prevent the mixture from sticking to your palms, ensuring a smooth finish.
-
Taste Adjustment: Feel free to adjust the sweetness level by altering the amount of maple syrup based on your personal preference—each bite should feel indulgent!
-
Storage Tips: Keep your Chocolate Orange Bliss Balls in an airtight container in the fridge for a week—perfect for having a healthy snack ready at a moment’s notice.
Make Ahead Options
These Chocolate Orange Bliss Balls are a fantastic choice for meal prep, allowing you to indulge in a delicious treat anytime without the last-minute rush! You can prepare the bliss ball mixture up to 24 hours ahead of time; simply blend all the ingredients and shape them into balls, but skip the rolling in coconut. Store the formed balls in an airtight container in the fridge. When you’re ready to serve, roll them in the desiccated coconut and chill for 30 minutes to meld the flavors beautifully. This prep-ahead strategy not only saves you kitchen time but also ensures that every bite is just as delightful as when freshly made!
What to Serve with Chocolate Orange Bliss Balls?
Imagine a setting where sweet citrus mingles with rich chocolate, creating the perfect background for a cozy gathering or an afternoon treat.
- Creamy Almond Butter: Drizzling a bit of almond butter adds a velvety richness, enhancing the nutty flavor profile of the bliss balls.
- Refreshing Fruit Salad: A vibrant fruit medley complements the bliss balls’ sweetness and adds a splash of freshness to each bite.
- Coconut Yogurt Parfait: Layering bliss balls in coconut yogurt creates an inviting breakfast option, packed with flavors and textures for your morning routine.
- Chia Seed Pudding: The contrasting textures of creamy pudding and chewy bliss balls can create a beautiful and delicious dessert combination.
- Trendy Matcha Latte: Pairing these treats with a matcha latte brings a unique twist to your snack time, where earthy flavor meets decadence.
- Crispy Rice Cakes: Serve bliss balls on top of rice cakes for a crunchy, satisfying snack that adds a delightful texture to your day.
- Nutty Granola: Sprinkle some granola on top for an added crunch and satisfyingly nutritious bites that complement the blissful flavors perfectly.
- Chocolaty Smoothie: Enjoy these bliss balls with a thick, chocolate smoothie for a delicious dessert or post-workout treat that feels indulgent.
- Herbal Tea: A calming herbal tea not only balances the sweetness but also adds warmth to your snacking experience, making every moment cozy.
Chocolate Orange Bliss Balls Variations
Get ready to explore the exciting ways you can personalize these delicious Chocolate Orange Bliss Balls to suit your taste!
-
Nut-Free: Swap almonds for sunflower seeds or pumpkin seeds, making these bliss balls safe for school lunches.
-
Extra Texture: Add in some chopped dried fruits like cranberries or apricots for a chewy surprise that enhances the sweetness. The added fruit will bring complementary flavors and lovely textures together!
-
Chocolate Delight: For a richer flavor, try dark chocolate cocoa powder instead of regular cocoa powder. This gives a new depth that chocolate lovers will appreciate.
-
Spice It Up: Throw in a dash of cinnamon instead of cardamom for warm, comforting vibes. It’s a delightful twist that will enliven the taste experience!
-
Flavor Variations: Experiment with different extracts, such as vanilla or almond, to add a unique twist to your bliss balls. Each extract will provide its own delightful nuance to the treats.
-
Coconut Replace: Instead of desiccated coconut, roll the bliss balls in finely chopped nuts or even matcha powder for a gourmet look and flavor. This offers a creative spin on presentation as well!
-
Protein Boost: Mix in a scoop of your favorite protein powder for an extra energizing kick. Perfect for post-workout snacks, these bliss balls can help satisfy your hunger while adding a healthful element.
For an extra delicious duo, consider trying my Chocolate Peanut Butter Muffins or enjoy these treats beside my Creamy Spaghetti and Meatballs for a well-rounded meal!
How to Store and Freeze Chocolate Orange Bliss Balls
Fridge: Store your Chocolate Orange Bliss Balls in an airtight container for up to 1 week. This keeps them fresh and ready for snacking whenever you crave something delightful.
Freezer: For longer storage, freeze the bliss balls in a single layer on a baking sheet until firm, then transfer them to a freezer-safe bag. They can last up to 3 months.
Thawing: To enjoy a bliss ball from the freezer, simply remove one and let it sit at room temperature for about 10-15 minutes before serving. This allows the flavors to renew and the texture to soften.
Batch Preparation: Consider making a larger batch to always have these quick snacks on hand. Store them in both the fridge and freezer to suit your immediate needs!
Chocolate Orange Bliss Balls Recipe FAQs
What kind of dates should I use for the Chocolate Orange Bliss Balls?
Absolutely! I recommend using Medjool dates because they are naturally sweet and sticky, making them perfect for binding the ingredients. If Medjool dates are unavailable, any soft, sticky dates will work well. Just make sure they’re fresh to avoid a dry texture!
How long can I store Chocolate Orange Bliss Balls?
You can store your Chocolate Orange Bliss Balls in an airtight container in the fridge for up to 1 week. This way, they remain fresh and delicious for snacking throughout the week. If you want to keep them longer, consider freezing them.
Can I freeze Chocolate Orange Bliss Balls?
Yes, these bliss balls freeze wonderfully! To freeze, first lay them out in a single layer on a baking sheet and freeze until firm. Then, transfer them to a freezer-safe bag. They’ll last up to 3 months. When you’re ready to enjoy one, just let it thaw at room temperature for 10-15 minutes.
What if my bliss ball mixture is too dry?
If your mixture seems too dry and isn’t holding together, don’t worry! You can simply add a splash of water or an extra drizzle of maple syrup. Blend again until the mixture reaches a sticky consistency that holds together when pressed. Adjust to your taste for the perfect indulgent treat!
Are there any allergens I should be aware of when making these bliss balls?
Very! While these Chocolate Orange Bliss Balls are naturally gluten-free, dairy-free, and vegan, make sure to check for nut allergies if you have guests with dietary restrictions. If someone needs a nut-free option, substitute the almonds with sunflower seeds, which also add a great crunch!
Chocolate Orange Bliss Balls Perfect for Quick Vegan Treats
Ingredients
Equipment
Method
- In a high-speed blender or food processor, combine the Medjool dates, orange rind, almonds, maple syrup, cardamom, and cocoa. Blend until the mixture is sticky and well mixed, about 1-2 minutes.
- Once your Chocolate Orange Bliss Balls mixture is ready, use your hands to divide it into evenly sized portions, roughly the size of a tablespoon. Roll each portion in your palms to create a smooth ball.
- Take the desiccated coconut and pour it into a shallow dish. Roll each bliss ball in the coconut until completely coated. Place the coated balls on a lined baking sheet and refrigerate for at least 30 minutes to set.
Leave a Reply