
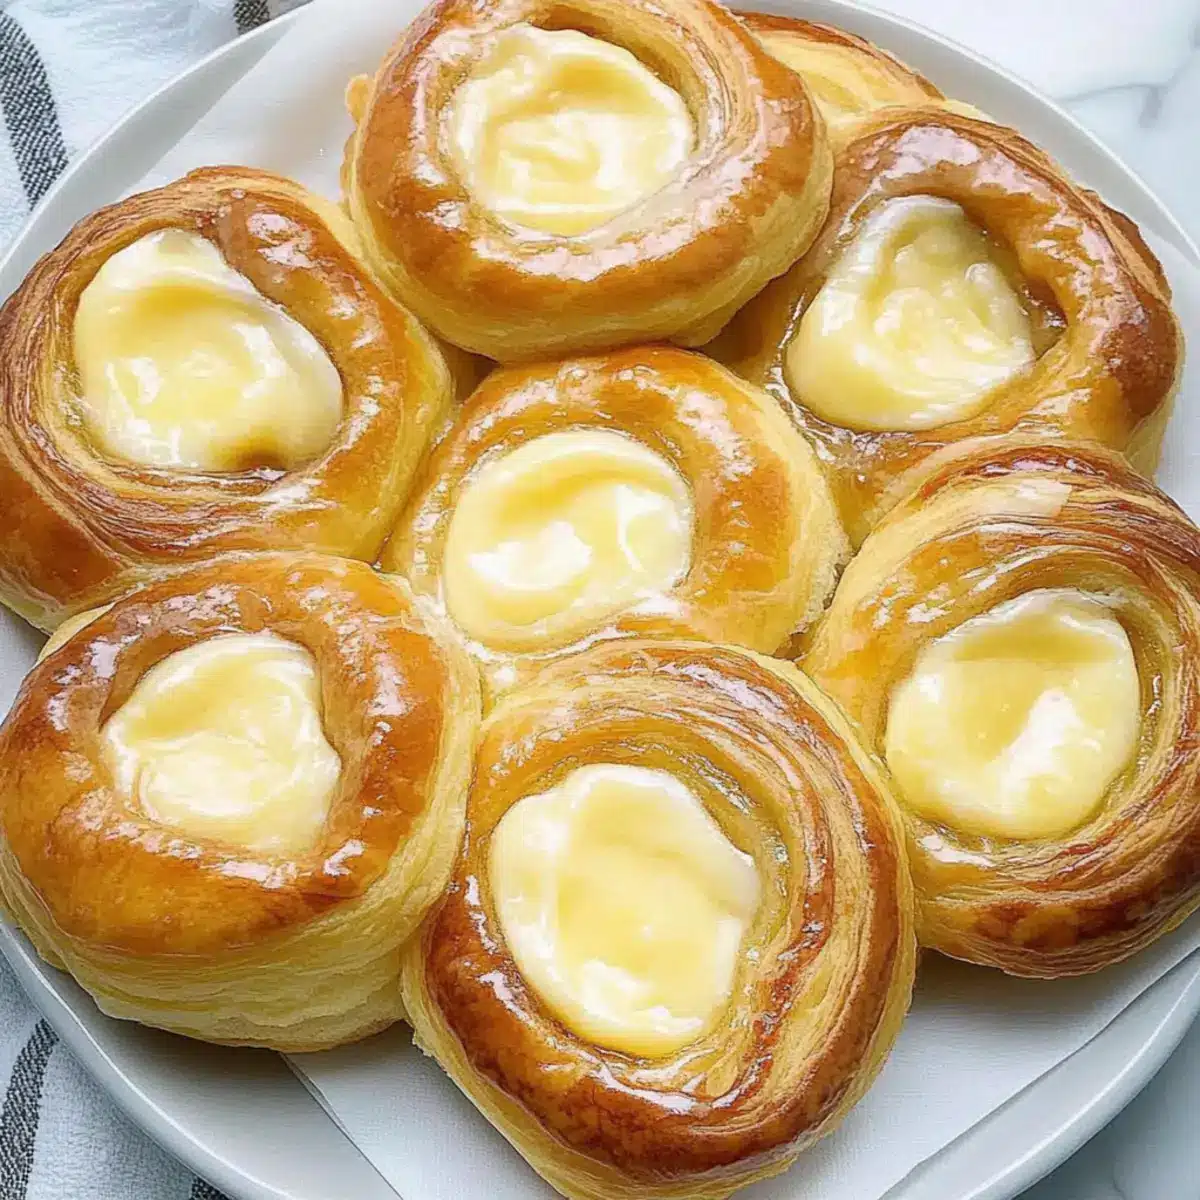
Rushing to grab a coffee and a croissant on a busy morning? Allow me to introduce you to a far more satisfying option: Heavenly Cheese Danishes. These delightful pastries are not just your average breakfast treat. With a buttery, enriched dough that’s beautifully flaky, they are stuffed with a creamy, tangy cheese filling that transforms every bite into a moment of indulgence. What’s more, these classic Cheese Danishes are ideal for anyone craving a homemade solution to fast food—perfect for brunch gatherings or cozy mornings at home. They’re also freezer-friendly, letting you enjoy gourmet pastry magic whenever the craving strikes. Curious about how to achieve this bakery favorite right in your kitchen? Let’s dive in!
Why are Cheese Danishes so irresistible?
Heavenly Flavor: The rich combination of cream cheese and subtle sweetness creates a flavor explosion that elevates your morning routine.
Easy to Make: With straightforward steps, you can create bakery-quality treats without a lot of hassle.
Versatile Options: Feel free to mix in fruit preserves or different spices for an exciting twist; the possibilities are endless!
Perfect for Sharing: These fluffy pastries are sure to impress friends and family at brunch, turning any gathering into a special occasion.
Make Ahead & Freeze: Prepare a batch in advance and stash them away for those busy mornings when only a warm pastry will do.
Elevate your breakfast game today with these tasty Cheese Danishes; they’re a delightful alternative to fast food!
Cheese Danish Ingredients
For the Dough
• Yeast – Activates the dough for rising; ensure it’s proofed correctly for fluffy Cheese Danishes.
• Warm Water – Necessary for activating the yeast (ideal temperature is 110°F to 115°F).
• All-purpose Flour – Provides essential structure; no substitutions recommended for best results.
• Sugar – Adds sweetness and helps activate the yeast; can substitute with brown sugar for a richer flavor.
• Salt – Enhances flavor and strengthens dough; do not skip for optimal taste.
• Cold Butter – Must be cubed and cold to create flaky layers in the pastry.
• Milk – Adjusts dough texture and adds moisture; can use dairy or non-dairy alternatives.
• Egg Yolks – Enriches the dough and contributes to its beautiful color; room temperature is best for mixing.
• Ground Cinnamon – Adds flavor; optional but highly recommended for a warm spice note.
For the Filling
• Cream Cheese – The star of the show! Ensure it’s softened for easy mixing and a smooth filling.
• Extra Sugar – Sweetens the cream cheese filling; adjust based on your sweetness preference.
• Egg (for wash) – Gives the Danish a gorgeous golden finish; whisk the egg white with water for brushing.
For the Glaze
• Maple Syrup – Drizzled on top after baking for added sweetness and glossy appeal.
Step‑by‑Step Instructions for Heavenly Cheese Danishes
Step 1: Activate Yeast
Start by dissolving 2 teaspoons of active dry yeast in 1/4 cup of warm water (ideal temp: 110°F to 115°F). Allow this mixture to sit for about 5 to 10 minutes, until it’s foamy and bubbly. This step is crucial for achieving perfectly risen Cheese Danishes, so make sure your yeast is fresh and active.
Step 2: Prepare Dough
In a mixing bowl, combine 2 cups of all-purpose flour, 1/4 cup of sugar, and 1/2 teaspoon of salt. Cut in 1/4 cup of cold, cubed butter using a pastry cutter until the mixture resembles coarse crumbs. Then, add 1/2 cup of milk and the yeast mixture, along with 2 egg yolks. Mix until a sticky dough forms, ensuring everything is well incorporated.
Step 3: Chill Dough
Cover the dough with plastic wrap and refrigerate for 8 to 24 hours. This chilling period allows the flavors to develop and makes the dough easier to roll. When you’re ready to proceed, the dough should be firm yet pliable, allowing for easy shaping of the Heavenly Cheese Danishes.
Step 4: Shape Danishes
After chilling, punch down the dough and divide it into four equal portions. Roll each portion into a rectangle about 1/4 inch thick. Lightly sprinkle with ground cinnamon if desired, then cut into strips. Twist and coil the strips into a spiral shape, tucking the ends underneath each dough piece to form a neat shape.
Step 5: Fill
In a bowl, beat together 8 ounces of softened cream cheese, 1/4 cup of sugar, and 1 egg yolk until the mixture is smooth and creamy. Carefully fill the center of each coiled Danish with a generous dollop of the cream cheese filling, making sure it doesn’t overflow.
Step 6: Proof
Cover the shaped Danishes with a clean kitchen towel and let them rise in a warm place for about 45 minutes, or until they have doubled in size. This step is essential for achieving a light and fluffy texture in your Heavenly Cheese Danishes.
Step 7: Preheat Oven
While the Danishes are proofing, preheat your oven to 350°F (175°C). This ensures that your Cheese Danishes will start baking immediately when they are ready, resulting in a beautifully golden-brown finish.
Step 8: Bake
Once the Danishes have risen, brush the tops with an egg wash made from whisking one egg white with a tablespoon of water. Place them on a lined baking sheet and bake in the oven for 15 to 20 minutes, or until they are puffed and golden brown. Keep an eye on them to avoid over-baking.
Step 9: Glaze
As soon as you remove the baked Danishes from the oven, brush them with warm maple syrup for an extra touch of sweetness and shine. Allow your Heavenly Cheese Danishes to cool briefly on a wire rack before serving them warm, perfecting that indulgent, homemade moment.

What to Serve with Heavenly Cheese Danish
Indulging in these delightful pastries opens up a world of delicious pairings that will elevate your breakfast spread.
- Fresh Fruit: Serve with a vibrant mix of berries or sliced citrus to add a refreshing burst that complements the sweetness of the Danishes.
- Savory Frittata: A fluffy egg frittata adds a savory note, balancing the sweetness of the Cheese Danish and making for a hearty brunch.
- Greek Yogurt: Creamy yogurt drizzled with honey enriches the palate while offering a tangy contrast to the rich cheese filling.
- Espresso or Coffee: The bold flavors of a rich espresso or cup of coffee provide a perfect pairing, enhancing the breakfast experience.
- Herbal Tea: A light and fragrant herbal tea can cleanse the palate and refresh your senses after enjoying a sweet Danish.
- Maple Bacon: Crispy, salty bacon brings an indulgent savory touch that plays wonderfully against the sweetness of the pastries.
- Chocolate Croissants: For the true dessert lovers, serving a selection of pastries can transform your meal into an exquisite pastry affair.
- Almond Milk Smoothie: A smooth, nutty almond milk smoothie can add a nutritious touch and a delightful, creamy texture alongside your Danishes.
- Cinnamon Roll Casserole: For those weekend brunches, a layer of cinnamon roll casserole can turn your breakfast into a family feast.
- Warm Milk: A cozy mug of warm milk can evoke feelings of comfort, making your morning feel like a warm hug.
Make Ahead Options
These Heavenly Cheese Danishes are perfect for meal prep enthusiasts! You can prepare the dough up to 24 hours in advance by following the initial steps and then covering it tightly in the refrigerator to develop flavor and texture. Additionally, you can fill and shape the Danishes, then refrigerate them for up to 3 days before baking; simply cover them well to prevent drying out. When you’re ready to enjoy these delightful pastries, allow them to come to room temperature, proof them for about 45 minutes, and bake. This way, you’ll have warm, restaurant-quality Cheese Danishes ready to impress with minimal effort on busy mornings!
Cheese Danishes Variations & Substitutions
Feel free to add your personal touch to these delightful Cheese Danishes; let’s make them uniquely yours!
-
Fruit-Filled: Add a spoonful of fruit preserves or fresh berries to the cream cheese filling for a burst of flavor.
-
Almond or Lemon: Stir in a few drops of almond or lemon extract into the dough for a fragrant twist that brightens every bite.
-
Savory Style: Omit sugar in the filling and incorporate herbs like chives or dill for a tasty twist that’s perfect for brunch.
-
Nutty Crunch: Mix chopped nuts like pecans or almonds into the cream cheese filling for added texture and nutty flavor.
-
Double Cheese: Blend in a bit of shredded sharp cheddar with the cream cheese for a wonderful contrast of flavors.
-
Spiced Option: Experiment with spices like nutmeg or cardamom in the dough for an aromatic version that tantalizes the senses.
-
Chocolate Drizzle: After glazing with maple syrup, drizzle some melted chocolate on top for an indulgent dessert twist.
Each of these variations brings a new layer of deliciousness to your Cheese Danishes, turning a classic treat into a showcase of flavors. And if you’re looking for more creative ideas, you might enjoy our Cottage Cheese Spinach for a savory option, or explore the delightful flavors of Orzo Mac Cheese to get inspired!
Expert Tips for Cheese Danishes
-
Fresh Yeast Check: Always ensure your yeast is fresh; it should foam up when activated. A dead yeast can ruin your Cheese Danishes.
-
Chill for Success: Don’t skip the chilling time! It’s key to developing flavor and making the dough easier to work with.
-
Avoid Overworking: Treat the dough gently—overworking can lead to tougher pastries instead of the fluffy, flaky texture you desire.
-
Cream Cheese Consistency: Make sure your cream cheese is softened well to prevent lumps in the filling and achieve a smooth mixture.
-
Proper Storage: Store any leftover Danishes in an airtight container to maintain their delightful texture; refrigerate for up to five days.
-
Experiment with Fillings: Feel free to add fruits or spices to your filling for extra flavor; they make your Cheese Danishes uniquely yours!
How to Store and Freeze Cheese Danishes
- Fridge: Store leftover Cheese Danishes in an airtight container for up to 5 days. This keeps them from drying out while retaining their flaky texture.
- Freezer: For longer storage, individually wrap each Danish in plastic wrap and place them in a freezer bag. They can be frozen for up to 2 months without losing their delicious flavor.
- Reheating: To enjoy frozen Cheese Danishes, reheat them in an oven at 350°F for about 10-15 minutes until warmed through. This will help revive their flaky goodness!
- Thawing: Thaw frozen Danishes in the fridge overnight before reheating, allowing for optimal texture and taste.

Heavenly Cheese Danish Recipe FAQs
How do I choose the right yeast for my Cheese Danishes?
Absolutely! When selecting yeast, look for active dry yeast that is fresh and labelled with a good expiration date. When you dissolve it in warm water (specifically at 110°F to 115°F), it should foam up within 5 to 10 minutes. This indicates that your yeast is active and ready to create that perfect fluffy texture in your Cheese Danishes.
What’s the best way to store leftover Cheese Danishes?
To keep your delicious Cheese Danishes fresh, store them in an airtight container in the refrigerator for up to 5 days. This method helps maintain their flakiness while preventing them from drying out. When you’re ready to enjoy them, just pop them in the oven for a few minutes to restore their warm, fresh-out-of-the-oven quality.
Can I freeze Cheese Danishes for later?
Very! Freezing is a great option for long-term storage. Individually wrap each cooled Danish in plastic wrap, then place them in a freezer-safe bag or container. They can be frozen for up to 2 months. To reheat, simply thaw them in the refrigerator overnight and warm them in a 350°F oven for about 10-15 minutes to restore their delicious flakiness.
What if my Cheese Danishes don’t rise properly?
Ah, the dreaded dough dilemma! If your Danishes don’t rise as expected, it could be due to inactive yeast or insufficient proofing time. Always check your yeast’s freshness and ensure it’s dissolved in warm water (not too hot!). If your dough seems too dense, try letting it rise in a warmer spot, which often encourages better growth. A reliable thermometer can help you maintain the ideal conditions!
Are there any dietary considerations I should keep in mind?
Absolutely! For those with lactose intolerance, consider using lactose-free cream cheese and a dairy-free milk alternative in your Cheese Danishes. Additionally, be sure to adjust the sugar in the filling to cater to personal preferences or dietary needs. If you’re serving these to pets or have serious allergies in your household, take care to keep these delectable treats out of reach, as many ingredients (like sugar and chocolate) can be harmful to animals.
Irresistible Cheese Danishes That Will Brighten Your Morning
Ingredients
Equipment
Method
- Activate Yeast: Dissolve 2 teaspoons of active dry yeast in 1/4 cup of warm water. Let sit for 5-10 minutes until foamy.
- Prepare Dough: Combine 2 cups of all-purpose flour, 1/4 cup of sugar, and 1/2 teaspoon of salt. Cut in cold butter until coarse crumbs.
- Chill Dough: Cover and refrigerate for 8 to 24 hours.
- Shape Danishes: Divide dough, roll into rectangles, cut into strips, and twist into spirals.
- Fill: Mix 8 ounces of cream cheese, 1/4 cup of sugar, and 1 egg yolk until smooth. Fill each Danish center.
- Proof: Cover and let rise in a warm place for about 45 minutes.
- Preheat Oven: Preheat to 350°F (175°C).
- Bake: Brush tops with egg wash and bake for 15-20 minutes until golden brown.
- Glaze: Brush with warm maple syrup immediately after baking.
Leave a Reply