
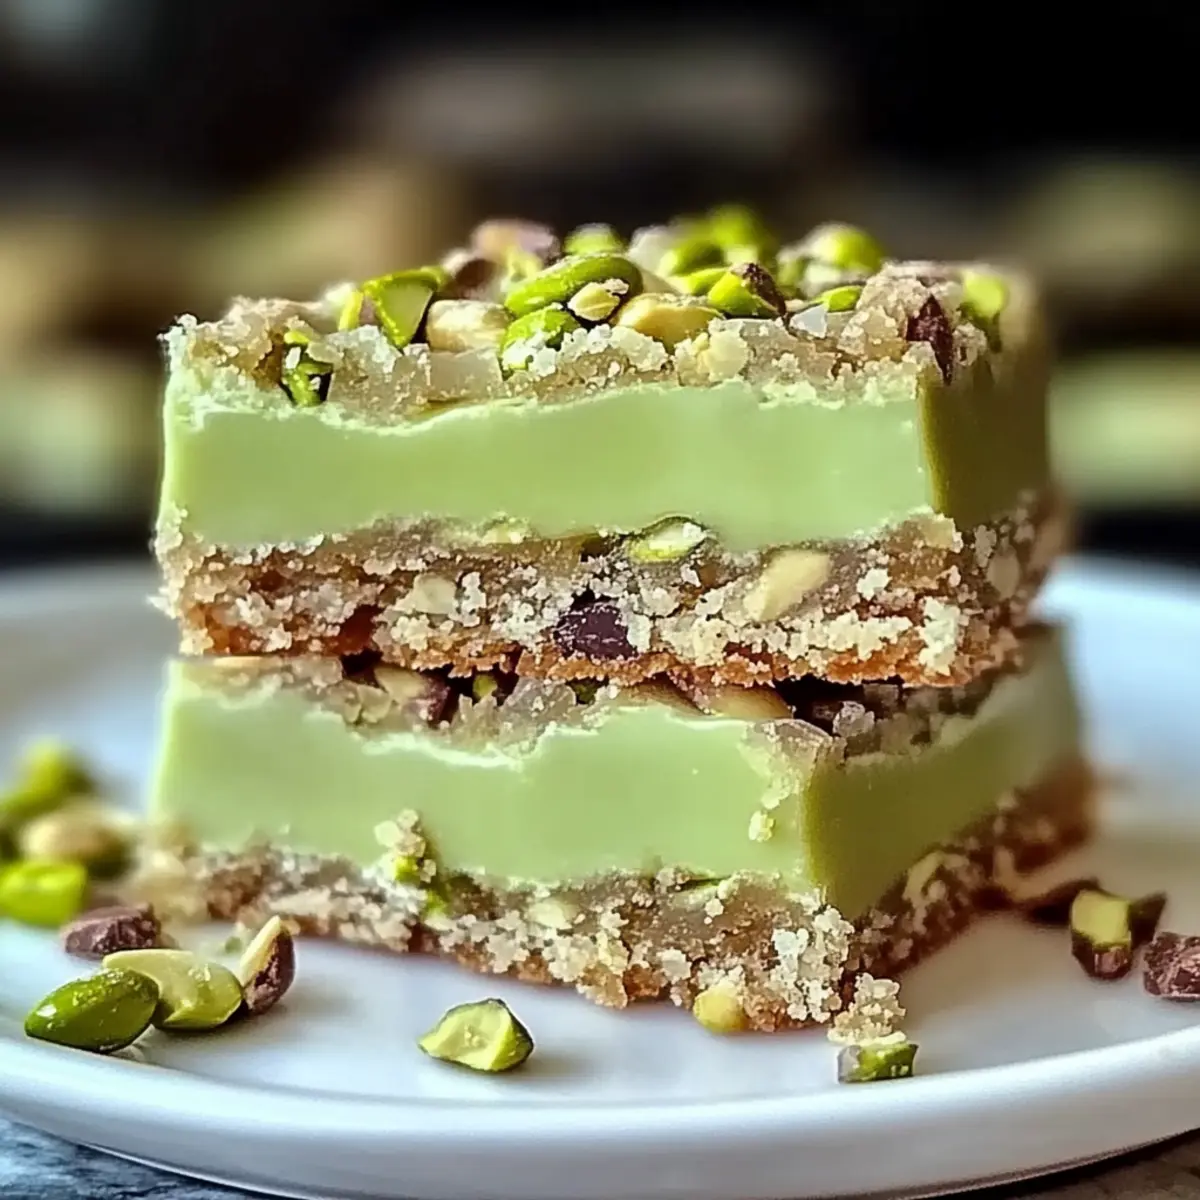
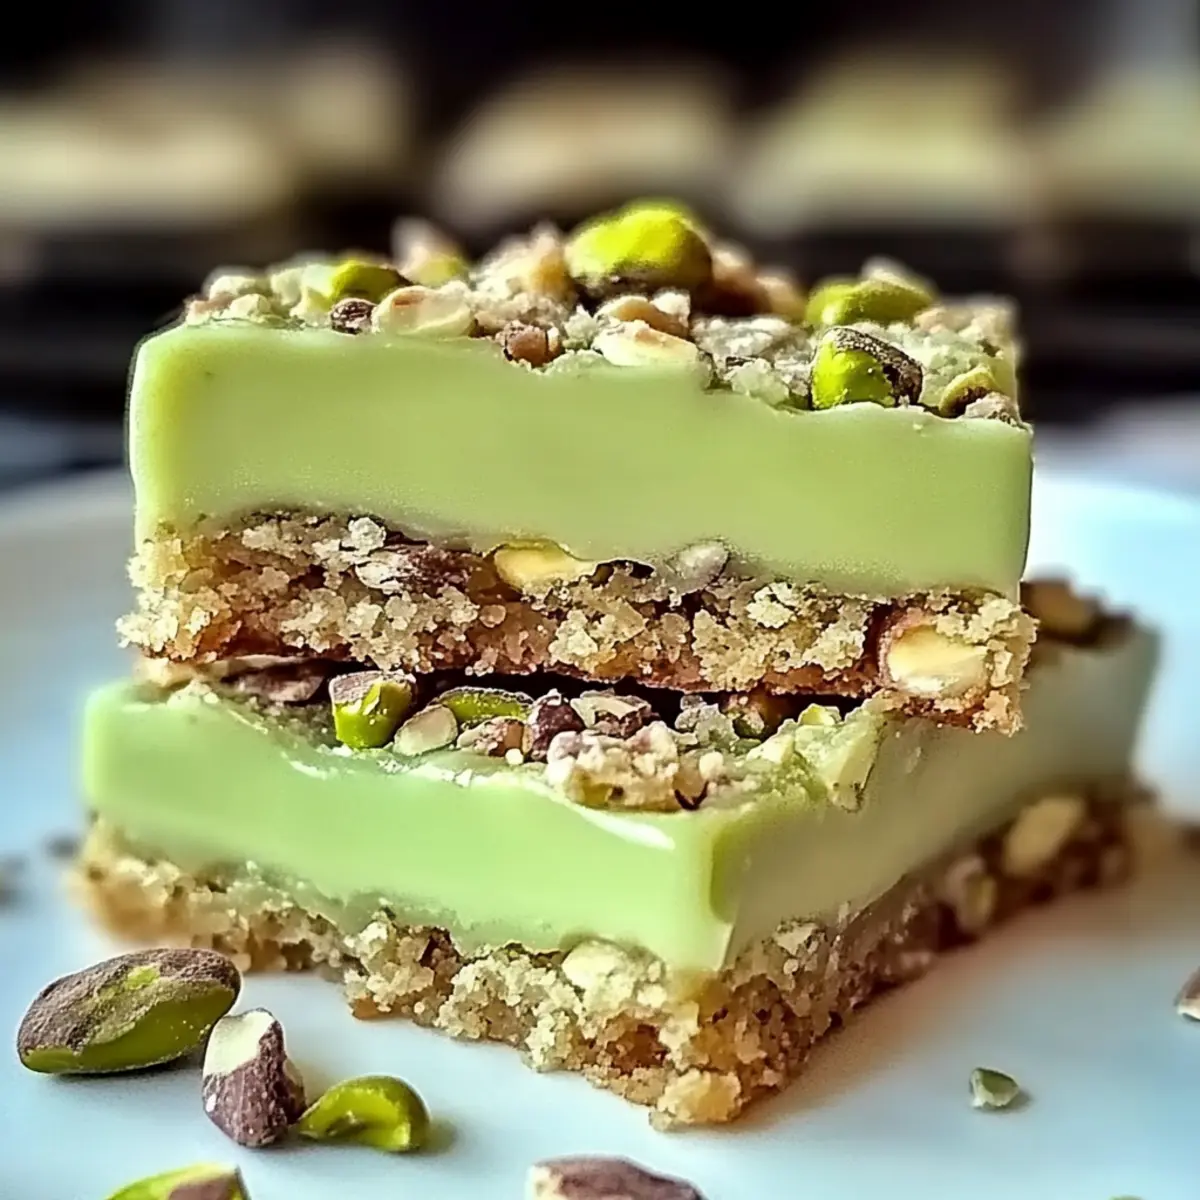
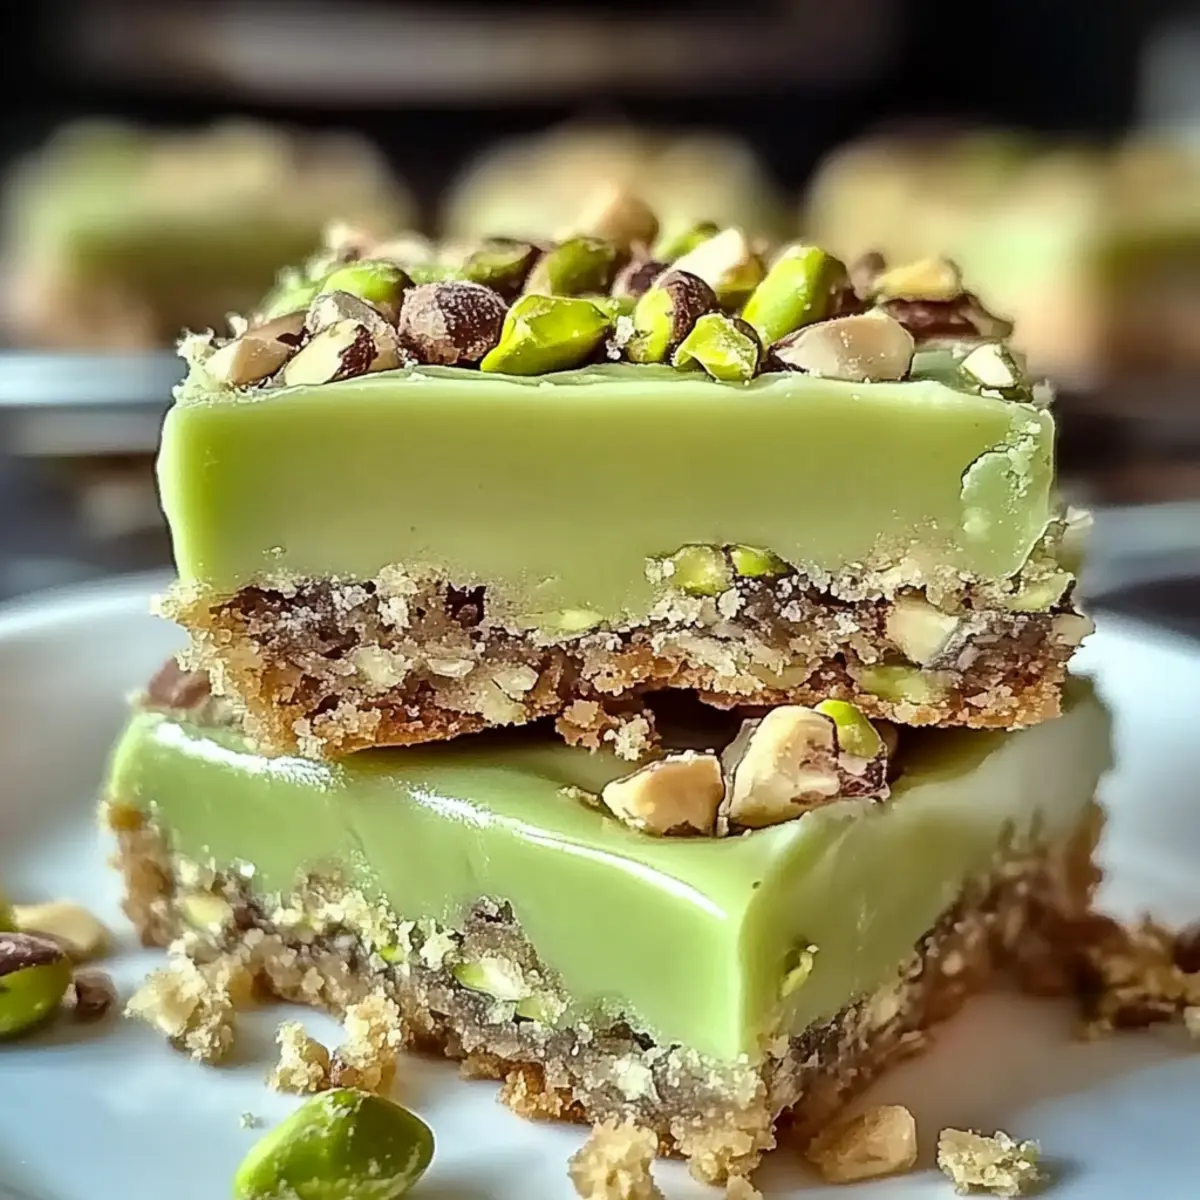
As I stood by my kitchen counter, the rich, buttery scent of baking wafted through the air, instantly lifting my spirits. That’s when I decided to whip up a batch of Pistachio Dream Cookie Bars—a recipe that balances simplicity and indulgence perfectly. These chewy delights come together in just a snap, making them an ideal choice for anyone looking to ditch fast food in favor of homemade goodness. With a vibrant pop of color and a nutty flavor that dances on the palate, they’re bound to enchant friends and family alike. Plus, these bars are easily customizable, allowing you to cater to different tastes and dietary needs. Are you ready to transform a few simple ingredients into a treat that looks as good as it tastes?
Why Are Pistachio Dream Cookie Bars So Special?
Indulgent Flavor: These chewy bars bring a delightful combination of nutty pistachio and rich butteriness—perfect for satisfying your sweet cravings.
Quick and Easy: With just a handful of simple ingredients and minimal prep time, you can have these bars ready to enjoy in no time, allowing you to treat yourself mid-week!
Customizable Options: Want to mix things up? You can easily substitute ingredients for dietary needs, like using a gluten-free sugar cookie mix or adding chocolate chips for extra sweetness.
Visually Stunning: The vibrant green hue from the pistachio pudding makes them an eye-catching treat that’s equally enjoyable to eat and admire.
Ideal for Sharing: Perfect for gatherings, these bars are sure to impress friends and family—pair them with a scoop of ice cream or a berry salad for an elevated dessert experience! Check out our other crowd-pleasers like Banana Pudding Dream or Chocolate Chip Bars for more delicious options.
Pistachio Dream Cookie Bars Ingredients
For the Bars
• Unsalted Butter – Provides richness and moisture; ensure it’s softened for a creamy texture.
• Eggs – Contributes to structure and moisture; use room temperature eggs for better incorporation.
• Pistachio Instant Pudding Mix – Adds flavor and vibrant color; opt for natural-flavored mix for authenticity.
• Sugar Cookie Mix – Easy base for baking these bars, resulting in a chewy texture; can substitute with gluten-free mix if needed.
• Cooking Spray or Butter – For greasing the baking sheet, ensuring easy release of your Pistachio Dream Cookie Bars.
Optional Topping
• Melted Chocolate – A warm drizzle adds elegance; use semi-sweet or dark chocolate for a delightful contrast.
Step‑by‑Step Instructions for Pistachio Dream Cookie Bars
Step 1: Preheat the Oven
Begin by preheating your oven to 375°F (190°C). As the oven warms up, grab a baking sheet and lightly grease it with cooking spray or butter to ensure your Pistachio Dream Cookie Bars come out easily after baking. You’ll want a smooth, greased surface for the bars to rest upon.
Step 2: Mix Base Ingredients
In a mixing bowl, combine softened unsalted butter, room temperature eggs, and pistachio instant pudding mix. Using an electric mixer, beat these ingredients together on medium speed for 2-3 minutes until the mixture is creamy and smooth. This step creates a rich base that adds depth to your cookie bars.
Step 3: Add Sugar Cookie Mix
Next, gradually add the sugar cookie mix to your creamy batter. Continue mixing on low speed until just combined, approximately 1-2 minutes. Be cautious not to overmix, as this could affect the chewiness of your Pistachio Dream Cookie Bars. The dough should be cohesive but still slightly thick.
Step 4: Prepare the Dough
Now, transfer the dough into the greased baking sheet. Using your hands or a spatula, press the mixture evenly into the pan, ensuring a uniform thickness for consistent baking. Visualize a smooth, flat surface—this will help create those perfectly chewy edges we all love in cookie bars.
Step 5: Bake the Bars
Once your dough is set in the baking dish, place it in the preheated oven and bake for 18-22 minutes. Keep an eye on it; the edges should turn golden brown while the center remains slightly soft. This contrast is crucial for those soft, delightful Pistachio Dream Cookie Bars.
Step 6: Cool Completely
After baking, remove the pan from the oven and allow the cookie bars to cool in the pan for about 10 minutes. Then, transfer them to a wire rack to cool completely for at least 30 minutes. This cooling period is vital for preventing crumbling when slicing the bars.
Step 7: Optional Drizzle
For an added touch of elegance, consider warming some chocolate until it’s melted and smooth. Once the bars have cooled, drizzle the melted chocolate over the top for a delightful contrast. This step is entirely optional, but it adds a beautiful finishing touch to your Pistachio Dream Cookie Bars.
Storage Tips for Pistachio Dream Cookie Bars
Room Temperature: Store your bars in an airtight container for up to 5 days to maintain freshness and prevent them from drying out.
Refrigerate: To extend the lifespan of your Pistachio Dream Cookie Bars, keep them in a sealed container in the fridge for up to 7 days, maintaining their chewy texture.
Freezer: For longer storage, individually wrap each bar in plastic wrap and place them in a freezer bag. They can be frozen for up to 3 months, ensuring you have a treat ready whenever the craving strikes.
Reheating: When you’re ready to enjoy a cold bar, simply let it sit at room temperature for a few minutes or pop it in the microwave for 10-15 seconds for a warm, gooey delight!
What to Serve with Pistachio Dream Cookie Bars
Enhance your experience with delightful pairings that complement the chewy indulgence of these enchanting bars.
-
Vanilla Ice Cream: The creamy, cool texture creates a delightful contrast to the warm, chewy bars, turning them into a divine dessert experience. A scoop of vanilla ice cream is like a sweet hug for your taste buds!
-
Whipped Cream: Light and airy, this topping adds a luscious finish to each bite, making every forkful feel like a celebration. A dollop of whipped cream can also be a canvas for toppings like nuts or chocolate shavings.
-
Fresh Berry Salad: The tartness of mixed berries balances the sweetness of the bars, offering a refreshing counterpoint. Juicy strawberries, blueberries, and raspberries will liven up your plate for a colorful touch!
-
Dark Chocolate Drizzle: Elevate the taste with a rich chocolate drizzle crafted from melted dark chocolate. This decadent touch adds a hint of sophistication and creates a beautiful contrast against the green pistachio hue.
-
Mint Tea: Warm herbal notes from mint tea cleanse the palate, making it a soothing accompaniment to the rich flavors of your cookie bars. Sip slowly and enjoy a moment of tranquility alongside your treat.
-
Citrus Sorbet: This light and zesty sorbet brings a refreshing twist that cuts through the richness of the pistachio bars. The bright flavors will make your dessert feel even more festive and fun!
-
Zesty Lemonade: A glass of chilled lemonade adds a thirst-quenching brightness that perfectly complements the nutty sweetness of the bars. The citrusy zing will dance on your palate, leaving you wanting more!
-
Caramel Sauce: Drizzling warm caramel over your bars creates a delightful gooey sensation, enhancing the richness and sweetness. It’s a luxurious addition that will instantly elevate your dessert experience.
Each of these pairings brings something unique, ensuring that your Pistachio Dream Cookie Bars shine even brighter on your dessert table!
Make Ahead Options
These Pistachio Dream Cookie Bars are perfect for meal prep enthusiasts! You can prepare the dough up to 24 hours in advance by mixing all your ingredients and then storing the unbaked dough in an airtight container in the refrigerator. This method not only saves you time but also intensifies the flavors. For added convenience, you can bake the bars and then allow them to cool completely before slicing; store the sliced bars in an airtight container for up to 5 days at room temperature or up to 7 days in the refrigerator. When you’re ready to enjoy, simply drizzle melted chocolate over the bars for an elevated presentation—just as delicious, with minimal effort!
Expert Tips for Pistachio Dream Cookie Bars
• Measure Ingredients Carefully: Accurate measurements ensure a perfect balance of flavors and textures, leading to mouthwatering Pistachio Dream Cookie Bars.
• Avoid Overmixing: Overmixing can result in tough bars; mix just until ingredients are combined to maintain that desirable chewy texture.
• Use Room Temperature Eggs: Bringing eggs to room temperature helps them blend seamlessly into the batter, contributing to the bars’ rich consistency.
• Cool Before Slicing: Allow the bars to cool entirely on a wire rack before cutting, preventing them from crumbling and helping you achieve clean, beautiful slices.
• Experiment with Mix-ins: For a delightful twist, consider adding chocolate chips or citrus zest; this customization adds exciting flavors to your Pistachio Dream Cookie Bars!
Pistachio Dream Cookie Bars Variations
Feel free to explore delightful twists and swaps to make these cookie bars uniquely yours!
-
Chocolate Chip Add-In: Fold in semi-sweet chocolate chips for a delightful sweetness that complements pistachio well. Imagine each bite bursting with choco-nutty goodness!
-
Nut-Free Version: Substitute pistachio pudding with vanilla or coconut mix. This twist ensures a tasty treat for those with nut allergies, maintaining the chewy texture everyone loves.
-
Gluten-Free Option: Use a gluten-free sugar cookie mix to cater to dietary restrictions. This easy adjustment allows everyone to indulge without worry, ensuring no one misses out on the fun.
-
Citrus Zest: Incorporate lemon or orange zest for a refreshing twist. The bright notes from the citrus brighten the overall flavor, adding an uplifting touch to each bite.
-
Tropical Variation: Add shredded coconut for a unique texture and flavor. You’ll be transported to a tropical paradise with the added chewiness and mild sweetness from the coconut.
-
Candy Bar Fusion: Mix in your favorite chopped candy bars—think Snickers or Milky Way—for a decadent treat. The combination of flavors and textures will leave you craving more with every bite.
-
Spiced Delight: Add a pinch of cinnamon or nutmeg to the batter for a warm, spiced flavor. This subtle twist can bring a surprisingly comforting depth to your Pistachio Dream Cookie Bars.
-
Cream Cheese Swirl: Create a creamy swirl by mixing cream cheese and a bit of sugar into the batter before baking. This adds a luscious layer that beautifully contrasts the chewy texture of the bars.
For even more delightful ideas, check out our extravagant Pistachio Pudding Icebox or our irresistibly chewy Maple Pecan Cookies—each offering a different flavor profile to keep your dessert game exciting!
Pistachio Dream Cookie Bars Recipe FAQs
How do I choose ripe pistachio pudding mix?
Absolutely! When selecting pistachio instant pudding mix, look for one that has a bright green color and is labeled as natural or real flavors. Avoid any mixes with artificial coloring or a long list of ingredients, as these may alter the taste. A quality mix enhances the overall flavor and appeal of your Pistachio Dream Cookie Bars.
What is the best way to store my Pistachio Dream Cookie Bars?
Very! To maintain their freshness, you can store your cookie bars in an airtight container for up to 5 days at room temperature. If you want them to last a bit longer, refrigerate them in a sealed container for up to 7 days. Make sure to separate layers with parchment paper to prevent sticking!
Can I freeze Pistachio Dream Cookie Bars?
Absolutely! For longer storage, individually wrap each bar in plastic wrap and place them in a labeled freezer bag. They can be frozen for up to 3 months. When you’re ready to enjoy them, just let them thaw at room temperature or microwave them for 10-15 seconds for a warm treat.
What should I do if my cookie bars crumble when cutting?
No worries! Crumbling happens if the bars are not allowed to cool completely. Ensure they cool on a wire rack for at least 30 minutes after baking. To achieve clean slices, using a sharp knife and cutting them when slightly warm can also work wonders. If they still crumble, just embrace the delicious chaos—a spoonful with some ice cream can still be heavenly!
Are there any allergy considerations for my cookie bars?
Absolutely! If you’re making these for someone with nut allergies, I recommend substituting the pistachio pudding with a vanilla or coconut flavor. For gluten-free options, simply use a gluten-free sugar cookie mix. Always check labels to ensure all ingredients are safe!

Pistachio Dream Cookie Bars - Chewy Delights Made Easy
Ingredients
Equipment
Method
- Preheat your oven to 375°F (190°C). Grease a baking sheet with cooking spray or butter.
- Combine softened butter, room temperature eggs, and pistachio pudding mix in a mixing bowl. Beat on medium speed for 2-3 minutes until creamy.
- Gradually add sugar cookie mix to the batter, mixing on low speed until just combined on 1-2 minutes.
- Transfer the dough into the greased baking sheet, pressing evenly into the pan.
- Bake for 18-22 minutes until edges are golden brown and center is slightly soft.
- Allow to cool for about 10 minutes in the pan, then transfer to a wire rack to cool completely for at least 30 minutes.
- Drizzle melted chocolate over the cooled bars for an optional added touch.
Leave a Reply