
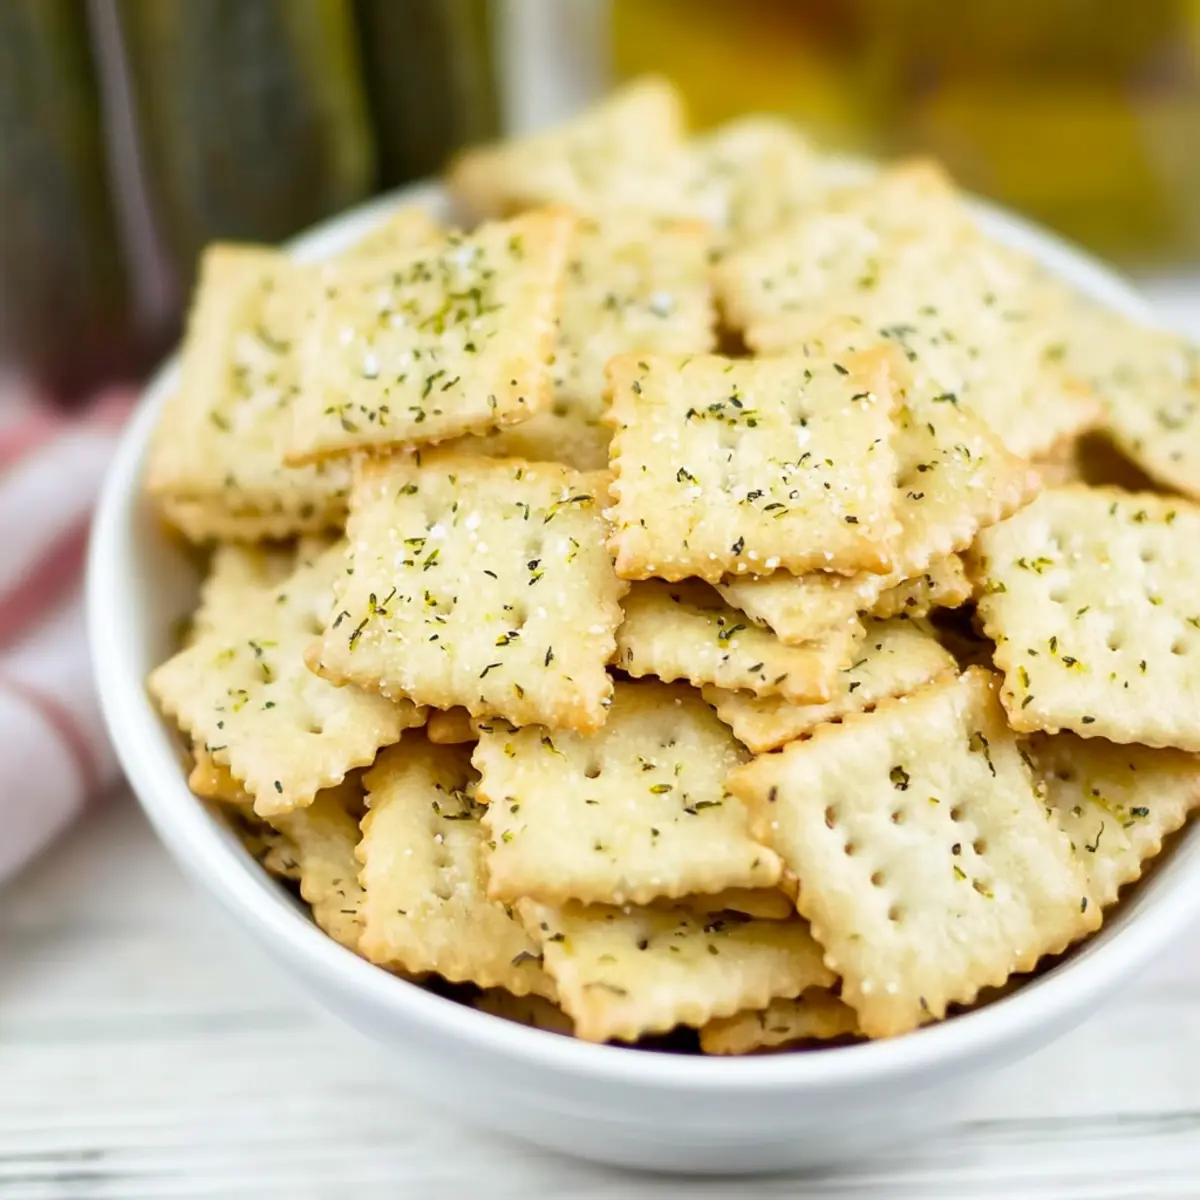
The aroma of freshly baked snacks wafted through my kitchen, instantly transporting me to carefree childhood days filled with crunchy treats. Today, I’m thrilled to share my Crispy Dill Pickle Saltines, a delightful snack that transforms simple crackers into a flavor-packed sensation. This recipe is perfect for anyone looking to elevate their snack game without spending hours in the kitchen. With just a handful of ingredients, you’ll whip up a tangy and savory treat that’s not only easy to make but also ideal for any occasion—be it a cozy movie night, game day festivities, or a quick nibble during a busy afternoon. Curious about how a few pantry staples can create such delightful bites? Let’s dive in!
Why Are Dill Pickle Saltines So Irresistible?
Crispy Texture: Each bite delivers a satisfying crunch that makes them addictively snackable.
Zesty Flavor: The tangy dill pickle and ranch combination creates an explosion of taste that will awaken your taste buds.
Ease of Preparation: With just a few simple steps, you can easily prepare these in no time, making them perfect for spontaneous gatherings.
Versatile Snacking: Enjoy them on their own or pair with your favorite spreads and dips for a crowd-pleasing appetizer.
Guilt-Free Pleasure: With only 12 calories per serving, these snacks let you indulge without the guilt—perfect for health-conscious snackers! For more simple snack ideas, check out our easy dips for parties.
Dill Pickle Saltines Ingredients
For the Base
• Mini Saltines – The light, crispy texture serves as the perfect foundation for this snack; feel free to use full-size if mini aren’t available.
• Unsalted Butter – Richness is added to the mix and helps the seasoning stick; salted butter can be used if you adjust the added salt carefully.
For the Flavor
• Dry Ranch Dressing Mix – This essential ingredient brings a savory depth that’s hard to replicate with substitutions.
• Dill Pickle Juice – The secret to that zingy flavor, providing tang and moisture; make sure to reserve juice from your favorite dill pickles.
• Dried Dill – Elevates the dill flavor profile; if you prefer fresh dill, adjust the quantity to balance the flavors.
• Garlic Powder – Introduces a lovely aromatic depth; if you choose fresh garlic, add it cautiously to avoid overpowering the other flavors.
These crispy Dill Pickle Saltines pack a delightful punch, making them a snack you won’t want to miss!
Step‑by‑Step Instructions for Dill Pickle Saltines
Step 1: Preheat the Oven
Begin by preheating your oven to 250°F (120°C). This low temperature allows the flavors to meld while ensuring a crunchy finish. While the oven warms up, line a rimmed baking sheet with parchment paper to prevent sticking and make cleanup a breeze.
Step 2: Prepare the Crackers
In a large mixing bowl, add the mini Saltines, spreading them out evenly. This will provide ample space for the seasoning to coat each cracker thoroughly. The Saltines are the heart of your Dill Pickle Saltines, so ensure they are fresh and ready for a zesty makeover.
Step 3: Mix the Seasoning Blend
In a separate bowl, melt the unsalted butter and whisk in the dry ranch dressing mix, dill pickle juice, dried dill, and garlic powder. Stir until combined, creating a fragrant mixture that will elevate the simple Saltines into a mouthwatering snack. You’ll love the aromatic blend that fills your kitchen!
Step 4: Coat the Crackers
Pour the seasoning mixture over the Saltines, using a spatula to gently toss them. Ensure every cracker is evenly coated, as this will enhance the flavor of your Dill Pickle Saltines. Take your time; an even coating is essential for maximum deliciousness in each bite.
Step 5: Arrange on the Baking Sheet
Transfer the seasoned Saltines to the prepared baking sheet, spreading them out in a single layer. This ensures that hot air circulates around each cracker, promoting even baking and crispiness. The sight of the crackers glistening with butter and seasoning is just a preview of their tasty transformation!
Step 6: Bake Until Crispy
Place the baking sheet in the preheated oven and bake for 30 minutes. Stir the crackers gently every 10 minutes to ensure they bake evenly and develop that perfectly crunchy texture. Keep an eye on them; you want them golden and crispy but not burnt.
Step 7: Cool and Store
Once baked, remove the Dill Pickle Saltines from the oven and allow them to cool on the baking sheet. This step is crucial for achieving the desired crunch! After they’ve completely cooled, transfer them to an airtight container for storage, keeping them fresh for up to 5 days.

Make Ahead Options
These Dill Pickle Saltines are perfect for meal prep enthusiasts looking to save time during busy weeks! You can prepare the seasoning mix (butter, ranch dressing mix, dill pickle juice, dried dill, and garlic powder) up to 24 hours in advance; just store it in the fridge to keep the flavors fresh. The crackers can also be coated and arranged on the baking sheet in advance, ready to bake at your convenience; simply refrigerate them until you’re ready to bake—preferably no longer than 3 days to maintain optimal freshness. When you’re ready to enjoy, just pop them in the oven, and you’ll have delicious, crunchy Dill Pickle Saltines that taste just as fantastic as if you made them fresh!
Expert Tips for Dill Pickle Saltines
• Cracker Choice: Use mini Saltines for the best texture, but full-size works too. Ensure they are fresh to get that perfect crunch.
• Butter Variations: Unsalted butter is ideal to control saltiness; if you use salted, taste the mixture before adding any extra salt.
• Seasoning Mix: Don’t skip the dry ranch dressing mix—it’s essential for the robust flavor of your Dill Pickle Saltines.
• Stir Gently: During baking, stir the crackers carefully every 10 minutes to avoid breaking them while ensuring even crisping.
• Cooling Time: Allow the crackers to cool completely before storing to maintain their satisfying crunch—this step is key!
• Storage Method: Store in an airtight container at room temperature for up to 5 days; avoid freezing to keep the texture intact.
How to Store and Freeze Dill Pickle Saltines
Airtight Container: Store your Dill Pickle Saltines in an airtight container at room temperature to keep them crispy for up to 5 days. Make sure they’re completely cooled before sealing.
Avoid Freezing: Freezing is not recommended as it may lead to a loss of crunchiness upon thawing. The delightful texture is a key feature of these snacks!
Refreshing Tip: If they start to lose their crispness, pop them back in a preheated oven at 250°F (120°C) for a few minutes to revive that crunch before serving.
Check for Freshness: Before enjoying, always check for any off smells or tastes to ensure your Dill Pickle Saltines remain fresh and delicious.
What to Serve with Crispy Dill Pickle Saltines
These crispy, tangy crackers are perfect for creating a delightful snack spread or a full meal that will impress your family and friends.
-
Creamy Spinach Dip: A luscious, creamy dip with vibrant spinach complements the crunch of the Saltines, adding a fresh touch to your snacking experience.
-
Cheese Platter: Pair with a variety of cheeses, such as cheddar, gouda, or pepper jack, for a harmonious blend of flavors and textures. The saltiness of the cheese enhances the dill flavor beautifully.
-
Vegetable Sticks: Fresh cucumber, carrot, and bell pepper sticks offer a crunchy contrast that pairs well with the tangy Saltines while adding a healthy crunch to the mix.
-
Zesty Salsa: A bold, fresh salsa adds a burst of flavor to each bite, elevating your crispy Saltines to a whole new level of tasty snacking. Each bite offers a satisfying contrast between the textures.
-
Classic Potato Salad: A creamy, savory potato salad is a filling side that harmonizes well with the tangy crackers, making for a delightful picnic or BBQ spread.
-
Iced Tea or Lemonade: Refreshing iced tea or a zesty homemade lemonade balances the salty flavor of the Saltines, providing a cool sip that complements the snack perfectly.
-
Chocolate Covered Pretzels: Satisfy your sweet tooth by pairing these salty snacks with the sweetness of chocolate-covered pretzels for a delightful contrast of flavors.
Dill Pickle Saltines Variations
Feel free to enhance your Dill Pickle Saltines with these fun twists that will awaken your taste buds!
-
Oyster Crackers: Swap mini Saltines for oyster crackers to achieve a slightly different texture that’s equally satisfying.
-
Spicy Kick: Add a pinch of cayenne pepper to the butter mixture for a little heat that perfectly complements the dill.
-
Cheesy Flavor: Sprinkle grated Parmesan or cheddar cheese on top after baking for a rich, cheesy addition that takes these crackers to the next level.
-
Fresh Herbs: Replace dried dill with fresh dill for a more vibrant flavor; just adjust the amount to avoid overpowering the dish.
-
Vegan Option: Use vegan butter in place of unsalted butter to make a delightful dairy-free version that doesn’t skimp on flavor.
-
Sweet & Savory: Drizzle a touch of honey or maple syrup before baking for a sweet contrast to the tangy dill and ranch flavors.
-
Lemon Zest: Add fresh lemon zest into the seasoning blend for a zesty, refreshing note that brightens each bite.
-
Smoky Flavor: Incorporate smoked paprika instead of garlic powder for a unique, smoky twist that brings depth to every crunch.
Explore these variations to discover new favorites, and if you’re in the mood for dipping, check out some delicious ideas for easy dips for parties to serve alongside these addictive crackers!
Dill Pickle Saltines Recipe FAQs
What’s the best way to choose dill pickles for the juice?
When selecting dill pickles for your Dill Pickle Saltines, look for pickles that are firm, with no soft spots or dark spots all over the skin. The juice should be clear, not cloudy, indicating freshness. I recommend using your favorite brand to ensure the flavor shines through in the seasoning!
How should I store my Dill Pickle Saltines to keep them crispy?
To maintain the crispness of your Dill Pickle Saltines, store them in an airtight container at room temperature. Make sure they are completely cooled before sealing, and they’ll stay fresh and crunchy for up to 5 days. If you live in a particularly humid climate, consider adding a small silica gel packet to the container to absorb excess moisture.
Can I freeze my Dill Pickle Saltines?
I would advise against freezing your Dill Pickle Saltines, as it may lead to loss of their beloved crunchiness upon thawing. If you want to revitalize their crispiness after a few days, simply pop them in a preheated oven at 250°F (120°C) for 5 to 10 minutes. This will help restore their delightful texture!
What should I do if my crackers are not as crispy as I’d like?
If your Dill Pickle Saltines are chewy instead of crispy, it’s likely they didn’t dry out enough during baking or weren’t stirred frequently. To remedy this, return them to the oven and bake at 250°F (120°C) for an additional 10 minutes, stirring halfway through. This should help them regain that satisfying crunch!
Are Dill Pickle Saltines suitable for people with allergies?
Yes, but some considerations are needed. This recipe includes butter, ranch dressing mix, and potentially gluten-containing saltines, which may not be suitable for those with dairy, gluten, or specific dressing mix allergies. For a dairy-free version, you can use dairy-free butter and look for a gluten-free ranch dressing mix. Always check ingredient labels to ensure safety!
Can I customize the flavor of my Dill Pickle Saltines?
Absolutely! You can experiment with different flavor profiles by substituting the ranch dressing mix with other seasoning blends such as taco seasoning or Italian seasoning. Just keep in mind that the dry ranch mix plays a key role in the flavor, so aim for savory mixes that complement the tanginess of the dill pickle juice!
Dill Pickle Saltines for a Zesty Snack You’ll Crave
Ingredients
Equipment
Method
- Preheat your oven to 250°F (120°C) and line a rimmed baking sheet with parchment paper.
- In a large mixing bowl, add the mini Saltines, spreading them out evenly.
- In a separate bowl, melt the unsalted butter and whisk in the dry ranch dressing mix, dill pickle juice, dried dill, and garlic powder.
- Pour the seasoning mixture over the Saltines, using a spatula to gently toss them.
- Transfer the seasoned Saltines to the prepared baking sheet, spreading them out in a single layer.
- Place the baking sheet in the oven and bake for 30 minutes, stirring every 10 minutes.
- Once baked, remove from the oven and cool on the baking sheet before transferring to an airtight container.
Leave a Reply