
The aroma of melted cheese wafting through the kitchen is enough to tug at the heartstrings of any home chef, reminding me of cozy gatherings with friends and family. That’s where this Creamy Green Chile Cheese Dip shines its brightest! This deliciously rich dip combines gooey melted cheese with the subtle heat of green chiles, making it a perfect low-carb and keto-friendly appetizer for any occasion. Not only is it a breeze to whip up—taking mere minutes to prepare—but it’s also incredibly versatile, allowing you to customize it with spicy jalapeños, savory sausage, or crispy bacon. Whether you’re hosting game day or just want a comforting snack, this dip is here to rescue your tastebuds. What will you add to make it your own?

Why is Green Chile Cheese Dip a Must-Try?
Irresistible Creaminess: The blend of cream cheese and shredded cheeses creates a dip that’s decadent yet light, perfect for any palate.
Quick and Easy: This recipe is a breeze to make! Just mix, bake, and enjoy in under 30 minutes—ideal for spontaneous get-togethers.
Versatile Flavor: Customize it with options like crispy bacon or savory sausage for a twist that suits every taste bud. Don’t forget to try it alongside other favorites, like Bacon Egg Cheese for a delicious pairing!
Low Carb and Keto-Friendly: Guilt-free snacking is now a reality; enjoy this flavorful dip with fresh veggies instead of chips.
Crowd-Pleasing: Whether it’s game day or a chill night in, this dip will keep everyone coming back for more!
Green Chile Cheese Dip Ingredients
• A delightful combination of flavors and textures awaits!
For the Dip Base
- Cream Cheese – essential for achieving that creamy texture; make sure it’s softened beforehand.
- Green Chiles – provide a tasty kick without overwhelming heat; choose mild or hot based on your preference.
- Shredded Cheese – a mix of sharp cheddar and Monterey Jack is best for meltiness; always opt for freshly shredded to avoid grittiness.
- Heavy Cream or Milk – helps achieve the desired creamy consistency; heavy cream adds a richer flavor.
For the Seasoning
- Garlic Powder – brings a savory depth to the dip without being overpowering.
- Onion Powder – adds a subtle sweetness that enhances the overall cheese flavor.
- Salt – essential for elevating all flavors; adjust to taste after baking for the perfect finish.
This Green Chile Cheese Dip is sure to impress your guests and can be adapted to suit any occasion!
Step‑by‑Step Instructions for Green Chile Cheese Dip
Step 1: Prepare Baking Dish
Preheat your oven to 375°F (190°C) and take a small baking dish, lightly greasing it with non-stick spray or butter. This will help ensure the creamy Green Chile Cheese Dip comes out easily once baked and is perfectly golden.
Step 2: Mix Cream Cheese
In a medium-sized mixing bowl, beat the softened cream cheese using a hand mixer or a spatula until it’s completely smooth. This process should take about 2-3 minutes and is crucial for creating that rich, creamy base your dip will be known for, eliminating any lumps.
Step 3: Add Green Chiles
Fold in the drained green chiles into the smooth cream cheese mixture. Use a silicone spatula for gentle mixing, ensuring the chiles are evenly distributed throughout the dip. This step infuses the creaminess with a mild heat, giving your Green Chile Cheese Dip its signature flavor.
Step 4: Combine Cheeses
Gradually stir in the freshly shredded sharp cheddar and Monterey Jack cheeses until evenly mixed. This should take about 1-2 minutes; be careful not to overwork the mixture, as you want the cheeses to meld harmoniously for that gooey, indulgent texture.
Step 5: Adjust Consistency
Now, slowly incorporate the heavy cream or milk into the cheese mixture, adding just enough until the dip reaches a thick but spreadable consistency. This step is crucial for achieving the right texture, which should be silky and luscious—perfect for dipping.
Step 6: Season
Sprinkle in the garlic powder, onion powder, and a pinch of salt, mixing well. Taste your Green Chile Cheese Dip and adjust seasoning as necessary, ensuring the flavors are balanced. This is your chance to personalize it, so don’t hesitate to make it your own!
Step 7: Bake
Transfer the creamy mixture into your prepared baking dish, spreading it evenly. Bake in the preheated oven for 20-25 minutes, or until the edges are bubbly and the top is glossy and lightly golden brown. Your kitchen will be filled with a mouthwatering aroma as it bakes!
Step 8: Rest
Once out of the oven, let your Green Chile Cheese Dip sit for about 5 minutes before serving. This resting time will help the dip firm up slightly, making it easier to scoop up with tortilla chips or fresh veggies.

Green Chile Cheese Dip Variations
Feel free to let your creativity run wild and transform this delectable dip into your own signature creation!
- Spicy Jalapeño Dip: Add finely diced jalapeños for heat. The fiery kick perfectly complements the creaminess of the cheese.
- Sausage Version: Mix in cooked breakfast sausage or chorizo for added protein. This twist brings a heartiness that’s truly satisfying.
- Bacon Addition: Fold in crispy bacon for a smoky flavor. Every bite becomes a treasure trove of crunch and richness, making it a delightful crowd-pleaser.
- Chicken Option: Stir in shredded rotisserie chicken for a heartier dip. It’s perfect for those who want to turn snacking into a meal!
- Three-Cheese Variation: Incorporate mozzarella or pepper jack for extra cheesiness. The melty goodness will have everyone reaching for more!
- Tex-Mex Twist: Add diced tomatoes for a classic touch. This variation brightens the flavors and gives the dip a fresh, vibrant face.
- Cream Cheese Substitute: Use Greek yogurt or sour cream for a tangy twist. Both options elevate the dip while keeping it creamy and dreamy.
- Herb Infused: Mix in fresh chopped cilantro or parsley for a refreshing pop of flavor. It adds a wonderful herbaceous note that pairs beautifully with the cheeses.
Don’t forget, you can always pair this dip with delightful munchies like Orzo Mac Cheese or go bold and serve alongside some Bacon Egg Cheese for an unforgettable snack spread!
Make Ahead Options
These Creamy Green Chile Cheese Dip is perfect for meal prep enthusiasts! You can assemble the entire dip mixture up to 24 hours in advance by following the instructions up until the baking step. Just prepare the dip base with cream cheese, green chiles, and shredded cheeses, then cover it tightly with plastic wrap and refrigerate. This helps maintain its creamy texture and flavors. When ready to serve, simply take it out, let it sit for a few minutes at room temperature, then bake it as directed until bubbly and golden. Trust me, your dip will be just as delicious, saving you time on busy days!
Expert Tips for Green Chile Cheese Dip
- Fresh Cheese Matters: Always shred your cheese fresh instead of using pre-packed. It prevents graininess and enhances the dip’s texture.
- Keep it Smooth: Avoid overheating the dip while baking. Gentle baking allows for creamy goodness without a grainy finish.
- Spice It Up: If you prefer heat, add finely diced jalapeños or use hot green chiles to increase flavor intensity.
- Perfect Substitutions: Feel free to experiment! Use sour cream for a tangy twist, or Greek yogurt for added creaminess without extra calories.
- Serving Suggestions: This Green Chile Cheese Dip pairs wonderfully with fresh veggies or low-carb crackers for a keto-friendly experience.
How to Store and Freeze Green Chile Cheese Dip
Fridge: Store any leftover Green Chile Cheese Dip in an airtight container in the refrigerator for up to 4 days.
Freezer: Freeze the dip in a well-sealed, freezer-safe container for up to 3 months. Thaw overnight in the fridge before reheating.
Reheating: Gently reheat in the microwave in short intervals, stirring in between, or bake in a preheated oven at 350°F until heated through.
Make-Ahead Tip: Assemble the dip ahead of time and refrigerate for up to 24 hours before baking for a convenient solution when entertaining.
What to Serve with Creamy Green Chile Cheese Dip
Set the stage for a delightful gathering with pairings that enhance every cheesy bite and create an unforgettable experience.
-
Tortilla Chips: A classic companion, perfectly crunchy for scooping up the creamy dip. They add a satisfying crispiness to each bite.
-
Fresh Veggie Platter: Crunchy carrots, celery, and bell peppers offer a refreshing contrast to the richness of the dip, perfect for a guilt-free option.
-
Spiced Nuts: Roasted and seasoned nuts provide a delightful crunch that balances the creaminess, making for a great snacking addition.
-
Guacamole: This cool, creamy dip complements the green chiles wonderfully, offering a rich and smooth layer of flavor beneath the cheesy goodness.
-
Mini Tacos: Small, soft tacos filled with seasoned meat or veggies provide a delicious vessel for indulging in the warm dip, making each bite a feast.
-
Mexican Street Corn Salad: The sweetness of corn mixed with vibrant lime and cilantro pairs beautifully with the smoky flavors in the cheese dip.
-
Mocha Iced Coffee: This smooth and rich drink contrasts the heat of the dip while also satisfying your caffeine cravings, making it perfect for game day.
-
Chocolate Dipped Strawberries: For a sweet finish, these add a fruity note that contrasts the savory dip, ending the meal on a cheerful and refreshing note.

Green Chile Cheese Dip Recipe FAQs
What type of green chiles should I use?
Absolutely! For the best flavor, choose between mild or hot green chiles based on your heat preference. If you’re aiming for a balanced dip, I recommend starting with mild ones and adjusting with jalapeños if you desire more spice.
How should I store the leftover Green Chile Cheese Dip?
Store any leftover dip in an airtight container in the refrigerator for up to 4 days. To reheat, place it in the microwave in short intervals, stirring in between, or bake it gently in a preheated oven at 350°F until warmed through.
Can I freeze Green Chile Cheese Dip?
Yes! To freeze your dip, place it in a well-sealed, freezer-safe container for up to 3 months. When ready to enjoy, allow it to thaw overnight in the fridge. Gently reheat to return it to its creamy glory!
How can I ensure my dip has the perfect texture?
For a smooth and creamy texture, always shred your cheese fresh instead of using pre-packaged options—this prevents graininess. Also, be careful not to overheat your dip while baking; gentle baking at 375°F allows it to set beautifully without turning grainy.
Can I adjust this recipe for dietary considerations, like allergies?
Very! If you’re catering to specific allergies, make sure to choose dairy-free cheese and sour cream alternatives for a creamy option. Always double-check labels to ensure all ingredients are safe for those with allergies, and feel free to customize based on dietary needs while still keeping it keto-friendly!
What are some ways to enhance the dip further?
Consider mixing in crispy bacon, cooked sausage, or shredded rotisserie chicken for heartier versions. You could also add finely diced jalapeños for an extra spicy kick or even a Tex-Mex twist with diced tomatoes to significantly elevate your Green Chile Cheese Dip experience.
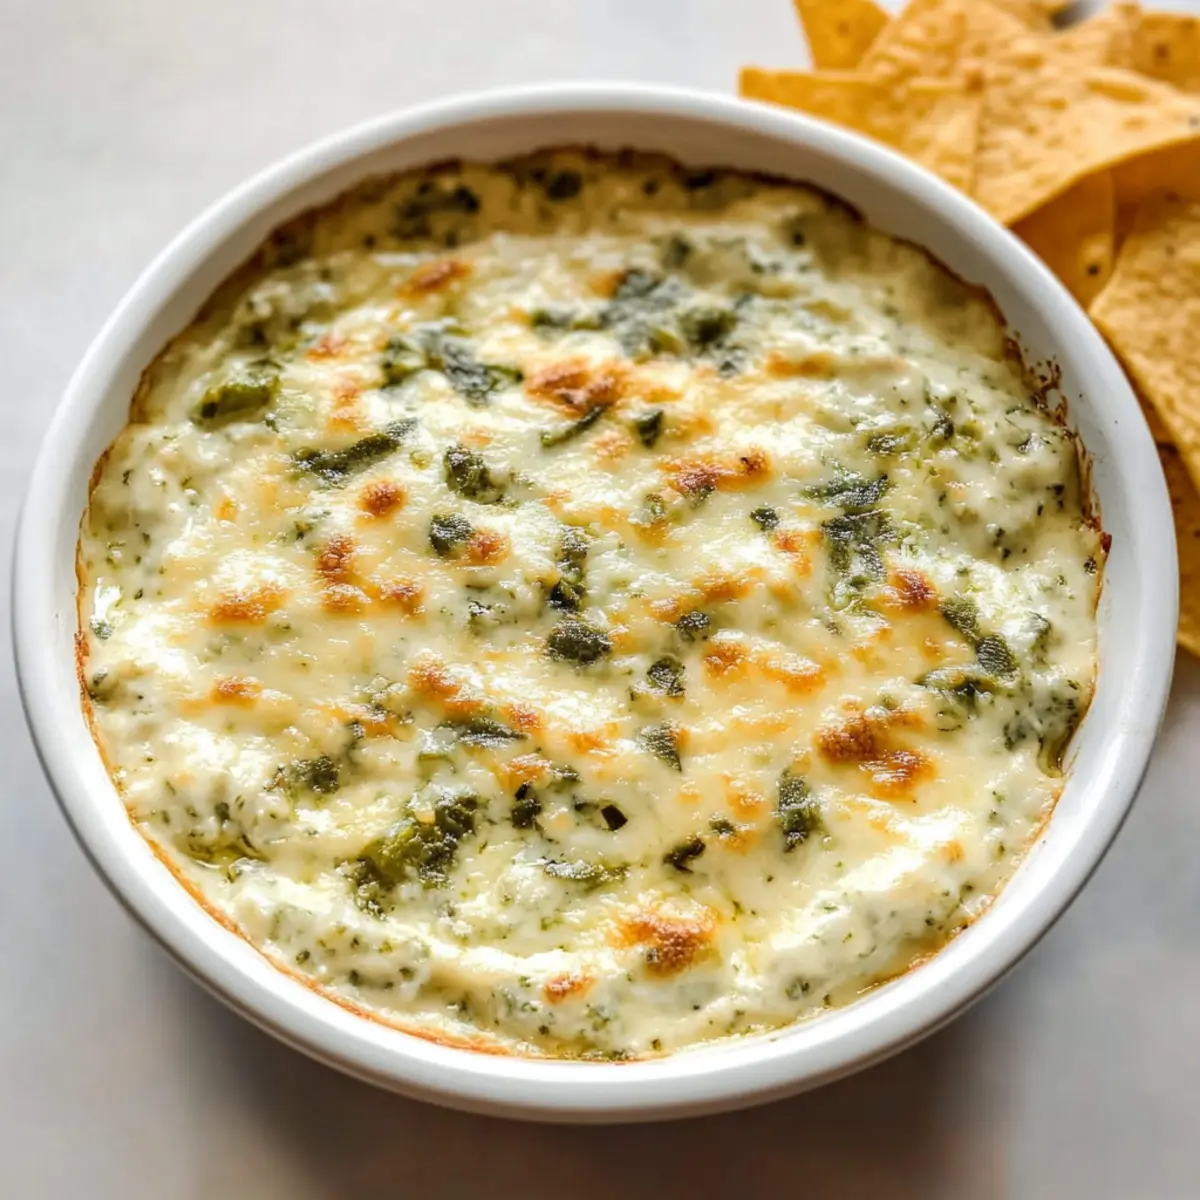
Creamy Green Chile Cheese Dip: The Ultimate Snack Delight
Ingredients
Equipment
Method
- Preheat oven to 375°F (190°C) and lightly grease a small baking dish.
- In a mixing bowl, beat softened cream cheese until smooth.
- Fold in the drained green chiles into the cream cheese mixture.
- Gradually stir in shredded sharp cheddar and Monterey Jack cheese until evenly mixed.
- Slowly incorporate heavy cream or milk until a thick, spreadable consistency is reached.
- Sprinkle in garlic powder, onion powder, and salt, mixing well to taste.
- Transfer mixture to the prepared baking dish, spreading evenly, and bake for 20-25 minutes.
- Let dip rest for about 5 minutes before serving.
Leave a Reply