
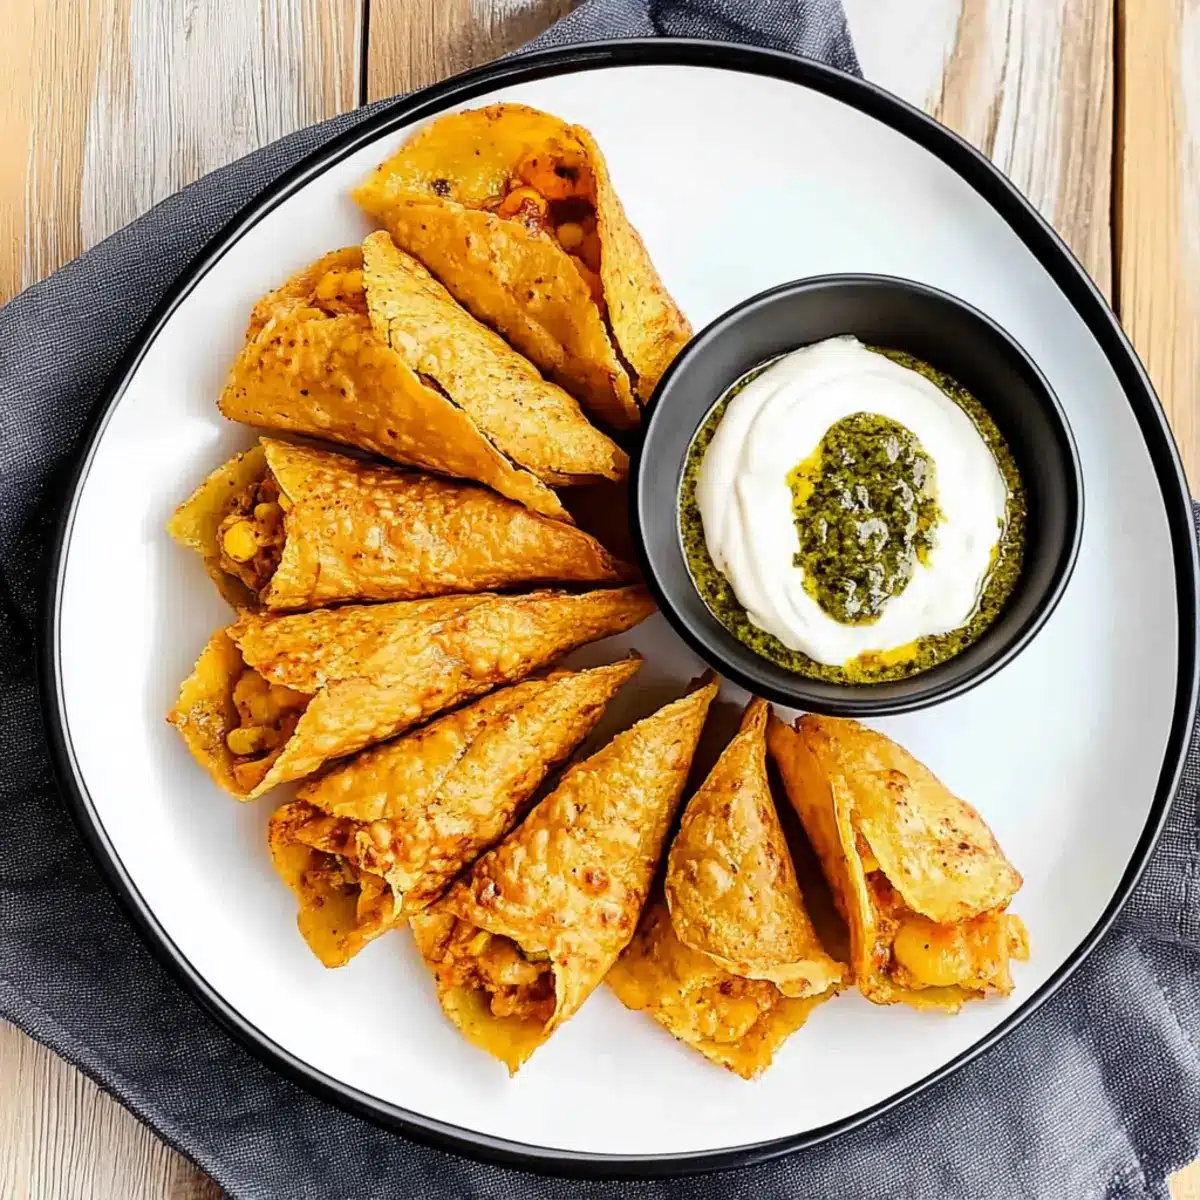
As soon as the sun sets and the kitchen begins to fill with the aroma of spices, I’ve found a savory lifesaver: Antojitos! These delightful Mexican street food appetizers, meaning “little cravings,” are the perfect solution for those busy evenings when you need a quick and satisfying bite. In under 30 minutes, you can whip up these cheesy delights that are not only bursting with flavor but also incredibly adaptable to suit your taste buds. Whether you’re hosting a gathering or simply treating yourself, these easy antojitos are sure to impress. Curious about how to make your own cheesy masterpiece? Let’s dive into this delicious recipe!
Why Are Antojitos So Irresistible?
Quick and Easy: You can whip these up in just 30 minutes, making them ideal for busy weeknights or last-minute gatherings.
Flavor Explosion: A blend of creamy cheese, spices, and fresh veggies creates a filling that’s both rich and satisfying.
Versatile: Customize these bites with your favorite fillings—add chicken, switch up the veggies, or even experiment with different cheeses.
Crowd Pleaser: Perfect as appetizers or snacks, these antojitos are sure to delight guests at any event.
Perfect for Sharing: Serve them on a platter alongside guacamole or salsa for a delightful spread. You can even check out our Guacamole Recipe to pair with these tasty treats!
Antojitos Ingredients
For the Filling
- Flour Tortillas – Choose 10-inch tortillas for easy rolling and maximum stuffing ability.
- Cream Cheese – Softened to ensure a smooth and creamy filling that melds perfectly with other ingredients.
- Diced Green Chilies – Adds a mild yet flavorful heat; canned works great, or substitute with fresh jalapeños for extra spice.
- Cheddar Cheese – The star of the show; shredded for optimal melting, but feel free to swap with Monterey Jack for a different flavor.
- Red Onion – A classic addition for crunch and a bit of sharpness; finely dice for even distribution—yellow onion is a good substitute too.
- Bell Pepper – Provides sweetness and a burst of color; any variety will do, just make sure to deseed and finely dice.
- Sour Cream – Adds tanginess and smooth texture; you can adjust the amount for a lighter filling.
- Paprika – Enhances flavor and color; consider smoked paprika for an extra kick.
- Garlic Powder – Infuses depth into the filling; fresh minced garlic can be used instead if desired.
- Onion Powder – Reinforces the overall onion flavor.
- Cayenne – Introduces a hint of heat; adjust based on your spice preferences, or omit for a milder version.
For Dipping
- Basil Pesto – A fragrant and earthy complement to the antojitos; use store-bought or homemade for convenience.
Now that you have all the key ingredients listed, you’re just a step away from creating your own batch of flavorful antojitos!
Step‑by‑Step Instructions for Antojitos
Step 1: Preheat the Oven
Begin by preheating your oven to 350ºF (175ºC). While the oven warms up, line a baking sheet with parchment paper to ensure the antojitos don’t stick during baking. This simple preparation step will help create a beautiful, golden finish on your cheesy Mexican appetizers.
Step 2: Prepare the Filling
In a large mixing bowl, combine softened cream cheese, diced green chilies, shredded cheddar cheese, finely diced red onion, bell pepper, sour cream, and all your spices. Use a hand mixer or spatula to blend the ingredients until the filling is smooth and creamy. The vibrant colors and rich flavors indicate that your filling for the antojitos is ready!
Step 3: Fill the Tortillas
Take a flour tortilla and evenly spread a portion of the cheese filling across it, ensuring you cover most of the surface. Roll the tortilla tightly, ensuring none of the filling spills out. Repeat this process with the remaining tortillas, making sure each antojito is packed with that delicious cheesy goodness.
Step 4: Slice and Arrange
Once rolled, use a sharp knife to cut each tortilla roll into five equal pieces, discarding the ends. Arrange these bite-sized pieces cut-side up on the prepared baking sheet. The colors of the fresh veggies should be visible, creating an enticing appearance for your antojitos.
Step 5: Bake to Perfection
Place the baking sheet in the preheated oven and bake for 8 minutes. After this time, switch your oven to broil for an additional 5 minutes. Keep an eye on the antojitos as they broil, ensuring they turn a beautiful golden color and become irresistibly crispy.
Step 6: Serve with a Delightful Dip
Once baked, remove the antojitos from the oven, allowing them to cool for a couple of minutes on the baking sheet. Serve these cheesy Mexican appetizers warm, accompanied by a side of basil pesto sour cream for dipping. The combination of flavors will soon have you reaching for just one more!

Antojitos Variations & Substitutions
Feel free to get creative with your antojitos; these delightful little bites can be tailored to suit every palate!
-
Spicy Kick: Add diced jalapeños or habaneros for a fiery twist. This adds a delightful heat that spice lovers will appreciate.
-
Vegetarian Delight: Swap out meat for diced mushrooms or spinach. Sautéed mushrooms add a hearty texture while spinach introduces a nutritious, leafy element.
-
Cheese Lovers: Substitute cheddar with pepper jack for a zesty kick or a blend of Mexican cheeses for varied flavors. Mixing cheeses can create a melty masterpiece that’s extra special.
-
Creamy Avocado: Incorporate mashed avocado into the filling to enhance creaminess and add healthy fats. This variation gives a fresh, creamy element to each bite.
-
Pesto Perfection: Replace sour cream with basil pesto for a herby flavor heightened by fresh ingredients. It will add a new dimension and richness to the dish.
-
Crunch Factor: Toss in some finely chopped nuts such as almonds or walnuts. This will introduce a fantastic crunch that contrasts wonderfully with the smooth filling.
-
Herb Infusion: Mix in fresh herbs like cilantro or basil for an aromatic twist. Fresh herbs not only elevate the flavor profile but also brighten the overall dish.
-
Kicking Up the Heat: Add a dash of sriracha or your favorite hot sauce directly to the filling. This allows you to control the heat level, ensuring each bite is just as spicy as you desire.
These variations open the door to an array of deliciousness while keeping the spirit of antojitos alive. Don’t hesitate to experiment; check out our Guacamole Recipe for another amazing dip to pair with your creations!
Expert Tips for Antojitos
-
Keep it Cool: Make sure your cream cheese is softened for easy mixing—this ensures a smooth filling without lumps.
-
Watch the Broiler: Broiling can be tricky; stay close and keep an eye on the antojitos during the last few minutes to prevent burning.
-
Don’t Overstuff: While it’s tempting to pack in more filling, overstuffing can cause the tortillas to burst. Aim for moderation for perfect bites!
-
Use Fresh Ingredients: Fresh veggies not only enhance flavor but also add vibrant color to your antojitos, making them more appetizing.
-
Perfect for Meal Prep: You can prepare the filling ahead of time and store it in the fridge for up to two days—just roll the tortillas when you’re ready to serve.
-
Customize with Cheese: Feel free to mix and match your favorite cheeses for varied flavors—pepper jack gives a nice kick, while mozzarella offers a milder taste.
Make Ahead Options
Antojitos are a fantastic choice for meal prep, making your life easier on busy days! You can prepare the filling for the antojitos up to 3 days in advance by mixing cream cheese, green chilies, cheddar, onions, bell pepper, sour cream, and spices. Store the filling in an airtight container in the refrigerator to keep it fresh. Additionally, you can fill and roll the tortillas the day before serving; simply wrap them tightly in plastic wrap to enhance the flavors. When you’re ready to enjoy, bake them straight from the fridge, adding a couple of extra minutes if necessary. With these make-ahead tips, you’ll have delicious antojitos ready to go with minimal effort!
How to Store and Freeze Antojitos
Fridge: Keep leftover antojitos in an airtight container for up to 4 days. Reheat in the oven for crispy results or use the microwave for a quick fix.
Freezer: For longer storage, freeze assembled but uncooked antojitos for up to 2 months. Wrap tightly in plastic wrap and then in foil to prevent freezer burn.
Reheating: When ready to enjoy, bake frozen antojitos directly from the freezer at 350ºF for about 12-15 minutes or until heated through. They’ll regain their crispiness!
Storage Tip: Ensure the filling is fully cooled before storing, as this helps maintain the texture and flavor of your delicious antojitos.
What to Serve with Antojitos
The delightful crunch and cheesy goodness of these bites open a world of pairing possibilities for a complete, delicious meal.
-
Guacamole: Creamy and refreshing, guacamole adds a cool contrast that perfectly complements the spicy and cheesy flavors of antojitos.
-
Salsa Verde: Bright and tangy, this green salsa bursts with earthy flavors that elevate your appetizers and ignite your taste buds.
-
Chipotle Black Beans: Hearty and smoky, these tender beans offer a fulfilling side that adds depth without overshadowing the star of the meal.
-
Mexican Street Corn: Sweet and spicy corn on the cob drizzled with lime and chili powder brings vibrant summer flavors, creating a festive atmosphere.
-
Crispy Caesar Salad: A light and crispy side salad balances the richness of antojitos. Add a sprinkle of parmesan for that lovely savory touch.
-
Margaritas: A tangy, refreshing margarita is a classic companion, making every bite of these cheesy treats even more enjoyable.
These pairings not only enhance your meal experience but also create a vibrant and inviting atmosphere perfect for any occasion!

Antojitos Recipe FAQs
What type of flour tortillas should I use for antojitos?
I recommend using 10-inch flour tortillas for the best results. They provide ample surface area for rolling and stuffing without tearing, ensuring that each bite is packed with cheesy goodness!
How should I store leftover antojitos?
Leftover antojitos can be stored in an airtight container in the refrigerator for up to 4 days. When you’re ready to enjoy them again, simply reheat in the oven at 350ºF for about 10 minutes to restore their crispy exterior.
Can I freeze antojitos for later use?
Absolutely! You can freeze assembled, uncooked antojitos for up to 2 months. Just wrap each one tightly in plastic wrap and then in foil to prevent freezer burn. When you’re ready to enjoy, bake them straight from the freezer at 350ºF for 12-15 minutes or until heated through and crispy.
What if my filling is too runny?
If your filling turns out too runny, you can add more cream cheese or shredded cheese to thicken it up. Another option is to drain any excess liquid from your vegetables, especially if using fresh ones, to avoid excess moisture that could make the filling soggy.
Are antojitos suitable for children or those with dietary restrictions?
Very! You can easily customize the ingredients in antojitos to suit different dietary needs. For a milder version for kids, reduce or omit the cayenne pepper and green chilies. Additionally, feel free to replace dairy ingredients with plant-based versions to accommodate lactose intolerance or vegan diets. Enjoy making these delicious bites fit for everyone!
Can I prepare the filling in advance?
Yes, you can prepare the filling ahead of time! Store it in the fridge for up to 2 days before using. This not only saves time on busy nights but also allows the flavors to meld together beautifully. Just remember to roll the tortillas right before cooking for the best texture!

Cheesy Antojitos: Irresistible Mexican Appetizers Made Easy
Ingredients
Equipment
Method
- Preheat your oven to 350ºF (175ºC) and line a baking sheet with parchment paper.
- In a large mixing bowl, combine softened cream cheese, diced green chilies, shredded cheddar cheese, finely diced red onion, bell pepper, sour cream, and all your spices. Blend until smooth.
- Evenly spread the cheese filling on each tortilla and roll tightly.
- Slice each rolled tortilla into five equal pieces and arrange cut-side up on the baking sheet.
- Bake for 8 minutes, then broil for an additional 5 minutes until golden and crispy.
- Allow to cool slightly and serve warm with basil pesto for dipping.
Leave a Reply