
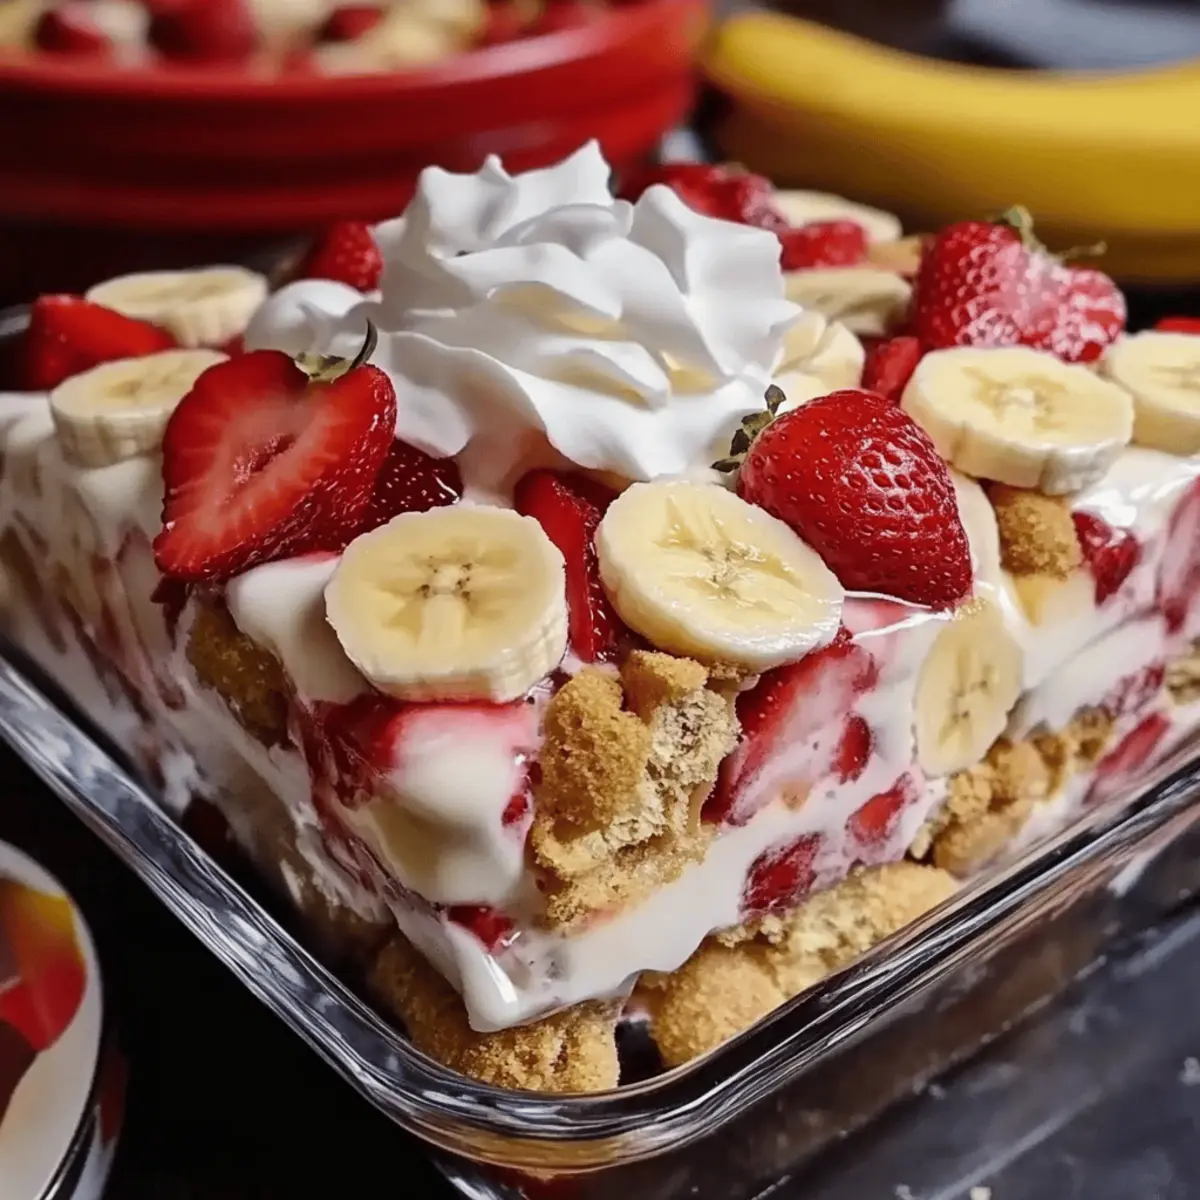
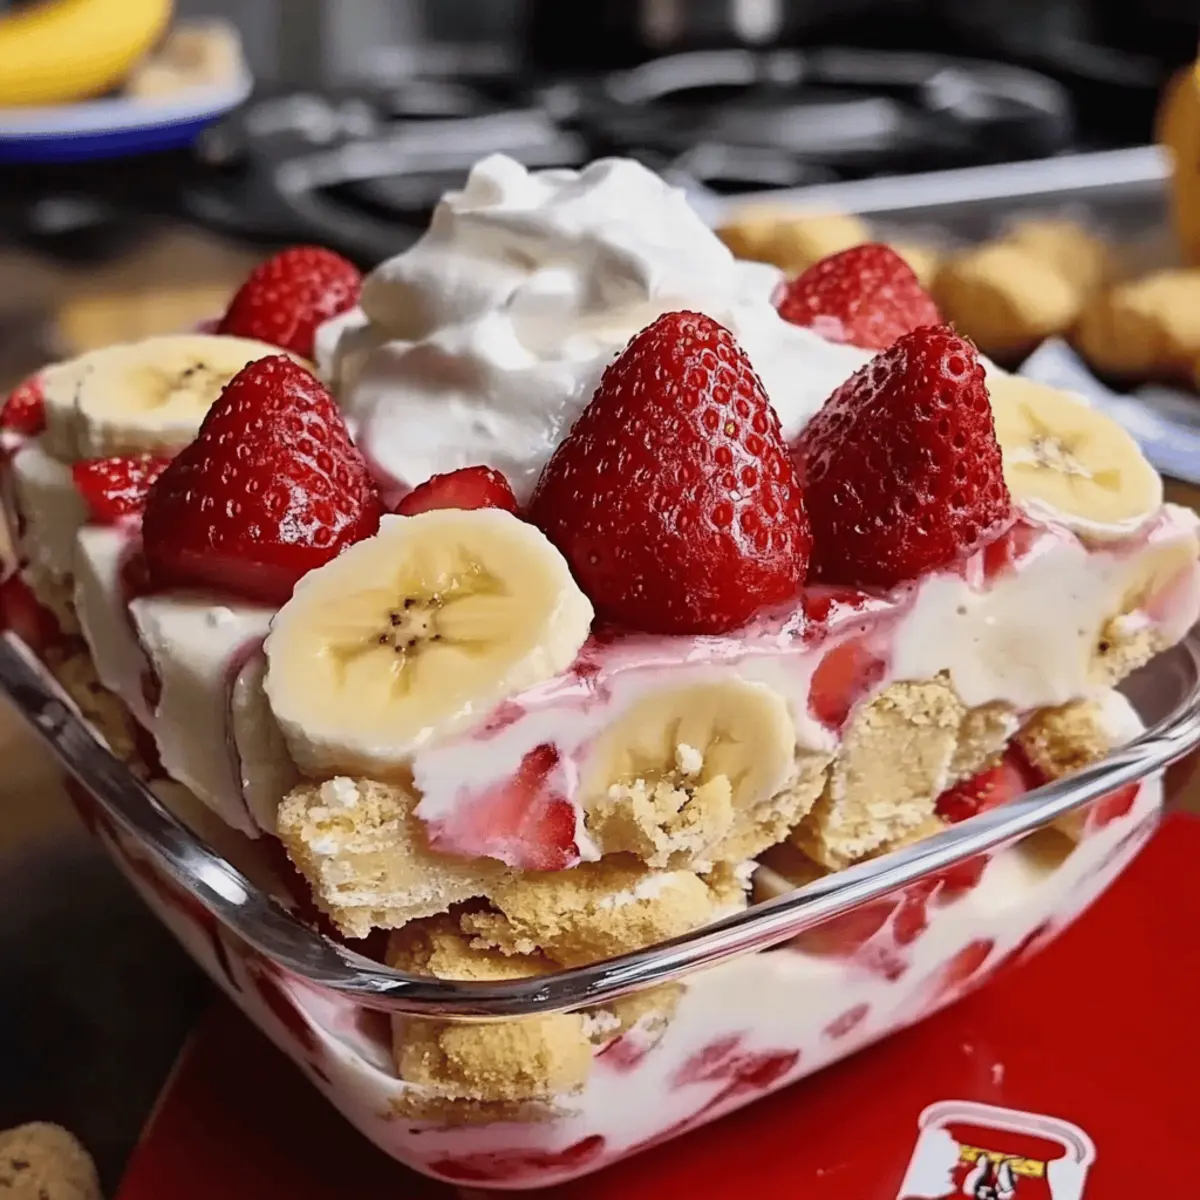
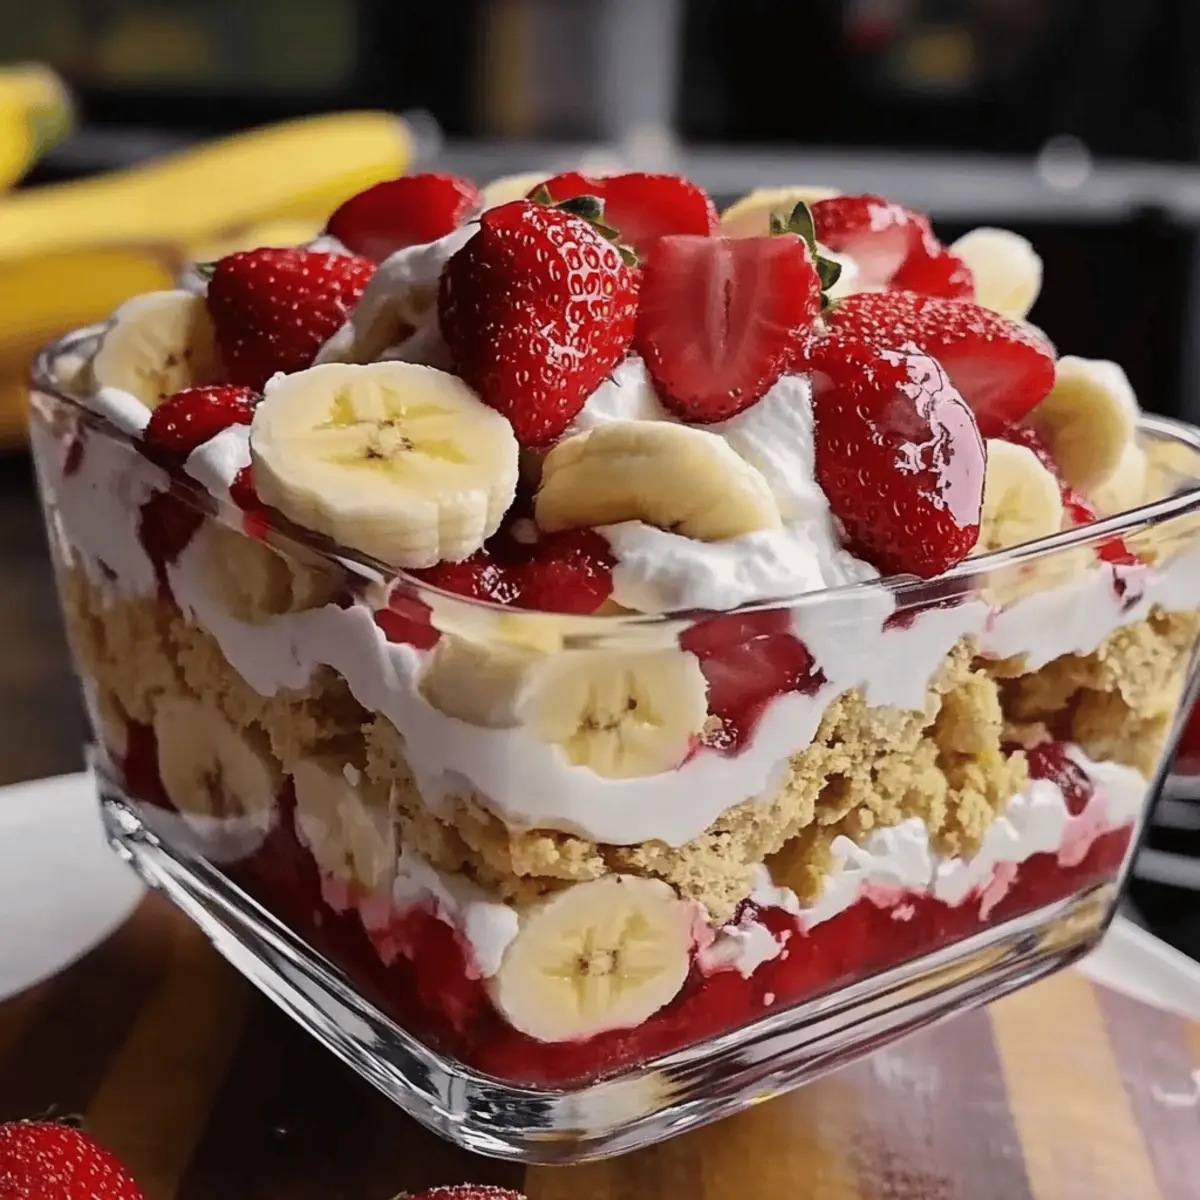
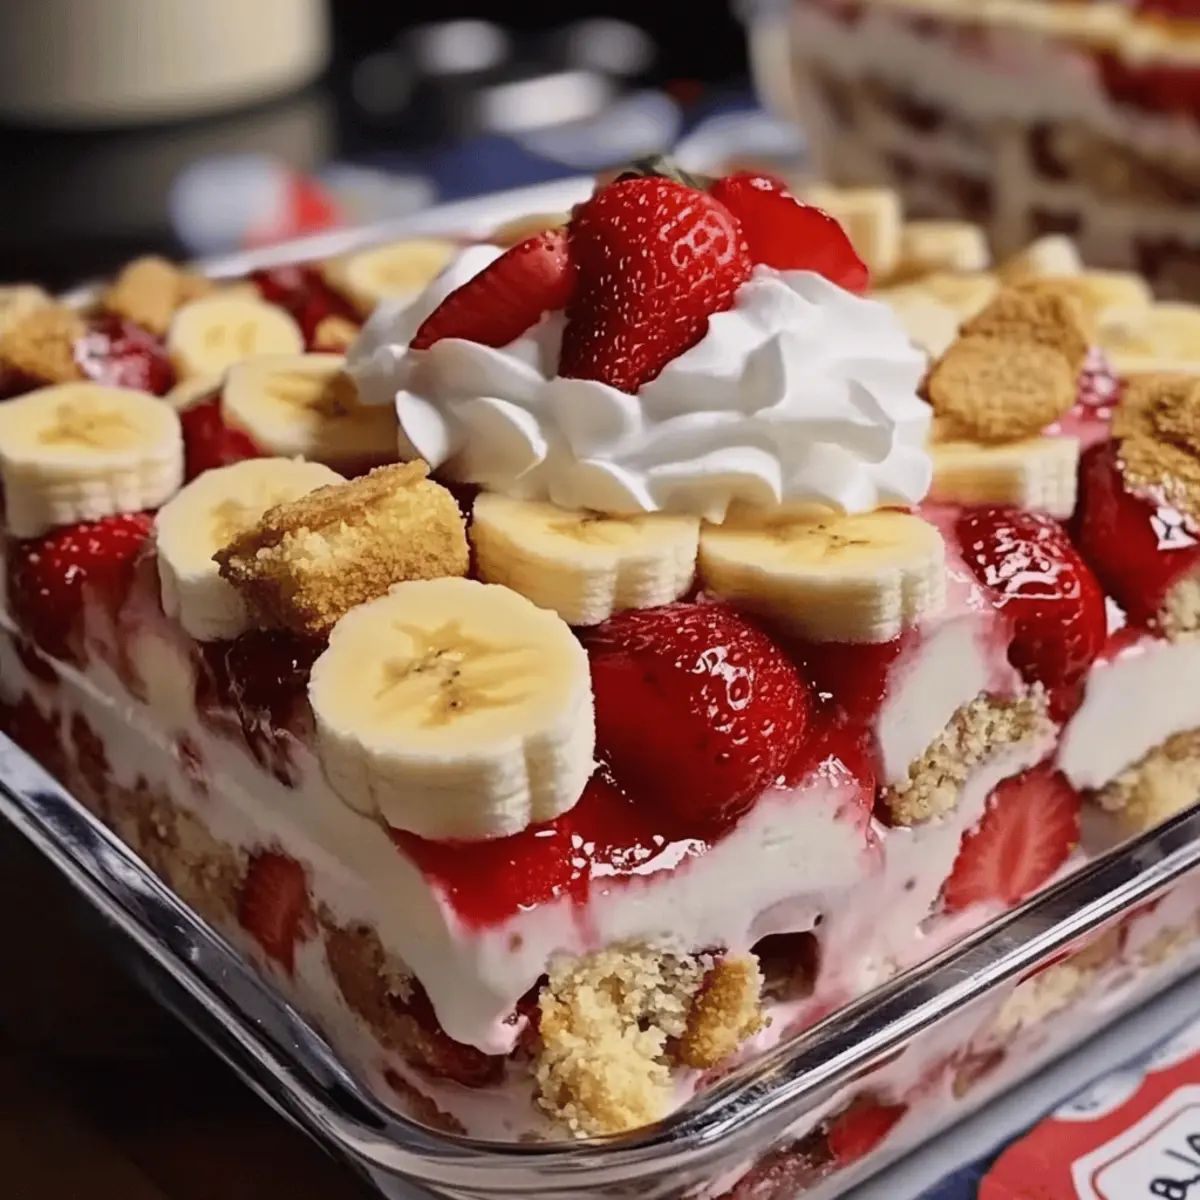
“Can you believe how easy it is to whip up a stunning dessert in just 20 minutes?” I overheard a friend ask, and it immediately made me think of my favorite Strawberry Banana Pudding Dream. This no-bake delight is perfect for those hectic days when you crave something sweet but don’t want to spend hours in the kitchen. With layers of creamy pudding, fresh strawberries, and bananas, each spoonful offers a refreshing burst of flavor that will wow your guests and leave you smiling. Not only is it a crowd-pleaser, but it also accommodates various diets with gluten-free options and no baking required! Whether you’re hosting a family gathering or just treating yourself, I can’t wait for you to discover the joy of this dessert. Ready to dive in and create your own delicious masterpiece?
Why Is This Dessert a Must-Try?
Effortless preparation: In just 20 minutes, you can make this dessert without turning on the oven, making it perfect for busy days.
Fresh, vibrant flavors: The combination of ripe bananas and juicy strawberries creates a refreshing symphony of taste.
Diet-friendly options: With gluten-free and vegetarian alternatives available, everyone can indulge in this creamy delight.
Stunning presentation: Each layer reveals a colorful arrangement that will impress your guests at gatherings or potlucks.
Make-ahead magic: Prepare it the day before to save time and let the flavors develop beautifully, ensuring it’s ready when you are.
For more delicious dessert ideas, check out my Fil Banana Pudding and Peanut Butter Pudding.
Strawberry Banana Pudding Dream Ingredients
For the Base
• Vanilla Wafers – Provide structure and crunch to the layers; substitute gluten-free wafers for a gluten-free option.
• Bananas – Fresh, sliced bananas add sweetness and texture; use ripe bananas for the best flavor.
For the Pudding Mixture
• Milk – Combines with the pudding mix for creaminess; almond milk can be used as a dairy-free option.
• French Vanilla Pudding Mix – Creates the creamy pudding base; crucial for flavor, and instant pudding mix is recommended for quick preparation.
• Cream Cheese – Adds richness and a smooth texture; Greek yogurt can replace cream cheese for a lighter version.
• Sweetened Condensed Milk – Sweetens and enhances the pudding’s creaminess, essential for that perfect Strawberry Banana Pudding Dream consistency.
For the Topping
• Strawberries – Fresh strawberries give a fruity burst; if fresh aren’t available, use thawed and drained frozen strawberries.
• Whipped Topping – Provides a light, fluffy finish; use dairy-free whipped topping for a vegan version.
Step‑by‑Step Instructions for Strawberry Banana Pudding Dream
Step 1: Mix Creamy Base
In a large mixing bowl, beat 8 ounces of cream cheese until smooth, using a hand mixer or whisk. Gradually add 1 can (14 ounces) of sweetened condensed milk, continuing to mix until fully combined and creamy, about 1-2 minutes. This will serve as the luscious base for your Strawberry Banana Pudding Dream.
Step 2: Prepare Pudding Mixture
Next, sprinkle in 1 package (3.4 ounces) of French vanilla pudding mix and pour in 2 cups of cold milk. Mix thoroughly until the pudding is well incorporated and free from lumps, taking about 2-3 minutes. The mixture will begin to thicken and create the creamy texture essential for your delicious layers.
Step 3: Layer Vanilla Wafers
Take a large serving dish or trifle bowl and start by arranging a layer of vanilla wafers at the bottom. Make sure they are evenly spaced and cover the base completely to create a stable foundation. This crunchy layer will add contrast and structure to your Strawberry Banana Pudding Dream.
Step 4: Add Fruit Layers
Slice 2 ripe bananas and arrange a layer of banana slices over the vanilla wafers, followed by a layer of fresh, hulled strawberries. Ensure the fruits are evenly distributed for balanced flavor in every bite. The freshness of the fruit will complement the creamy layers beautifully.
Step 5: Pour Pudding Mixture
Pour half of the prepared pudding mixture over the fruit and wafers, spreading it evenly with a spatula. This layer will seal in the fruit flavors and provide a rich creamy texture, making your Strawberry Banana Pudding Dream irresistibly good.
Step 6: Repeat Layering
Repeat the layering process by adding another layer of vanilla wafers, followed by the remaining sliced bananas and strawberries. Pour the rest of the pudding mixture on top, smoothing it out with your spatula so that every bit of fruit is covered. This helps create a beautiful, cohesive dessert.
Step 7: Finish with Whipped Topping
Finish by spreading a generous layer of whipped topping over the final pudding layer. Use a spatula to create an even, fluffy coating that adds a delightful lightness to the Strawberry Banana Pudding Dream. This final touch makes it visually appealing and enhances the overall texture.
Step 8: Chill and Serve
Cover the dessert with plastic wrap and refrigerate for at least 4 hours, or preferably overnight. This chilling time allows the flavors to meld and the pudding to firm up. When ready to serve, simply slice or scoop your Strawberry Banana Pudding Dream directly from the dish, and enjoy!
What to Serve with Strawberry Banana Pudding Dream
Looking for delightful pairings to elevate your dessert experience?
- Fresh Berries: A bowl of mixed berries adds a vibrant touch, enhancing the fruity essence of the pudding. Their juicy burst complements the creamy texture beautifully.
- Coconut Whipped Cream: For an extra tropical twist, serve your dessert with a dollop of coconut whipped cream. It adds a light, airy quality that will delight your taste buds.
- Crunchy Biscotti: These crunchy treats provide a satisfying contrast to the smooth pudding. Dip them in coffee or tea for a delightful combination that warms the heart.
- Mint Leaves: A sprinkle of fresh mint brings a refreshing element to the dish. It not only elevates the visual appeal but also adds an aromatic touch.
- Chocolate Sauce: Drizzle chocolate sauce over your pudding for a luscious finish. The sweet, rich flavor of chocolate pairs wonderfully with the fruitiness, creating a decadent dessert experience.
- Sparkling Lemonade: Pair your Strawberry Banana Pudding Dream with a glass of sparkling lemonade. The zesty bubbles will refresh your palate and add a festive flair to your gathering.
- Shortbread Cookies: These buttery cookies offer a lovely crunch and pair well with the creamy pudding. Enjoy them on the side for a delightful contrast in textures.
- Coffee or Espresso: The rich, bold flavor of coffee or espresso complements the sweetness of the pudding. Enjoy a cup alongside to balance the dessert’s creamy sweetness.
- Fruit Salad: A light fruit salad serves as a refreshing counterpoint. Choose seasonal fruits for a colorful and wholesome side that brightens your plate.
- Vanilla Ice Cream: For an indulgent treat, serve a scoop of vanilla ice cream on the side. The creamy scoop enhances the overall dessert experience, making it irresistibly delightful.
Expert Tips for Strawberry Banana Pudding Dream
-
Timing Matters: Allow the dessert to chill for at least 4 hours; this helps the flavors blend beautifully and improves the texture of the pudding.
-
Layer with Care: Ensure even layers of fruit and pudding for a balanced taste. Rushing this process may result in a mixed-up flavor experience.
-
Ingredient Substitutions: If using almond milk or Greek yogurt, check for flavor compatibility with the other ingredients to maintain the essence of the Strawberry Banana Pudding Dream.
-
Freshness Counts: Opt for ripe bananas and fresh strawberries for the best taste. Don’t use overly ripe or mushy fruit, which can alter the dessert’s texture.
-
Storing Leftovers: Keep your dessert covered in the refrigerator and consume within three days for optimal freshness, as the ingredients can change consistency over time.
How to Store and Freeze Strawberry Banana Pudding Dream
-
Fridge: Store any leftovers in an airtight container in the refrigerator for up to 3 days. This ensures your Strawberry Banana Pudding Dream stays fresh and delicious for later enjoyment.
-
Freezer: For freezing, layer the pudding mixture and fruit in a freezer-safe container, leaving room for expansion. It can last in the freezer for up to 1 month, but be mindful that the texture may change upon thawing.
-
Thawing: When ready to eat, transfer the frozen Strawberry Banana Pudding Dream to the fridge to thaw overnight. Enjoy chilled for the best experience.
-
Reheating: This dessert is best served cold and not reheated. Thawing it in the fridge allows the flavors to return to their original creamy state without compromising taste or texture.
Strawberry Banana Pudding Dream Variations
Feel free to play around with this delightful dessert and make it your own—your taste buds will thank you!
-
Tropical Twist: Add crushed pineapple in place of half the bananas for a refreshing, fruity fusion. This brings a sunny vibe to each bite!
-
Berry Bonanza: Swap bananas for mixed berries like blueberries or raspberries based on what you have on hand. The juicy burst of flavor adds a delightful touch to the classic.
-
Choco Delight: Drizzle chocolate syrup over the layers to elevate the sweetness. For an extra treat, sprinkle mini chocolate chips on top before serving.
-
Creamy Dreamy: Use mascarpone cheese instead of cream cheese for a richer, creamier base. You’ll introduce a lovely Italian flair to your dessert!
-
Nutty Crunch: Sprinkle chopped nuts, like almonds or walnuts, between the layers for an added crunch and nutty flavor. It creates a pleasing contrast to the creamy pudding.
-
Dairy-Free Magic: Substitute almond milk and dairy-free whipped topping for a completely vegan Strawberry Banana Pudding Dream. This version is equally delightful without sacrificing flavor.
-
Spiced Up: Add a dash of cinnamon or nutmeg to the pudding mix for a warm, cozy note in your dessert. You might just surprise your family with this unexpected twist.
Looking for more delicious options? Check out my Vegetarian Southern Casserole for a hearty dish that complements your sweet craving perfectly!
Make Ahead Options
These Strawberry Banana Pudding Dream layers are perfect for meal prep enthusiasts! You can prepare the creamy pudding mixture and layer the vanilla wafers, bananas, and strawberries up to 24 hours in advance, which not only saves time but also enhances the flavor as it melds overnight. Simply cover your layered creation tightly with plastic wrap and refrigerate to maintain freshness. When you’re ready to serve, spread the whipped topping over the final layer just before enjoying, ensuring it remains light and fluffy. This way, you’ll have a gorgeous, no-bake dessert that is just as delicious on the day it’s made!
Strawberry Banana Pudding Dream Recipe FAQs
What kind of bananas should I use for the best flavor?
I recommend using ripe bananas for this recipe. Look for bananas that have a few brown spots on the skin as they will be sweeter and creamier, providing the perfect texture and flavor for your Strawberry Banana Pudding Dream.
How should I store leftovers, and how long do they last?
Store any leftovers in an airtight container in the refrigerator for up to 3 days. This helps maintain the freshness and prevents the pudding from absorbing any odors from the fridge, ensuring you enjoy every last bite of your Strawberry Banana Pudding Dream!
Can I freeze the Strawberry Banana Pudding Dream?
Absolutely! To freeze, layer the pudding mixture and fruit in a freezer-safe container, making sure to leave some room for expansion. It can last in the freezer for up to 1 month. Keep in mind that the texture may slightly change upon thawing, so it’s best to enjoy it fresh when possible.
What if my pudding mixture is lumpy?
If you find your pudding mixture is lumpy, don’t fret! This can happen if the pudding mix isn’t blended well. To fix it, simply whisk the mixture again vigorously until it’s smooth. Alternatively, using a handheld mixer can help break up any lumps, ensuring a creamy consistency for your Strawberry Banana Pudding Dream.
Is this dessert suitable for people with allergies?
Always check your ingredient labels! For allergies, you can substitute dairy products with almond milk and dairy-free whipped toppings. Ensure that the vanilla wafers are gluten-free if needed, making this dessert more inclusive for different dietary needs.
Strawberry Banana Pudding Dream: Effortless No-Bake Bliss
Ingredients
Equipment
Method
- In a large mixing bowl, beat 8 ounces of cream cheese until smooth, then gradually add 1 can of sweetened condensed milk and mix until creamy.
- Add 1 package of French vanilla pudding mix and 2 cups of cold milk, mixing until well incorporated and free from lumps.
- Arrange a layer of vanilla wafers at the bottom of your serving dish.
- Slice 2 ripe bananas and layer over the wafers, followed by a layer of hulled fresh strawberries.
- Pour half of the pudding mixture over the fruit and wafers, spreading it evenly.
- Repeat the layering process with another layer of vanilla wafers, remaining bananas, and strawberries, then pour the rest of the pudding mixture on top.
- Spread a generous layer of whipped topping over the final pudding layer.
- Cover and refrigerate for at least 4 hours or overnight before serving.
Leave a Reply