
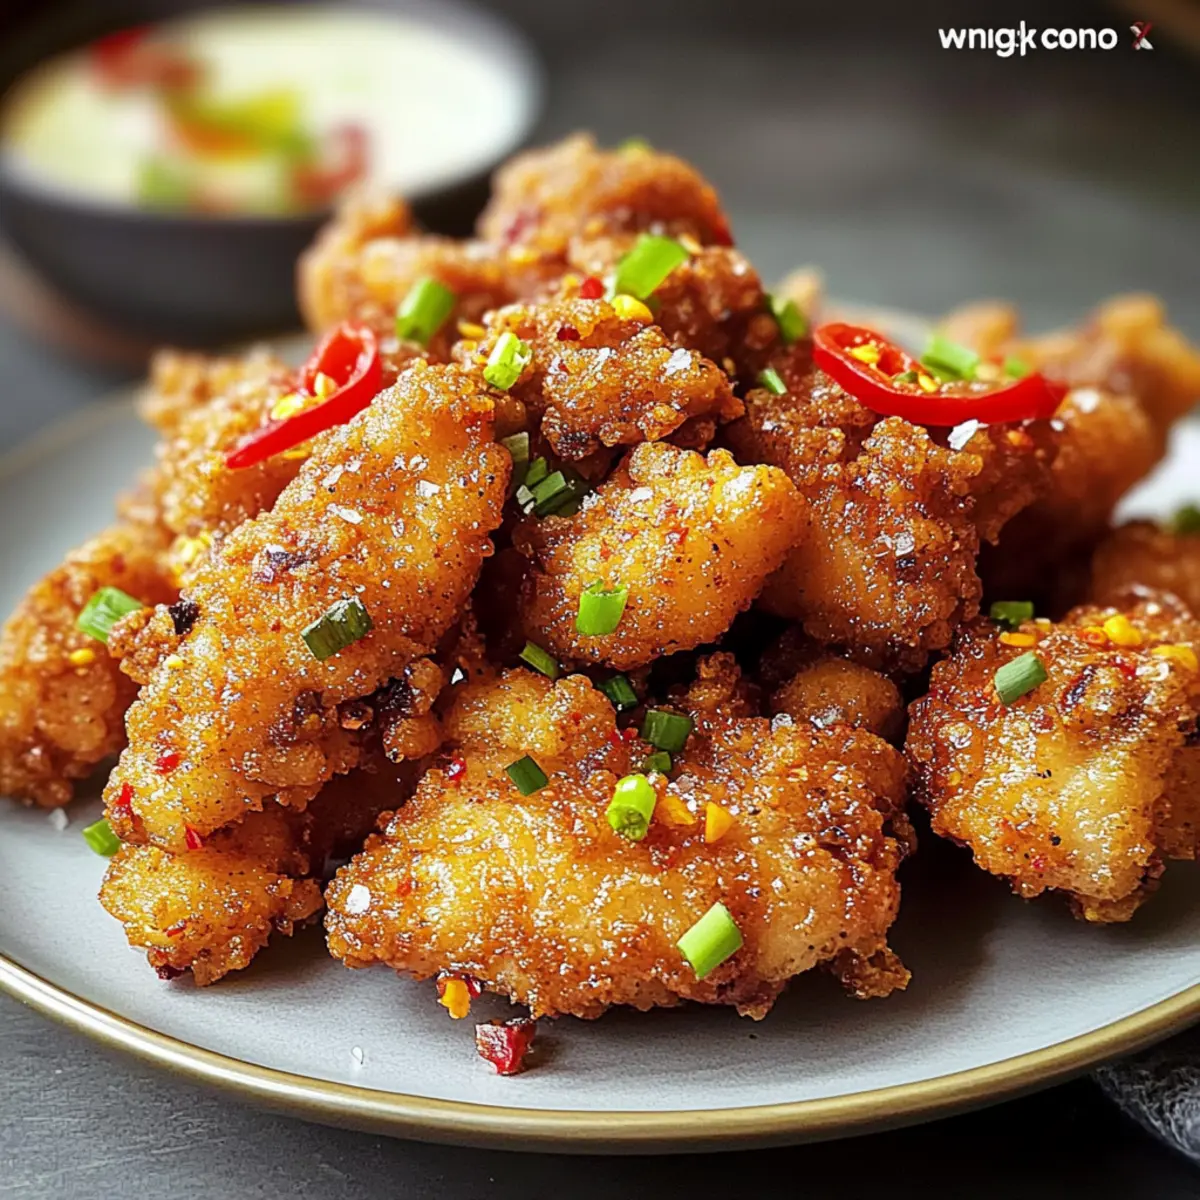
You know that delightful crunch when you first sink your teeth into perfectly fried chicken? That’s exactly the moment I aim for in my Salt and Pepper Crispy Chicken. This Asian-inspired dish is not just about the crunch; it’s a vibrant blend of garlic and chili that infuses each juicy piece with irresistible flavor. What makes this recipe truly special is its simplicity. With quick prep and a crowd-pleasing nature, it’s ideal for a weeknight meal or an impressive appetizer at gatherings. Plus, it’s easily adaptable for gluten-free diets, ensuring everyone can savor its goodness. Are you ready to transform your chicken nights with this flavor-packed delight? Let’s dive into the recipe!

Why is this Chicken Recipe a Must-Try?
Simplicity at its finest: This Salt and Pepper Crispy Chicken requires minimal ingredients and quick preparation, making weeknight dinners a breeze.
Flavor explosion awaits: The combination of crispy chicken, garlic, and chili creates an irresistible taste that dances on your palate.
Customizable goodness: Easily adjust the spice level to suit your family’s preferences or swap in gluten-free options without sacrificing taste.
Crowd-pleaser: Perfect for gatherings, this dish is sure to impress guests or family, making it an ideal appetizer or main course.
Versatile pairing: Serve it with steamed rice, a fresh cucumber salad, or alongside a delicious bowl of fried rice for a complete meal experience.
Salt and Pepper Crispy Chicken Ingredients
Unlock the secrets to perfecting your dish!
For the Chicken
• Boneless Chicken Thighs or Breasts – Choose thighs for juiciness or breasts for a leaner option; both work wonderfully!
• Cornstarch – This ingredient adds an irresistible crunch to the coating; it’s also gluten-free!
• All-Purpose Flour – Provides structure for a crispy finish; for gluten-free, substitute with a gluten-free flour blend.
For the Flavor
• Minced Garlic – Fresh garlic enhances the dish’s aroma and flavor, creating a fragrant experience.
• Red Chilies (sliced) – Introduces a pop of heat; adjust based on your spice preference.
• Ground White Pepper – Gives a milder heat and unique flavor profile compared to black pepper.
• Salt – Essential for bringing out the flavors; feel free to adjust to your liking.
• Sugar – Balances the heat from the chilies, offering a delightful contrast.
For the Finish
• Chopped Green Onions – Adds freshness and a burst of color, elevating the final presentation.
• Oil (for deep frying) – Neutral oils like canola or peanut are excellent choices for achieving that golden-crisp texture.
Enjoy delighting your taste buds with this Salt and Pepper Crispy Chicken!
Step‑by‑Step Instructions for Salt and Pepper Crispy Chicken
Step 1: Coat Chicken
In a mixing bowl, combine cornstarch and all-purpose flour for your Salt and Pepper Crispy Chicken coating. Take your boneless chicken thighs or breasts, cut them into even-sized pieces, and thoroughly coat each piece in the flour mixture. Ensure all sides are evenly coated for optimum crunch, then set the coated chicken aside on a plate while you prepare to heat the oil.
Step 2: Heat Oil
In a deep pan or large pot, pour enough neutral oil to submerge the chicken, about 2-3 inches deep. Heat the oil over medium-high heat until it reaches 350°F (175°C). Use a thermometer for accuracy, watching for small bubbles to appear as a visual cue that the oil is ready. This step is crucial to achieving that crispiness we all love in Salt and Pepper Crispy Chicken.
Step 3: Fry Chicken
Once the oil is hot, carefully add the coated chicken pieces in small batches; this allows for even cooking and prevents the temperature from dropping. Fry each batch for 4–5 minutes, turning occasionally, until the chicken is golden brown and crisp. Use a slotted spoon to remove the chicken and drain them on paper towels, which will help maintain the crunchy texture.
Step 4: Sauté Aromatics
In a clean skillet, add a small amount of oil and heat it over medium flame. As the oil warms, add in the minced garlic and sliced red chilies, sautéing until fragrant, about 1-2 minutes. Keep an eye on the garlic to ensure it doesn’t burn, as this will enhance the dish’s flavor profile for your Salt and Pepper Crispy Chicken with aromatic goodness.
Step 5: Season Chicken
Once the garlic and chilies are aromatic, add the fried chicken pieces into the skillet. Sprinkle with salt, ground white pepper, and a touch of sugar. Toss everything together until the chicken is well coated and every piece showcases the delightful flavor combination. This step infuses the Salt and Pepper Crispy Chicken with savory and spicy tones.
Step 6: Garnish & Serve
After seasoning, turn off the heat and transfer the chicken to a serving platter. Garnish generously with chopped green onions for a fresh finish. Serve your Salt and Pepper Crispy Chicken hot, ideally alongside steamed rice or your favorite noodles, to complete this mouthwatering meal. Enjoy the delightful crunch and savory flavor at your next gathering!

How to Store and Freeze Salt and Pepper Crispy Chicken
Fridge: Store any leftover Salt and Pepper Crispy Chicken in an airtight container for up to 2 days to maintain freshness.
Freezer: For longer storage, freeze the chicken for up to 3 months. Place in a single layer on a baking sheet until frozen, then transfer to a freezer-safe bag.
Reheating: Reheat in the oven at 375°F (190°C) for about 10–15 minutes to restore the crispiness; avoid microwaving, which can make the coating soggy.
Cool Before Storing: Allow the chicken to cool completely before placing it in the fridge or freezer to maintain quality and prevent condensation.
Salt and Pepper Crispy Chicken Variations
Feel free to get creative with this recipe and tailor it to your taste buds!
-
Gluten-Free: Substitute all-purpose flour with a gluten-free flour blend for a satisfying crunch without the gluten.
This tweak maintains the dish’s integrity while allowing those with dietary restrictions to enjoy it fully. -
Spicy Twist: Increase the number of red chilies or use spicy chili paste for a fiery kick.
If you really love heat, consider adding some crushed red pepper flakes for an extra layer of flavor! -
Herb-Infused: Add fresh herbs like cilantro or basil for a fragrant twist.
Tossing in these vibrant herbs right before serving will elevate the dish while adding a pop of color. -
Crispy Veggie Add-Ins: Fry thinly sliced bell peppers or green beans along with the chicken for added texture.
This way, you can incorporate a medley of colors and nutrients right into your crispy bites. -
Zesty Lime: Drizzle fresh lime juice over the fried chicken just before serving for a bright finish.
The citrusy zing will awaken your taste buds and complement the savory notes perfectly. -
Asian Sauce Enhancement: Serve with a side of sweet chili or teriyaki sauce for dipping and extra flavor.
It turns each bite into a flavor adventure and is a fun way to mix it up during special occasions. -
Baked Version: For a healthier twist, bake the chicken at 400°F (200°C) instead of frying.
Lightly spray the coated pieces with oil before baking to achieve that golden, crispy finish!
For more delicious chicken recipes, don’t miss out on my Dry Rub Chicken or explore my fantastic Bang Bang Chicken for a flavor fiesta!
Expert Tips for Salt and Pepper Crispy Chicken
• Uniform Sizing: Ensure chicken pieces are cut into even sizes to promote consistent cooking and a delightful texture throughout your Salt and Pepper Crispy Chicken.
• Oil Temperature Matters: Maintain the oil at 350°F (175°C) for the perfect fry. If the oil is too hot, the coating may burn, while too low can result in greasy chicken.
• Batch Frying: Avoid overcrowding the pan when frying. Cooking in small batches allows each piece to get that irresistible crunch without steaming.
• Flavor Boost: Toss the chicken with seasonings immediately after frying to lock in flavor. The heat helps the salt, pepper, and sugar cling beautifully to every piece.
• Serving Fresh: Enjoy your Salt and Pepper Crispy Chicken fresh for the best taste. If storing, reheat in the oven rather than the microwave to maintain its crispy texture.
What to Serve with Salt and Pepper Crispy Chicken
When you’re ready to take your meal to the next level, let’s explore delightful pairings that enhance the flavor of this crispy sensation.
-
Steamed Jasmine Rice: A fluffy side that soaks up the savory juices, creating a beautiful balance with the spices.
-
Cucumber Salad: This refreshing salad offers a cool crunch, contrasting the heat from the chicken and brightening the dish with a zesty flavor.
-
Fried Rice: Packed with vegetables and aromatics, this hearty side is perfect to soak in the flavors of the crispy chicken and adds delightful texture.
-
Asian Slaw: A colorful mix of cabbage, carrots, and sesame dressing adds vibrant freshness and a satisfying crunch that pairs wonderfully with the savory chicken.
-
Hot and Sour Soup: This traditional soup’s bold flavors complement the chicken beautifully, providing a warm and tangy contrast that warms the heart.
-
Dipping Sauce: Serve with a soy-vinegar dipping sauce for added depth. The tanginess enhances the overall flavor while providing a delightful contrast to the crispiness.
-
Green Tea: A soothing drink that refreshes the palate and balances the richness of the chicken, making it an ideal dining companion for your meal.
Make Ahead Options
These Salt and Pepper Crispy Chicken bites are perfect for meal prep enthusiasts looking to save time on busy weeknights! You can coat the chicken pieces with the cornstarch and flour mixture up to 24 hours in advance; just store them in an airtight container in the refrigerator to maintain their crunch. Additionally, you can prepare the garlic and chilies ahead and sauté them shortly before serving for maximum flavor. When you’re ready to enjoy your homemade dish, simply heat the oil and fry the prepped chicken—resulting in the same delightful crunch and taste as if made fresh!
Salt and Pepper Crispy Chicken Recipe FAQs
How do I select the right chicken for this recipe?
Absolutely! For the best results, opt for boneless chicken thighs for their juicy texture or boneless chicken breasts for a leaner choice. Look for pieces that are plump and moist, avoiding those with dark spots or an unpleasant odor.
What’s the best way to store leftover Salt and Pepper Crispy Chicken?
I recommend storing any leftovers in an airtight container in the fridge. They will stay fresh for up to 2 days. To maintain their crispiness, reheat them in the oven rather than the microwave; simply set it to 375°F (190°C) and warm for about 10-15 minutes.
Can I freeze Salt and Pepper Crispy Chicken?
Absolutely! To freeze, first, let the cooked chicken cool completely. Then, place the pieces in a single layer on a baking sheet until they’re frozen solid. Once frozen, transfer them to a freezer-safe bag. They can be stored in the freezer for up to 3 months. When you’re ready to eat, reheat in the oven as mentioned for the best texture.
What if my chicken isn’t crispy after frying?
Very! If your chicken isn’t crispy, ensure that the oil was properly heated to 350°F (175°C) before frying. Also, avoid overcrowding the pan, as this can cause the temperature to drop and lead to soggy chicken. If it still turns out less crispy than desired, a quick reheating in the oven will help regain some crunch.
Are there any gluten-free adaptations for this Salt and Pepper Crispy Chicken?
Yes, indeed! For a gluten-free version, simply substitute the all-purpose flour with a gluten-free flour blend when coating the chicken. Make sure to also check that your cornstarch is gluten-free, as most are, and enjoy the same crispy goodness without any gluten worries.
Is this recipe suitable for my pets?
While Salt and Pepper Crispy Chicken is delicious for humans, it’s not recommended for pets due to the seasoning, especially garlic. Garlic can be problematic for dogs and cats, so it’s best to prepare a plain version without spices if you want to share a taste with your furry friends.
Irresistible Salt and Pepper Crispy Chicken for Perfect Nights
Ingredients
Equipment
Method
- In a mixing bowl, combine cornstarch and all-purpose flour for the coating. Coat chicken pieces evenly and set aside.
- Heat oil in a deep pan to 350°F (175°C). Use a thermometer to check the temperature.
- Fry the chicken in small batches for 4-5 minutes until golden brown. Drain on paper towels.
- In a skillet, heat a small amount of oil, then add garlic and chilies, cooking until fragrant.
- Add fried chicken to the skillet, season with salt, white pepper, and sugar, and toss to coat.
- Transfer chicken to a serving platter and garnish with chopped green onions. Serve hot.
Leave a Reply