
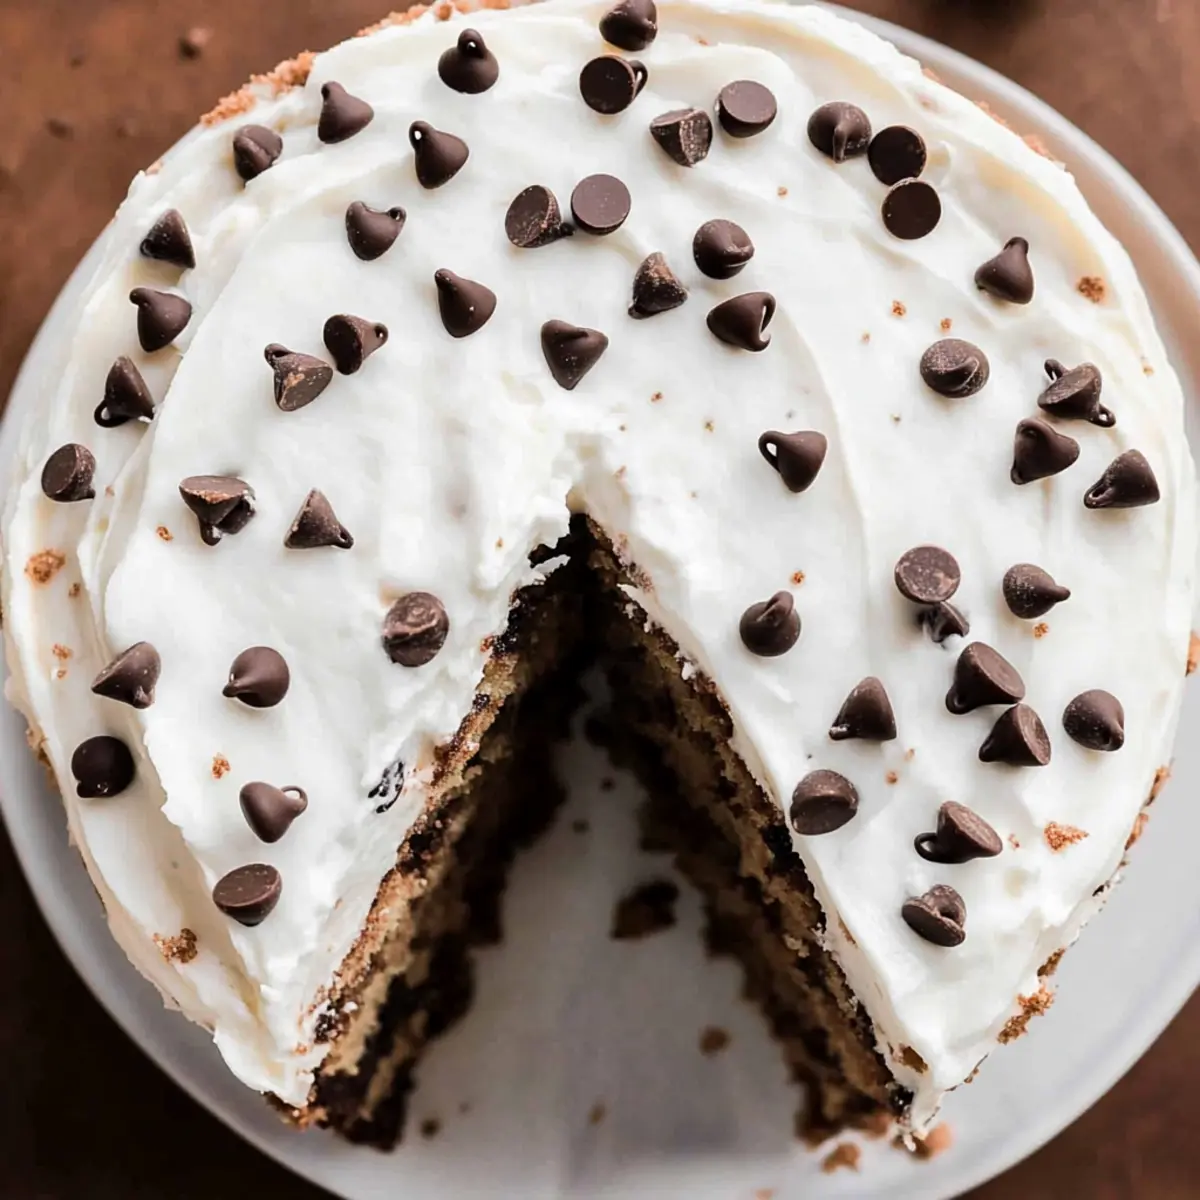
The aroma of warm, freshly baked cake wafting through the kitchen is truly a magic spell. When it comes to embodying comfort and nostalgia, nothing beats a moist Chocolate Chip Cake. This recipe showcases two layers of fluffy goodness, filled with semi-sweet mini chocolate chips and topped off with an irresistible vanilla chocolate chip buttercream. It’s incredibly simple to whip up—no need for heavy equipment—and what’s even better? You can prepare it in advance and even freeze it for those spontaneous get-togethers. Imagine sharing a slice with loved ones, each bite bringing smiles and memories. Are you ready to bake this classic crowd-pleaser that will have everyone asking for seconds?
Why is Chocolate Chip Cake So Irresistible?
Decadent, Comforting Flavor: Each bite of this chocolate chip cake brings a wave of nostalgia, reminiscent of childhood treats, thanks to the semi-sweet mini chocolate chips that melt beautifully into the fluffy layers.
Easy to Make: With straightforward steps, you don’t need to be a professional baker to impress your friends and family.
Perfect for Any Occasion: Whether it’s a birthday celebration or a casual gathering, this cake fits perfectly into any setting and is sure to be a crowd favorite.
Versatile Delight: Feeling adventurous? You can switch up the chocolate chips or even transform the batter into whimsical cupcakes!
Generous Storage Options: Bake ahead? No problem! This chocolate chip cake can be frozen and enjoyed like fresh, with minimal effort.
If you love this treat, consider trying our Oatmeal Chocolate Chip bars or Cherry Chocolate Chip cookies for more delightful inspiration!
Chocolate Chip Cake Ingredients
• Here’s everything you need to create your delicious Chocolate Chip Cake.
For the Cake
- All-Purpose Flour – Provides structure; measure correctly for best results.
- Baking Powder – Ensures the cake rises beautifully; check for freshness.
- Salt – Balances sweetness and enhances flavor.
- Unsalted Butter – Adds moisture and richness; ensure it’s room temperature.
- Granulated Sugar – Sweetens the cake and supports its structure.
- Large Eggs – Contributes moisture and aeration; room temperature eggs work best for mixing.
- Vegetable Oil – Keeps the cake moist; can use melted coconut oil for a twist.
- Whole Milk – Keeps the cake soft; feel free to substitute with 1% or 2% milk.
- Vanilla Extract – Elevates flavors, making the cake irresistible.
- Semi-Sweet Mini Chocolate Chips – Bursts of chocolate goodness; coat in flour to prevent sinking.
For the Frosting
- Unsalted Butter – The base of the frosting, providing a creamy texture; also needs to be at room temperature.
- Powdered Sugar – Sweetens and thickens the buttercream; sifting ensures a smooth finish.
- Vanilla Extract – Enhances the flavor of the frosting.
- Heavy Cream – Creates a luxurious, creamy consistency in the frosting.
- Semi-Sweet Mini Chocolate Chips – Adds delightful texture to the frosting; optional if you prefer a smooth finish.
Step‑by‑Step Instructions for Chocolate Chip Cake
Step 1: Preheat the Oven
Begin by positioning your oven rack in the center and preheating it to 350°F (175°C). While the oven is heating, prepare two 8-inch cake pans by spraying them with baking spray or lining them with parchment paper for easy removal later. This preparation ensures that your Chocolate Chip Cake will bake evenly and come out perfectly.
Step 2: Mix the Dry Ingredients
In a medium mixing bowl, whisk together 2 cups of all-purpose flour, 2 teaspoons of baking powder, and a pinch of salt until well combined. Set aside a few tablespoons of this mixture to coat your chocolate chips later. This step helps to maintain structure in the cake, ensuring a delightful texture.
Step 3: Cream the Butter and Sugar
In a large mixing bowl, use an electric mixer to beat 1 cup of room temperature unsalted butter with 1 ½ cups of granulated sugar until the mixture is light and fluffy, which should take about 3-5 minutes. This aeration is key to achieving a light Chocolate Chip Cake. Next, mix in 2 large eggs, 1/4 cup of vegetable oil, 1 teaspoon of vanilla extract, and 1/2 cup of whole milk until smooth and well blended.
Step 4: Combine Wet and Dry Ingredients
Gradually add the dry ingredient mixture to the wet ingredients, stirring gently until just combined. Be careful not to overmix, as this can lead to a denser cake. Once blended, fold in the reserved flour-coated semi-sweet mini chocolate chips gently, ensuring they are evenly distributed throughout the batter.
Step 5: Bake the Cake
Divide the batter equally between the prepared cake pans, smoothing the tops with a spatula. Place the pans in the preheated oven and bake for 32-35 minutes or until a toothpick inserted into the center comes out clean. Keep an eye on the layers; they should rise nicely and turn a lovely golden brown. Allow the cakes to cool for 10 minutes in the pans before carefully transferring them to a wire rack to cool completely.
Step 6: Prepare the Buttercream Frosting
While the cakes cool, you can make the vanilla chocolate chip buttercream. In a bowl, beat 1 cup of room temperature unsalted butter with an electric mixer until smooth and creamy. Gradually add 4 cups of sifted powdered sugar, 1 teaspoon of vanilla extract, and enough heavy cream (about 2-4 tablespoons) until the frosting reaches your desired consistency. If you like, stir in more semi-sweet mini chocolate chips for added texture.
Step 7: Assemble the Cake
Once the chocolate chip cake layers are completely cooled, place one layer on a serving platter and generously spread a layer of frosting on top. Carefully place the second layer on top of the first, then frost the top and sides of the entire cake. For a beautiful finish, create swirls or patterns in the frosting to impress your guests. Enjoy your delightful creation!
Make Ahead Options
These moist Chocolate Chip Cake layers are perfect for meal prep and can be made in advance to save you time on busy days! You can bake the cake layers up to 3 days ahead of time; simply allow them to cool completely, wrap them tightly in plastic wrap, and refrigerate. The vanilla chocolate chip buttercream can also be prepared up to a week in advance; store it in an airtight container in the refrigerator. When you’re ready to serve, just bring the cake layers to room temperature, frost them with the buttercream, and enjoy a dessert that tastes freshly made! This thoughtful prep means you can impress your guests without the last-minute rush!
Chocolate Chip Cake Variations & Substitutions
Feel free to explore these delightful variations that can transform your Chocolate Chip Cake into something uniquely yours!
-
Dark Chocolate: Swap semi-sweet chips for dark chocolate chips for a richer flavor. The deep, intense taste elevates every bite.
-
Nutty Twist: Add chopped walnuts or pecans to the batter for some crunch. This gives a delightful contrast to the fluffy cake and pairs beautifully with the chocolate.
-
Zesty Citrus: Mix in the zest of a lemon or an orange for a refreshing hint of citrus. This adds a bright note that complements the chocolate magnificently.
-
Cupcake Conversion: Use the same batter to create cupcakes; just adjust the baking time to 18-20 minutes. These bite-sized treats are perfect for parties or gift-giving.
-
Cream Cheese Frosting: Try topping your cake with a tangy cream cheese frosting for a delicious contrast to the sweetness. It adds a touch of elegance and creaminess that everyone will enjoy!
-
Vegan-Friendly: Use plant-based butter, almond milk, and flax eggs to make a vegan version. It maintains the deliciousness while catering to dietary preferences.
-
Spice it Up: For warmth and depth, add a teaspoon of cinnamon or a pinch of nutmeg to the batter. This adds a cozy flavor that feels like a hug in cake form.
-
Caramel Drizzle: Drizzle homemade or store-bought caramel over the frosting for that extra indulgence. It makes each slice even more decadent and beautiful!
If you’re inspired by these variations, don’t miss out on our delicious Chocolate Peanut Butter muffins or rich Cheese Pound Cake for more sweet delight!
Storage Tips for Chocolate Chip Cake
-
Room Temperature: Keep the chocolate chip cake tightly wrapped or in an airtight container for up to 3 days. This will help maintain its moisture and flavor.
-
Fridge: If you want to store the cake longer, place it in the refrigerator for up to a week, but be sure to wrap it well to prevent it from drying out.
-
Freezer: For longer storage, freeze the cake layers wrapped in plastic wrap and foil for up to 1 month. Thaw at room temperature before serving for optimal texture.
-
Frosting Storage: Store any leftover buttercream frosting in the refrigerator for up to a week. Re-whip before using to restore its creamy consistency.
What to Serve with Moist Chocolate Chip Cake?
Indulging in a slice of this delectable cake creates an unforgettable moment, especially when paired with the perfect accompaniments.
- Vanilla Ice Cream: The creamy, cool contrast to the warm cake enhances each chocolatey bite, creating a delightful experience.
- Fresh Berries: Juicy strawberries, raspberries, or blueberries add a refreshing tartness that beautifully balances the cake’s sweetness.
- Coffee or Espresso: A steaming cup of coffee offers a cozy, rich flavor that complements the chocolate, elevating your dessert experience.
- Whipped Cream: Light and airy, a dollop of freshly whipped cream enhances the cake’s flavors, making each bite more luscious.
- Chocolate Sauce: Drizzling warm chocolate sauce over the cake intensifies its chocolaty goodness, perfect for every chocolate lover.
- Nuts or Almonds: Adding a sprinkle of toasted nuts offers a delightful crunch that contrasts with the cake’s soft, fluffy layers, enriching the texture.
- Caramel Sauce: For a touch of decadence, a drizzle of caramel brings in a sweet, buttery flavor that beautifully melds with the chocolate.
- Sparkling Water or Lemonade: A refreshing drink that cleanses the palate, allowing you to fully savor the moist chocolate chip cake with each bite.
- Fruit Salad: A bright medley of seasonal fruits lightens up the meal and provides a fresh contrast to the cake’s richness.
- Milk: A classic pairing, a glass of cold milk complements the chocolaty flavors, making it a nostalgic treat for all ages.
Expert Tips for Chocolate Chip Cake
-
Proper Measurements: Measure your ingredients accurately, particularly flour and sugar, to achieve the perfect structure for your chocolate chip cake.
-
Butter Temperature: Ensure your unsalted butter is at room temperature before creaming; this helps create a light and fluffy cake.
-
Flour-Coated Chips: Don’t skip coating your mini chocolate chips in reserved flour—this prevents them from sinking to the bottom during baking, ensuring even distribution throughout the cake.
-
Watch Baking Time: Keep a close eye on your cake in the oven. Every oven is different, so check for doneness a few minutes early to avoid overbaking.
-
Cooling Completely: Allow your cake layers to cool completely before frosting. If they’re even a little warm, the buttercream can melt and slide off, ruining your presentation!
-
Storage Tips: Store any leftovers in an airtight container at room temperature for 2-3 days or freeze for up to a month to keep your chocolate chip cake fresh and delicious!
Chocolate Chip Cake Recipe FAQs
What are the best chocolate chips to use for this chocolate chip cake?
Absolutely! Semi-sweet mini chocolate chips are recommended because they offer perfect bursts of chocolate flavor and help prevent sinking when coated in flour. If you prefer a different taste, you can substitute with dark or milk chocolate chips, as they add a unique sweetness depending on your preference.
How do I know when my chocolate chip cake is fully baked?
A great way to check is to insert a toothpick into the center of the cake. If it comes out clean or with just a few moist crumbs, it’s done! Keep an eye on it as baking times can vary with different ovens; typically, it will take about 32-35 minutes at 350°F.
How should I store leftover chocolate chip cake?
To keep your chocolate chip cake fresh, wrap it tightly in plastic wrap or store it in an airtight container at room temperature for up to 3 days. If you need to store it longer, refrigerate it for up to a week. Just make sure it’s wrapped well to avoid drying out!
Can I freeze the chocolate chip cake? If so, how?
Very! You can freeze cake layers for up to 1 month. Wrap each layer in plastic wrap, then in aluminum foil for optimal protection against freezer burn. When you’re ready to enjoy, simply thaw the layers at room temperature for a few hours, then assemble and frost as desired.
What if my chocolate chip cake sinks in the middle?
If your cake sinks, it could be due to several reasons: overmixing the batter, using too much leavening agent, or underbaking. To avoid this, always measure your ingredients accurately, mix just until combined, and check for doneness by performing the toothpick test. If it’s still gooey in the center, give it a few more minutes in the oven!
Is this chocolate chip cake suitable for those with allergies?
While this chocolate chip cake is a delightful treat, it’s essential to note that it contains common allergens like gluten (from flour), dairy (from butter and milk), and eggs. For alternatives, consider using gluten-free flour blends, dairy-free butter, and egg substitutes to accommodate dietary restrictions. Always double-check labels for any packaged ingredients to ensure they’re allergen-friendly.
Decadent Chocolate Chip Cake That Will Make You Smile
Ingredients
Equipment
Method
- Preheat the oven to 350°F (175°C) and prepare two 8-inch cake pans.
- In a medium bowl, whisk together the dry ingredients: flour, baking powder, and salt.
- In a large bowl, beat butter and sugar until fluffy, then mix in eggs, oil, vanilla, and milk.
- Gradually add dry ingredients to wet ingredients, mixing gently, then fold in flour-coated chocolate chips.
- Divide batter into pans and bake for 32-35 minutes until a toothpick comes out clean. Cool for 10 minutes.
- For buttercream, beat butter until smooth, gradually add powdered sugar, and enough heavy cream until creamy.
- Spread frosting between cake layers and over the top and sides of the cake. Enjoy!
Leave a Reply