
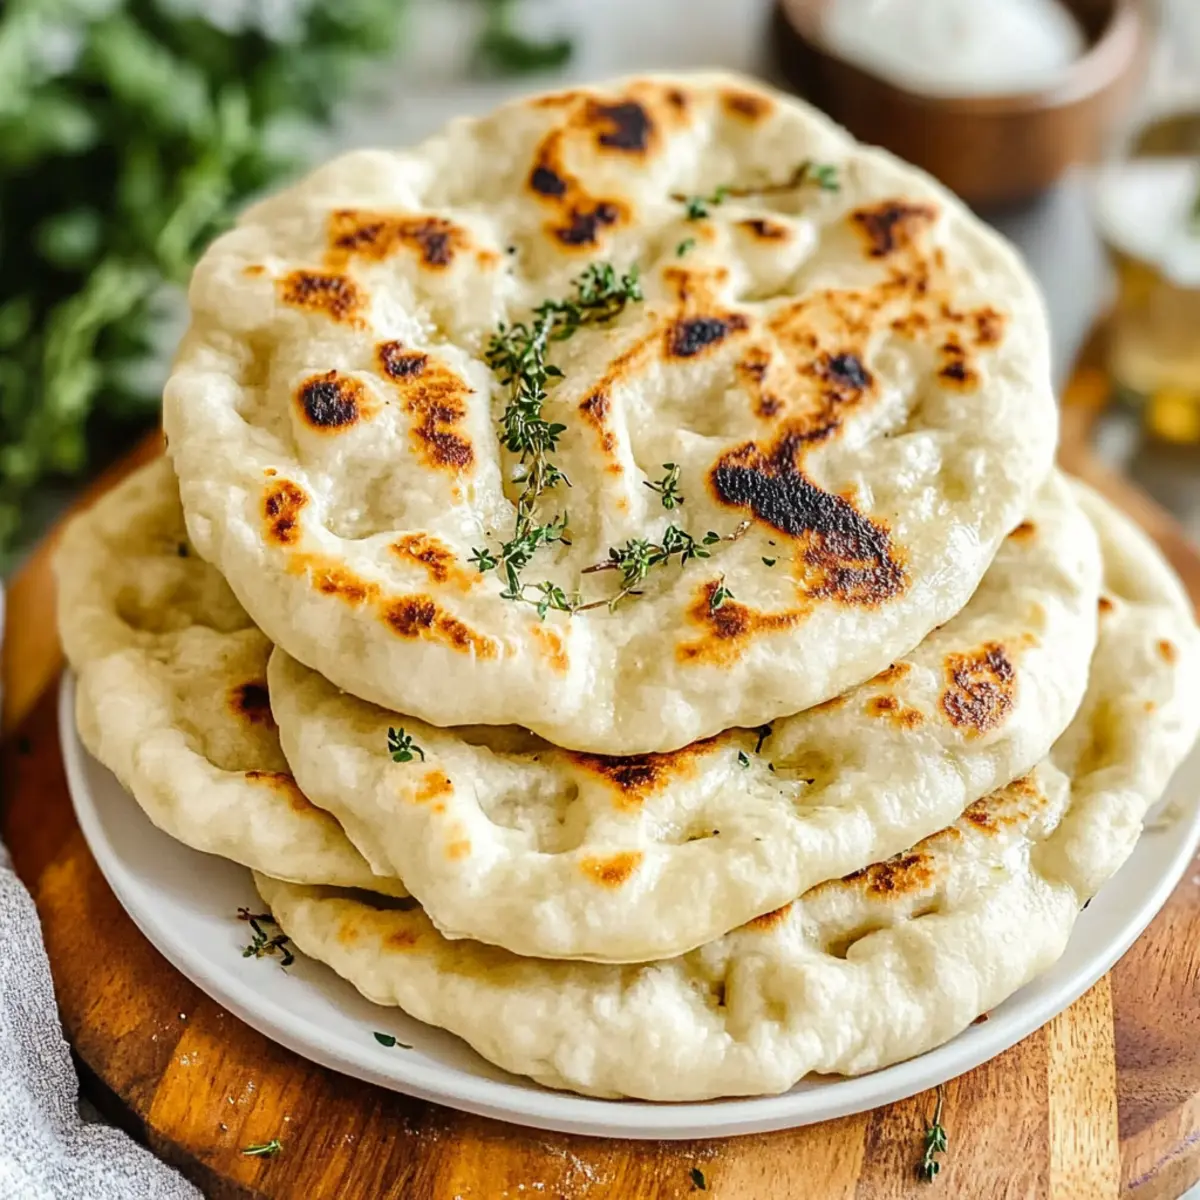
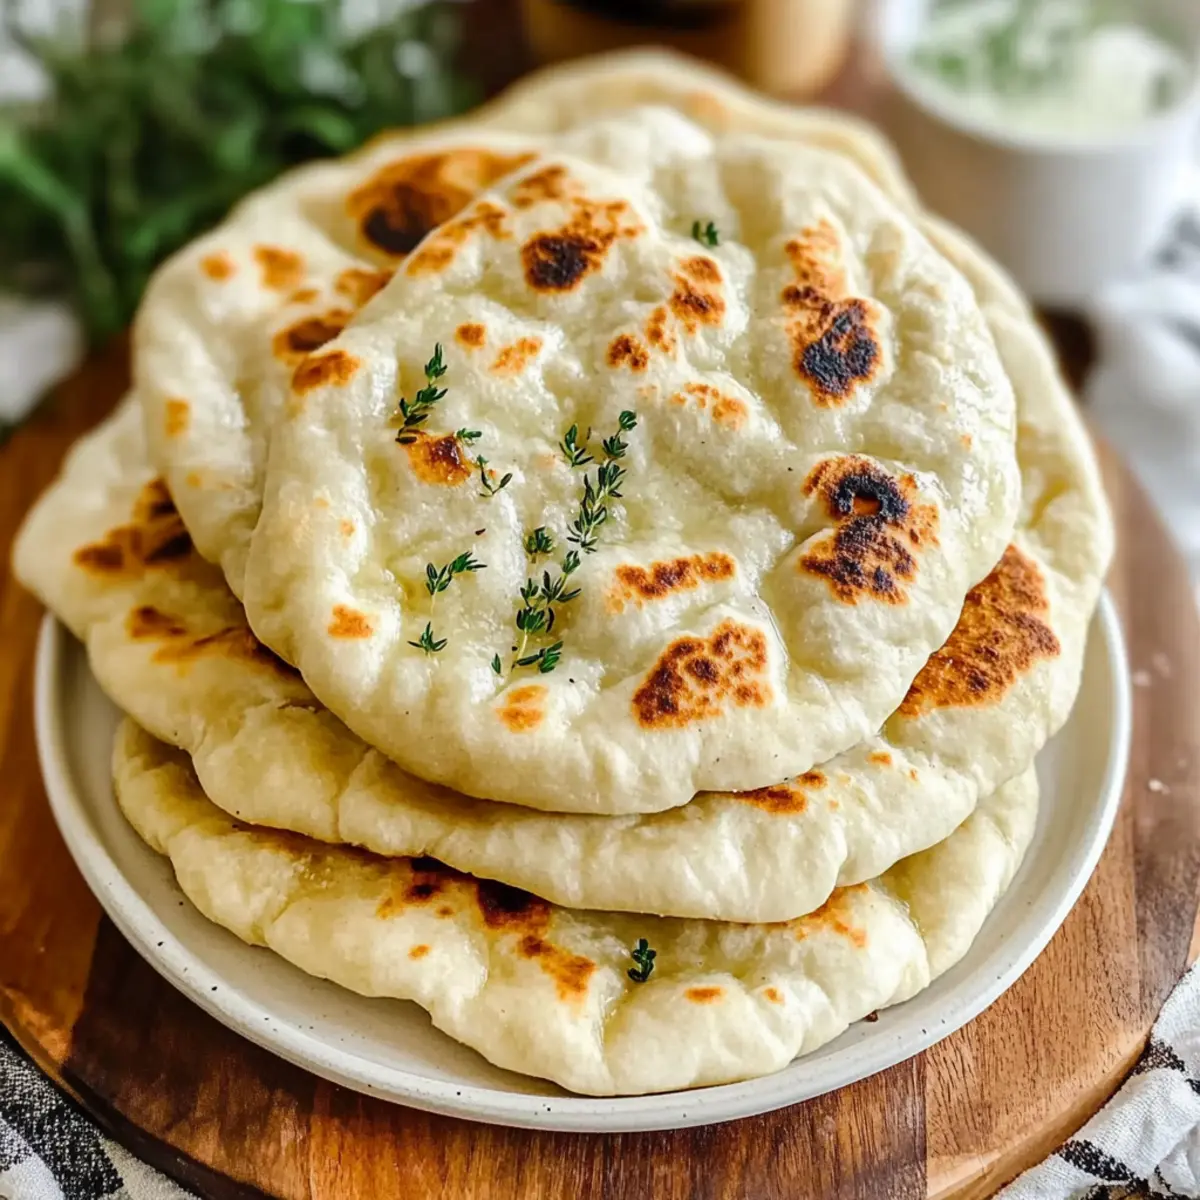
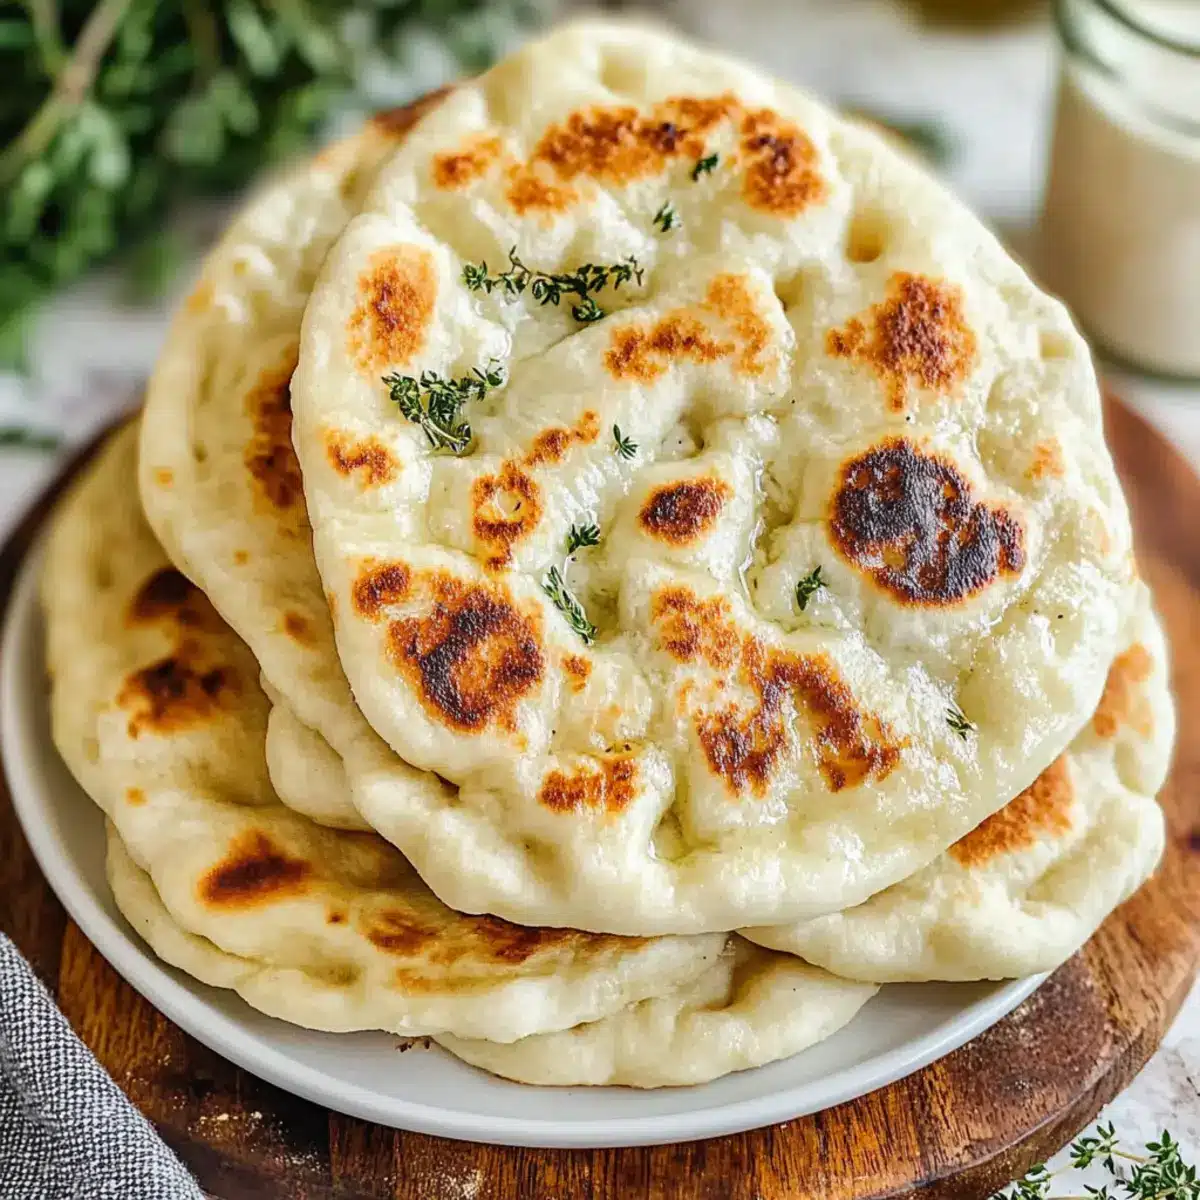
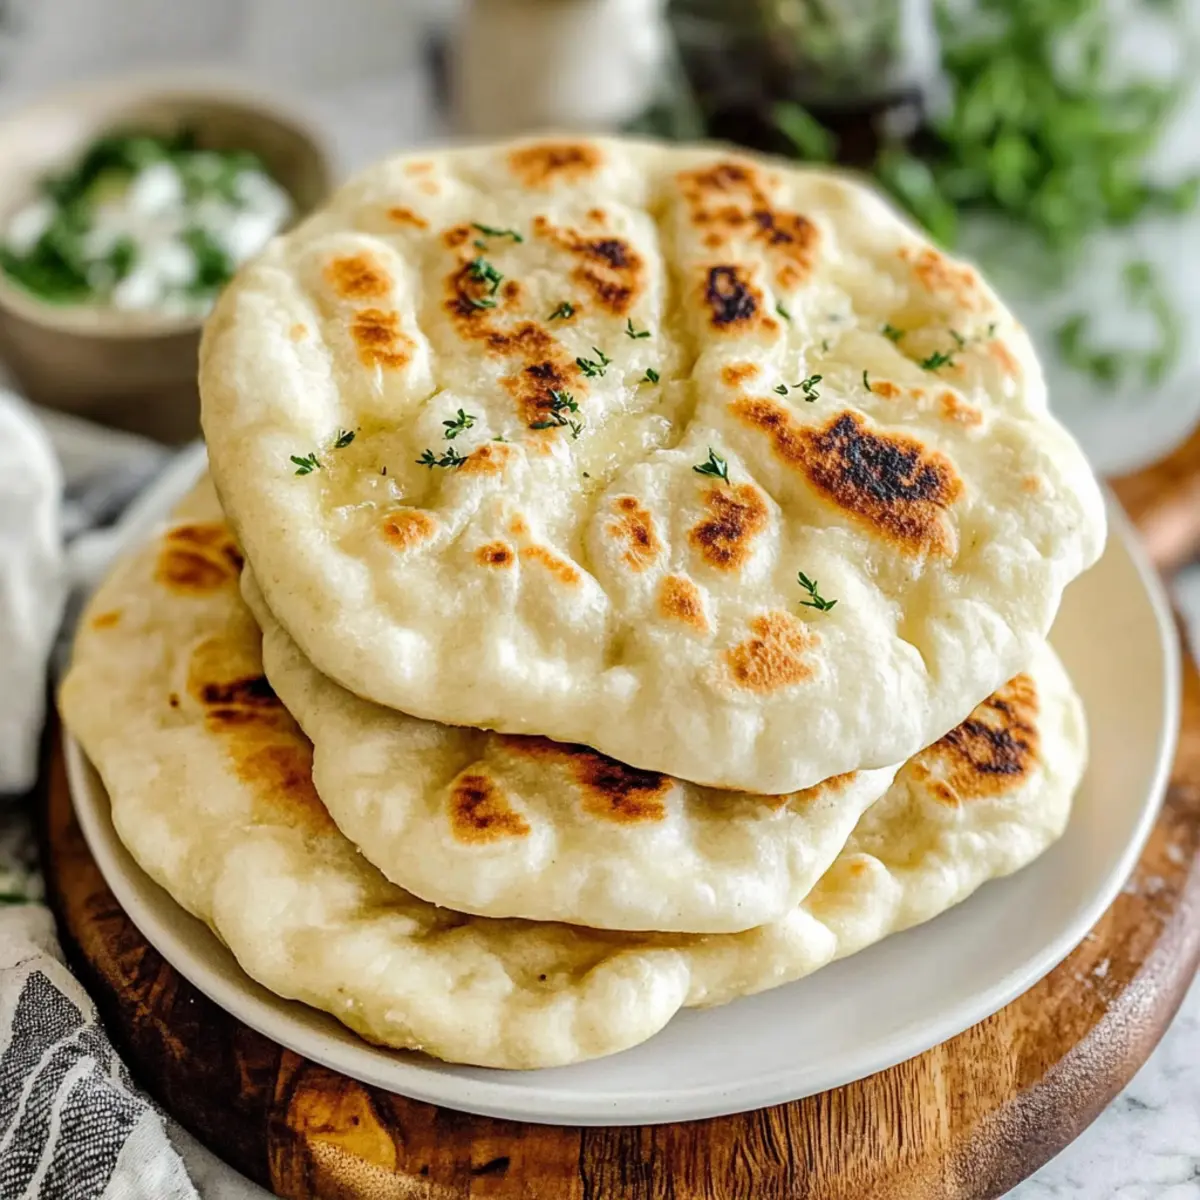
As I stood over the stove, the sizzling sound of the pan brought an exciting energy to my kitchen. The moment my homemade Greek Pita Bread hit the hot skillet, I couldn’t help but watch in awe as these simple disks of dough began to puff up dramatically, revealing their soft, pillowy interiors. In just over an hour and with only six ingredients, this recipe is truly a game-changer for anyone tired of store-bought breads. Not only is it easy to whip up, but it also accommodates dietary needs with a simple gluten-free option. There’s something magical about pulling a warm pita fresh off the heat, perfect for wrapping around savory fillings or scooping up your favorite dips. Curious to see how you can bring the taste of Greece to your dinner table? Let’s dive into the recipe!
Why is Homemade Greek Pita Bread Special?
Freshness Awaits: There’s nothing quite like enjoying warm, homemade pita straight from the skillet, offering a delightful burst of flavor.
Gluten-Free Option: This recipe is versatile, allowing you to easily swap out all-purpose flour for gluten-free alternatives without sacrificing taste.
Quick & Easy: With just six simple ingredients and a little over an hour, you’ll have your very own pita ready to impress your family!
Perfect for Dipping: The pocket-style pita is ideal for stuffing with your favorite grilled meats or veggies, or for scooping up hummus and tzatziki from our Butter Jelly Bread or Shrimp Scampi Bread.
Crowd-Pleaser: Whether for a casual dinner or a festive gathering, this pita bread will surely be a hit at your next gathering!
Greek Pita Bread Ingredients
For the Dough
• All-Purpose Flour – Provides structure and chewiness; substitute with gluten-free flour for a delightful gluten-free Greek pita bread.
• Active Dry Yeast – Leavens the dough, creating those signature pockets; feel free to use instant yeast for quicker preparation.
• Kosher Salt – Enhances overall flavor, balancing the ingredients seamlessly.
• Warm Milk – Adds richness and activates the yeast; unsweetened plant-based milk can work as a great alternative.
• Warm Water – Hydrates the dough and helps with yeast activation.
• Olive Oil – Brings flavor and moisture to the dough; remember, you’ll need extra for cooking!
Step‑by‑Step Instructions for Best Ever Homemade Greek Pita Bread
Step 1: Mix Dry Ingredients
In a large mixing bowl, whisk together 3 cups of all-purpose flour, 2 teaspoons of active dry yeast, and 1 teaspoon of kosher salt until well combined. This combination creates the foundation for our Greek Pita Bread, ensuring it rises beautifully. Make sure there are no clumps of yeast, as an even mix is essential for proper fermentation.
Step 2: Add Liquid Ingredients
Gradually pour in 1 cup of warm milk and 1 cup of warm water into the flour mixture, stirring continuously with a wooden spoon until a shaggy dough begins to form. This process should take about 2-3 minutes. The warm liquids will activate the yeast, leading to a wonderfully airy pita.
Step 3: Knead the Dough
Incorporate 2 tablespoons of olive oil into the dough and transfer it to a floured surface. Knead the dough for 5-7 minutes, until it becomes smooth and slightly tacky to the touch. You’re aiming for a soft consistency, so be careful not to add too much flour, which can dry it out.
Step 4: Let It Rise
Lightly grease a large bowl with a drizzle of olive oil, placing your kneaded dough inside and covering it with plastic wrap. Let it rise in a warm area for about 1 hour, or until it has doubled in size. This step is crucial as it allows the bread to develop those lovely air pockets that make Greek Pita Bread so special.
Step 5: Shape the Pitas
Once the dough has risen, gently punch it down to release the air. Transfer it to a floured surface and divide it into 8 equal pieces. Roll each piece into a circle about 7-8 inches wide, aiming for an even thickness. This shape helps ensure that the pitas puff perfectly while cooking.
Step 6: Heat the Skillet
Preheat a skillet over high heat and add a small amount of olive oil to coat the bottom. It’s important to let the skillet heat until it’s nearly smoking, as this high temperature is key for achieving the desired puff when cooking the Greek Pita Bread.
Step 7: Cook the Pitas
Carefully place each rolled-out pita in the hot skillet, cooking for about 30-45 seconds on each side. Watch for the bread to puff dramatically and develop a light char. Once cooked, stack them and cover with a clean towel to keep them warm and soft as you finish cooking the rest.
Step 8: Serve Immediately
For the best experience, serve your homemade Greek Pita Bread warm, either on its own or accompanied by dips and fillings. They retain their soft and pillowy texture, making them perfect for wrapping around delicious fillings or scooping up tasty dips like hummus and tzatziki.
Greek Pita Bread Variations & Substitutions
Feel free to get creative and make this Greek Pita Bread your own with these fun variations!
-
Gluten-Free: Swap all-purpose flour for a gluten-free flour blend, ensuring everyone can enjoy this tasty treat.
-
Herbed Delight: Incorporate dried herbs like oregano or thyme into the dough for an aromatic twist that elevates your pitas to new heights.
-
Whole Wheat: Use whole wheat flour instead of all-purpose for a heartier texture that adds a nutty flavor while boosting nutrition.
-
Spice it Up: Add a pinch of cayenne or smoked paprika for a subtle kick that enhances the flavor without overwhelming the palate. This can create a delightful experience when paired with savory fillings!
-
Flavored Oils: Experiment with lemon-infused or garlic olive oil in the dough for a refreshing twist that adds depth and character to each bite.
-
Cheesy Pitas: Mix in shredded cheese like feta or mozzarella into the dough before kneading for a delicious cheesy surprise waiting inside your pita. Perfect for pairing with dips such as Greek Chicken Burgers!
-
Sweet Pitas: Try adding a tablespoon of honey or agave syrup to the dough for a hint of sweetness, great for pairing with fruit spreads or yogurt.
-
Mini Pitas: Roll out smaller pieces of dough to create mini-sized pita that are perfect for appetizers or party platters, allowing guests to indulge with a variety of fillings!
Each variation invites unique flavors to your table, ensuring your homemade Greek Pita Bread remains a delightful centerpiece at every meal!
What to Serve with Best Ever Homemade Greek Pita Bread
Warm, fluffy pitas made from scratch can transport you to a cozy Mediterranean kitchen, brimming with fresh flavors.
-
Creamy Hummus: This smooth and savory dip enhances the soft pita’s texture, making every bite a deliciously rich experience.
-
Zesty Tzatziki: Pairing tangy yogurt with fresh cucumber and garlic, tzatziki adds a refreshing crunch that complements the pita’s warmth perfectly.
-
Grilled Kebabs: Juicy, marinated meat skewers provide a hearty and flavorful filling, ideal for wrapping in your fresh pita for a satisfying meal.
-
Greek Salad: Bright tomatoes, cucumbers, and olives tossed in olive oil offer a crisp contrast to the softness of the pita, delivering a refreshing burst of flavor.
-
Spanakopita: This flaky spinach pie adds a delightful crunch, while the creamy filling plays beautifully against the soft pita, creating a textural harmony.
-
Roasted Veggies: Smoky, oven-roasted vegetables bring earthy flavors, ideal for stuffing into the warm pita for a wholesome, veggie-packed bite.
-
Sparkling Water: A fizzy drink can cleanse your palate and enhance the fluffy pita experience, allowing each bite to shine.
-
Baklava: End on a sweet note with this honey-soaked pastry, providing a rich counterpoint to the savory delights of your meal.
Expert Tips for Greek Pita Bread
-
Hot Skillet Essential: Ensure your skillet is nearly smoking before adding the dough. This high temperature is crucial for achieving perfect puffing in your Greek pita bread.
-
Watch Dough Hydration: Be mindful of your dough’s hydration—avoid adding too much flour while kneading, as this can lead to a dry pita that won’t puff properly.
-
Kneading Time Matters: Knead the dough for a full 5-7 minutes to develop the gluten structure that allows your pitas to rise beautifully.
-
Timing is Key: Serve pitas warm for the best flavor and texture. They tend to dry out quickly, so enjoy them fresh off the skillet.
-
Storage Savvy: If you have leftovers, store them in a zip-top bag to keep them soft for up to two days. For longer storage, freeze them and reheat as needed!
Make Ahead Options
These Best Ever Greek Pita Bread are perfect for meal prep enthusiasts! You can prepare the dough up to 24 hours in advance by mixing it and letting it rise as usual. After the first rise, simply punch it down, shape it into rounds, and wrap each individually in plastic wrap. Store them in the refrigerator to prevent drying out. When you’re ready to cook, let the dough sit at room temperature for about 30 minutes before cooking in a hot skillet. This way, you’ll enjoy just as delicious fresh pitas with minimal effort, making your busy weeknights hassle-free and delightful!
Storage Tips for Greek Pita Bread
-
Room Temperature: Store cooled Greek pita bread in a zip-top bag at room temperature for up to 2 days to maintain its softness and flavor.
-
Fridge: If you need to store your pitas longer, refrigerate them in an airtight container for up to 5 days. Just remember to cover them to prevent drying out.
-
Freezer: For extended storage, freeze your pita bread in a freezer bag for up to 2 months. Make sure they are wrapped tightly to avoid freezer burn.
-
Reheating: For the best texture, reheat frozen pitas in a skillet over medium heat for a few minutes on each side or in the microwave wrapped in a damp paper towel for about 15-20 seconds.
Best Ever Homemade Greek Pita Bread Recipe FAQs
What type of flour is best for Greek pita bread?
I highly recommend using all-purpose flour for the best texture and chewiness in your Greek Pita Bread. However, if you’re looking for a gluten-free option, you can easily swap it with a gluten-free flour blend that includes xanthan gum for structure. Just be sure to follow the proportions suggested on the package for the best results.
How should I store my homemade Greek pita bread?
To keep your pita bread fresh, store it at room temperature in a zip-top bag for up to 2 days. For longer preservation, refrigerate in an airtight container for up to 5 days, but do cover them well to avoid drying out. If you want to save some for later, freeze them in a freezer bag for up to 2 months. Remember to let them cool completely before freezing to maintain texture.
Can I freeze Greek pita bread, and if so, how?
Absolutely! To freeze your delicious Greek Pita Bread, first, let them cool completely on a baking rack. Then, stack the pitas with parchment paper between each one to prevent them from sticking together. Place them in a freezer bag, removing as much air as possible, and freeze for up to 2 months. When you’re ready to enjoy, simply reheat them in a skillet or microwave for a quick meal!
What should I do if my pita bread doesn’t puff up?
If your pita bread doesn’t puff up while cooking, it’s often due to insufficient heat in the skillet. Make sure you preheat your skillet until it’s almost smoking. It’s also crucial not to add too much flour while kneading, which can lead to a drier dough that won’t puff. Additionally, if your dough hasn’t risen sufficiently before cooking, that could affect puffing, so ensure it’s risen to double its size after resting.
Can I use instant yeast instead of active dry yeast for this recipe?
Yes, you can! If you choose to use instant yeast, there’s no need for proofing – simply mix it directly with your dry ingredients. This can save you a bit of time, and your Greek Pita Bread will still turn out beautifully!
Are there any dietary considerations I should be aware of?
Good question! This recipe for Greek Pita Bread can be made gluten-free by using a proper gluten-free flour blend. Always check the ingredients for any allergens if you’re preparing these for someone with dietary restrictions. If you’re serving pets with your leftover pita, be mindful of certain additives in dips like garlic or onions that can be harmful to them. It’s always best to stick with plain bread for your furry friends!
Delicious Greek Pita Bread You Can Make at Home Today
Ingredients
Equipment
Method
- In a large mixing bowl, whisk together the flour, yeast, and salt until well combined.
- Gradually pour in the warm milk and warm water into the flour mixture, stirring continuously until a shaggy dough forms.
- Incorporate the olive oil into the dough and knead on a floured surface for 5-7 minutes until smooth and slightly tacky.
- Grease a bowl with olive oil, place the dough inside, cover with plastic wrap, and let it rise in a warm area for about 1 hour or until doubled in size.
- Punch down the risen dough, transfer to a floured surface, and divide into 8 equal pieces. Roll each into a circle about 7-8 inches wide.
- Preheat a skillet over high heat and add olive oil to coat the bottom.
- Place each rolled-out pita in the hot skillet and cook for about 30-45 seconds on each side until puffed.
- Serve the pitas warm, either on their own or with dips and fillings.
Leave a Reply