
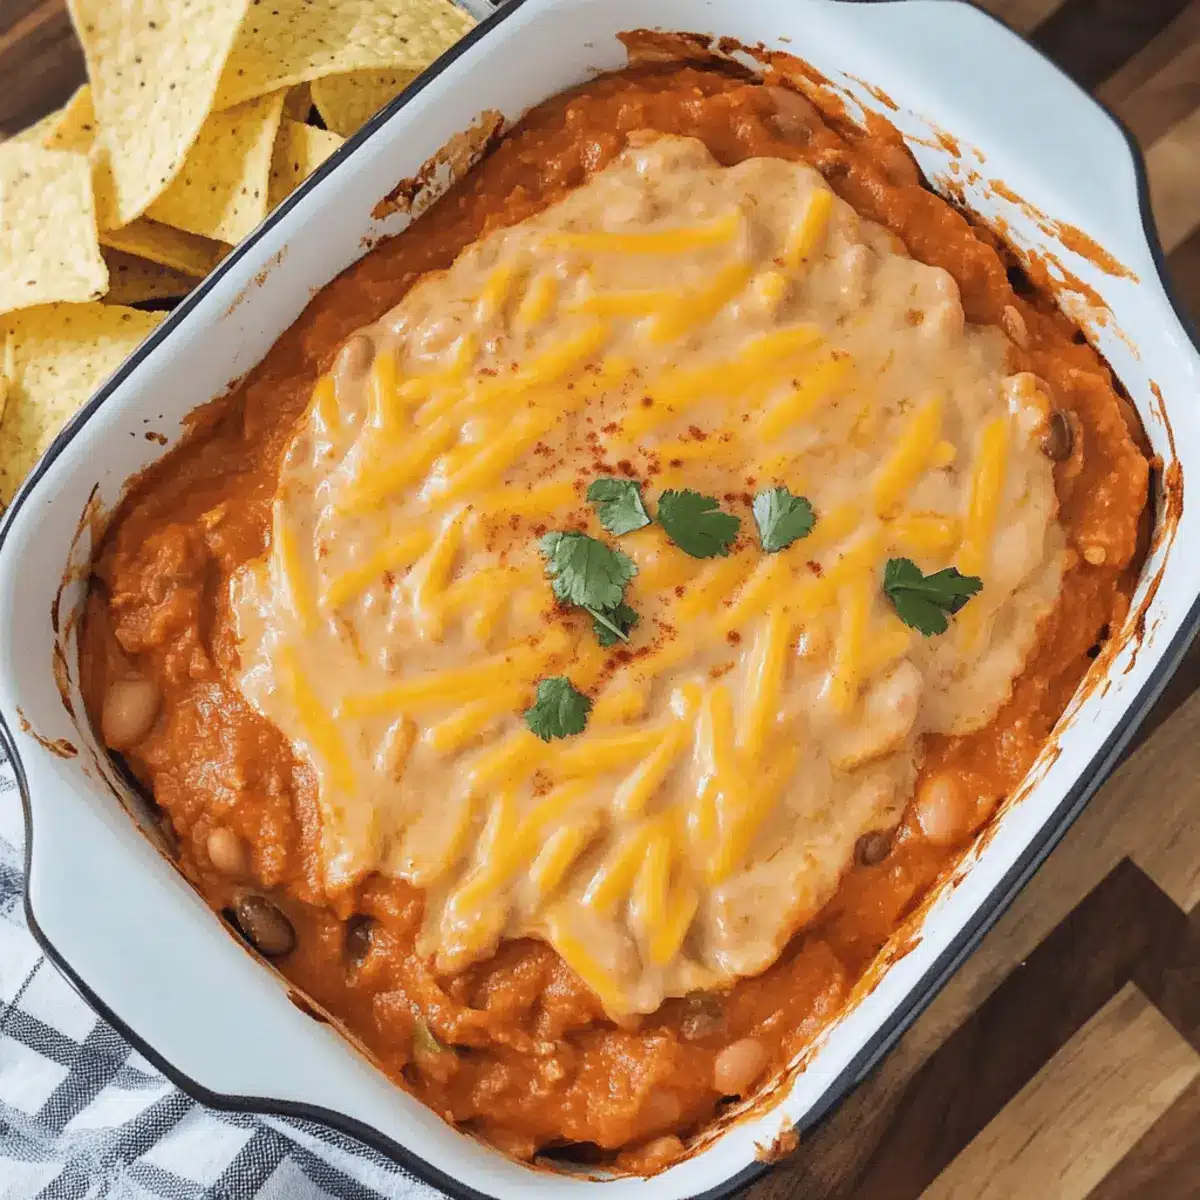
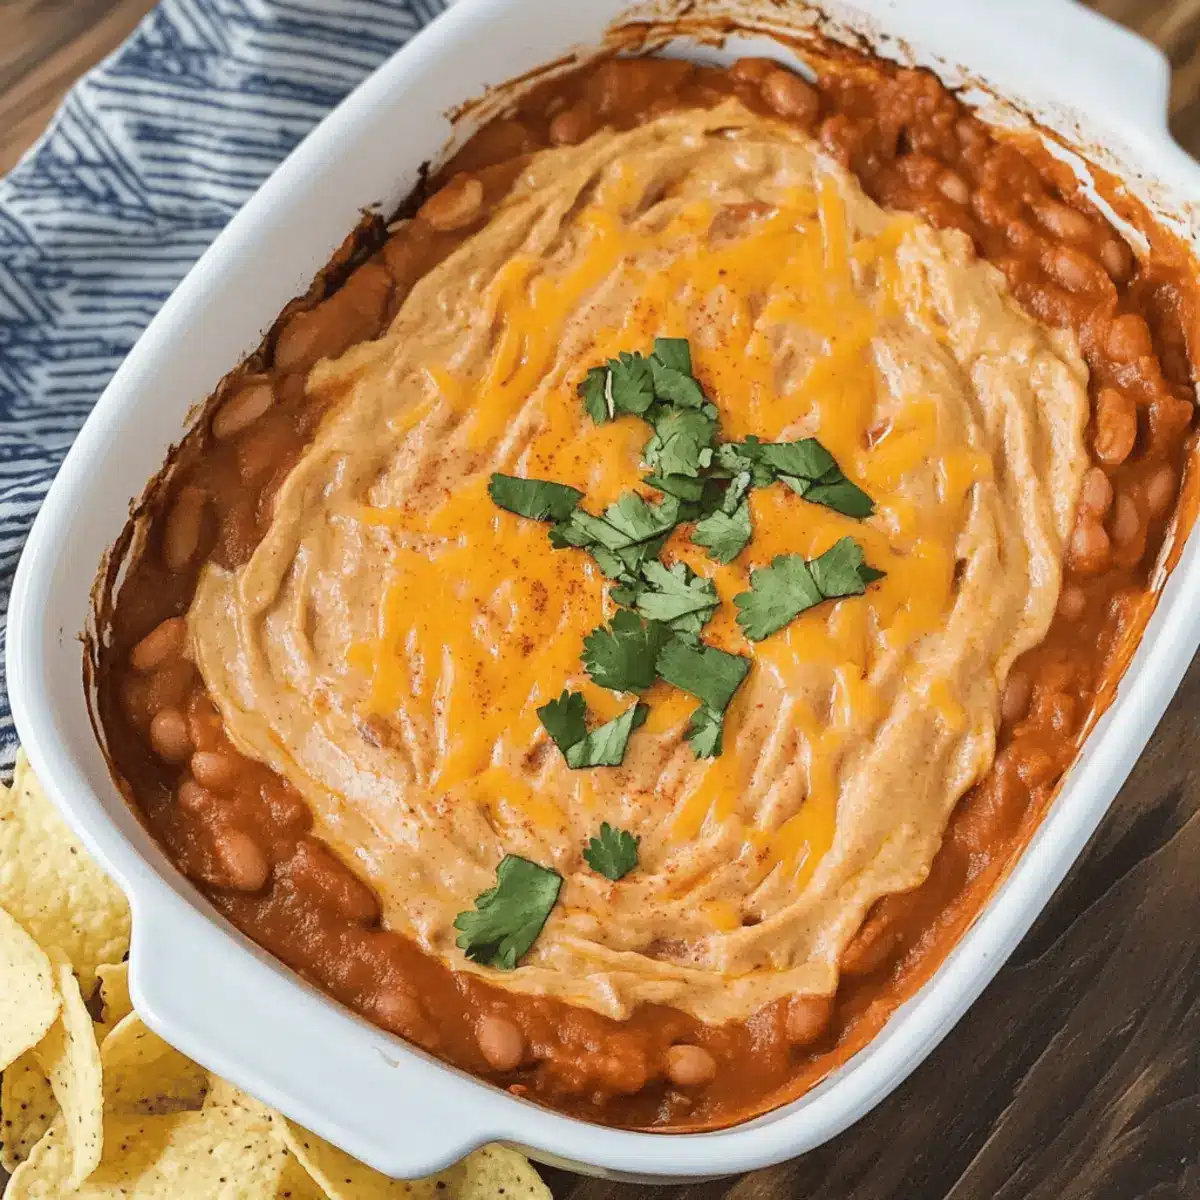
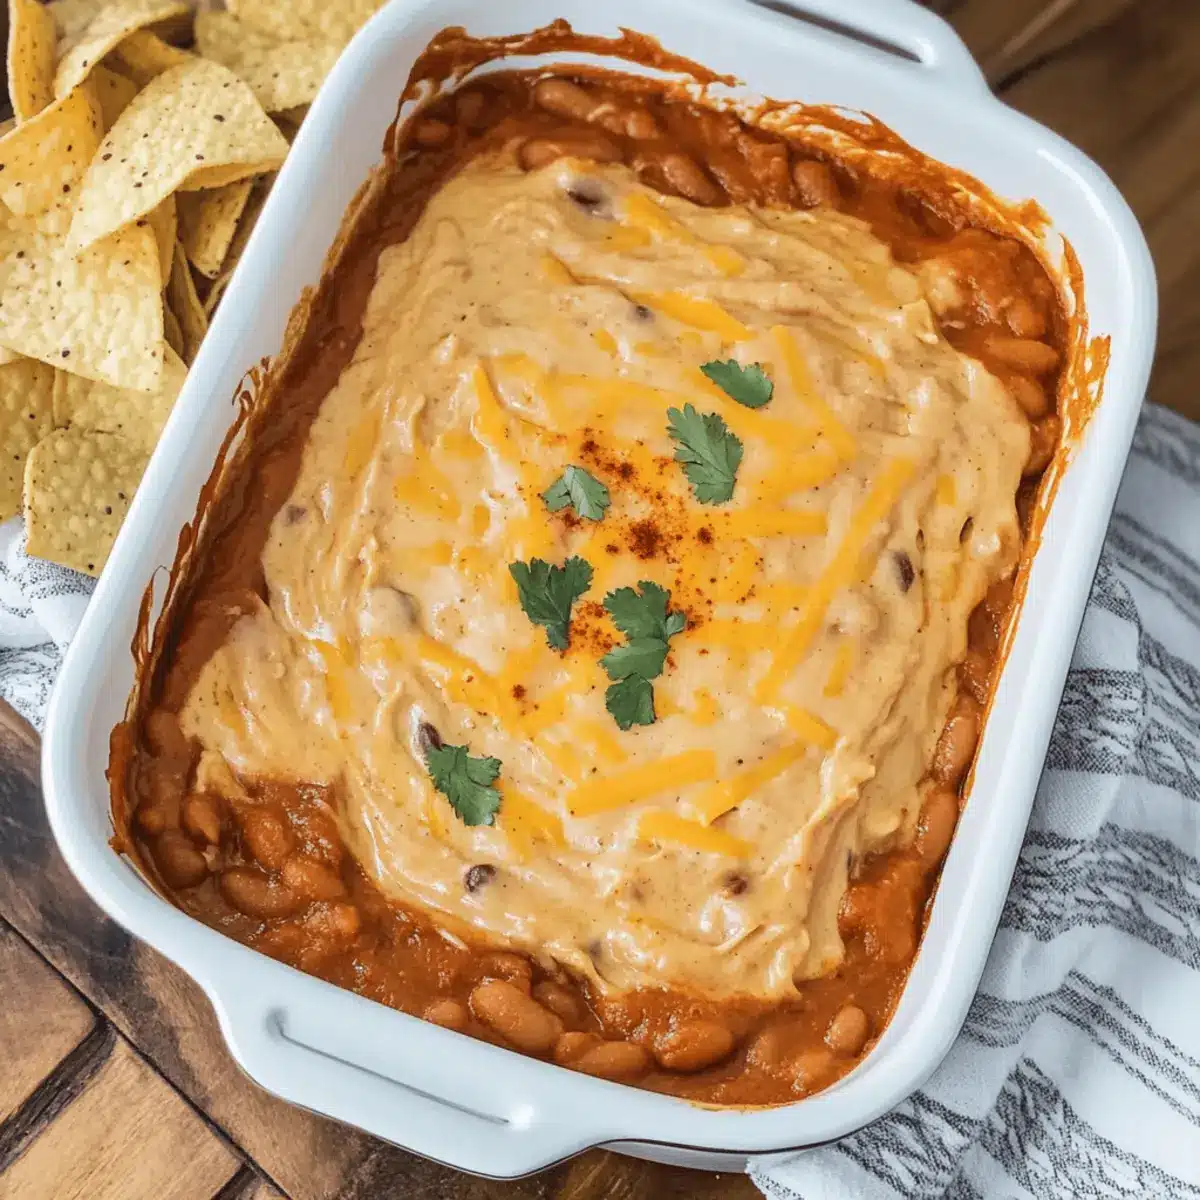
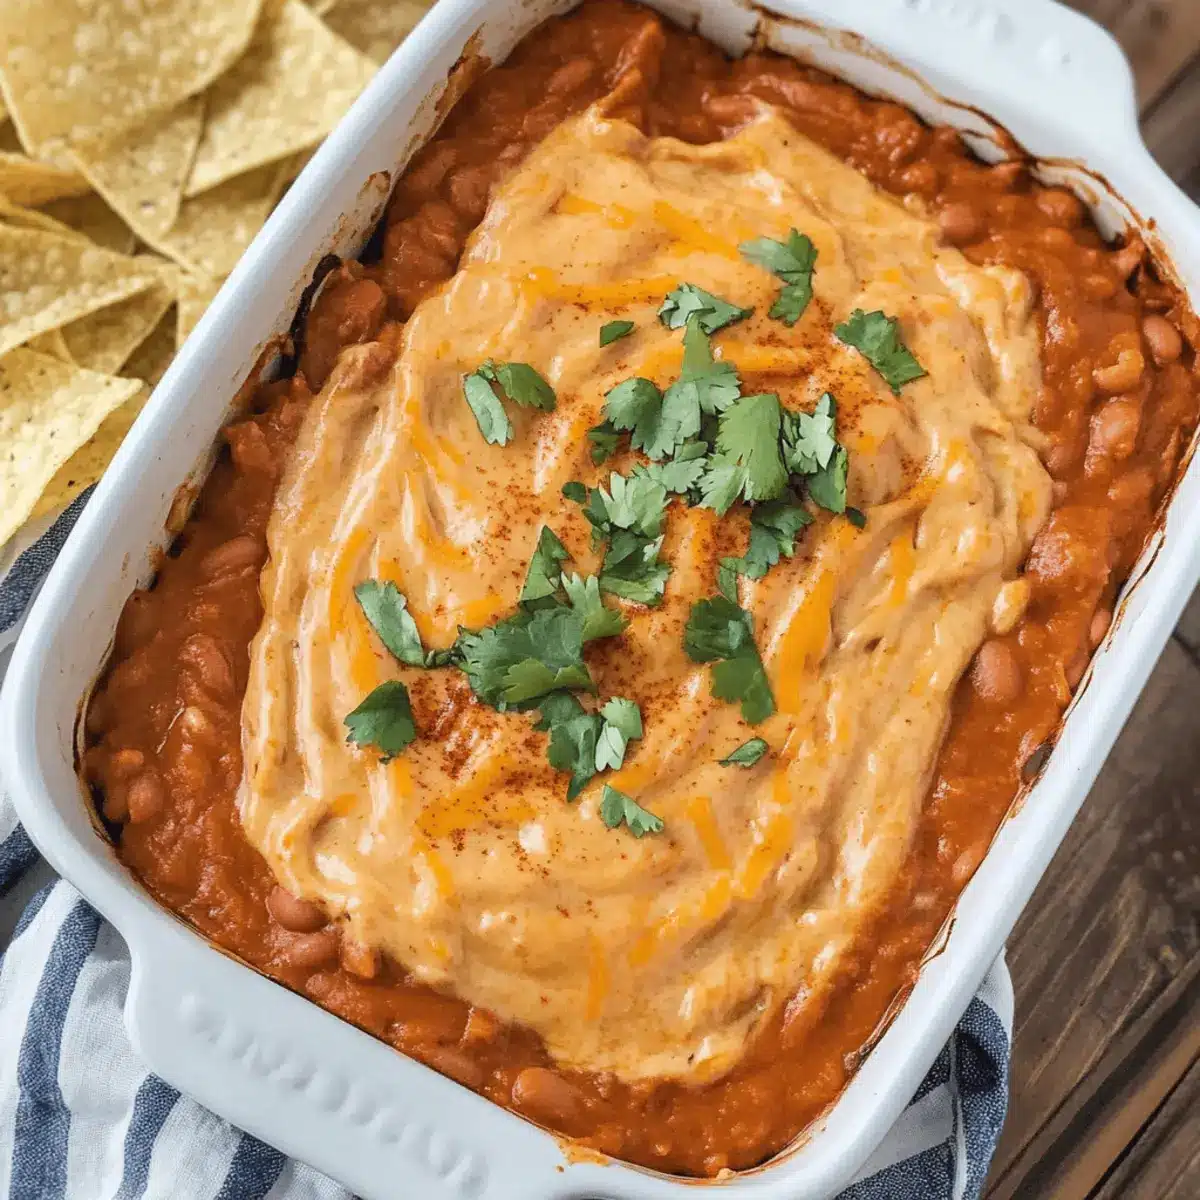
Every time game day rolls around, I find myself craving something that blends comfort and excitement, and that’s where my Easy Cheesy Mexican Bean Dip comes in! This luscious, oven-baked dip transforms simple ingredients into a vibrant fiesta on your table, perfect for scooping up with crispy tortilla chips. In just 10 minutes of prep time, you’ll have a crowd-pleasing appetizer that’s not only vegetarian but makes your home feel like the best Mexican restaurant in town. Whether you’re hosting friends for a thrilling match or celebrating Cinco de Mayo, this dip is your go-to for making delicious memories. So, are you ready to elevate your snacking game?
Why You’ll Love This Mexican Bean Dip
Easy preparation: With just 10 minutes of prep time, this dip is ready to go when you need it most. Crowd pleaser: The rich and cheesy goodness appeals to everyone, making it a hit at any gathering. Versatile building blocks: Customize it your way by adding jalapeños or black beans for extra excitement, or try swapping in different cheeses! Perfect pairing: It shines with crispy tortilla chips, but can also complement your favorite tacos or burritos. For a refreshing touch, serve it alongside a French Style Salad or drink pairing of margaritas! Quick and satisfying: Enjoy a delightful taste of Mexican cuisine right at home, turning any occasion into a memorable feast.
Mexican Bean Dip Ingredients
• Get ready to whip up your delicious dip!
For the Base
- Canned Refried Beans – This is the creamy foundation for your Mexican bean dip; feel free to use homemade refried beans for a fresher taste.
- Cream Cheese – Adds a luscious richness that melds beautifully; substitute with sour cream for a tangy kick.
For the Cheesy Goodness
- Mild Cheddar Cheese – Provides a creamy, mild flavor; grating from a block enhances melt quality.
- Monterey Jack Cheese – Brings extra gooeyness and flavor depth; it’s best when grated from a block as well.
For the Flavor Boost
- Taco Sauce – Introduces zesty goodness that brightens the dip; swap it with salsa for a chunky texture and vibrant flavor.
- Cumin – This spice offers warm undertones; it’s a staple in Mexican bean dip recipes for a reason!
- Ground Red Cayenne Pepper – A gentle heat that can be adjusted to your liking, allowing you to take your dip from mild to warm.
For Serving
- Tortilla Chips – These are perfect for scooping up the cheesy dip; homemade or fresh chips elevate this dish to a whole new level.
With these simple yet flavorful ingredients, you can create your unforgettable Mexican bean dip that transforms any occasion into a festive delight!
Step‑by‑Step Instructions for Mexican Bean Dip
Step 1: Preheat the Oven
Begin by preheating your oven to 350°F (175°C). This will create the perfect environment for your Mexican bean dip to bake, ensuring it becomes deliciously warm and gooey. While the oven is heating, gather all your ingredients and get ready for mixing, as efficient preparation is the key to a smooth cooking process.
Step 2: Mix Base Ingredients
In a small oven-safe baking dish, combine the canned refried beans and softened cream cheese. Use a spatula or a fork to thoroughly blend these two base ingredients until smooth and creamy. You want to see no lumps, creating a rich foundation for your dip that will enhance every bite of your Mexican bean dip.
Step 3: Blend in Cheese and Seasonings
Next, add the mild cheddar cheese, Monterey Jack cheese, taco sauce, cumin, and ground red cayenne pepper to the bean mixture. Stir the ingredients together until everything is fully combined and well distributed. You should see a colorful blend of cheeses and spices throughout the mixture, coaxing a delightful aroma that hints at the delicious flavors to come.
Step 4: Spread and Bake
Once your mixture is well combined, spread it evenly in the baking dish. Place the dish in the preheated oven and bake for about 15 minutes. Keep an eye on your dip; it should start to bubble and the edges will appear slightly golden, which indicates that your Mexican bean dip is cooking to perfection.
Step 5: Stir and Continue Baking
After 15 minutes, take the dip out of the oven and give it a good stir to ensure an even distribution of heat and flavors. Return the baking dish to the oven and bake for another 10 minutes, monitoring it closely. If you want an extra cheesy topping, feel free to sprinkle additional shredded cheese over the top during the last few minutes.
Step 6: Serve and Enjoy
Finally, remove your Mexican bean dip from the oven when it’s all golden and bubbly. Let it cool for a minute, then serve it immediately with crispy tortilla chips on the side. The dip should be velvety and inviting, just waiting for you to scoop it up and dig in.
Expert Tips for Mexican Bean Dip
-
Cheese Quality: Use block cheese instead of pre-shredded varieties for better melting and richer flavor. Grating fresh cheese makes a noticeable difference in your Mexican bean dip’s texture.
-
Mixing Ingredients: Ensure that your cream cheese is softened before mixing. This prevents lumps and provides a smoother base for the dip.
-
Seasoning Adjustments: Start with less cayenne pepper and adjust according to your spice preference. Remember, it’s easier to add heat than to take it away!
-
Baking Temperature: Avoid a too-high oven temperature which can cause the dip to dry out. Stick to 350°F (175°C) for perfectly gooey results.
-
Storage Tip: If you have leftovers, store them in an airtight container in the refrigerator. Reheat gently in the oven for the best texture; microwaving can make it rubbery.
What to Serve with Easy Cheesy Mexican Bean Dip
Every gathering deserves a side that complements the delightful richness of your dip, turning casual snacking into a feast.
-
Crispy Tortilla Chips: Nothing beats the classic. These crunchy chips are perfect for scooping up the creamy dip, creating a satisfying contrast in texture.
-
Zesty Guacamole: This creamy avocado dip adds a refreshing twist, balancing the richness of the Mexican bean dip beautifully. Plus, the vibrant green color makes your table pop!
-
Fresh Pico de Gallo: The bright flavors of diced tomatoes, onions, and cilantro make for a refreshing topping that enhances the dip’s savory notes.
-
Vegetable Platter: A crisp assortment of veggies like bell peppers, cucumbers, and carrots provide a fresh crunch. They are perfect for dipping and add a healthy element to the spread.
-
Spicy Jalapeño Poppers: For those who enjoy a kick, these stuffed jalapeños pair fantastically with the bean dip, elevating the flavor profile for spice lovers.
-
Margaritas: A classic pairing that adds a festive flair! The citrusy notes of a margarita cut through the creaminess of the dip, making it an irresistible combination.
-
Churros for Dessert: End your meal on a sweet note! These cinnamon-sugar-dusted treats are perfect for dipping in chocolate or caramel sauce, rounding out a delightful snacking experience.
How to Store and Freeze Mexican Bean Dip
Fridge: Store leftover Mexican bean dip in an airtight container for up to 5 days. Make sure it’s completely cooled before sealing to maintain its creamy texture.
Freezer: For longer storage, freeze the dip in a freezer-safe container for up to 3 months. Thaw in the fridge overnight before reheating.
Reheating: Reheat your dip gently in the oven at 350°F for about 10-15 minutes. For microwave reheating, do it in intervals of 1–2 minutes, stirring halfway through to keep it smooth.
Wrap for Freshness: If freezing, wrap the container tightly with plastic wrap or foil to prevent freezer burn and preserve the dip’s flavor.
Mexican Bean Dip Variations & Substitutions
Explore delightful twists to customize your Mexican bean dip for every occasion!
-
Spicy Kick: Add diced jalapeños or a splash of hot sauce for heat that awakens your taste buds. For those who love a zest, this addition will deliver the perfect punch.
-
Heartier Version: Mix in black beans for extra texture and protein. This not only enhances the dip’s nutritional value but also gives it a delightful twist that will satisfy hungry guests.
-
Cheese Swap: Try pepper jack cheese instead for an extra spicy flavor, or experiment with a blend of queso for a melty, chewy texture that elevates your dip.
-
Creaminess Boost: Substitute cream cheese with avocado for a rich, creamy, and healthier version. This adds a unique flavor profile while keeping your dip dreamy and delicious.
-
Vegetarian Delight: Swap out taco sauce with homemade salsa to create a fresh, vibrant twist. This change introduces a chunkier texture and a new depth of flavor.
-
Nutty Flavor: Incorporate a sprinkle of ground walnuts or pecans into the mix for an unexpected crunch. This unique texture can make your dip truly memorable at gatherings.
-
Fresh Herbs: Garnish with fresh cilantro or green onions just before serving for a burst of color and freshness. This simple addition brightens up the dish visually and flavor-wise.
-
Layered Dip: Instead of a traditional baked dip, consider creating a layered dip with refried beans, guacamole, sour cream, and cheese. Serve it cold for a refreshing alternative that pairs beautifully with crispy tortilla chips.
Experimenting with these variations guarantees delicious memories every time you gather with loved ones. For more vibrant flavors, don’t forget to serve your dip alongside a refreshing French Style Salad or classic sides like Batter Dipped Fish!
Make Ahead Options
These Easy Cheesy Mexican Bean Dip is perfect for meal prep enthusiasts looking to save time! You can prepare the dip mixture (comprised of refried beans, cream cheese, and all the spices) up to 24 hours in advance. Simply combine all ingredients in a baking dish, cover tightly with plastic wrap, and refrigerate. When you’re ready to enjoy, remove the dip from the fridge, let it sit at room temperature for about 30 minutes, then bake in a preheated oven at 350°F (175°C) for about 25-30 minutes or until bubbly. This method ensures your dip stays just as delicious and creamy as when freshly made, allowing you to quickly serve a crowd-pleasing appetizer with minimal effort!
Mexican Bean Dip Recipe FAQs
What type of beans should I use for the Mexican bean dip?
You can use canned refried beans for convenience, which give the dip a creamy texture. However, if you’re up for it, homemade refried beans can add an extra layer of freshness and flavor. Look for high-quality canned options if you’re going the shortcut route!
How should I store leftovers of the Mexican bean dip?
Store any leftover Mexican bean dip in an airtight container in the refrigerator for up to 5 days. Be sure to let it cool completely before sealing, as this helps maintain its creamy texture. When you’re ready to enjoy it again, simply reheat it in the oven or microwave to bring back that gooey goodness.
Can I freeze Mexican bean dip?
Absolutely! You can freeze the dip in a freezer-safe container for up to 3 months. When you’re ready to use it, transfer it to the refrigerator to thaw overnight. For reheating, put it in the oven at 350°F for about 10-15 minutes or microwave it in 1-2 minute intervals, stirring halfway through to keep it smooth.
What if my dip is too thick after baking?
If your Mexican bean dip turns out thicker than you’d like, don’t worry! Simply stir in a tablespoon of milk or sour cream while reheating; this will restore its creamy texture. Adjust as needed until you achieve your desired consistency.
Can my pets have any part of this Mexican bean dip?
While it may be tempting to share your delicious dip, it’s best to keep it away from pets. Ingredients like cream cheese and certain spices may not be suitable for their digestion. Play it safe and enjoy the dip yourself!
What substitutions can I make for dietary restrictions?
For a lighter version, substitute the cream cheese with Greek yogurt, or use vegan cheese and beans to create a plant-based dip. If you want to jazz it up, feel free to add diced jalapeños or black beans for an even heartier dish!
Gooey Mexican Bean Dip for Your Next Game Day Feast
Ingredients
Equipment
Method
- Preheat your oven to 350°F (175°C). Gather all your ingredients while the oven heats.
- In a small oven-safe baking dish, combine the canned refried beans and softened cream cheese, blending until smooth.
- Add mild cheddar cheese, Monterey Jack cheese, taco sauce, cumin, and cayenne pepper to the mixture and stir until fully combined.
- Spread the mixture evenly in the baking dish and bake for about 15 minutes until bubbling and the edges are slightly golden.
- Stir the dip, return it to the oven, and bake for another 10 minutes, adding extra cheese if desired.
- Remove from the oven, let cool for a minute, and serve with tortilla chips.
Leave a Reply