
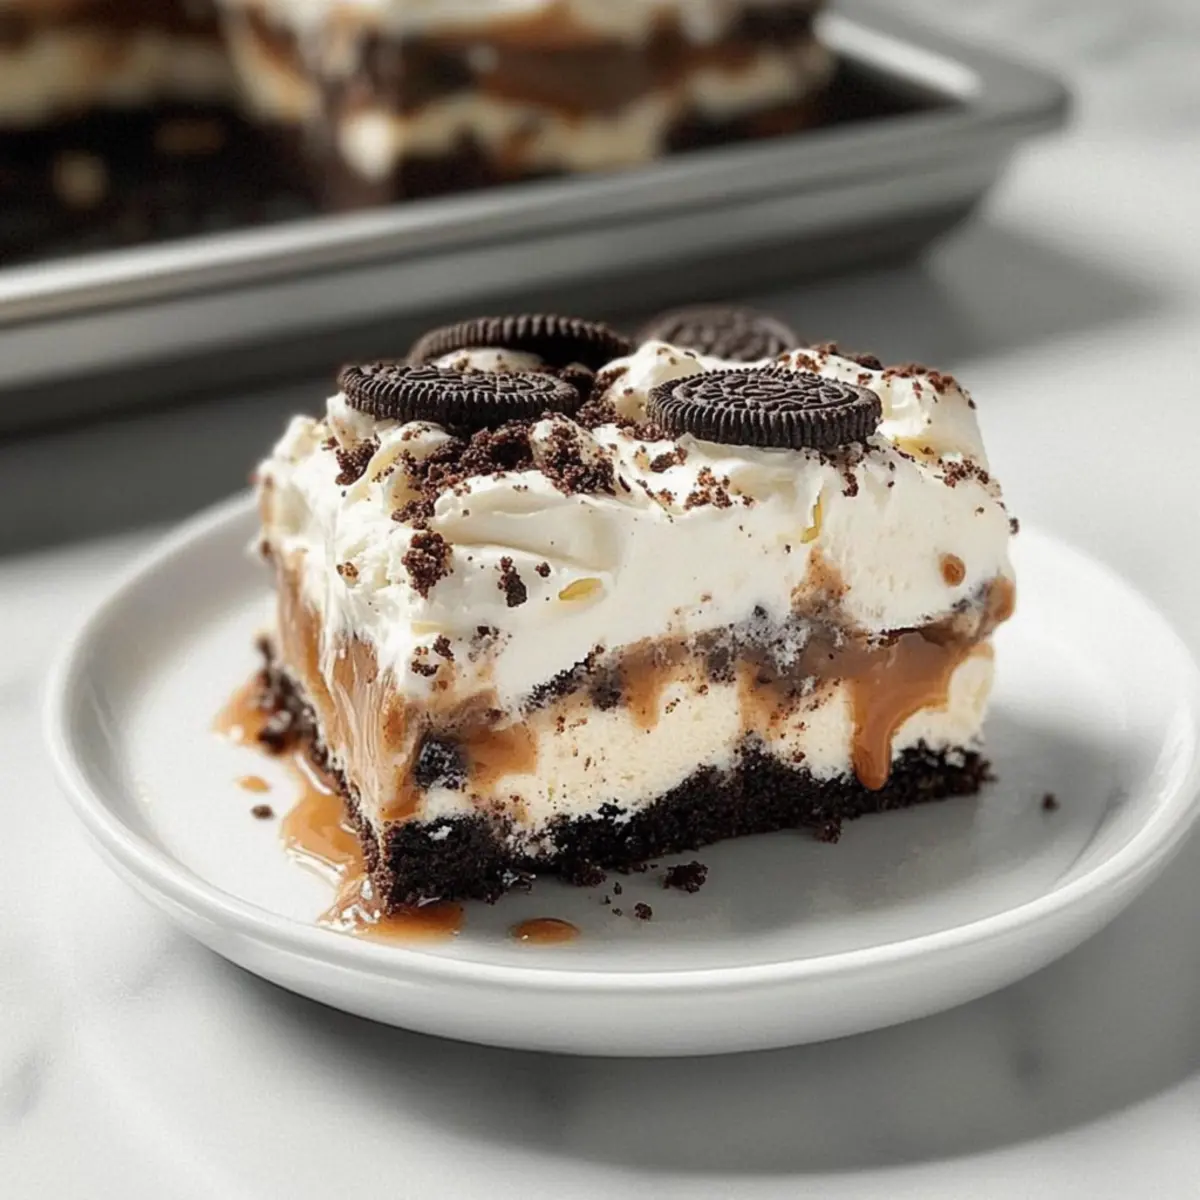
As the sun blazes down and summer beckons, there’s nothing quite like the satisfying chill of a dessert that requires zero baking—enter my No-Bake Oreo Ice Cream Cake. This delightful treat layers creamy vanilla ice cream and a crunchy Oreo crust, topped with warm hot fudge that can make anyone weak at the knees. Perfect for those hot afternoons or laid-back gatherings, this recipe is not only incredibly easy to prepare but guaranteed to impress your guests. The beauty lies in its versatility; you can customize it with different toppings or add a fun twist with mix-ins like Spanish peanuts or caramel. Are you ready to discover how to whip up this showstopper that will have everyone clamoring for a second slice?
Why is this cake a must-try?
No-Bake Simplicity: This Oreo Ice Cream Cake makes indulgence easy with zero baking required, perfect for busy days!
Crowd-Pleasing Delight: Everyone will love its delicious combination of creamy ice cream and crunchy cookie crust—a guaranteed hit at any gathering.
Customizable Options: Whether you prefer caramel drizzle or a sprinkle of Spanish peanuts, this cake invites creativity to impress your guests.
Quick Prep: With minimal prep time needed, you can whip up this dessert in a flash, leaving you with more time to enjoy the sunshine.
Perfect for Summer: Ideal for barbecues or pool parties, this cake is the ultimate cool treat to beat the heat. Make sure to pair it with refreshing sides like a fruit medley!
Oreo Ice Cream Cake Ingredients
For the Crust
- Oreo Cookies – Perfect for a chocolatey base; don’t forget to crush them finely for a stable crust.
- Butter – Helps bind the cookie crumbs; margarine works well as a substitute if needed.
For the Filling
- Vanilla Ice Cream – The star of this dessert; feel free to choose your favorite flavor for a twist.
- Hot Fudge Topping – Adds a decadent touch; swap it with caramel topping for a unique flavor profile.
For the Topping
- Whipped Topping – Creates a light, creamy finish; use real whipped cream for a fresh taste.
- Additional Cookie Crumbs – Reserve some from the crust to sprinkle on top for extra texture.
This Oreo Ice Cream Cake is a delightful treat that everyone will love!
Step‑by‑Step Instructions for Oreo Ice Cream Cake
Step 1: Prep Crust
In a large mixing bowl, combine 3 cups of finely crushed Oreo cookies with melted butter until well blended. Press this mixture firmly into a greased 13×9-inch dish, ensuring an even layer across the bottom. The crust should feel compact and stable, setting the perfect foundation for your Oreo Ice Cream Cake.
Step 2: Layer Ice Cream
Allow 1 quart of vanilla ice cream to soften at room temperature for about 10-15 minutes. Once it’s creamy and spreadable, smoothly spread it over the Oreo crust, reaching the edges. Place the dish in the freezer for at least 2–3 hours until the ice cream is firm and sets a solid layer for the next step.
Step 3: Add Fudge
Take your hot fudge topping and warm it up for about 30 seconds in the microwave, stirring until it’s pourable. Drizzle the warmed fudge evenly over the ice cream layer, allowing it to seep in slightly. Return the cake to the freezer for another 1–2 hours until the fudge is set and ready for the final topping.
Step 4: Finish Layer
Remove the dish from the freezer and spread a generous layer of whipped topping over the fudge layer, smoothing it out evenly. For added texture, reserve some cookie crumbs to sprinkle on top before you finish. Cover this layer with plastic wrap and freeze for at least 2 hours to achieve that perfect cut.
Step 5: Serve
When ready to serve your Oreo Ice Cream Cake, take it out of the freezer and let it sit at room temperature for about 10 minutes. This will slightly soften the cake, making it easier to slice. Use a sharp knife to cut into squares and enjoy the layers of delicious flavors!
Oreo Ice Cream Cake Variations
Feel free to put your own spin on this delightful dessert for a personalized touch that will dazzle your taste buds!
-
Peanut Butter Swirl: Mix creamy peanut butter into the softened ice cream for a nutty twist. The combination of chocolate and peanut butter is a classic that everyone adores.
-
Caramel Drizzle: Swap the hot fudge for warm caramel topping to create a rich, sweet layer. This sweet layer beautifully contrasts with the chocolate crust, making it irresistible.
-
Mint Chocolate Chip: Use mint chocolate chip ice cream instead of vanilla for a refreshing flavor. The coolness of mint paired with chocolate brings a refreshing zing perfect for hot days.
-
Add Crunch: Mix in crushed nuts or toffee bits between layers for an added texture boost. Crunchy elements bring excitement to each bite, ensuring no two slices taste the same.
-
Chocolate Chips: Fold mini chocolate chips into the filling for extra chocolaty goodness. These tiny bursts of sweetness will enhance the overall flavor experience.
-
Fruit Fun: Add a layer of sliced strawberries or bananas between the ice cream and fudge layers for a fruity contrast. This not only brightens the look but also adds a fresh taste.
-
S’mores Style: Incorporate mini marshmallows and graham cracker crumbs for a s’mores take. The melting marshmallows combined with crunchy graham crackers create a delightful campfire experience at home.
-
Frozen Yogurt Option: Substitute regular ice cream with your favorite frozen yogurt for a lighter, tangier dessert. This swap transforms it into a guilt-free indulgence that balances sweetness with a refreshing taste.
Explore these variations, and don’t forget to experiment with your own ideas, perhaps inspired by a delightful Pudding Icebox Cake or even a creamy Cream Cheese Pound cake to mix things up!
Storage Tips for Oreo Ice Cream Cake
Fridge: Store any leftover slices in an airtight container in the fridge for up to 3 days; however, be mindful that they may lose some texture.
Freezer: For long-term storage, wrap the Oreo Ice Cream Cake tightly in plastic wrap and then foil. It will keep well in the freezer for up to a week without losing flavor.
Thawing: To enjoy after freezing, remove the cake from the freezer and let it sit for about 10 minutes at room temperature before slicing; this makes cutting easier.
Reheating: There’s no need to reheat this dessert, as it’s best served chilled, allowing the creamy layers of the Oreo Ice Cream Cake to shine through.
What to Serve with No-Bake Oreo Ice Cream Cake
Pairing this delightful dessert with the right accompaniments can create a truly memorable meal experience. Imagine the satisfaction of a well-rounded treat that tantalizes your taste buds and delights your loved ones.
- Fresh Berries: Bursting with flavor, strawberries and blueberries add a refreshing contrast to the rich sweetness of the cake, balancing each bite beautifully.
- Homemade Whipped Cream: A dollop of fresh whipped cream creates a light and airy contrast, enhancing the cake’s creaminess while adding a touch of elegance.
For a playful twist, serve it with a side of crunchy cookie crumbles for texture, and don’t forget to drizzle some extra fudge over the top!
- Chocolate Mint Cookies: These provide an extra layer of chocolatey goodness that echoes the flavors in the cake while introducing a delightful minty surprise.
- Ice Cream Floats: A fruity soda combined with a scoop of vanilla, this drink pairs wonderfully with the dessert, refreshing the palate between bites.
- Coffee or Espresso: The rich and bold flavors of coffee contrast perfectly with the sweetness of the cake, providing a warm and satisfying end to your meal.
With these delightful pairings, your No-Bake Oreo Ice Cream Cake will shine even brighter at your next gathering—each bite is sure to make hearts melt!
Make Ahead Options
This Oreo Ice Cream Cake is a fantastic option for meal prep that saves time on busy days! You can prepare the crust and layer the vanilla ice cream up to 24 hours in advance; simply press the crust into the dish and freeze it, then add the ice cream layer (let the ice cream soften for 10-15 minutes beforehand). To maintain quality, ensure each layer is frozen solid before adding the next. When you’re ready to serve, just drizzle on the hot fudge topping and finish with the whipped topping, then freeze for an additional 2 hours to set. This way, you can enjoy a homemade dessert that’s just as delicious and wonderfully convenient whenever the craving strikes!
Expert Tips for Oreo Ice Cream Cake
-
Creamy Ice Cream: Ensure your ice cream is fully softened before spreading; this prevents the crust from breaking and creates smooth layers.
-
Crust Consistency: For a firm crust, make sure to press the crushed Oreo mixture firmly into the dish. A loose crust can crumble when slicing your Oreo Ice Cream Cake.
-
Layer Freezing: Freeze the cake between layers to maintain structure. Skipping this step can lead to a messy dessert when cutting.
-
Flavor Twists: Don’t hesitate to experiment with different toppings, like caramel or crushed nuts, to add exciting new flavors to your cake.
-
Presentation Tip: Reserve some cookie crumbs for a sprinkle on top before serving. It adds visual appeal and extra crunch that everyone will love!
Oreo Ice Cream Cake Recipe FAQs
What type of Oreo cookies should I use for the crust?
Absolutely! For the best flavor, I recommend using classic chocolate sandwich Oreo cookies. They create a rich, chocolatey base that pairs perfectly with the sweet ice cream. You can also experiment with the various Oreo flavors available—double stuff or mint could add a delightful twist!
How do I store leftover Oreo Ice Cream Cake?
To preserve your cake’s delightful flavors, store leftovers in an airtight container in the freezer for up to 1 week. If you have a larger portion, tightly wrap it in plastic wrap and then foil to prevent ice crystals from forming. Remember to slice into portions before freezing for easier serving later!
Can I freeze the Oreo Ice Cream Cake?
Absolutely! To freeze, do as follows: After assembling your cake, cover the dish tightly with plastic wrap and then with foil to protect it from freezer burn. This will keep your cake fresh for up to 3 months. When you’re ready to enjoy, let it thaw at room temperature for about 10 minutes before slicing.
What should I do if the ice cream is difficult to spread?
If you find that the ice cream is too hard to spread easily, just let it sit out at room temperature for 10-15 minutes until it softens up. This will allow for a smoother, more even layer on your Oreo Ice Cream Cake, ensuring you maintain the integrity of that delicious crust underneath!
Are there any dietary considerations I should keep in mind?
Very! If you’re catering to dietary restrictions, you can easily substitute vanilla ice cream with a dairy-free version. Similarly, confirm the cookies are suitable if serving guests with allergies—look for gluten-free Oreos for those avoiding gluten. As always, make sure to communicate any ingredient changes to your guests for their safety.
How long can I keep the cake in the fridge before it goes bad?
For refrigerated slices, store them in an airtight container for up to 3 days. However, keep in mind that storing it in the fridge may affect the texture slightly. If you want to enjoy it longer while maintaining its creamy layers, the freezer is your best friend!
Easy No-Bake Oreo Ice Cream Cake for Ultimate Summer Bliss
Ingredients
Equipment
Method
- In a large mixing bowl, combine Oreo cookies and melted butter until well blended. Press firmly into a greased 13x9-inch dish.
- Allow vanilla ice cream to soften, then spread it evenly over the crust. Freeze for 2-3 hours until firm.
- Warm the hot fudge topping in the microwave and drizzle over the ice cream layer. Freeze for 1-2 hours until set.
- Spread whipped topping over the fudge layer, sprinkle reserved cookie crumbs on top, and freeze for at least 2 hours.
- Let the cake sit at room temperature for about 10 minutes before slicing into squares to serve.
Leave a Reply