
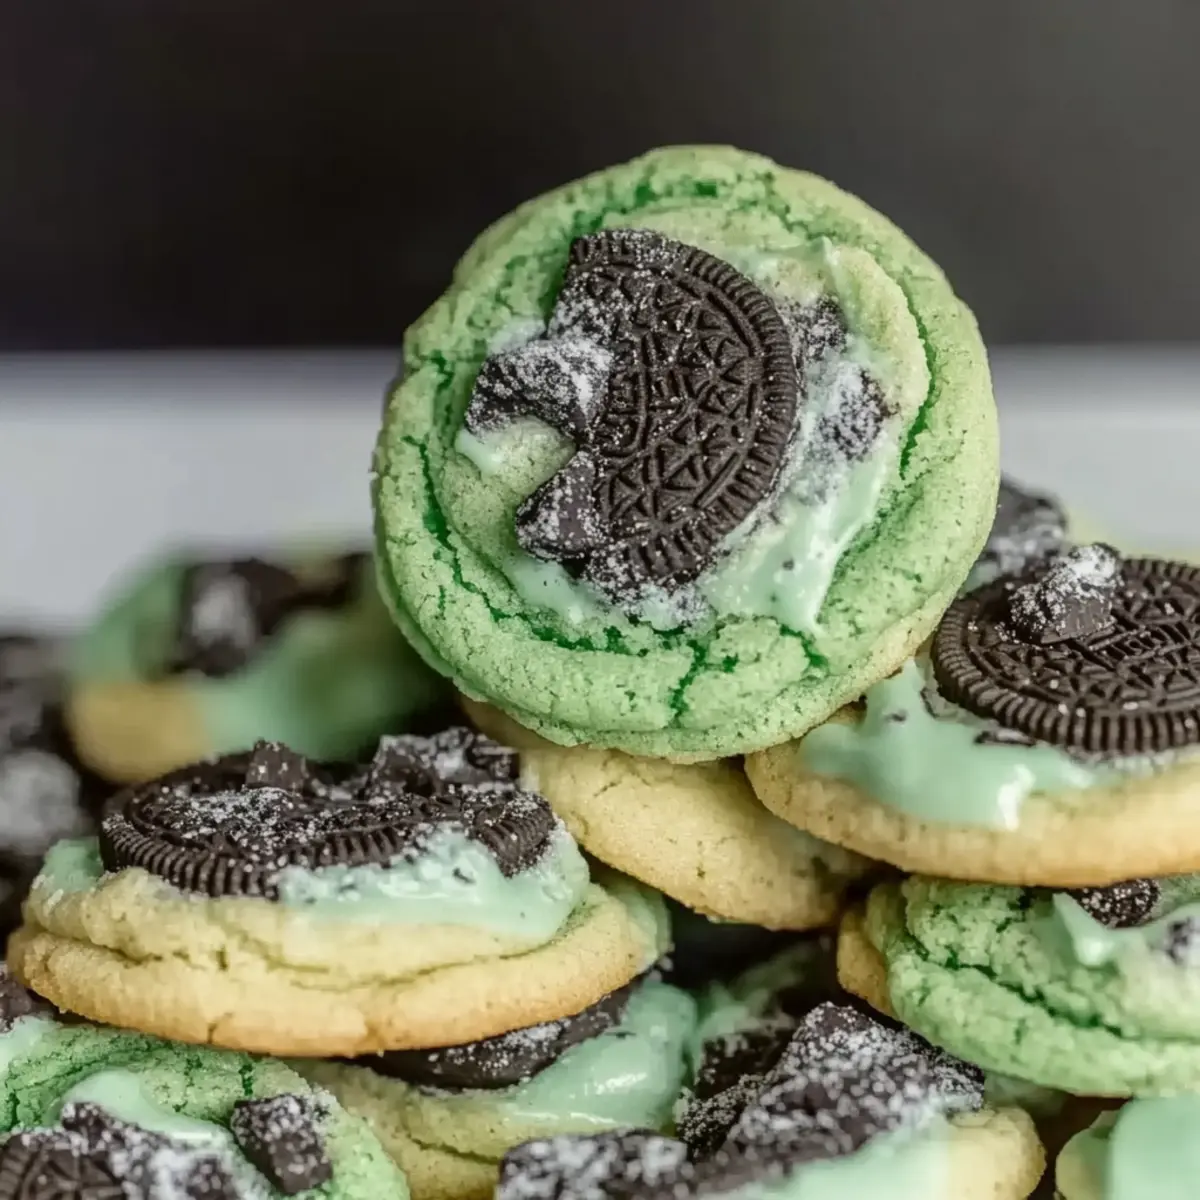
The first bite of these cookies transports me straight to festive gatherings, with their vibrant minty aroma filling the kitchen. Enter the world of Oreo Shamrock Shake Cookies—a delightful twist on a classic! Combining buttery dough with crunchy Mint Oreos and a splash of peppermint extract, these cookies achieve the perfect harmony of soft and chewy in each bite while delivering a refreshing minty flavor. Not only are these cookies a crowd-pleaser at any celebration, but they also offer an effortless gluten-free option for those looking to indulge without worry. Whether it’s St. Patrick’s Day or just a spring afternoon, these cookies promise joy and flavor that elevate any occasion. Curious about how to make these irresistible treats? Let’s dive into the recipe!
Why Are Oreo Shamrock Shake Cookies So Special?
Festive Cheer: These cookies aren’t just delicious—they bring a sparkle to your gatherings with their vibrant minty goodness.
Unique Flavor Fusion: The blend of Mint Oreos and peppermint extract creates a rich, refreshing taste that’s hard to resist!
Gluten-Free Option: Easily swap in a gluten-free flour blend, making these cookies friendly for everyone at your table.
Quick to Make: With a straightforward recipe, you’ll have warm, delightful cookies ready to share in no time.
Perfect Texture Contrast: Enjoy the contrast of a soft, chewy center with slightly crisp edges, creating a satisfying bite!
Crowd-Pleasing Treat: Whether for St. Patrick’s Day or any spring celebration, these cookies are sure to win hearts—and taste buds! Pair them with a side of ice cream for an extra decadent treat.
Oreo Shamrock Shake Cookies Ingredients
For the Cookie Base
• All-Purpose Flour – Provides structure and supports cookie shape; substitute with a 1:1 gluten-free baking flour blend for gluten-free cookies.
• Baking Soda – Helps cookies rise and achieve golden edges—integral for texture.
• Baking Powder – Balances texture, ensuring cookies are soft and tender.
• Salt – Enhances sweetness and balances the minty flavor intensity.
• Unsalted Butter – Adds richness for a melt-in-your-mouth consistency; remember to soften it before use.
• Granulated Sugar – Sweetens the dough while adding chewiness; measure accurately to avoid dry cookies.
• Egg – Acts as a binder, providing moisture; use a room-temperature egg for best results.
• Vanilla Extract – Mimics the creamy vanilla notes of a Shamrock Shake, enhancing flavor.
• Peppermint Extract – Delivers the refreshing mint flavor that characterizes these cookies.
• Green Food Coloring (optional) – Adds a festive look; omit if desired without affecting flavor.
For the Crunch
• Mint Oreos – Provide crunch and bold mint flavor; substitute with regular Oreos if you prefer, increasing peppermint extract slightly.
Step‑by‑Step Instructions for Oreo Shamrock Shake Cookies
Step 1: Preheat Your Oven
Begin by preheating your oven to 350°F (175°C). While the oven is heating, prepare your baking sheets by lining them with parchment paper to prevent sticking. This will ensure a perfect bake for your Oreo Shamrock Shake Cookies, creating a delightful golden edge while keeping them soft in the center.
Step 2: Whisk the Dry Ingredients
In a medium bowl, whisk together the all-purpose flour, baking soda, baking powder, and salt. This essential step combines the dry ingredients thoroughly and ensures even distribution of the leavening agents, which will help your cookies rise perfectly. Set this bowl aside as you move to the next step, keeping your workspace organized.
Step 3: Cream the Butter and Sugar
In a large mixing bowl, use an electric mixer to cream together the softened unsalted butter and granulated sugar until the mixture is light and fluffy, approximately 2–3 minutes. The butter-sugar blend should appear pale and airy, creating a wonderful foundation for your Oreo Shamrock Shake Cookies that adds richness and moisture.
Step 4: Add the Wet Ingredients
Once combined, add in the egg, vanilla extract, peppermint extract, and green food coloring (if using) to the butter-sugar mixture. Mix on medium speed until all ingredients are well incorporated and you have a smooth, vibrant dough. This step captures that festive spirit perfect for your cookies, enhancing their minty flavor profile.
Step 5: Combine the Dry and Wet Mixtures
Gradually add the dry ingredient mixture to the wet ingredients, mixing on low speed until just combined. Be careful not to overmix, as this could lead to tougher cookies. You want to see a soft, slightly sticky cookie dough form; this is the base for your Oreo Shamrock Shake Cookies!
Step 6: Fold in the Mint Oreos
Gently fold in the crushed Mint Oreos using a spatula, ensuring that some chunks remain for that delightful crunch. Each piece brings a burst of bold mint flavor to the cookie while complementing the soft texture. Make sure the Oreos are evenly distributed throughout the dough for a balanced taste in every bite.
Step 7: Chill the Cookie Dough
Once the dough is ready, cover the bowl with plastic wrap and refrigerate for at least one hour. Chilling the dough prevents excessive spreading during baking, ensuring your Oreo Shamrock Shake Cookies maintain their shape and soft, chewy centers. This patience will pay off with perfectly textured cookies!
Step 8: Scoop the Dough
After the chilling period, use a cookie scoop (about 3 tablespoons) to portion the dough, placing each ball on the prepared baking sheets, leaving about two inches between each. This spacing allows room for the cookies to expand while baking, ensuring that they bake evenly and maintain their delightful shape.
Step 9: Bake the Cookies
Place the baking sheets in your preheated oven and bake for 11–12 minutes. Keep an eye on them; the edges should turn a lovely golden brown, while the centers will still look soft and slightly underbaked. This is the perfect moment to remove them for that soft, chewy texture everyone loves.
Step 10: Cool Before Serving
Allow the cookies to cool on the baking sheets for about five minutes after taking them out of the oven. This resting period lets them firm up slightly, making them easier to transfer. Afterward, gently move the cookies to wire racks to cool completely before indulging in your delicious Oreo Shamrock Shake Cookies!
Make Ahead Options
These Oreo Shamrock Shake Cookies are a perfect choice for busy home cooks looking to save time while still delighting family and friends! You can prepare the cookie dough up to 24 hours in advance; simply cover the bowl tightly with plastic wrap and refrigerate. This not only enhances the flavor as the ingredients meld but also helps maintain a soft and chewy texture after baking. Alternatively, you can scoop the dough into balls and freeze them for up to 3 months. When you’re ready to bake, you can pop the frozen dough balls directly into the preheated oven, adding a couple of extra minutes to the baking time. Either way, you’ll have fresh, scrumptious cookies with minimal effort, making them just as delicious as if baked the same day!
Storage Tips for Oreo Shamrock Shake Cookies
Room Temperature: Store cookies in an airtight container at room temperature for up to 5 days. This keeps them fresh while maintaining their delightful softness.
Freezer: For longer storage, freeze cooled cookies in a single layer for up to 3 months. When ready to enjoy, just thaw at room temperature or warm them up briefly in the oven.
Cookie Dough Storage: If you want fresh-baked cookies anytime, freeze the cookie dough balls. They can stay frozen for up to 3 months; add a couple of extra minutes to the baking time when using frozen dough.
Reheating: To revive the cookies, pop them in the microwave for about 10-15 seconds or warm in the oven for a few minutes at 350°F (175°C) for that fresh-baked taste.
What to Serve with Oreo Shamrock Shake Cookies?
Indulging in cookies brings warmth to any gathering, especially when they embody the refreshing spirit of spring!
-
Mint Ice Cream: A scoop of mint ice cream is the perfect pairing, enhancing the minty flavor and keeping things cool and creamy.
-
Chocolate Milk: Rich, chocolatey milk complements the cookies’ minty notes, making for a nostalgic treat reminiscent of childhood snacks.
-
Fresh Berries: Juicy strawberries or raspberries add a refreshing contrast, balancing the sweetness of the cookies with their tartness.
-
Creamy Vanilla Pudding: A small cup of vanilla pudding can act as a delightful dip, creating a fun texture experience with each bite.
-
Coffee or Espresso: The bold flavors of coffee bring out the richness of the cookies, providing a perfectly balanced end to your dessert.
-
Lemonade: This tangy beverage brightens the flavors of the cookies, making for an uplifting and festive pairing that reminds you of springtime.
-
Chocolate-Covered Strawberries: Indulgent and elegant, these will elevate your dessert table, offering a vibrant contrast to the minty cookies.
-
Sweetened Whipped Cream: A dollop of homemade whipped cream adds a fluffy touch, enriching each bite with creaminess alongside the cookies.
-
Mini Fruit Tarts: These little bites lend a crunchy and fruity dimension, which can serve as a delightful contrast to the creamy textures of the cookies.
-
Chocolate Fondue: Dip the cookies into warm chocolate for an unforgettable treat that takes dessert indulgence to the next level.
Expert Tips for Oreo Shamrock Shake Cookies
Chill the Dough: Ensure you chill the dough for at least one hour to prevent spreading during baking. This helps maintain the cookie’s thickness and chewiness.
Measure Flour Correctly: Use the spoon-and-level method to measure all-purpose flour accurately. This avoids dry cookies that might crumble instead of being soft and chewy.
Don’t Overmix: Once you’ve added the dry ingredients, mix just until combined. Overmixing can lead to tough cookies, so keep it gentle for the perfect Oreo Shamrock Shake Cookies.
Monitor Baking Time: Keep a close eye on the cookies while baking. Remove them when the edges are golden but the centers still appear soft for that dreamy, chewy texture.
Experiment with Additions: Feel free to mix in white chocolate chips or drizzle melted chocolate for a delightful twist. These variations keep your cookie enjoyment fresh and exciting!
Oreo Shamrock Shake Cookies Variations
Feel free to personalize your Oreo Shamrock Shake Cookies for a delightful twist that caters to your taste!
-
Gluten-Free: Use a 1:1 gluten-free flour blend to make these cookies suitable for gluten-sensitive friends.
-
Minty Chocolate: Incorporate a handful of chocolate chips for an added richness that pairs brilliantly with the mint.
-
Flavor Infusion: Add a dash of almond extract alongside the peppermint for a unique flavor twist that pleasantly surprises your palate.
-
Ice Cream Sandwiches: Sandwich two cookies around a scoop of vanilla or mint chocolate chip ice cream for a decadent treat.
-
Chocolate Drizzle: Drizzle melted dark or white chocolate over the cooled cookies for an elegant finishing touch.
-
Crushed Candies: Swap in crushed peppermint candies or Andes mints instead of Mint Oreos for a refreshing crunch.
-
Nutty Texture: Add chopped walnuts or pecans for a delightful contrast that brings an extra layer of flavor and texture.
-
Cookie Dough Freezer: Prepare cookie dough in advance and freeze it for fresh-baked cookies whenever the craving hits; just bake them straight from the freezer!
These variations not only keep your cookie game exciting but also cater to a range of dietary preferences. Celebrate togetherness and flavor by sharing your creations or exploring new combinations! You might also enjoy these Pan Banging Cookies for a fun baking experience or sweeten the air with Maple Pecan Cookies for another festive dessert option.
Oreo Shamrock Shake Cookies Recipe FAQs
What type of Oreos should I use for the best flavor?
Absolutely! Using Mint Oreos is key to achieving that iconic minty flavor in your Oreo Shamrock Shake Cookies. If you can’t find them, regular Oreos work too; just increase the peppermint extract slightly (by about 1/4 teaspoon) to ensure you capture that minty essence.
How long can I store Oreo Shamrock Shake Cookies?
These delightful cookies can be stored at room temperature in an airtight container for up to 5 days. To keep them fresh longer, freeze cooled cookies in a single layer for up to 3 months. Just remember to allow them to thaw at room temperature before indulging again!
Can I freeze the cookie dough?
Yes! For make-ahead convenience, you can freeze the cookie dough balls for up to 3 months. Simply scoop the dough onto a baking sheet lined with parchment paper, freeze until solid, then transfer the dough balls to a zip-top freezer bag. When you’re ready to bake, add a couple of extra minutes to the baking time.
What should I do if my cookies are too flat?
If your Oreo Shamrock Shake Cookies come out flat, it might be due to the dough not being chilled properly. Always chill the dough for at least 1 hour before baking to prevent spreading. If they still spread too much, consider reducing the amount of butter slightly or adding an extra tablespoon of flour to ensure they hold their shape better.
Are these cookies safe for pets or people with allergies?
While Oreo Shamrock Shake Cookies are a delicious treat for humans, they are not safe for pets, particularly due to chocolate found in Oreos. Additionally, they contain gluten, eggs, and dairy, which could be problematic for those with allergies. Be sure to use gluten-free substitutes and check all ingredient labels to accommodate dietary restrictions.
Delicious Oreo Shamrock Shake Cookies for a Festive Treat
Ingredients
Equipment
Method
- Preheat your oven to 350°F (175°C) and line baking sheets with parchment paper.
- In a medium bowl, whisk together the flour, baking soda, baking powder, and salt.
- In a large mixing bowl, cream together the softened butter and sugar until light and fluffy, about 2–3 minutes.
- Add the egg, vanilla extract, peppermint extract, and green food coloring to the butter-sugar mixture and mix until smooth.
- Gradually mix the dry ingredient mixture into the wet ingredients until just combined.
- Gently fold in the crushed Mint Oreos using a spatula.
- Cover the dough with plastic wrap and refrigerate for at least one hour.
- Use a cookie scoop to portion the dough onto the prepared baking sheets, leaving space between each.
- Bake for 11–12 minutes until the edges are golden and centers are soft.
- Allow cookies to cool on the baking sheets for 5 minutes before transferring to wire racks to cool completely.
Leave a Reply