
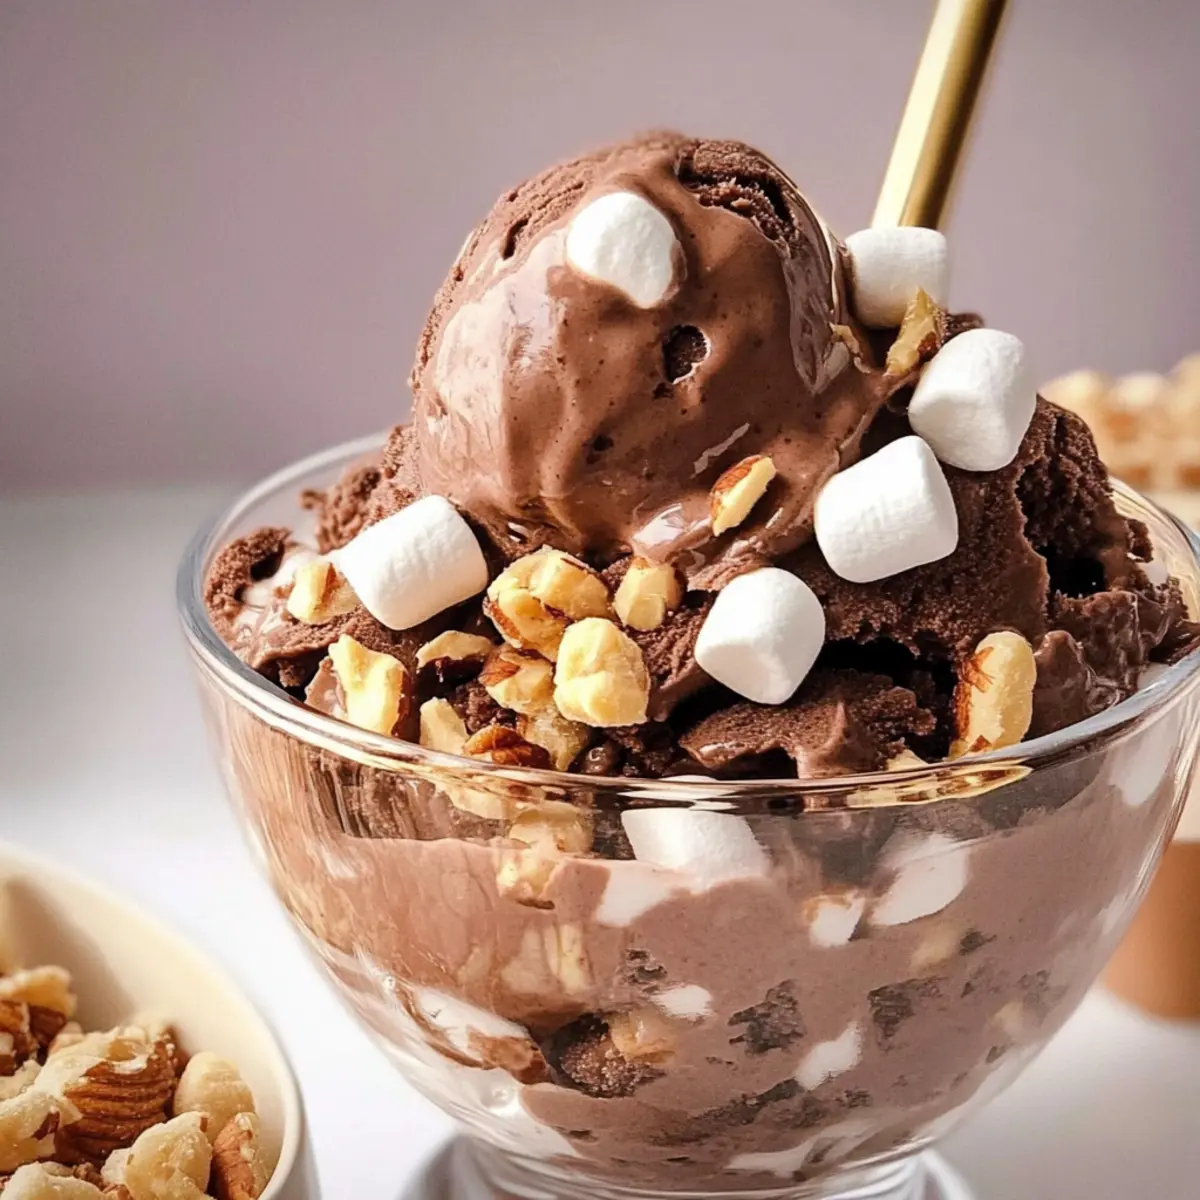
The sweet sound of laughter fills the kitchen as we gather for a treat that feels like a warm hug on a summer day—no-churn Rocky Road Ice Cream! With a delightful blend of creamy chocolate, fluffy mini marshmallows, and crunchy nuts, this homemade dessert brings everyone together without the hassle of an ice cream machine. As a busy home chef, I love how easy it is to whip up this treat. Just a few simple ingredients and a bit of patience, and you’ll have a crowd-pleaser ready to serve at your next gathering or simply for a cozy night in. Want to impress your family and friends without the fuss? Let’s dive into this irresistible and straightforward recipe, perfect for satisfying those ice cream cravings!
Why is Rocky Road Ice Cream a Must-Try?
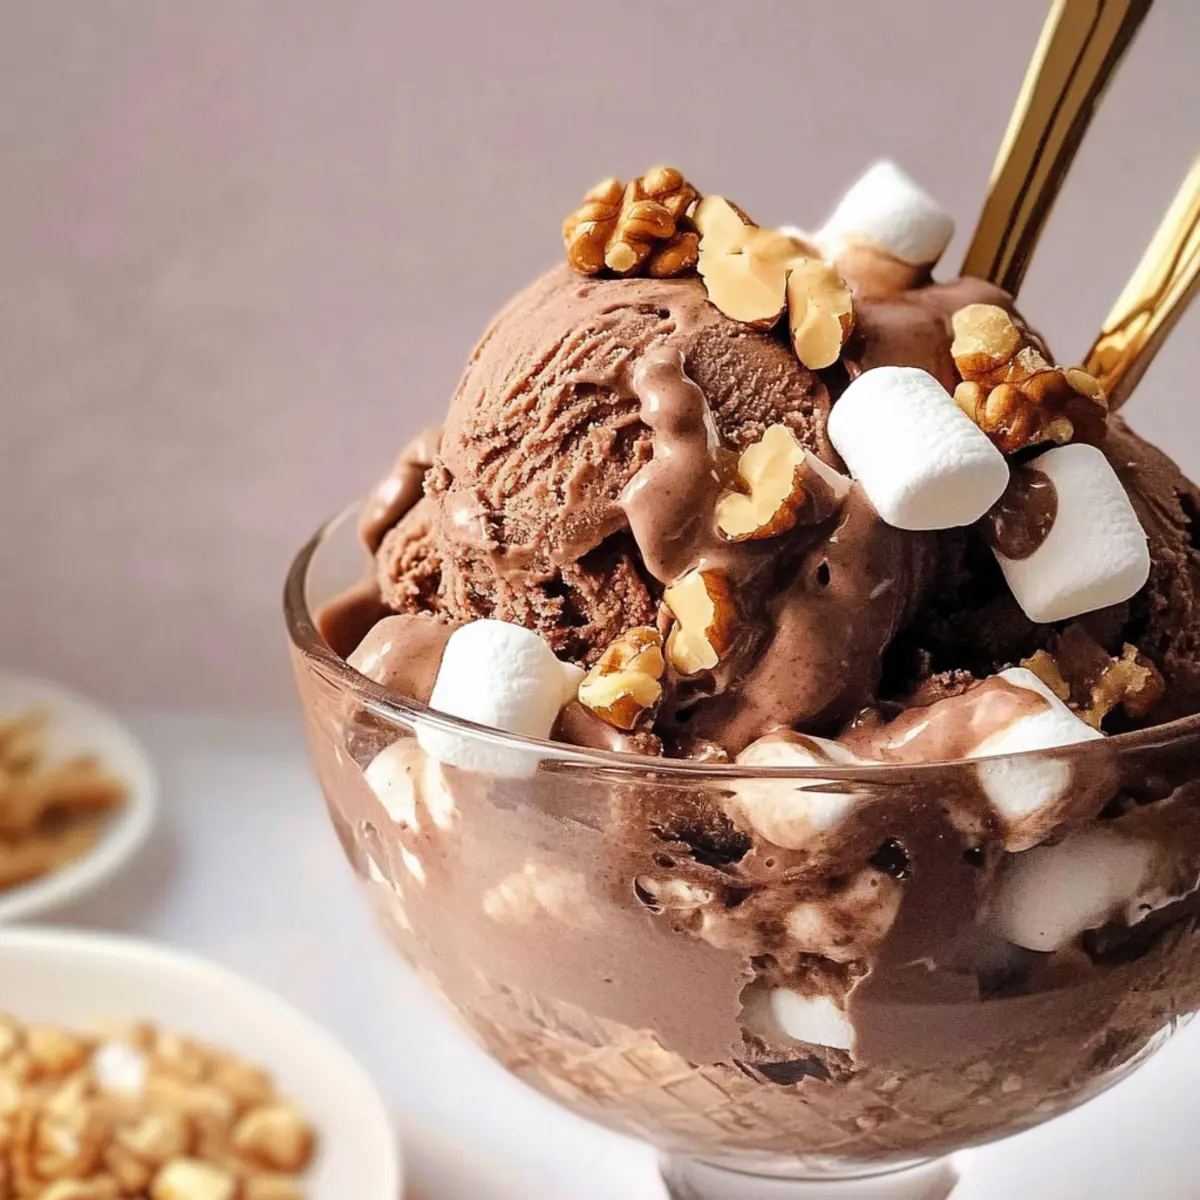
Irresistible Flavor: Each spoonful bursts with rich chocolate, complemented by sweet marshmallows and crunchy nuts, making it a decadent treat for any occasion.
No Machine Needed: This no-churn recipe means you can make this delightful ice cream without any special equipment.
Quick and Easy: With just a handful of simple ingredients, this recipe comes together in no time, perfect for busy weeknights or last-minute gatherings.
Crowd-Pleasing Delight: Whether for a summer BBQ or a cozy night in, this Rocky Road Ice Cream is sure to impress everyone.
Versatile Options: Feel free to get creative! Substitute nuts with cookie chunks or drizzle some caramel for a tasty twist.
For a delightful pairing, consider serving it alongside Cream Cheese Pound for a rich dessert experience.
Rocky Road Ice Cream Ingredients
• Dive into the flavors of homemade Rocky Road Ice Cream with these simple ingredients!
-
For the Base
-
Milk – Use whole milk for the creamiest texture, making your ice cream rich and delicious.
-
Cocoa Powder – Unsweetened or Dutch-process cocoa gives that perfectly deep chocolate flavor.
-
Sugar – Granulated sugar sweetens the mixture; feel free to swap with alternatives if desired.
-
Heavy Whipping Cream – Essential for a luxuriously creamy finish; skipping low-fat versions yields the best results.
-
Vanilla Extract – Pure vanilla enhances flavor depth, making your homemade ice cream irresistible.
-
For the Mix-Ins
-
Nuts – Choose roasted almonds, walnuts, or pecans for a delightful crunch in every bite.
-
Mini Marshmallows – These soft, sweet morsels add a chewy texture; larger marshmallows can be chopped if needed.
Now you’re all set to create your no-churn Rocky Road Ice Cream!
Step‑by‑Step Instructions for Rocky Road Ice Cream
Step 1: Prepare the Chocolate Base
In a medium saucepan, combine whole milk, unsweetened cocoa powder, and granulated sugar over medium heat. Whisk continuously until the mixture is smooth and heated through, but do not let it boil. This should take about 5 minutes. Once smooth, remove it from heat and transfer to a container, allowing it to cool slightly before refrigerating for at least 2 hours until fully chilled.
Step 2: Whip the Cream
In a separate mixing bowl, pour in the heavy whipping cream and add pure vanilla extract. Using a hand mixer or stand mixer, whip the cream on medium speed until soft peaks form, which should take about 2-3 minutes. The cream should hold its shape but still be soft and fluffy, perfect for folding into your chocolate base for your Rocky Road Ice Cream.
Step 3: Combine the Mixtures
Once the chocolate base is chilled, remove it from the refrigerator. Pour the chilled chocolate mixture into the bowl with the whipped cream. Gently fold the two together using a spatula, taking care not to deflate the whipped cream. Continue folding until you achieve a consistently rich chocolate color throughout, creating the creamy mixture for your homemade Rocky Road Ice Cream.
Step 4: Add the Mix-Ins
Pause your folding process, and sprinkle in half of the chopped nuts and mini marshmallows into the chocolate mixture. Gently fold these in, allowing them to be evenly distributed while adding delightful texture to your ice cream. The blend of crunchy nuts and soft marshmallows will enhance the flavor, making your Rocky Road Ice Cream a true treat.
Step 5: Freeze the Ice Cream
Transfer the blended mixture into a loaf pan for freezing. Smooth the top with a spatula, and sprinkle the remaining nuts and marshmallows on top for decoration. Cover the pan with plastic wrap or a lid, and place it in the freezer. Let it freeze for at least 3 hours, or until the ice cream is firm and scoopable, perfect for serving.
Make Ahead Options
These delightful Rocky Road Ice Cream treats are perfect for meal prep aficionados! You can prepare the chocolate base up to 24 hours in advance; simply follow steps 1 and 2, and refrigerate the mixture until you are ready to complete your dessert. Additionally, you can chop the nuts and marshmallows ahead of time—just store them in separate airtight containers to maintain freshness. When it’s time to serve, take the chilled chocolate base, whip the cream, and combine everything together before freezing. This means you can have a creamy, rich dessert ready for guests with minimal last-minute effort, ensuring that your homemade ice cream is just as delicious as if made fresh that day!
How to Store and Freeze Rocky Road Ice Cream
Fridge: Store any leftovers in an airtight container in the fridge for up to 2 days; however, the texture may become firm.
Freezer: For longer storage, keep Rocky Road Ice Cream in the freezer in an airtight container for up to 2 weeks.
Reheating: Before serving, let the ice cream sit at room temperature for about 5-10 minutes for easier scooping.
Prevent Ice Crystals: Press plastic wrap directly onto the surface of the ice cream to prevent ice crystals from forming during storage.
Expert Tips for Rocky Road Ice Cream
-
Chill Thoroughly: Ensure the chocolate base is completely chilled before mixing with the whipped cream for the creamiest Rocky Road Ice Cream.
-
No Ice Cream Maker? No Problem: If you lack an ice cream maker, simply stir the mixture in the loaf pan every 30 minutes while freezing to achieve a smooth texture.
-
Toast the Nuts: For an added layer of flavor, consider toasting your nuts before mixing them in. This enhances crunchiness and richness.
-
Cover to Avoid Ice Crystals: Press plastic wrap directly onto the surface of the ice cream before sealing to prevent ice crystals from forming during storage.
-
Mix-Ins Variety: Feel free to customize your mix-ins! Chocolate chips or cookie chunks make delightful alternatives to nuts and marshmallows.
Rocky Road Ice Cream Variations
Feel free to let your creativity shine and personalize this delightful ice cream recipe in countless ways!
-
Nut-Free: Skip the nuts altogether for a smooth, allergy-friendly version, or swap in crunchy cereal for that satisfying crunch.
-
Vegan Delight: Replace milk and heavy cream with coconut milk and coconut cream, using maple syrup or agave instead of sugar for a dairy-free treat.
-
Flavor Boost: Stir in your favorite chocolate fudge sauce just before freezing for an extra indulgent chocolate experience. It’s like a chocolate hug in every bite!
-
Fruit Fusion: Add diced strawberries or cherries for a refreshing twist that complements the rich chocolate perfectly for those who love fruity additions.
-
Spicy Kick: Sprinkle a pinch of cayenne pepper in the chocolate base for a surprising and delightful heat that balances the sweetness. It’s an adventurous take you’re bound to love!
-
Cookie Crumble: Incorporate chunks of your favorite cookies, like Oreos or chocolate chip, for an exciting new texture and flavor enhancement.
-
Marshmallow Swirl: Fold in a generous dollop of marshmallow fluff for an extra layer of sweetness that enhances the classic Rocky Road experience.
-
Caramel Surprise: Add dollops of caramel sauce to the mixture for a sweet contrast to the chocolate, creating that perfect blend of flavors. Consider serving it with a slice of Pistachio Pudding Icebox for an ultimate dessert duo!
What to Serve with Rocky Road Ice Cream?
What better way to create a delightful spread than by pairing it with other delicious treats?
-
Warm Brownies: These rich, fudgy brownies provide a delightful contrast with the cool ice cream while amplifying the chocolatey goodness. Serve them warm, topped with a scoop of your homemade Rocky Road Ice Cream for a truly decadent dessert experience.
-
Crunchy Waffle Cones: Crispy waffle cones filled with your favorite creamy ice cream create a delightful textural experience. The crunch of the cone perfectly complements the smoothness of the Rocky Road Ice Cream, making every bite a joy.
-
Fresh Berries: A side of plump raspberries or strawberries adds a refreshing burst of flavor and color to your dessert. Their natural sweetness balances the richness of the ice cream, creating a perfect harmony on your plate.
-
Chocolate Sauce Drizzle: Enhance your Rocky Road Ice Cream by adding a warm drizzle of chocolate sauce. Each spoonful becomes an indulgent treat, marrying the flavors of chocolate, nuts, and marshmallows beautifully.
-
Ice Cream Sundae Bar: Create an interactive dessert experience by setting up a sundae bar. Guests can choose toppings like crushed cookies, caramel, or extra marshmallows to personalize their Rocky Road Ice Cream, ensuring everyone leaves happy!
-
Spiced Hot Chocolate: This comforting beverage doesn’t just warm you up on cooler evenings; it also pairs deliciously with the cold and creamy ice cream. The combination of flavors will make you feel all cozy inside.
-
Fruit Sorbet: For a lighter option, serve a tangy fruit sorbet alongside your Rocky Road Ice Cream. The fruity flavors will cleanse your palate, making it a refreshing contrast to the chocolate and nuts.
-
Fudge Sauce: A rich fudge sauce perfect for drizzling not only tastes fantastic but also enhances the visual appeal of your dessert. It’s the cherry on top of an irresistible sundae experience.

Rocky Road Ice Cream Recipe FAQs
How do I select the right cocoa powder for Rocky Road Ice Cream?
Absolutely! Choosing the right cocoa powder can elevate your ice cream’s flavor. I recommend using unsweetened cocoa or Dutch-process cocoa, as they provide a rich and smooth chocolate taste. Look for a deep, dark cocoa powder for a more intense chocolate experience!
How should I store leftover Rocky Road Ice Cream?
To keep your homemade Rocky Road Ice Cream at its best, store it in an airtight container in the freezer for up to 2 weeks. For easier scooping later, allow it to sit at room temperature for about 5-10 minutes before serving. If you notice ice crystals forming, pressing plastic wrap on the surface before sealing can help prevent that!
Can I freeze the Rocky Road Ice Cream for longer than two weeks?
Technically, yes! While it’s best consumed within two weeks for optimal flavor and texture, it can last up to 3 months in the freezer. Just make sure it’s tightly sealed in an airtight container to maintain its quality. When you’re ready to enjoy, let it thaw again for 5-10 minutes for a creamy texture.
What should I do if my Rocky Road Ice Cream is too hard after freezing?
Very common! Ice cream can become hard if frozen for a long time or if the mixture wasn’t chilled adequately before freezing. To resolve this, simply let it sit out at room temperature for 10-15 minutes before scooping. If you’re making this without an ice cream maker, stir the mixture in the loaf pan every 30 minutes to break up ice crystals and improve creaminess.
Can I make Rocky Road Ice Cream without nuts?
Of course! If anyone in your family has nut allergies or simply prefers not to use nuts, feel free to swap them out for chocolate chips or cookie chunks. You can still achieve that delightful texture, and it will be just as creamy and delicious!
Are there any dietary considerations for pets, especially with the ingredients in Rocky Road Ice Cream?
Yes, it’s crucial to remember that many human foods can be harmful to pets. Chocolate is toxic to dogs and cats, so please ensure that your furry friends don’t sneak any bites of your homemade Rocky Road Ice Cream. Always keep pet safety in mind when preparing any desserts that include chocolate!

Homemade Rocky Road Ice Cream: No Machine Needed!
Ingredients
Equipment
Method
- In a medium saucepan, combine whole milk, unsweetened cocoa powder, and granulated sugar over medium heat. Whisk continuously until smooth and heated through, about 5 minutes, then cool and refrigerate for at least 2 hours.
- In a mixing bowl, whip heavy whipping cream and vanilla extract until soft peaks form (about 2-3 minutes).
- Combine chilled chocolate mixture with whipped cream, gently folding together until uniform.
- Fold in half of the chopped nuts and mini marshmallows until evenly distributed.
- Transfer the mixture to a loaf pan, smooth the top, sprinkle remaining nuts and marshmallows, and freeze for at least 3 hours until firm.
Leave a Reply