
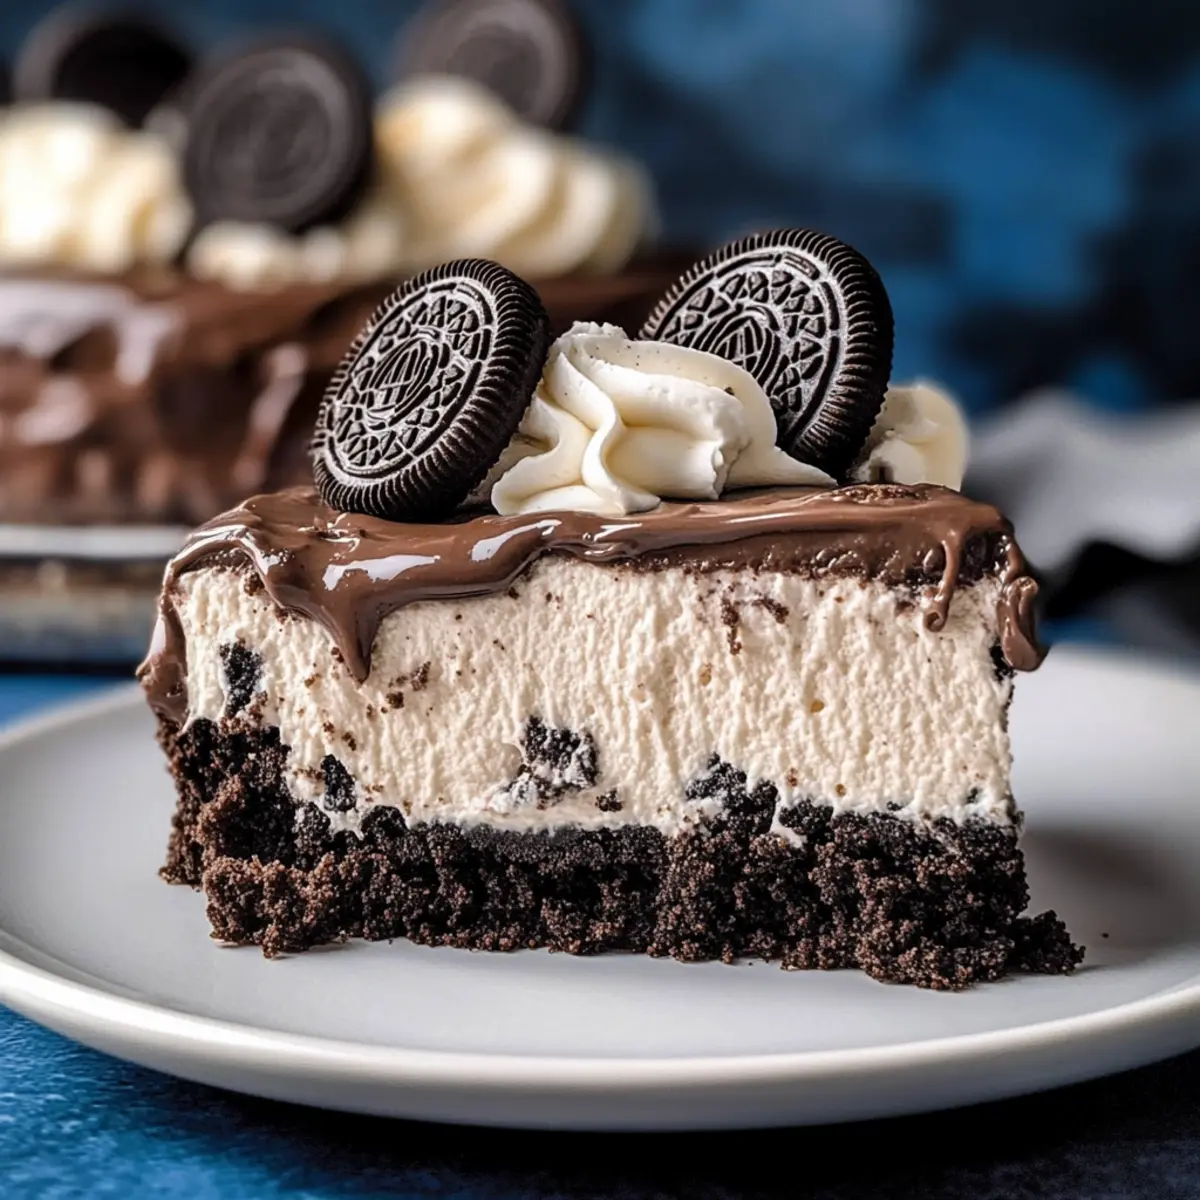
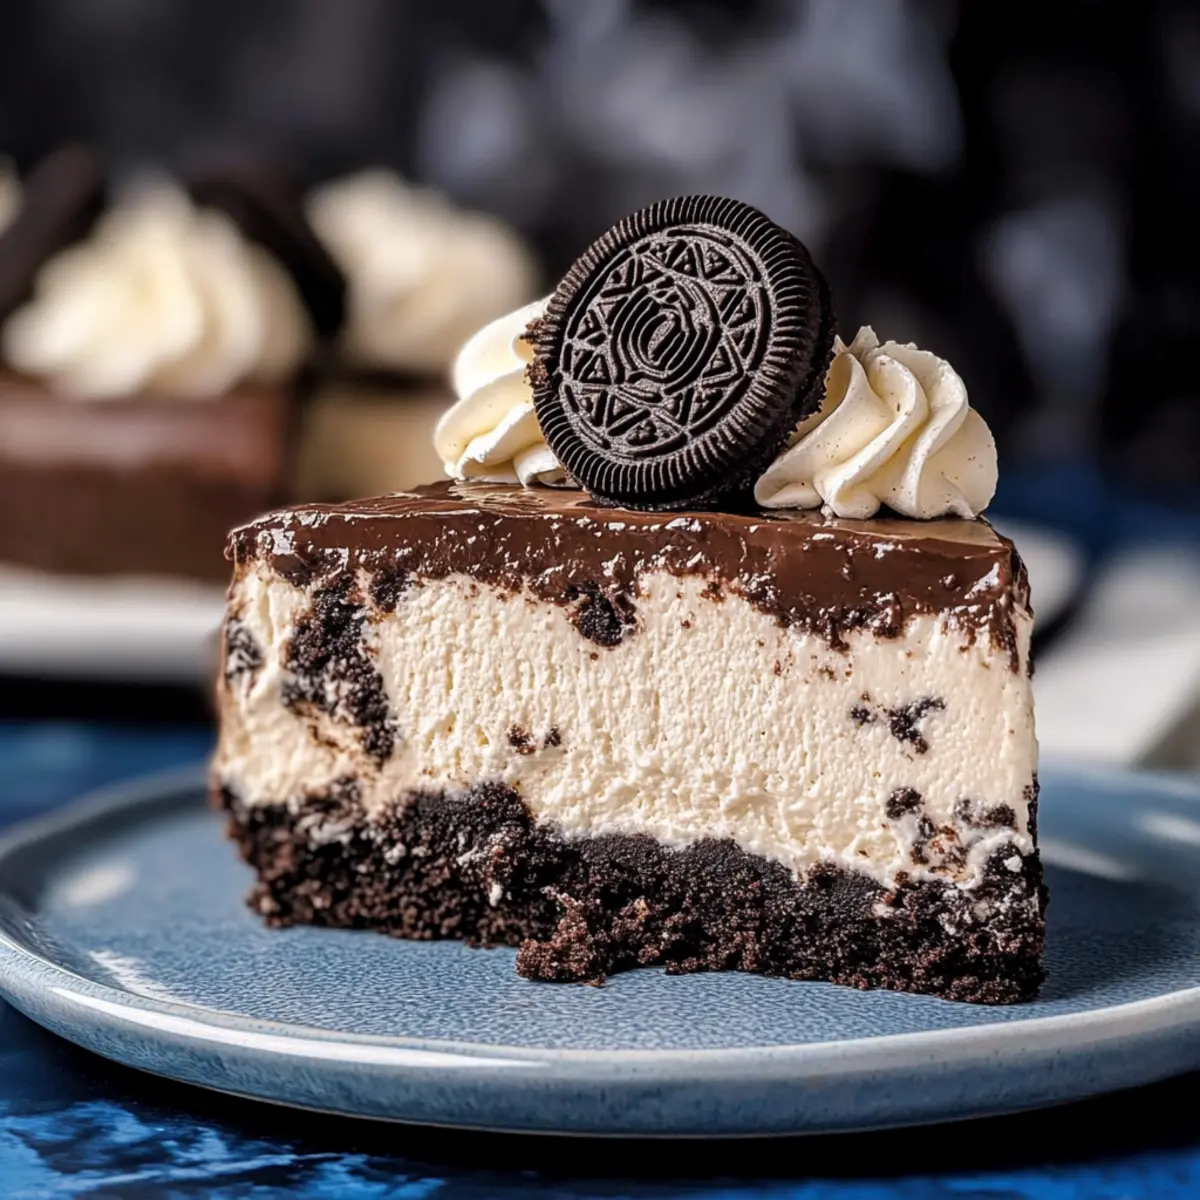
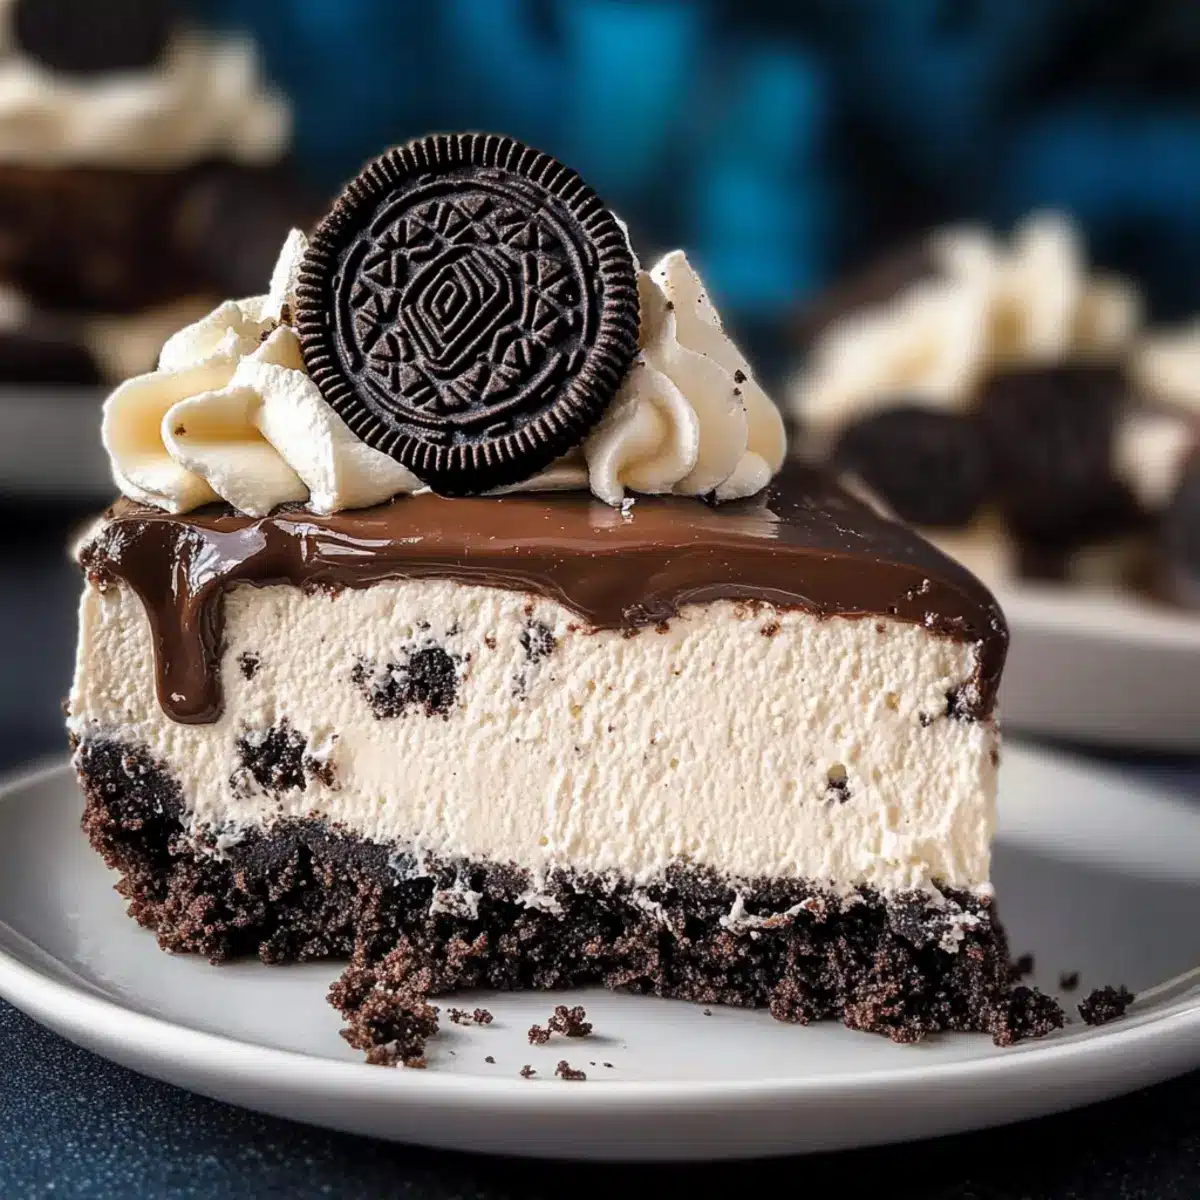
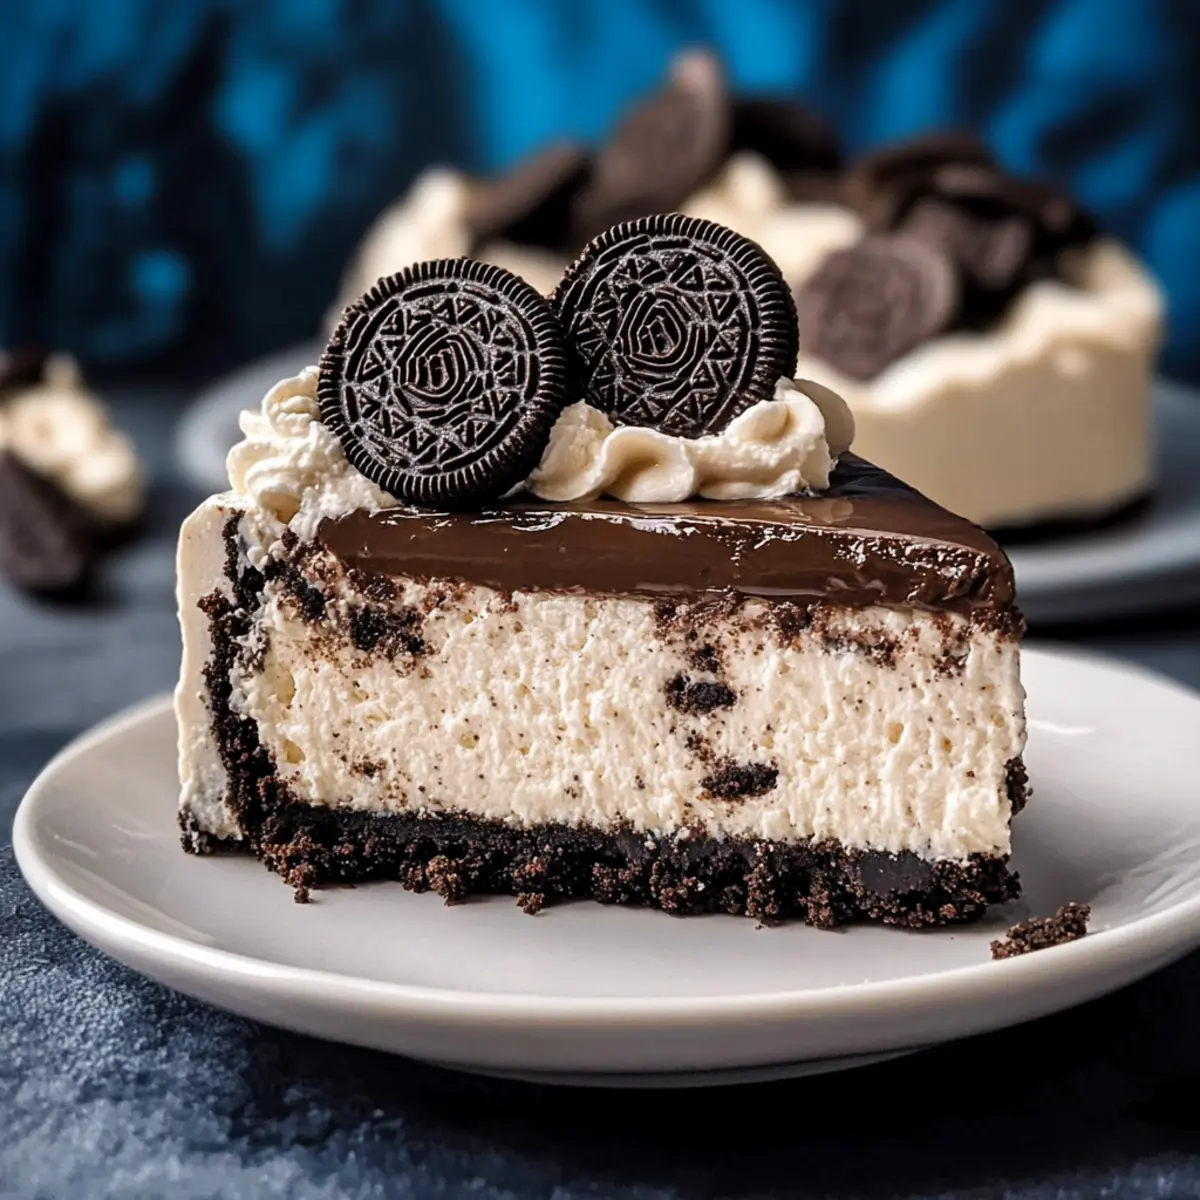
There’s something utterly charming about a dessert that doesn’t require an oven, and my No Bake Oreo Cheesecake Recipe perfectly captures that essence! With its velvety cheesecake filling paired with the delightful crunch of Oreos, this treat is not only simple to whip up in just 30 minutes but also ensures your kitchen stays cool during those warmer days. Each slice is bound to impress, making it an instant favorite for family gatherings and celebrations. Plus, it’s a crowd-pleaser, striking that ideal balance between indulgence and ease. Are you ready to dive into a sweet adventure that will have everyone begging for seconds? Let’s get started!
Why is Oreo Cheesecake so popular?
Effortless to make: This No Bake Oreo Cheesecake Recipe is perfect for those who want a stunning dessert without the hassle of baking. With just 30 minutes of prep time, you can impress your guests in no time.
Decadent flavors: Each bite delivers a heavenly combination of creamy cheesecake and chocolatey Oreos, creating a rich and satisfying dessert that appeals to both kids and adults alike.
Versatile options: Feel free to get creative! You can experiment with flavors by swapping in chocolate Oreos or adding a fruity layer. Need more dessert inspiration? Check out these Bakery Style Oreo or Blueberry Cheesecake Crumble ideas for even more delicious treats.
Perfect for gatherings: This cheesecake is not only delicious but makes for an eye-catching centerpiece at parties, ensuring it will be a hit among friends and family.
Cool and refreshing: No baking means you can enjoy a fabulous dessert even on the hottest of days while keeping your kitchen nice and cool.
No Bake Oreo Cheesecake Ingredients
• Discover the delightful components that create magic!
For the Crust
- Oreo Cookies – The primary crust ingredient that provides flavor and crunch; use a party-size package to ensure plenty for all layers.
- Salted Butter – Binds the crumb crust together; opt for salted variety to enhance flavor.
- Salt (optional) – Adds balance to the sweetness of the crust; omit if preferred.
For the Filling
- Cream Cheese – Creates the rich, creamy filling; use full-fat for best results as low-fat versions may alter texture.
- Powdered Sugar – Sweetens the cheesecake filling and can be adjusted based on taste preference.
- Vanilla Extract – Adds depth of flavor to the filling.
- Cool Whip – Lightens the cream cheese for a fluffy texture; remember to thaw before use.
- Crushed Oreos – Incorporated into the filling for added cookie flavor and delightful texture.
For the Ganache (optional)
- Semi-Sweet Chocolate Chips – Adds richness when melted; use for an extra indulgent experience.
- Heavy Cream – Combines with chocolate chips to create a smooth ganache.
For Garnishing
- Whipped Cream – Perfect for topping, adding a light touch.
- Oreos – Additional cookies for topping, enhancing presentation and flavor.
This No Bake Oreo Cheesecake Recipe is not only a treat for the taste buds but also wonderfully simple to make!
Step‑by‑Step Instructions for No Bake Oreo Cheesecake Recipe
Step 1: Prepare the Crust
Start by pulsing 28 Oreo cookies in a food processor until they form fine crumbs. In a medium bowl, combine these crumbs with melted salted butter and an optional pinch of salt, stirring until well mixed. Press this mixture firmly into the bottom of a 10-inch springform pan, ensuring an even layer that reaches up the sides slightly. Chill the crust in the refrigerator while you prepare the filling.
Step 2: Make Filling
In a large mixing bowl, beat together softened cream cheese, powdered sugar, and vanilla extract using an electric mixer on medium speed until the mixture is light and fluffy, about 3 minutes. Gently fold in the thawed Cool Whip and crushed Oreos until fully combined, taking care not to deflate the mixture. This will create a rich and creamy filling for your No Bake Oreo Cheesecake.
Step 3: Combine
Once the filling is ready, remove the chilled crust from the refrigerator. Spread the cheesecake filling evenly over the crust, smoothing the top with a spatula for a professional finish. Make sure there are no air pockets, and feel free to sprinkle some additional crushed Oreos on top for flair. Now it’s time for the cheesecake to set!
Step 4: Create Ganache (optional)
If you’d like a chocolaty topping, combine semi-sweet chocolate chips and heavy cream in a microwave-safe bowl. Heat in the microwave on high for about 30 seconds, then stir until the mixture is smooth and glossy. Let the ganache cool slightly, then pour it evenly over the cheesecake, allowing it to drizzle down the sides for an enticing look.
Step 5: Chill
Next, cover the springform pan with plastic wrap, ensuring it’s airtight. Place the cheesecake in the refrigerator and allow it to chill for at least 6 hours or, for best results, overnight. This chilling time is crucial for achieving that perfectly set texture in your No Bake Oreo Cheesecake.
Step 6: Serve
Once set, carefully run a thin knife around the edges of the springform pan before unlatching and removing the sides. To serve, top each slice with a dollop of whipped cream and additional crushed Oreos if desired. Get ready to slice and enjoy this indulgent treat that’s sure to impress your family and friends!
What to Serve with No Bake Oreo Cheesecake
Indulging in a slice of this creamy delight is just the beginning! To create the perfect dessert tableau, consider these tasty pairings.
-
Ice-Cold Milk: A classic choice that balances the richness of the cheesecake with its cool, refreshing nature.
-
Vanilla Ice Cream: Creamy and sweet, this pairing melts beautifully atop each slice, adding an extra layer of indulgence.
-
Fresh Berries: Raspberries or strawberries provide a tart contrast, cutting through the sweetness and enhancing flavors.
-
Chocolate Drizzle: A simple touch of melted chocolate over the top elevates the dessert’s elegance and adds an irresistible touch of richness.
-
Whipped Cream: A dollop on each slice adds a lightness that beautifully complements the decadent cheesecake, making every bite feel luxurious.
-
Coffee or Espresso: A warm cup of coffee enhances the chocolate flavors, creating a perfect end to a meal while adding warmth to your dessert experience.
-
Mint Sprigs: Garnishing slices with fresh mint not only beautifies the plate but also offers a refreshing contrast to the creamy dessert.
-
Chocolate Chip Cookies: Serve alongside for extra crunch and cookie flavor, creating a delightful duo that Oreo lovers will adore.
No Bake Oreo Cheesecake Variations
Get ready to explore some delicious twists that will elevate your No Bake Oreo Cheesecake experience!
- Lighter Option: Replace Cool Whip with freshly whipped cream for a lighter, homemade touch that’s just as fluffy.
- Choco Delight: Swap regular Oreos for chocolate Oreos to enhance the chocolate flavor and make it a double chocolate treat!
- Berry Bliss: Layer fruit preserves, like raspberry or strawberry, underneath the cheesecake filling for a delightful fruity surprise.
- Nutty Crunch: Add chopped nuts, such as pecans or walnuts, to the crust for a delightful crunch that will surprise your taste buds.
- Minty Fresh: Mix in a few drops of peppermint extract for a refreshing mint chocolate chip vibe—perfect for the holidays!
- Decadent Layering: Create an additional layer of chocolate ganache within the cheesecake for extra indulgence!
- Vegan Adaptation: Use vegan cream cheese and whipped coconut cream for a completely plant-based version of this classic dessert!
- Caramel Drizzle: Top your cheesecake with caramel sauce for that sweet, gooey flavor that pairs perfectly with the rich chocolatey base.
Now, don’t forget to pair your cheesecake with a glass of ice-cold milk or a scoop of vanilla ice cream for the ultimate indulgent treat! Feel free to get inspired by variations from my other recipes, like Baked Pears with Berries or Baked Apple Fritters, for even more fun ideas!
Expert Tips for No Bake Oreo Cheesecake
-
Room Temperature Cream Cheese: Ensure cream cheese is at room temperature for easier mixing and a smooth filling; this prevents lumps in your No Bake Oreo Cheesecake.
-
Check Your Chilling Time: Chilling the cheesecake overnight significantly enhances flavors and helps it set properly. Resist the temptation to rush, as patience pays off!
-
Extra Oreo Flavor: For a stronger Oreo flavor, consider adding up to five extra crushed Oreos to the filling. This adds delightful texture and boosts the cookie essence.
-
Storing Tips: Leftover cheesecake should be stored in an airtight container in the refrigerator for up to three days. Note: the crust will soften slightly over time.
-
Garnish Creatively: Elevate the presentation by garnishing each slice with a swirl of whipped cream and a sprinkle of crushed Oreos; this makes your No Bake Oreo Cheesecake truly Instagram-worthy!
How to Store and Freeze No Bake Oreo Cheesecake
Fridge: Store the No Bake Oreo Cheesecake in an airtight container in the refrigerator for up to 3 days to maintain freshness and prevent it from absorbing odors.
Freezer: For longer storage, you can freeze the cheesecake for up to 1 month. Wrap it tightly in plastic wrap and aluminum foil to protect it from freezer burn.
Thawing: To enjoy frozen cheesecake, transfer it to the refrigerator overnight to thaw gradually. Avoid thawing at room temperature to maintain texture.
Reheating: Enjoy it chilled directly from the fridge! If desired, garnish with fresh whipped cream and crushed Oreos after thawing for an appealing presentation.
Make Ahead Options
These No Bake Oreo Cheesecake Recipe options are perfect for meal prep enthusiasts! You can prepare the crust and filling up to 24 hours in advance, allowing the flavors to meld beautifully. Simply follow the recipe until you’ve spread the filling over the crust; then cover it tightly with plastic wrap and refrigerate. This will keep your dessert just as delicious while saving you time on the day of serving. When you’re ready to indulge, add the optional chocolate ganache, which can also be made ahead (just reheat gently if it thickens). With this prep, you’ll have a stunning dessert ready in no time for your next gathering!
No Bake Oreo Cheesecake Recipe FAQs
What kind of Oreos should I use for the crust?
I recommend using a party-size package of regular Oreo cookies to ensure you have enough for the crust, filling, and decoration. For a twist, you can substitute with chocolate Oreos for an even richer flavor!
How long can I store leftovers in the fridge?
Your No Bake Oreo Cheesecake can be stored in an airtight container in the refrigerator for up to 3 days. However, keep in mind that the crust may soften over time, so it’s best enjoyed fresh!
Can I freeze the No Bake Oreo Cheesecake?
Absolutely! To freeze, wrap the cheesecake tightly in plastic wrap and then in aluminum foil to prevent freezer burn. It will keep well for up to 1 month. Just be sure to thaw it in the refrigerator overnight for the best texture before serving.
What if my cream cheese doesn’t mix smoothly?
If your cream cheese isn’t mixing easily, it might be too cold. Always ensure it’s at room temperature before starting. If lumps persist, you can sift the mixture through a fine-mesh sieve or pulse it briefly in a food processor for a smoother consistency.
Is this cheesecake safe for kids and those with lactose intolerance?
While kids will love it, be cautious with serving if anyone has dairy allergies. You can experiment with lactose-free cream cheese and Cool Whip for a slightly different flavor and texture that’s still delicious!
No Bake Oreo Cheesecake Recipe: Effortless Indulgence Made Easy
Ingredients
Equipment
Method
- Pulse 28 Oreo cookies in a food processor until fine crumbs. Mix with melted salted butter and optional salt and press into a 10-inch springform pan. Chill.
- Beat together cream cheese, powdered sugar, and vanilla until fluffy. Fold in Cool Whip and crushed Oreos.
- Spread the filling over the chilled crust, smoothing the top and adding crushed Oreos if desired.
- For ganache, microwave chocolate chips and cream, stir until smooth, and pour over cheesecake.
- Cover cheese cake with plastic wrap and refrigerate for at least 6 hours or overnight.
- Serve by topping each slice with whipped cream and crushed Oreos.
Leave a Reply