
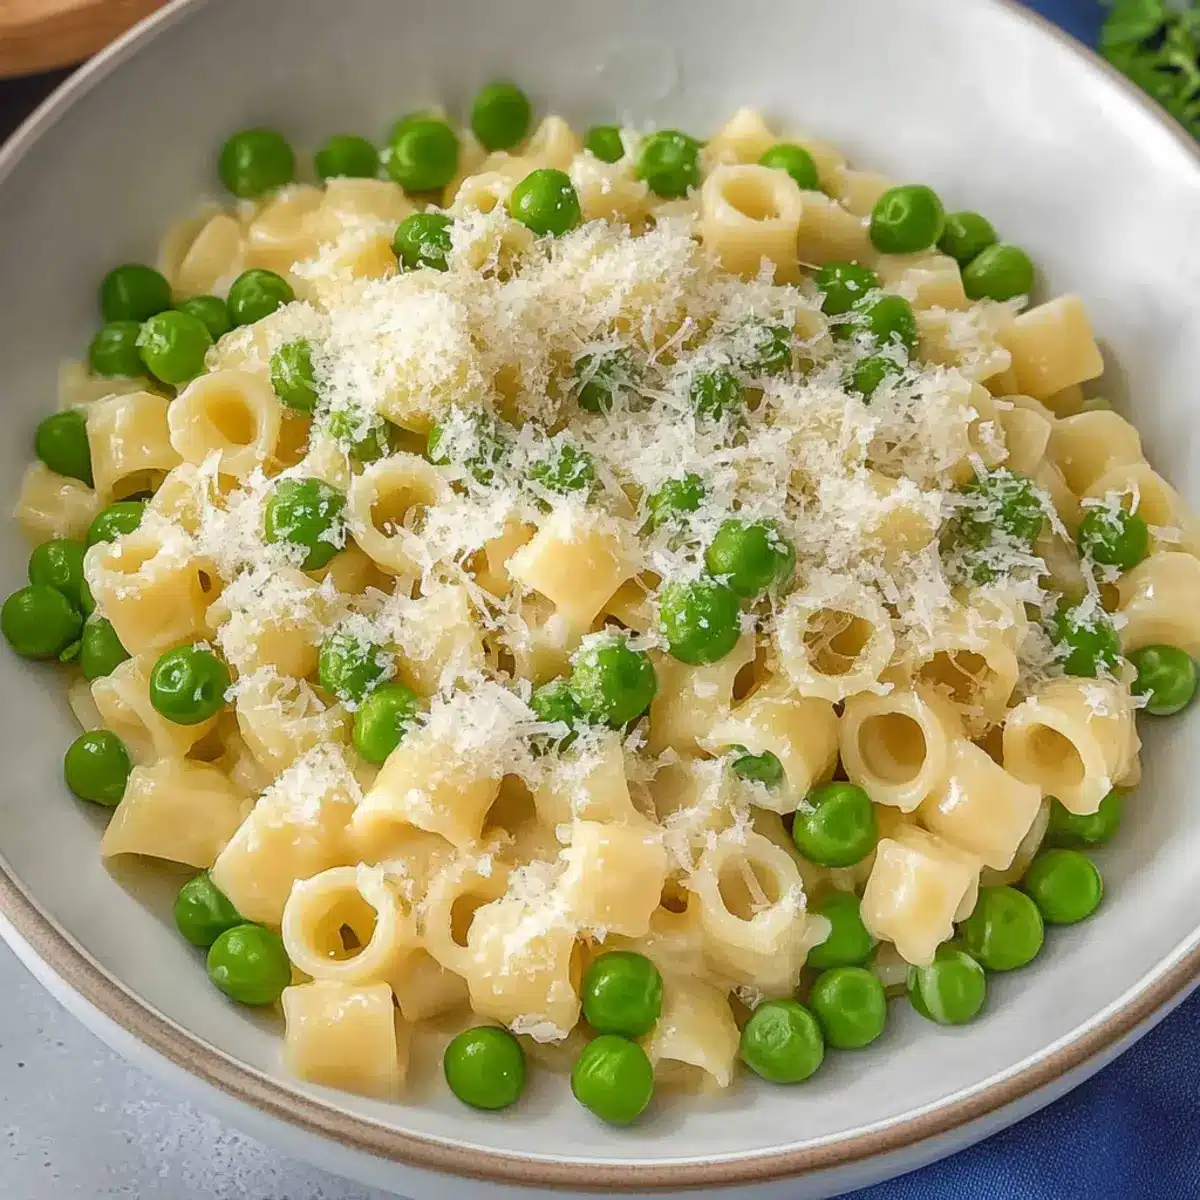
The comforting aroma of simmering peas and garlic wafts through the kitchen, coaxing everyone to gather around the table. That’s the magic of Pasta e Piselli, a beloved Italian dish that effortlessly combines simplicity and heartiness. With just a handful of ingredients, this creamy pasta and peas recipe comes together in under 30 minutes, making it a fantastic option for those busy weeknights when you crave home-cooked warmth without the fuss. Even better, it caters to picky eaters, ensuring the whole family enjoys each bite. Whether you stick to the classic version or toss in crispy bacon for an extra boost of flavor, this dish is sure to become a staple in your rotation. Ready to create a comforting meal that’s as nourishing as it is delicious? Let’s dive into the recipe!
Why is Pasta e Piselli special?
Comforting Simplicity: The beauty of Pasta e Piselli lies in its straightforward preparation, requiring minimal ingredients yet delivering maximum flavor.
Family-Friendly Delight: This dish is a hit with both kids and adults, making it the perfect solution for busy weeknights when you want everyone to gather around the dinner table.
Versatile Variations: Feel free to customize with proteins like bacon or prosciutto, or switch up the pasta type for a new twist.
Quick and Easy: Ready in under 30 minutes, this creamy dish is ideal for those who want homemade goodness without the long cooking times.
Hearty and Nourishing: With tender pasta and sweet peas enveloped in a rich sauce, it’s a satisfying meal that warms the soul. Why not try pairing it with a fresh salad or some delicious garlic bread for a complete experience? If you’re passionate about cozy dinners, you might also enjoy other pasta recipes like my Garlic Mushroom Pasta or Ditalini Sausage Pasta.
Pasta e Piselli Ingredients
• Create this comforting dish with just a few simple ingredients!
For the Dish
- Olive Oil – Adds richness and flavor to the dish; can substitute with butter or plant-based oil for a vegan option.
- Shallot (1, finely chopped) – Provides a mild onion flavor; consider using onion if shallots are unavailable.
- Onion (1, chopped) – Adds depth and sweetness that enriches the overall taste.
- Fresh or Frozen Peas (450g / 1 pound) – The star ingredient offering sweetness and a pop of color; frozen peas work perfectly for convenience.
- Ditalini Pasta (410g) – This small pasta shape holds the peas beautifully; you can swap it with orzo or small shells if needed.
- Parmesan Cheese (1 and 1/4 cups, freshly grated, divided) – Enhances the creaminess and flavor of the dish; nutritional yeast makes a great vegan alternative.
- Salt & Pepper – Essential for seasoning and bringing all the flavors to life.
Enjoy crafting this delightful Pasta e Piselli – it’s not just a meal, but an experience that brings comfort and joy to your table!
Step‑by‑Step Instructions for Pasta e Piselli
Step 1: Cook the Pasta
Bring a large pot of salted water to a rolling boil over high heat. Add the ditalini pasta and cook according to package directions, usually around 8-10 minutes, until al dente. For the perfect texture, check a minute before the suggested time. Before draining, remember to reserve 3 cups of the starchy pasta water—it’s essential for the final dish!
Step 2: Sauté Aromatics
In a large deep skillet, heat 2 tablespoons of olive oil over medium heat. Once hot, add the finely chopped shallot and onion. Sauté the aromatics for about 4-5 minutes, or until they are softened and fragrant but not browned. This step builds a flavorful foundation for your creamy Pasta e Piselli.
Step 3: Add Peas and Water
Stir in the fresh or frozen peas, followed by 2 cups of the reserved pasta water. Increase the heat slightly and let the mixture simmer for 5-8 minutes, allowing the peas to tenderize and infuse the broth with their natural sweetness. You’ll know it’s ready when the peas are bright green and soft, creating a deliciously vibrant base.
Step 4: Combine Pasta and Mixture
Once the peas are tender, gently fold in the drained pasta into the skillet. Mix it well, adding additional reserved pasta water a little at a time if you prefer a soupier consistency. Let everything simmer together for about 3 minutes, ensuring the pasta absorbs the flavors and the dish thickens slightly, creating a comforting texture.
Step 5: Finish with Cheese
Remove the skillet from the heat and stir in 1 cup of freshly grated Parmesan cheese. This will add a creamy richness to your Pasta e Piselli. Season generously with salt and pepper, tasting as you go to adjust to your preference. Serve the dish warm, with an extra sprinkle of cheese on top for that final touch of comfort!
What to Serve with Creamy Pasta e Piselli?
The perfect accompaniment can transform your Pasta e Piselli into a delightful feast, enhancing its comforting flavors and textures.
-
Garlic Bread: Warm, buttery garlic bread offers a crunchy and savory contrast, begging to be dipped into the creamy sauce.
-
Mixed Greens Salad: A refreshing salad with tangy vinaigrette cleanses the palate, providing a crisp and vibrant balance to the richness of the pasta.
-
Roasted Vegetables: Sweet, caramelized roasted veggies like carrots and bell peppers add depth and a touch of sweetness, beautifully complementing the peas.
-
Parmesan Crisps: These crunchy bites add a delightful texture, providing an extra cheesy flavor that enhances every mouthful of your dish.
-
Bruschetta Toppings: Top toasted baguette slices with fresh tomatoes, basil, and mozzarella for a colorful appetizer that brings a burst of flavor.
-
Pinot Grigio: A chilled glass of this light white wine pairs wonderfully, its crispness balancing the creamy richness of Pasta e Piselli.
-
Panna Cotta: A light and creamy dessert, panna cotta offers a delicate finish, giving a sweet note to conclude your meal on a lovely note.
Storage Tips for Pasta e Piselli
Fridge: Store leftovers in an airtight container for up to 4 days. Make sure to cool completely before sealing to avoid condensation.
Freezer: For longer storage, freeze Pasta e Piselli in individual portions for up to 3 months. Keep it in airtight freezer bags, squeezing out excess air.
Reheating: Thaw overnight in the fridge if frozen. Reheat on the stovetop with a splash of reserved pasta water for a creamy texture. Microwave on medium power, stirring occasionally.
Shelf Life Reminder: Enjoy your delicious Pasta e Piselli within these timeframes for the best flavor and texture!
Expert Tips for Pasta e Piselli
-
Perfect Pasta: Always cook your pasta al dente, as it will continue cooking when combined with the sauce. This ensures the right texture and bite.
-
Reserve Water: Don’t forget to save the pasta water before draining! It’s key for achieving the desired creamy consistency. If you forget, broth can work in a pinch.
-
Season Wisely: Taste and season gradually with salt and pepper; balancing the flavors is crucial for the perfect Pasta e Piselli.
-
Fresh Herbs: For an added burst of flavor, consider garnishing with fresh herbs like basil or mint before serving.
-
Customize with Protein: Want to make it heartier? Toss in some cooked bacon, ham, or prosciutto to elevate the dish.
-
Experiment with Pasta: Don’t be afraid to switch up the type of pasta! Using orzo or small shells can give this dish a fun twist and varied texture.
Pasta e Piselli Variations & Substitutions
Feel free to get creative and tailor this comforting dish to your taste preferences!
-
Add Protein: Incorporate cooked, chopped bacon or prosciutto for a richer, heartier dish that brings an extra layer of flavor.
-
Change the Pasta: Try substituting with orzo or whole grain pasta. This not only changes the texture but adds a nutritional boost too!
-
Herb Infusion: Add fresh mint or basil for a refreshing twist. The fragrant herbs elevate the dish’s flavor profile and brighten it up beautifully.
-
Tomato Variation: For a tangy twist, mix in some canned crushed tomatoes with the peas. This creates a delicious tomato-based version, bringing a whole new dimension!
-
Vegan Options: Swap cheese for nutritional yeast and use a plant-based oil instead of olive oil. This maintains the creamy texture while satisfying vegan diets.
-
Enticing Spices: Sprinkle in some red pepper flakes for a hint of heat. It’s an easy way to spice things up for those who enjoy a little kick.
-
Nutty Addition: Top with toasted pine nuts or walnuts for added crunch and flavor. Their nutty warmth complements the creamy pasta perfectly!
-
Cheesy Delight: Mix in a blend of ricotta and Parmesan for a cheese-lover’s paradise. This creates a rich, creamy experience that elevates the dish to another level!
Why not serve your Pasta e Piselli alongside a fresh salad or garlic bread for a truly delightful meal? You can also explore more pasta recipes like Garlic Mushroom Pasta for a different flavor adventure, or try my Ditalini Sausage Pasta for a heartier option. Enjoy the cooking journey!
Make Ahead Options
These creamy Pasta e Piselli are perfect for meal prep enthusiasts! You can chop the shallots and onions, as well as measure out your seasoned peas, up to 24 hours in advance, storing them in airtight containers in the refrigerator to maintain freshness. Additionally, cook the pasta a bit short of al dente, drain it, and toss it with a drizzle of olive oil to prevent sticking—this can also be done up to 24 hours ahead. When you’re ready to serve, simply sauté the aromatics, add the prepared peas and previously cooked pasta, followed by the grated Parmesan. This way, you’ll enjoy just as delicious results with minimal effort on those busy weeknights!
Pasta e Piselli Recipe FAQs
How do I choose the best peas for Pasta e Piselli?
Absolutely! Fresh peas are delightful when in season, offering a sweet and bright flavor. However, frozen peas are a fantastic alternative as they are picked at peak ripeness and maintain their sweetness. Look for bright green, glossy peas without any dark spots for the best quality.
What is the best way to store leftovers of Pasta e Piselli?
If you have leftovers, store them in an airtight container in the refrigerator for up to 4 days. Make sure the dish has cooled to room temperature before sealing to avoid condensation, which can lead to a soggy texture. When reheating, I often add a splash of reserved pasta water to help regain some creaminess.
Can I freeze Pasta e Piselli?
Yes! To freeze this delicious meal, portion it into individual servings and place it in airtight freezer bags, squeezing out as much air as possible. It can be frozen for up to 3 months. When you’re ready to enjoy, thaw the pasta in the refrigerator overnight and reheat on the stovetop with a little reserved pasta water to restore its creamy texture.
What should I do if my Pasta e Piselli turns out too dry?
Don’t worry! If you find your dish is a bit dry, simply add in a splash of the reserved pasta water gradually while stirring, until it reaches your desired consistency. Alternatively, you can use low-sodium vegetable broth if you need more liquid and flavor. Remember, pasta continues to absorb moisture, so this little trick can save your dinner!
Is Pasta e Piselli suitable for dietary restrictions?
Very! This dish is vegetarian-friendly and can easily be adapted for vegans by omitting the cheese or using nutritional yeast instead. If you have any allergies, always double-check ingredient labels, especially for pasta and vegetable broth, to ensure there are no undesired allergens present.
Pasta e Piselli: Creamy Comfort Food for Busy Nights
Ingredients
Equipment
Method
- Bring a large pot of salted water to a rolling boil over high heat. Add the ditalini pasta and cook according to package directions, usually around 8-10 minutes, until al dente. Before draining, remember to reserve 3 cups of the starchy pasta water.
- In a large deep skillet, heat 2 tablespoons of olive oil over medium heat. Once hot, add the finely chopped shallot and onion. Sauté for about 4-5 minutes until softened and fragrant but not browned.
- Stir in the fresh or frozen peas and 2 cups of the reserved pasta water. Increase the heat slightly and simmer for 5-8 minutes, allowing the peas to tenderize.
- Gently fold the drained pasta into the skillet. Mix well, adding reserved pasta water if a soupier consistency is desired. Let everything simmer together for about 3 minutes.
- Remove from heat and stir in 1 cup of freshly grated Parmesan cheese. Season with salt and pepper to taste and serve warm, topping with extra cheese.
Leave a Reply