
As I stood in my kitchen, the tantalizing aroma of roasted cherries filled the air, instantly whisking me away to sun-kissed summer days. My Roasted Cherry Yogurt Bowl captures that nostalgia beautifully, combining the rich sweetness of caramelized, juicy cherries with creamy Greek yogurt—an utterly delightful breakfast or snack for any time of day. Not only is this dish incredibly easy to whip up in under 30 minutes, but it’s also packed with seasonal goodness, making it a nourishing choice that satisfies cravings for something sweet without the guilt. The heavenly blend of flavors and textures will have you reaching for seconds in no time. Curious to see how these warm cherries transform your morning routine? Let’s dive into this delicious recipe!
Why is This Yogurt Bowl a Must-Try?
Fresh Taste: The roasted sweet cherries burst with flavor, creating an irresistible contrast to the creamy Greek yogurt. This delightful combo will make your taste buds dance!
Quick Prep: With simple steps, you can create this delicious bowl in under 30 minutes—perfect for busy mornings or afternoon snacks.
Versatile Delight: Enjoy this as a breakfast, snack, or dessert; it suits any craving and can be adapted with seasonal fruits like peaches or berries.
Health Boost: Packed with protein and seasonal ingredients, this dish serves as a guilt-free treat that nourishes your body. It’s a feel-good indulgence you can enjoy every day!
Mix It Up: Want more tweaks? Try adding chia seeds or swapping granola for nuts for an extra crunch, just like in my Roasted Vegetable Orzo recipe!
Dive into the scrumptious world of the Roasted Cherry Yogurt Bowl and elevate your mornings!
Roasted Cherry Yogurt Bowl Ingredients
For the Roasted Cherries
• Roasted Sweet Cherries – Main flavor component, sweet and juicy; use Northwest-grown cherries for best results.
• Lime Juice – Adds acidity to balance the sweetness of cherries; lemon juice can be used as a substitute.
• Cane Sugar – Sweetener that helps caramelize cherries; honey or maple syrup can be used for varying sweetness.
• Coconut Oil – Enhances the cherry mixture and adds a tropical flavor; melted butter provides a richer taste.
• Vanilla Extract – Provides aromatic flavor to the cherry mixture; try almond extract for a different twist.
• Salt – Enhances overall flavors and balances the sweetness of the cherries.
For the Yogurt Bowl
• Plain Greek Yogurt – Base for the bowl that adds creaminess and protein; non-dairy yogurt can be used for a vegan option.
• Granola – Adds crunchy texture and additional flavor; chopped nuts or seeds can offer similar crunch.
• Honey – For drizzling over the yogurt bowl for extra sweetness to taste; this makes the Roasted Cherry Yogurt Bowl truly irresistible!
Embrace the deliciousness of this recipe, and enjoy a lovely morning treat that’s full of flavor!
Step‑by‑Step Instructions for Roasted Cherry Yogurt Bowl
Step 1: Preheat the Oven
Begin by preheating your oven to 400°F (200°C). While the oven warms up, grab a baking sheet and line it with parchment paper to prevent sticking and make cleanup easier. This simple step sets the stage for roasting those sweet cherries to perfection!
Step 2: Prepare the Cherries
Next, take your fresh, sweet cherries and pit them carefully; you can use a cherry pitter or a metal straw for this task. Once pitted, slice the cherries in half and place them in a mixing bowl, ensuring they are ready for the delicious roasting process ahead.
Step 3: Mix Cherry Ingredients
In the bowl with the halved cherries, add a splash of lime juice, a drizzle of vanilla extract, and a sprinkle of cane sugar and salt. Don’t forget to melt some coconut oil and mix it in as well. Stir everything gently but thoroughly until the cherries are coated in the sweet, aromatic mixture—this will enhance the flavor of your Roasted Cherry Yogurt Bowl!
Step 4: Spread and Bake
Spread the cherry mixture evenly onto your prepared baking sheet, making sure they are in a single layer for even roasting. Place the baking sheet in the preheated oven and bake for about 18 minutes, or until the cherries are caramelized and fragrant, with a slightly gooey syrup forming around them. The anticipation will be worth it!
Step 5: Cool and Assemble
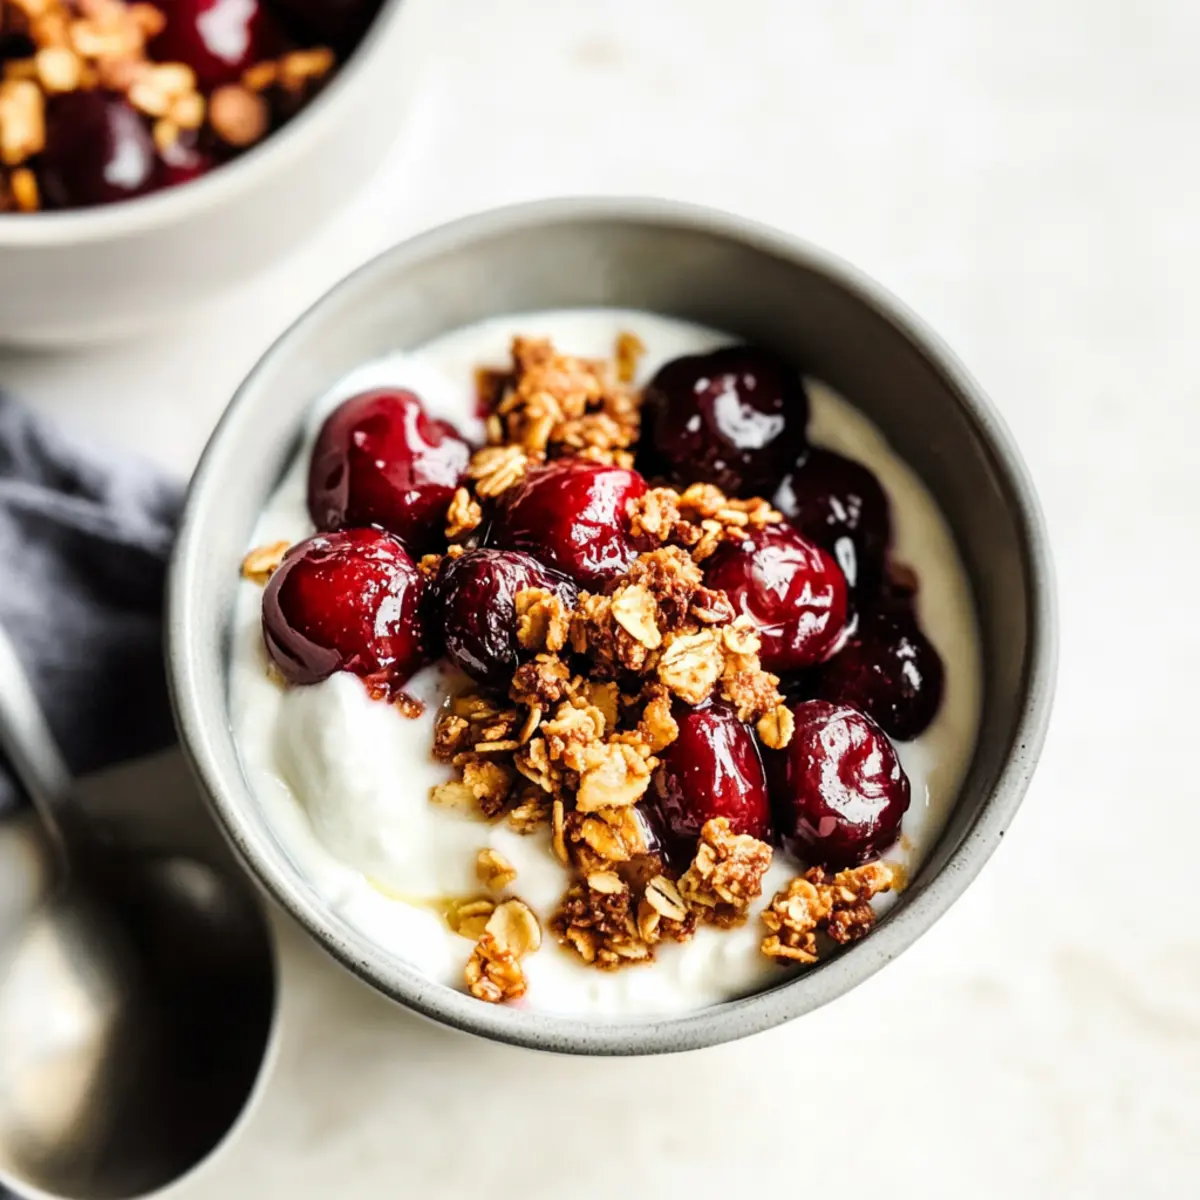
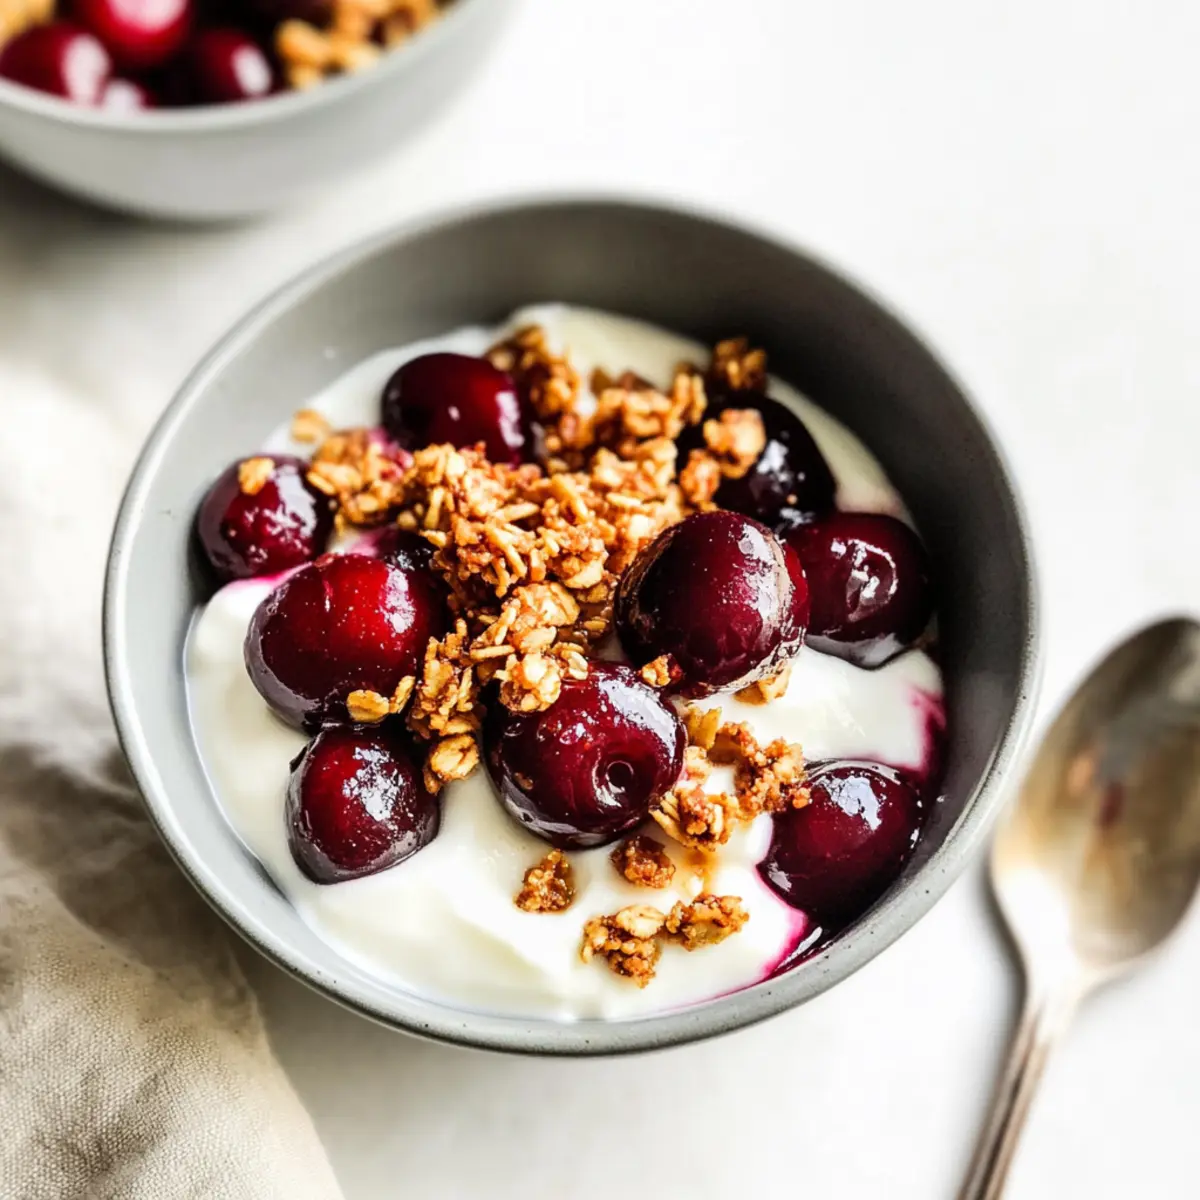
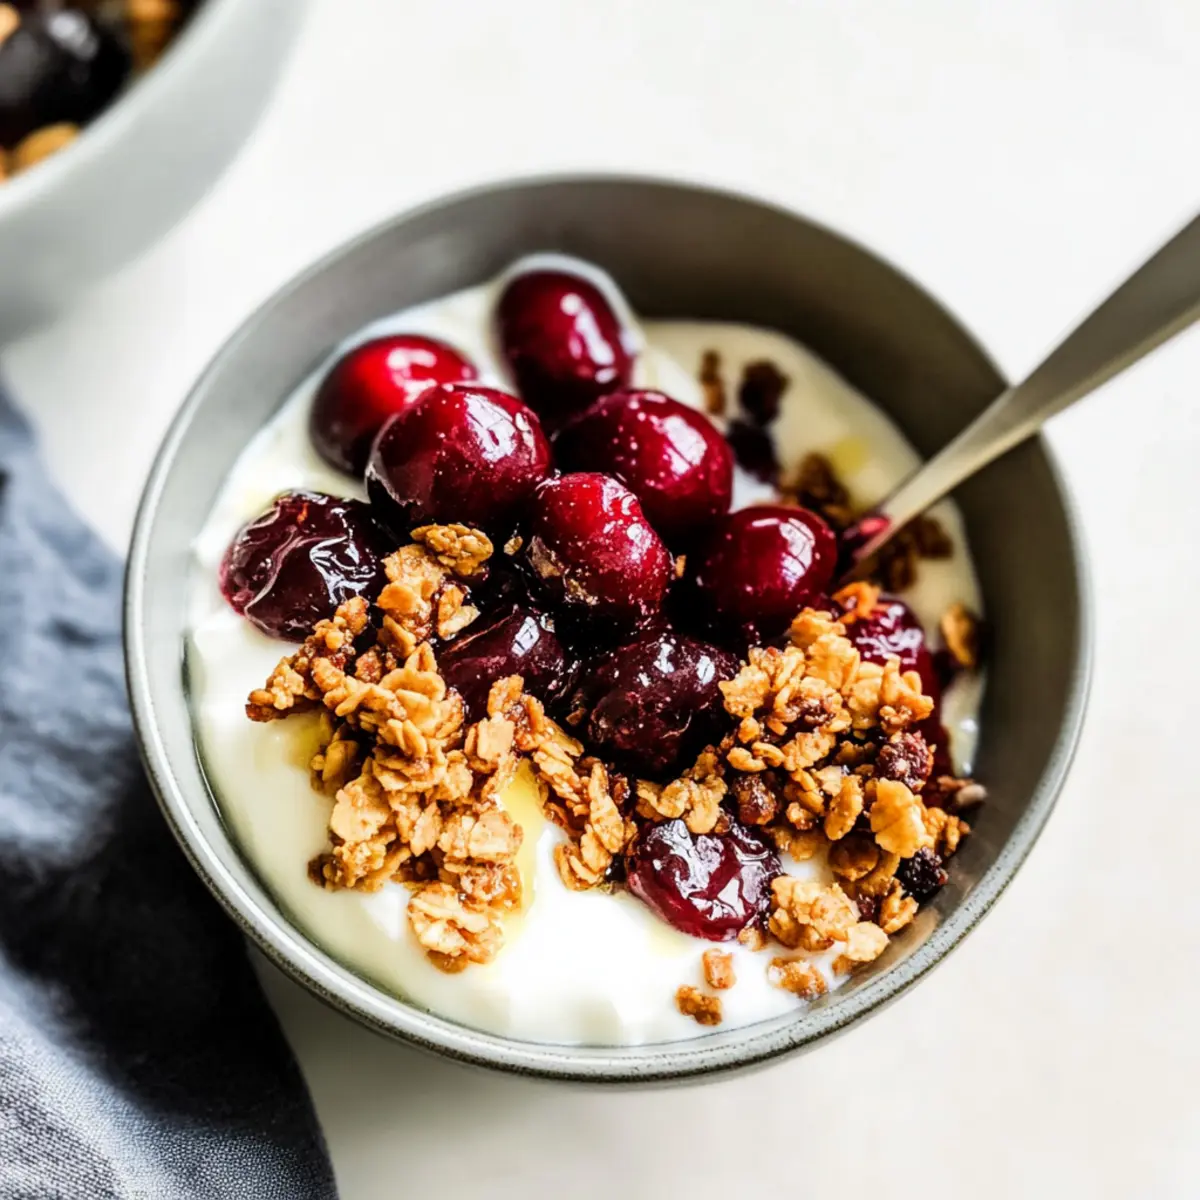
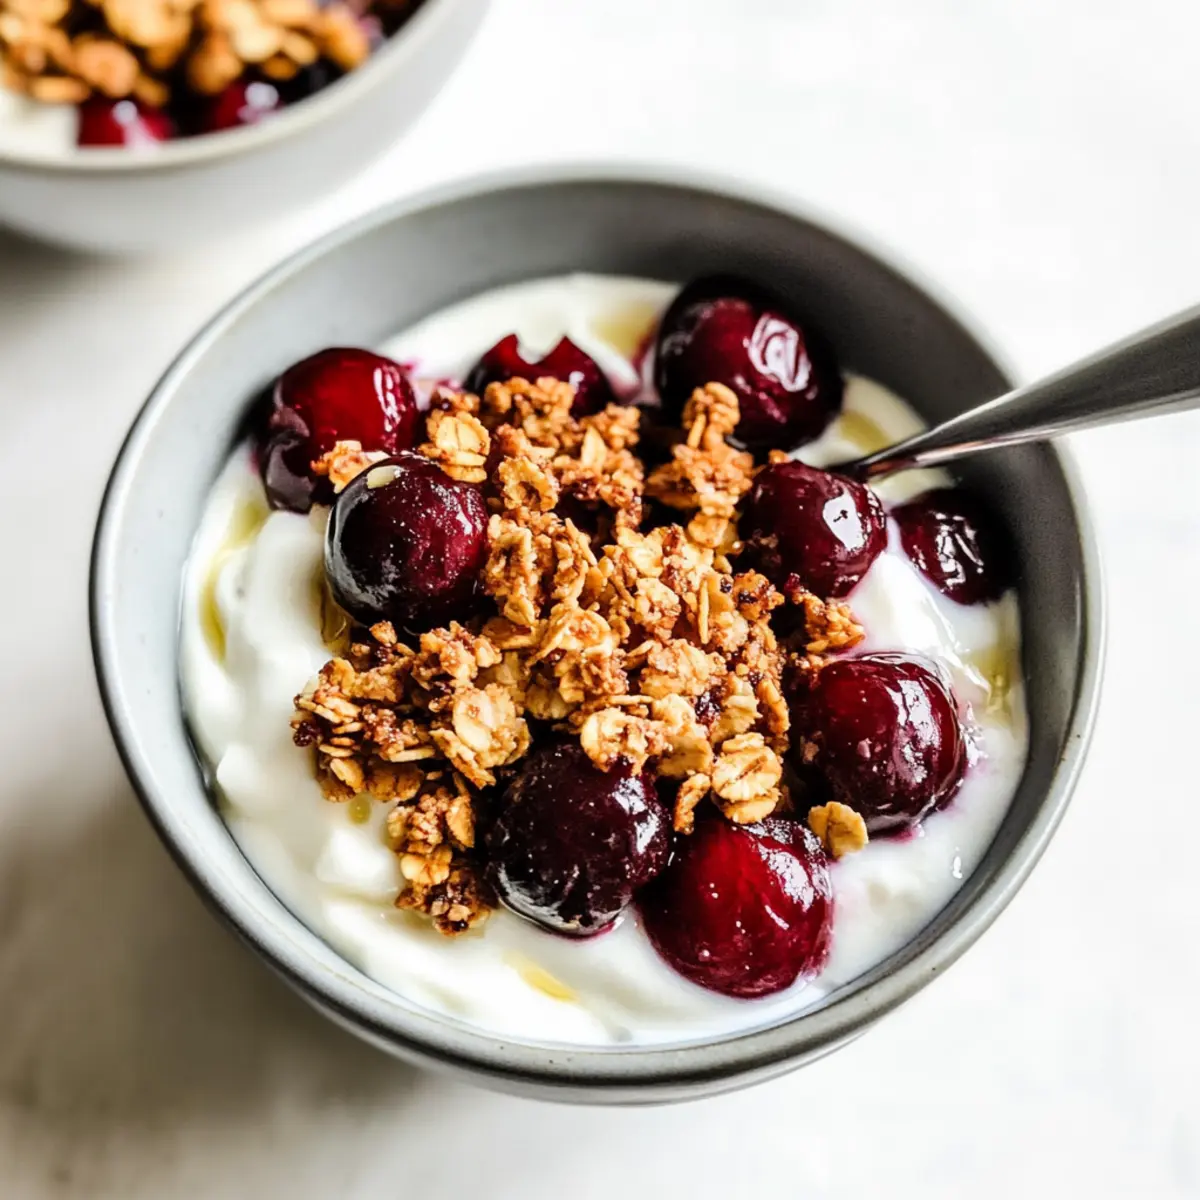
Once the cherries are done baking, remove the sheet from the oven and allow them to cool for about 5 minutes. Meanwhile, scoop a generous portion of plain Greek yogurt into a bowl. Layer those warm, roasted cherries right on top, letting their syrup drizzle over the yogurt for a delightful combination in your Roasted Cherry Yogurt Bowl.
Step 6: Add Toppings and Serve
To finish, add a sprinkle of granola for a delightful crunch and drizzle a bit of honey over the top for added sweetness to taste. This step brings all the textures together, creating a harmonious breakfast that looks as delicious as it tastes. Serve immediately and enjoy every spoonful!
What to Serve with Roasted Cherry Yogurt Bowl
Transform the charming Roasted Cherry Yogurt Bowl into a memorable meal with these delightful pairings that enhance flavor and texture.
-
Crispy Bacon: The salty crunch provides a savory counterpoint to the sweet yogurt bowl, creating a delightful balance of flavors.
-
Fresh Berries: Add a burst of freshness with ripe strawberries or blueberries that elevate the dish’s brightness and nutritional value.
-
Creamy Avocado Toast: A slice of buttery avocado toast offers a heartiness that complements the lightness of the yogurt bowl for a satisfying breakfast experience.
-
Chia Seed Pudding: This nutritious option adds texture and is packed with fiber, making it a fabulous pairing that keeps you fuller for longer.
-
Chamomile Tea: A soothing herbal tea brings a calming, floral note that harmonizes beautifully with the sweet roasted cherries.
-
Lemon Zest Muffins: Light and zesty muffins provide a delightful contrast in taste, enhancing your brunch table with flavorful indulgence.
-
Honey Yogurt Parfait: Layer additional yogurt with granola and seasonal fruits for a visually stunning dessert that’s just as nutritious.
-
Almond Croissant: Enjoy the delicate flakiness of a warm almond croissant, which pairs perfectly with the creamy yogurt and luscious cherries.
-
Sparkling Water with Lime: A refreshing beverage that cleanses the palate between sweet bites, enhancing the overall brunch experience.
Make Ahead Options
These Roasted Cherry Yogurt Bowls are perfect for meal prep enthusiasts! You can roast the sweet cherries and store them in a sealed glass container in the refrigerator for up to 3 days. To maintain their quality, allow the cherries to cool completely before sealing; this prevents condensation and keeps them from becoming watery. When you’re ready to enjoy your bowl, simply reheat the cherries in the microwave for about 30 seconds, then layer them over a scoop of Greek yogurt with granola and honey. With this make-ahead option, busy mornings become a breeze, allowing for a tasty, nutritious breakfast that tastes just as delicious as when freshly prepared!
How to Store and Freeze Roasted Cherry Yogurt Bowl
Fridge: Store any leftover roasted cherries in a sealed glass container in the refrigerator for up to 7 days. Ensure they cool completely before sealing to prevent condensation.
Freezer: If you’d like to freeze the roasted cherries, place them in an airtight container or freezer bag. They can be frozen for up to 3 months, making it easy to enjoy the Roasted Cherry Yogurt Bowl anytime.
Reheating: When ready to use your frozen cherries, thaw them in the fridge overnight or gently reheat in the microwave. This way, you’ll enjoy that warm, indulgent cherry topping just like fresh!
Yogurt Storage: Keep any extra yogurt in its original container, tightly sealed, in the refrigerator for up to 10 days for the best quality.
Expert Tips for Roasted Cherry Yogurt Bowl
-
Choose Quality Cherries: Always select fresh, ripe cherries for the best flavor. Northwest-grown cherries are particularly sweet and juicy, making your Roasted Cherry Yogurt Bowl unforgettable.
-
Balance Sweetness: Adjust cane sugar based on your taste preference. Remember that the sweetness will concentrate while roasting, so start with less sugar if you’re unsure.
-
Don’t Skip the Salt: A pinch of salt enhances the natural flavors of the cherries and the yogurt. It’s a tiny step that makes a big difference in balancing the overall taste.
-
Avoid Overcrowding: When spreading the cherry mixture on the baking sheet, ensure they are in a single layer. This allows for even roasting and prevents steaming, giving you that delicious caramelization.
-
Experiment with Yogurt: Try different flavored yogurts for a twist when preparing your Roasted Cherry Yogurt Bowl. This can save you from adding extra sweeteners while providing delightful variations!
-
Store Properly: If you have leftovers, let the roasted cherries cool completely before storing them in an airtight container. This prevents moisture buildup, keeping them delicious for up to a week.
Roasted Cherry Yogurt Bowl Variations
Feel free to get creative and customize your roasted cherry yogurt bowl with these delightful twists!
-
Berry Bliss: Swap cherries for mixed berries like blueberries or raspberries for a tart and fruity twist. Their vibrant colors will brighten your bowl!
-
Tropical Treat: Substitute coconut oil with melted butter and add pineapple chunks for a taste of the tropics. Combined with yogurt, it creates a luscious, island-inspired delight.
-
Nutty Crunch: Replace granola with toasted almonds or pecans for an extra layer of flavor and crunch. This lovely texture enhances the bowl beautifully.
-
Spicy Kick: Add a pinch of cayenne pepper or cinnamon to the cherry mixture before roasting for a subtle heat that plays wonderfully with the sweetness of the cherries.
-
Dairy-Free Delight: Use non-dairy yogurt made from almond or coconut in place of Greek yogurt for a vegan-friendly option. It’s just as creamy and satisfying!
-
Sweet Match: Drizzle maple syrup instead of honey for a rich and distinct sweetness that harmonizes with roasted cherries, enhancing their natural flavors wonderfully.
-
Chia Packed: Boost nutrition by mixing in chia seeds or flaxseeds to your yogurt for a healthy addition that adds both texture and omega-3s. They pair perfectly with your roasted toppings!
-
Zesty Touch: Replace lime juice with orange juice or zest for a fresh citrusy twist that complements the caramelized cherries beautifully. It’s like a burst of sunshine in a bowl!
For even more flavor ideas, don’t hesitate to explore recipes like my Cherry Tomato Bruschetta for fresh inspirations or enjoy a sweet snack with Zero Sugar Greek Yogurt Brownies. Embrace your kitchen creativity!
Roasted Cherry Yogurt Bowl Recipe FAQs
What type of cherries should I use for the best flavor?
Absolutely! For the most delicious Roasted Cherry Yogurt Bowl, opt for fresh, sweet cherries, preferably those grown in the Northwest. Their natural sweetness and juiciness will elevate your dish. If you can’t find those, feel free to use other sweet or tart cherry varieties instead.
How long can I store leftover roasted cherries?
Very! You can keep leftover roasted cherries in a sealed glass container in the refrigerator for up to 7 days. Make sure they cool completely before sealing to prevent condensation, which can make them mushy.
Can I freeze leftover roasted cherries?
Yes, indeed! To freeze, place the cooled roasted cherries in an airtight container or freezer bag. They can be stored in the freezer for up to 3 months. When you’re ready to enjoy them again, you can simply thaw them overnight in the fridge or reheat them gently in the microwave.
What if my cherries are overcooked or undercooked?
Common troubleshooting is easy! If your cherries are overcooked, you might find them mushy or too syrupy. Next time, reduce the baking time by a couple of minutes to achieve that perfect caramelization. On the other hand, if they are undercooked, simply put them back in the oven for a few more minutes while keeping an eye on them to prevent overbaking.
Are there any dietary considerations for this recipe?
Absolutely! This Roasted Cherry Yogurt Bowl can be made vegan by swapping the plain Greek yogurt for non-dairy alternatives like almond or coconut yogurt. Additionally, if you have a honey allergy, you can skip the drizzle or use an alternative sweetener that suits your needs, like agave syrup. Enjoy making adaptations that fit your lifestyle!
How can I make this recipe nut-free?
If you want a nut-free version of your Roasted Cherry Yogurt Bowl, simply use nut-free granola or replace it with seeds like pumpkin or sunflower seeds. These options will still provide that enjoyable crunch without any nuts!
Delicious Roasted Cherry Yogurt Bowl for a Cozy Morning Treat
Ingredients
Equipment
Method
- Preheat your oven to 400°F (200°C) and line a baking sheet with parchment paper.
- Pit and slice the cherries in half, placing them in a mixing bowl.
- Add lime juice, vanilla extract, cane sugar, salt, and melted coconut oil to the cherries, and stir to combine.
- Spread the cherry mixture on the baking sheet in a single layer and bake for 18 minutes or until caramelized.
- Allow the cherries to cool for 5 minutes, then scoop Greek yogurt into bowls and top with warm cherries.
- Finish by sprinkling granola on top and drizzling honey, then serve immediately.
Leave a Reply